The Infant Years….from Seedling to Sprouts

Now that the weather has continued to stay at above normal temperatures in our area, several of you are getting the ‘gardening’ bug.  Typically the word bug would not be good in garden terms, however, we all began gardening because we saw the immense benefit that it provides to ourselves and our families.  These benefits may be more than you bargained for – the most obvious is the nutritional benefit, but many don’t realize the additional benefits that derive from planting your own garden: emotionally, physically, and even spiritually for some.

Our 4 week old seeds have grown to this

Several times in our lives we get the desire to do something, but have no idea where to begin.  Over the last several weeks, we have continued to filter questions from individuals that would like to start a garden from seed but don’t know how.  We always tell everyone, don’t be afraid to try — the worst thing that could happen is that you are out a couple of dollars from buying those seed packets.  You have to make the jump and get started…..now is prime time to start your seeds if you plan to get them in the ground right after the threat of the last frost.

Basic instructions for seed planting:

1. Purchase your seeds from your local garden center  (we will get into harvesting your own seeds in other posts)

–if you are an organic gardener, make sure you purchase heirloom or organic seeds — Don’t worry, the packet will tell you what type you are purchasing

– if you buy F1 seedlings, you will not be able to harvest the seeds from your produce next year, as these will produce genetically modified organisms that are designed to increase disease resistance in your crop but not produce the exact reproduction in future years

2. Purchase planting soil and compost  (if you don’t make your own — which by the way is very simple to do)

—Composting 101 http://oldworldgardenfarms.wordpress.com/2012/03/02/composting-101-tips-to-make-easy-compost/

3. Decide where to plant your seeds

Seed beginning to sprout

– peat pots are biodegradable containers that can often be planted right in the ground with your seedlings.

– we have reused yogurt containers to start some of our seedlings — just make small slices in the bottom of the container to allow for adequate water drainage

–check out your local garden store for various seedling containers

4. Mix the potting soil and compost in a 1:1 ratio

5. Fill pots with soil mixture — pack lightly – you want the soil to be light and fluffy to allow room for root growth and water filtering

6. Moisten the soil –don’t drench the soil so it turns to mud, you just want to have the soil wet to the touch.

6. Plant your 2-3 seeds per pot – preferably not on top of each other, but in different areas for easy thinning.

–each packet will tell you the depth that the seeds should be planted — most are about 1/4inch deep — It doesn’t seem like very deep, but it will pay off when you are waiting for them to sprout.

7.  Lightly water the soil

8. Cover with a plastic sheet or lid and keep out of direct sunlight

– Really?  I thought sunlight made seeds grow???  I know, I know, but you have to get the seedlings to sprout first.  The moisture that will build up between the plastic and the pots will allow for optimum seed sprouting.  You will  most likely not have to water during this time — just make sure the soil remains moist.

Sprouts have been thinned

9. Wait

10. Wait again, but continue to check to make sure the soil is moist

11. Once you see 1-2 seedlings sprouting out of the soil, remove the lid and place in direct sunlight (or use a shop light placed 2 inches above the soil)

12.  You will need to water more frequently now — most likely once a day.

13. Once seeds begin to sprout, thin the growth to allow for one seed per container.

– you can attempt to replant the seedlings in other containers if you have a steady hand – and yes, you will feel like a Surgeon.

–or compost your non-preferred sprouts

–or if you are afraid to disturb the roots, cut the non-preferred sprouts down to the soil and let die off, which will become compost in the current soil

Seedlings under shop lights

13.  If you are using direct sunlight, rotate the plants to allow for even growth — the plants will get spindly as they search for the sun…but don’t worry, when you plant them you will just have to plant them deeper (up to the first leaves) than the shorter versions.

14. If you use shop lights – keep the lights at 1-2 inches above the plants.

Sangria pepper plant in a yogurt cup - now ready to be trained to tolerate outdoor temperatures.

15.  After your plants have gotten 2-3 sets of leaves, you can begin to train them to tolerate outdoor conditions.   On a warmer day in your climate, set them outside for a few hours.  Increase the time that you leave them outside each day and even overnight if there is no chance of frost.

Plants being trained to the outdoor climate

16.  Don’t get greedy — you can’t plant them in pots/gardens until the last chance of frost in your zone — In our area, May 15th is the ‘safe’  planting day.  Of course, we live on the edge and usually plant by May 5th :)

In a few weeks, we will discuss our garden planting system — the No-Tiller method.  But right now you need to concentrate on getting those seeds started!!!

Happy Planting!

Meet Lisa and Jason from Raven Mist Farm – This week’s “Tell us Your Story”

We want to thank Marie and her husband from Millview Farms for our last “Tell Us Your Story” feature - sharing their story of their farm and homestead in Southern Ontario.  If you get a chance, check out Marie’s great work on her blog, Plowing in Pearls ( http://plowinginpearls.com).

We travel back to the States this week to Germantown, Ohio for the story of Lisa, Jason and Raven Mist Farm (http://ravenmistfarm.wordpress.com/).  Lisa and Jason are a great example of the hard work and inginuity that goes into living the dream of your own farmstead.  They grow a wide variety of crops,  have created a CSA, and raise chickens for eggs and meat – all on a tight budget.

To follow along each week with our Sunday feature “Tell Us Your Story”,  you can simply enter your email address on the right of our blog and click “follow”.  Better yet – if you know of a farm that would make a great feature story, click on our “Tell Us You Story” tab and let us know all about it!

So here, in their words, the story of Lisa, Jason and Raven Mist Farm:

Thanks much to Mary and Jim for using their blog for a forum for all of us to share our stories!  We are Lisa, Jason and Xena (our 3 year old German Shepherd), and we are living the dream on a very tight budget here at Raven Mist Farm in Germantown, Ohio.  I think our story starts a little differently than most, we kind of backed into the farming idea.  In February of 2011, we bought this place because it was close enough to my job – yet far enough out that we would have a little space.  And –  we could afford it!  The house is 100 years old and had been empty for the past 10 years.  Needless to say it needs LOTS of work.

Lisa, Jason, and one of their baby Wyandotte chicks

We moved here in March and spring fever prompted us to begin on the outside first.  We put in a small perennial bed and then as the weather warmed, we added an herb garden and a small vegetable garden.  (I work a second job at a local garden center in the spring, so most of the plants were free or discounted.)  I was afraid that the garden would not do very well that first year.  The fields all around us had been farmed for commercial corn and soybeans – and I assumed that the soil would not be very fertile, but that first little garden provided us with bumper crops of tomatoes, peppers, and okra, along with a few watermelons and pumpkins.

Zena, Protector of the farm - and the last of the 2011 garden produce!

That little garden sprouted more than produce for us, and thoughts of a better life began to emerge.  We watched Jason’s sister raise a couple of backyard chickens, so we began to do some research, and in September we ordered 50 Silver Laced Wyandotte chicks.  We now have 10 hens and 2 roosters; the hens just began laying their first eggs about 3 weeks ago.  We are able to sell our eggs before we even gather them!  Along the way, we lost a few of the babies to a falcon and one got out one day and just kind of flew into the mouth of Xena (our German Shepherd)!  The rest ended up in the freezer and fed us this winter when money was tight. We used frozen pumpkin through the holidays and provided our families with their Jack-o-lantern pumpkins.  We’ve had gumbo made with our own frozen okra – made in a slow simmering iron pot over an open fire outside.  We frequently add dehydrated and frozen hot peppers to stews and soups.  Most of the soup stock we use is made from the feet of the butchered chickens.

Zues, God of the Raven Mist chicken farmyard

As the months progressed, my job just kept cutting back hours and upping the work load.  We live 25 minutes from the nearest populated area.  Gas prices have continued to rise along with the cost of everything that is shipped, and our paychecks just were not covering what we needed.  We figured since we could not make more money, we simply needed to ‘need’ less of it.  Growing our own food and preserving it seemed a great idea.  I have gardened off and on most of my life and Jason spent part of his childhood living on a farm with animals.  One night I was playing around on the internet and ran across the idea of growing food on as little as ¼ of an acre and selling shares of the produce.  One idea led to another and so we now have a handful of CSA customers pre-paid for our produce for this season.  We also have an online version of a farmer’s market set up.  Customers will choose in advance from what we have available each week in the season and we deliver to a central drop off area.  We are planning on selling direct from the farm, since we live on a fairly busy road and have plenty of drive-by traffic.  We are also fortunate enough to have a couple of free farmer’s markets within 20 minutes of us.

Cesar, He only thinks he is "God of the Chicken Yard"

We have started around 600 plants from seed.  Rather than spend money on seed kits, we spent cold, winter nights making newspaper pots while we watched television.  Most of our seeds are sprouting in these sitting in nursery trays I have saved over the years.  We are growing only heirloom varieties so that we can save our own seed and in turn, save that money in the coming years.

We had 2 extra roosters and plenty of meat in the freezer, and our local Tractor Supply was having a livestock buy, sell and trade in their parking lot.  We took our roosters, sold them and then used that money to buy 4 heritage Buckeye chicks that are now 3 weeks old.

So now, we have a dream for the farm.  We dream of a day when the farm will not only feed us, but bring in enough money to sustain us as well; while providing healthy food for our local community.

Baby Wayandotte chicks at Raven Mist Farm

We also have a master plan to give back to the land more than the land gives to us.  We are not planting our market garden in the usual way.  We are laying it out in a modified square foot garden pattern.  We are mixing vegetables, fruits, herbs, and flowers all together to feed the soil.  We have one compost pile ready to go and another begun for next year.  We are still surrounded by commercial farm fields, so we plan on planting a hedgerow to give us a little oasis for bees, birds and other beneficials.  There will be edibles mixed in there as well.  Because of the tight budget, we will be planting very small trees to begin with.  Time passes whether we plant anything or not, so we figured we should plant what we can afford rather than waiting!

We hope to add more laying hens this summer, and in the future we want a few geese.   We have also talked about raising a couple of pigs – one to sell, in order to pay for one to feed us for the winter.  We also hope that we will be able one day to save up enough to buy more of the land around us to expand our “farm” –  because right now – we’re not only doing this on a financial budget but on just an acre and a half!

Thanks so much to Lisa and Jason for sharing!!!  You you can check out their blog and farm at http://ravenmistfarm.wordpress.com/.    - Mary and Jim

Italian Crock Pot Pasta Sauce – “IT’S A EASY”

Thick and meaty pasta sauce

One of the crates we made from old barn wood – holding wine, pasta and our canned pasta sauce.

Here is our recipe for our Italian-style pasta sauce that can be made in the crock pot in 10 to 15 minutes before you leave for work in the morning – and be ready for hungry mouths when you get home! Pasta may be one of the easiest ways to feed a large family.  It’s inexpensive, and it goes a long way towards filling up hungry stomachs. With everyone at the house involved in sports and activities – the crock pot works out great – we can make the pasta as needed – and simply ladle the hot pasta sauce over it, and your ready to eat.  Although store bought tomato juice works great – this is an great way to use up tomato juice left over from last year’s garden in  your pantry.

A great way to use all of that canned tomato juice

Ingredients :

2 quarts of tomato juice  (For home canned juice, drain off the top 1/8 to 1/4 of the jar to get rid of the watery part)

2 cans of tomato paste

3 cloves of garlic minced fine or run through a press

Pasta drained and ready for sauce!

1 cup of red wine (we use Merlot)

1 to 1.5 pounds of ground hamburger, drained

3/4 cup of grated Parmigiano Reggiano cheese

1/4  teaspoon of red pepper flakes

1/8  teaspoon of onion powder

1 teaspoon of sugar

Ready to Eat!

1 teaspoon of salt (we use garlic salt to add a little more flavor)

1 teaspoon each of dried Oregano, Italian parsley and Basil.

1 to 2 bay leaves

Start by getting the  hamburger browned.  While that’s going, we pull out the crock pot and pour in half of the wine along with all of the other ingredients and turn it on high to get them a jump-start heating up.  I’ll go back and drain the fat from the meat, and put it back on to finish browning, adding the other half of the wine into the browning meat for about another 5 minutes.  Then place into the crock pot with the other ingredients – give it a final stir – set the crock pot back to low - and your done!!  That’s it.  Pretty simple.   I will usually take off the lid when I come home for the evening and keep the heat on low…it allows the sauce to thicken even more before serving.  We ladle it on top of each serving onto whatever pasta we are having that night.  It works great with spaghetti, penne, rigatoni, or bow tie pasta.  If we have any left over (which is usually not the case with the mouths we feed!) we just put in the fridge for leftovers.  If you would like to receive our Recipe Of The Week each Friday – be sure to sign up to follow the blog, hit the “like” button on the Facebook sidebar, or follow us on Twitter.

Chickens sentenced to 6 months in a minimum security prison

“What is this fence crap? And why can’t I go in the garden anymore?”

While working at the farm this past weekend – we decided that it is time.  Our girls, the chickens, need to have more of an assigned “designated area”.  During the building of the farm, the chickens have truly been free range and had free reign of every space.  With little to get into or get in the way of, we have simply let them run around.   However, now that there are patios, and flowerbeds and a much bigger garden going in –  things have to change.   Chickens love to dig, they love to scratch – and they just can’t seem to distinguish between all the green grass and dirt that is theirs – and the flowerbeds, patio spaces and garden space that is ours.

Enjoying her last few days of true freedom, Amelia surveys the empty garden from a fence post.

Late last summer and into fall, as the garden season came to a close – we allowed them in to rummage.  If you have chickens, it is actually a great thing to do after your garden has run its course.  They had a field day dusting and rooting around in the straw – decimating the insect population, eating and devouring weeds and seeds, and dropping valuable fertilizer.  It became a daily ritual – we let them out of the coop – and away they ran to the garden.

But now it’s spring, and plants are about to go back in.  We have spent the last few days raking back in the mulch that they have destroyed while mulling about all of the newly planted flower beds.   So, we decided we better get a plan in action.

Goldie wants to appeal the decision.

Now don’t get worried. We are not banishing them to a 2′ x 2′ cage.  Oh no, these chickens are our friends…we want to give them lots of space to roam and scratch and be happy – and to keep laying great eggs!  But just not in our barn, garden and patio area!  So out we went this past weekend to purchase a 150′ roll of fencing and a large amount of temporary poles.  It will allow them to have  a 30′ x  40′ area to scratch and play in.  Our plan is to rotate them around the property every  week or two to a new pasture area.  A minimum security “country club” type prison sentence for the next 6 months so to speak…until they can taste the freedom of the garden again this fall.

Jim and Mary

Building Our Farm One Pergola At A Time

The very first pergola. Hand built in the driveway before transporting out to the farm.

It’s a bit funny how it all started.  I would love to tell you it was a grand business scheme complete with well thought out ideas, a marketing plan, and great advertising.  A grand plan to build a business that would allow our farm to earn an income, and create a more self-sufficient farm and life.

It was however, all by chance.  You see, after clearing the land for the first time and putting in the raised bed gardens – we sat in lawn chairs in the upper northwest corner of the “farm” and took in the view.   While sitting, Mary simply said…”wouldn’t it be nice to have a place to sit and enjoy the garden and look out at the barn and farm”.

Early spring…the farm pergola with the barn being constructed in the background. Its a great place to sit when you need a rest!

We both liked the look of a pergola over other choices of garden structures like a gazebo or canopy.  The rustic and beautiful lines of a pergola just fit the theme of what we wanted our Old World Garden Farm to be about. Over the course of the next few weeks we looked everywhere to buy our dream pergola.  The problem was, we couldn’t find one we liked. We seemed to have two choices –  flimsy metal canopies that came with a not so flimsy price –  or ultra expensive wood kits on the markets that required the equivalent of a house payment.  So we decided on a third option…design an old world pergola and build it.

This was the view Mary loved of the fence and garden from the first time we sat in the lawn chairs with just an open field.

With no power still at the farm, and much like our chicken coop – we built our farm pergola in the driveway of our suburban neighborhood.  We cut our own pattern for the edges from a piece of cardboard until we liked the curves – then proceeded to cut out the purlins with an old jigsaw.  Looking back now – I laugh thinking how long it took to cut those boards – having to stop every 15 minutes just so the ol’ jigsaw would stop smoking from overheating.  We cut every curve and notch by hand – even cleaning out the notches with a hand chisel to get “just the right look”.    At the end of a couple long days – there she stood –  our “old world” garden pergola – an all wood, all natural hand-built pergola erected in our driveway.  We celebrated by heading out to a local dining establishment for a celebratory beverage and meal.

It took FOREVER to cut these notches the first time with our old jigsaw!

And then it happened  - Mary’s phone rang, and our little business started.  The call was from  parents of our neighbors down the street.  They had just driven by our driveway while we were at dinner and the pergola caught their eye.  She innocently asked where we had purchased it , because like us – she had been looking for a “real wood” pergola.  We laughed and said we looked too, and finally had just built one.  Before we both knew it – we were building another for them.   We built that one in the driveway too – and during the process a note appeared on the half-built pergola asking if we would build another….and then another.  That year, in just a few months we built and sold 15 pergolas…and every single bit of the profits were poured back into our farm.  It was our way to start building the dream.

Our first “sold” pergola.

And so it continues, we built a small website to showcase some of what we build (www.owgarden.com). We added a few more sizes, and a new style of a pergola that celebrates our love of old barn structures that we call the Garden Structure.  We have one simple rule.  Keep it fun and keep it simple.  We still build them one at a time – and always will, although we did purchase a new saw and a few new tools that makes all that cutting a little easier!  We will never build more than 50 a year – so that we can continue to enjoy time with our family and continue to build our farm.  We practice responsible building by using only FSC certified wood.    Forest Stewardship Council (FSC) is a non-profit organization devoted to encouraging the responsible management of the world’s forests. FSC sets high standards that ensure forestry is practiced in an environmentally responsible, socially beneficial, and economically viable way

One of our favorites!  A pergola we built for a couple in Ohio.

One of our favorites! A pergola we built for a couple in Ohio.

So whether it’s a CSA,  selling canned or baked goods, raising livestock, growing cash crops, making your own wine or beer – or building pergolas – there is always an opportunity to do things you love and to make a good simple living at it.  We still both have our days jobs – with no immediate plans to stop.  But our ultimate goal, is to have a completely self-sufficient little farmstead.  A little vineyard, an orchard, a full garden, chickens, with hopes of more future livestock as well.  And ultimately – a little bed and breakfast to share it all with others.  For now, our little business is helping us build it that much quicker, one pergola at a time.

- Jim and Mary

Making Home Made Pasta – Passing Down A Family Tradition From Italy

My Grandmother. Born in Italy in 1899, she came to the US where she met and married my grandfather.

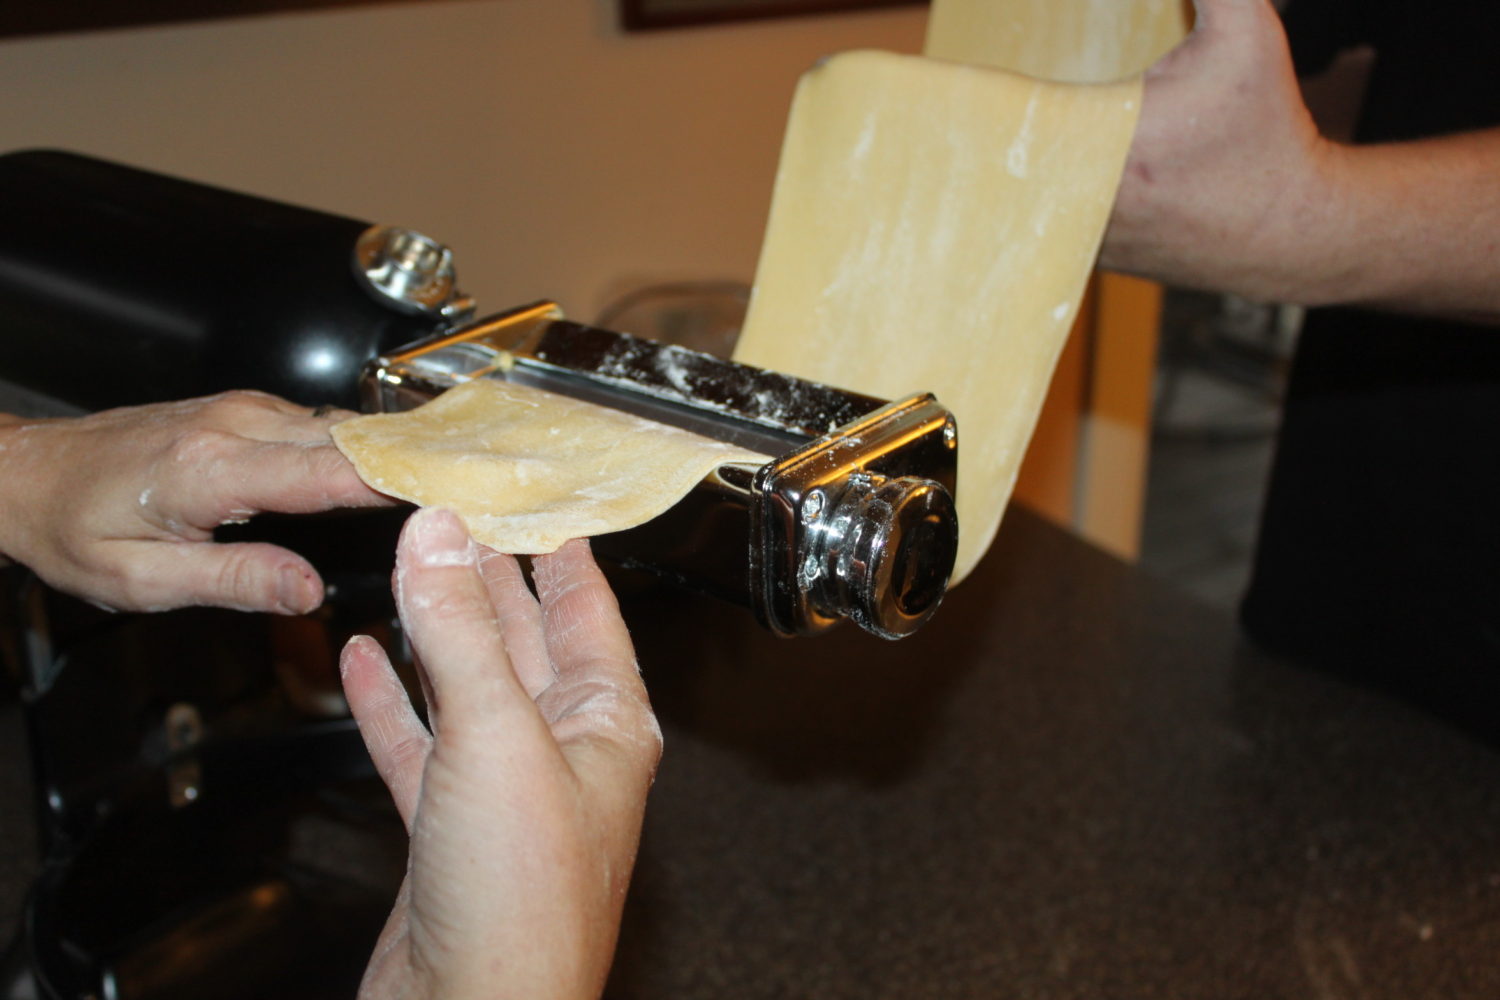
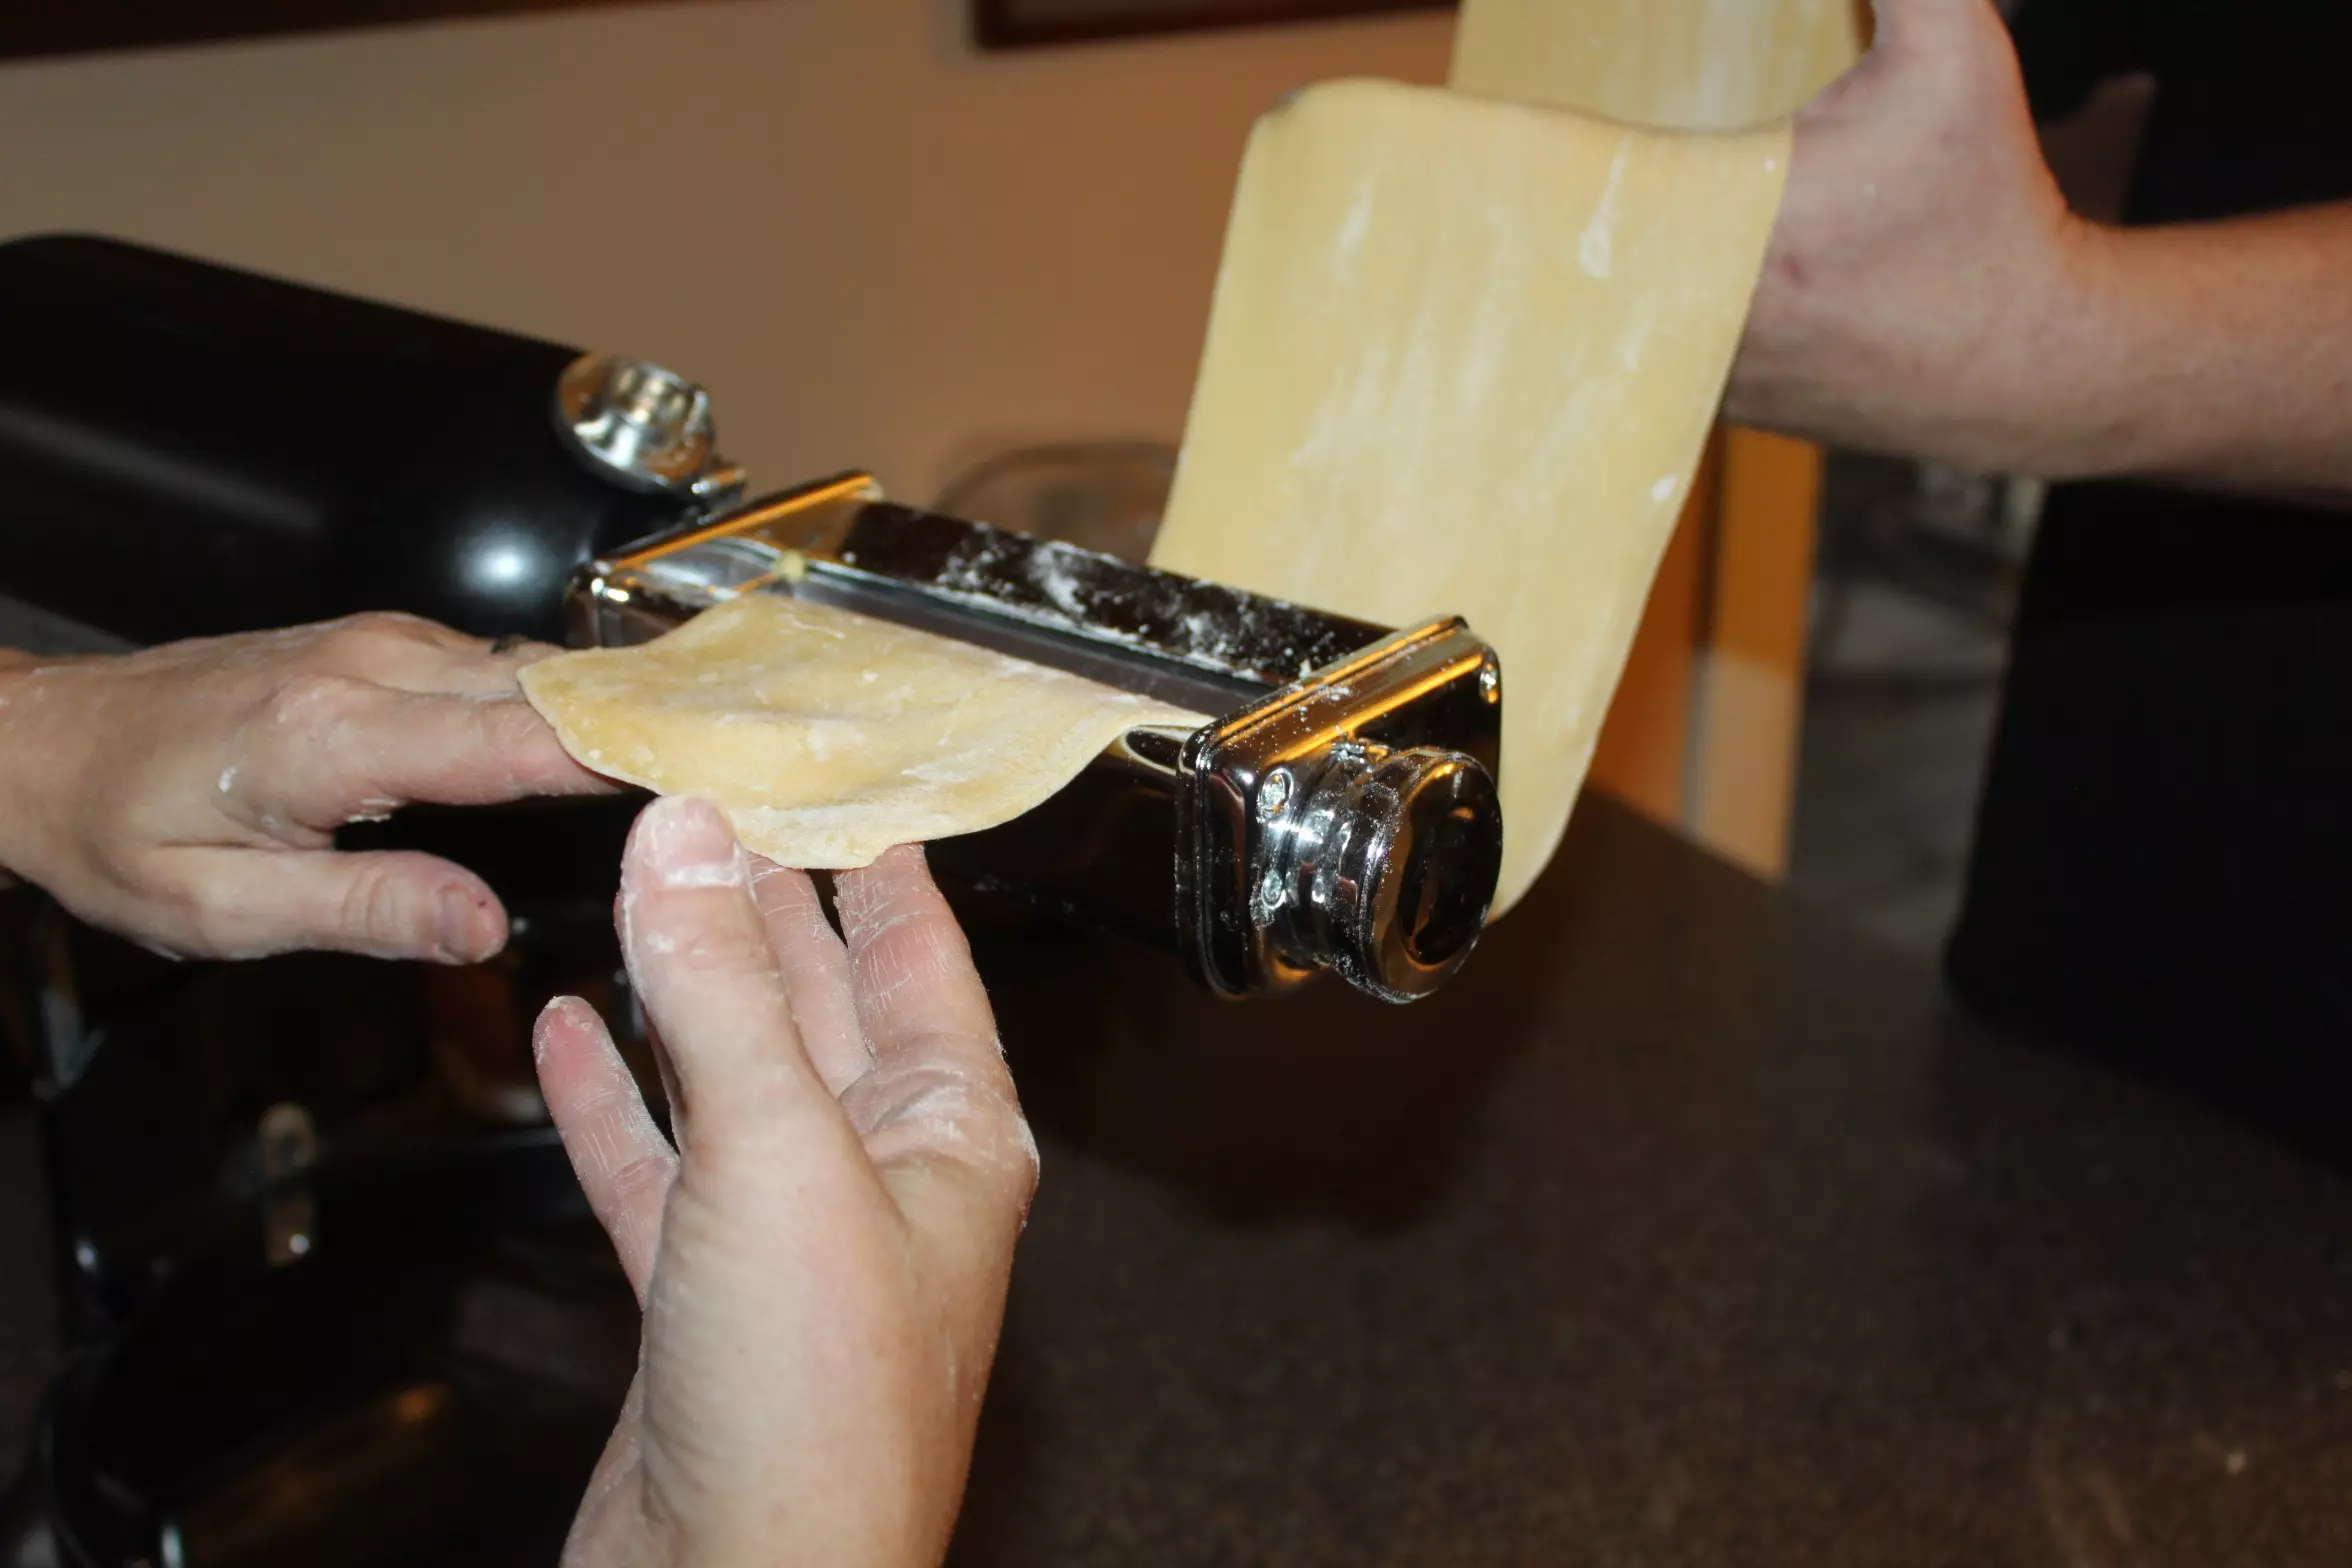
This past weekend, we spent the day making home-made pasta noodles with my mom, my sister and brother-in-law.  Mary and I both grew up with parents who made fresh pasta, and although I am sure we both may have been “little helpers” in our youth – this was truly the first time for either of us to really learn the art.  The best part of all, was in addition to making incredible fresh pasta – we learned so much more about the past.

Tried and true recipe with vintage tools of the trade

The recipe itself is simple.  Two basic ingredients. Eggs, and flour – with about 1 egg for every cup of flour.  It can’t get more simple than that – and it’s easy to see why pasta of all types has fed many a generation of hungry people.  It’s inexpensive and easy to make – and it filled you up!

On this day we had the privilege of using my mother’s pasta maker. It was imported from Italy over 65 years ago as a wedding present from my Italian grandmother to my then newlywed mom.

The pasta maker that was given to my mother as a wedding present in 1953 - still as beautiful as it was then!

As the day unfolded – I became amazed at just how many things my mom still used and that still looked and worked so well from those earlier years.

In addition to the pasta maker, we beat the eggs and mixed flour in brightly colored vintage Pyrex mixing bowls, and worked the dough on an old wooden pie board that was a wedding shower present.

If that wasn’t enough – we rolled and cut dough out on a classic cherry red kitchen table from the 50′s – in the extra downstairs kitchen my father had built for mom, complete with their matching vintage refrigerator and oven (still both working by the way!).

Working in the vintage kitchen - Admiral Fridge and Stove, along with a classic red table and the pasta machine.

We joked with my mom that all of her older “things” are so “in” right now – but after spending the day working with everything – it’s easy to see why that’s the case.  There is no mistaking the quality and workmanship built into the tools and appliances of our parents and grandparents era. Things were built to last, and taken care of by a generation who valued what they had.  Something that I think our generation should and could learn a lot from.

6 farm fresh eggs from our hens in a vintage red Pyrex bowl - ready to be beaten and mixed into the flour

So while we rolled the dough through the machine – We got to hear great stories about how my grandmother would make mountains of pasta right on the kitchen table – and all about big sunday dinners of the past, complete with spaghetti, fried chicken and of course, homemade wine.

We finished the day with a great family style spaghetti feast – topped with pasta sauce we had canned from our garden – and yes a little wine too (someday, hopefully we can use one of our own bottles!)   It felt like after all that pasta we should have included a nap as well!

The dough balls - all ready to be rolled through the pasta machine and then cut into noodles.

All joking aside – this day will go down as a favorite.  Spending time with family, passing on recipes, hearing stories of the past and enjoying great home-made food – that is something no amount of money can ever buy – and something I will cherish for the rest of my life.

Fresh Pasta with our Homemade sauce!

We also learned some valuable lessons from my mom in keeping a pasta machine working.  Never ever use any type of water to clean it. And never use salt in the dough.  If you follow those two simple rules…you end up with one vintage machine that can crank out a lot of noodles in it’s lifetime.  We included our little step by step process of the pasta making at the bottom of the post – if you have never tried it – it’s so worth the time!

“The Farm” – A perspective from a 12 year old.

***This post is written by Nolan. He is the youngest in the family at 12, and surprised us this past week when he asked if he could write a post.  Here is his post in his own words:

The Chicken Coop – made in the driveway, but now at home.

I have learned that the farm is a place where work is being done and beauty is being made.  You go over the little hill at the top of the driveway and immediately you can see the beauty.  Looking at the farm makes me think of all the hard work and reliving moments over the past few years.  It might only be 3 acres, but it feels like that’s all we need.  In the distance you can see the barn, chicken coop, garden and pergola.

Our first project was the chicken coop. At first I was a little embarrassed.  When we first started to build the coop, it was in our driveway in the city.  Even our high school football coach made a comment on the structure we were building, telling my brother he liked our new ‘dog house’.  The embarrassment came when we told him it was a chicken coop. but now I am getting used to it.

This has been one of our favorite family stories to tell.  Moving that chicken coop out of our driveway and to the farm wasn’t easy.  But with the help of some friends we accomplished it.  I even help get the eggs, and have learned to corral the girls to go back into the coop when it is time.  Don’t tell anyone, but I even asked to go buy more chicks last week.

This is our garden after we planted it in the spring

This is our garden after we planted it in the spring

Then spring came and it was time to start the garden.  This was one of my favorite projects, surprisingly.  There is a variety of food that we grow, but I like the banana peppers the best.  That is what we use to make our Hot Pepper Mustard that I love. I do not like to eat a lot of the things we plant, but they are still fun to help manage.  We got so many vegetables from the garden this year.

In fact, one day we were picking the garden, putting all the vegetables in a wood crate.

End of the season picking day – this is the crate that we filled at least once a day with produce. The one I couldn’t carry – and one Jim had a hard time carrying because it was so full.

I told Jim I would carry the full crate to the car, but when I went to down to pick it up, it was so full and heavy, that I couldn’t.  Then Jim comes over and he could barely pick it up.  Now Jim is a tall and bulky man, so you can tell how much stuff we had picked that day.  This was probably the best project we did.  The whole family was involved, especially the chickens.  They helped clear the bugs and weeds out of the garden, and Mom tells me they ‘fertilize’ the garden too.  After all the dirt and sweat that we put into the garden, it was finally finished.

Almost right after that we made our first pergola.  At first I had no idea what a pergola was, but I did learn quick.  I had to, because the next week I started helping making them make one for our farm.

My favorite pergola

The Barn we built from two old barns

The Barn we built from two old barns

One of the my favorite pergolas that we built was one for my friend’s grandparents. After building it, Mom and Jim were sore and ready to relax.  Well that’s what I thought.

After about two months, they started to focus on our farm.  They said it was missing something.  I guess that something was the barn.  I thought they were insane.  I did not think they could do it, but I knew that they were at least going to try.  They tore down two barns to make this new “recycled” barn.  I thought this barn was going to be just a new barn made with old things.

But I figured out that it was not.  Instead they made an amazing,  old fashioned barn.  After all the hard and painful work, they got it done.

One of my favorite things to do is take pictures around the farm.  In fact, a lot of the pictures they use on the website are mine, which is pretty neat.  Now we look at the farm and take pictures, we realize that this farm is truly paradise.

- Nolan


Meet Millview Farms from Ontario, Canada – This week’s “Tell Us Your Story”

We want to thank Celi and John from The Kitchens Garden ( http://thekitchensgarden.wordpress.com/ ) for sharing their story last week of their beautiful “farmy” on the Praries of Illinois. I think everyone enjoyed hearing about Mia, Ton-Ton, Daisy and all of the other wonderful animals – thanks so much Celi and John!

We travel to Canada this week and into Southern Ontario for the story of Marie and her husband, who own and run Milllview Farms.   Marie’s blog, Plowing in Pearls ( http://plowinginpearls.com) chronicles their life where in addition to growing cash crops, they raise meat and eggs in a natural and sustainable manner.

To follow along each week with our Sunday feature “Tell Us Your Story”,  you can simply enter your email address on the right of our blog and click “follow”.  Better yet – if you know of a farm that would make a great feature story, click on our “Tell Us You Story” tab and let us know all about it!

So here, in Marie’s words – the story of Millview Farms :

I want to thank Jim and Mary for putting this series together. It’s such a great opportunity to share, and get to know other like-minded people! My name is Marie, and I write a blog called Plowing in Pearls, which chronicles my “amazing life as a farmer’s wife.”

My husband,myself, our son, and our home.
My husband and I run a cash crop farm in Ontario, Canada. I’m a mother to a beautiful son, and am passionate about sustainability, homemaking, homesteading, and connecting with a way of life from years gone by. Although my husband has farmed his whole life, it’s completely new to me, and the learning curve has been a steep one. I like to think I’ve picked up pretty quickly though.

Here on our farm, we raise chickens, turkeys, and pigs for our own use as well as for sale to the public. I raise all my animals with respect, and in a way that allows them to exercise their natural tendencies. We use no hormones, preventative antibiotics (meaning they aren’t given antibiotics to prevent them from getting sick, like commercial producers, but I will medicate a sick animal if nothing else works) or growth hormones. Raising livestock in a respectful way is something that is very important to me, and this year we will be adding two rare breeds – the Large Black pig and Blue Slate turkey to our menagerie.

Chickens are my first love. I have many (many) breeds, from standard to heritage. All are free ranges, and we just love all the beautiful eggs they supply for us. Since my love borders on obsession, we have around 50 hens which provide us with more eggs than we could ever eat. The extra eggs go in to a fridge by our front door and we’ve developed quite a following of people looking for those golden yolks that can’t be found in the grocery store.

Although we raised our turkey’s on free-range last year, we learned that turkey’s “range” is quite a bit further than chickens. I spent a lot of time herding them off the road and out from underneath the cars of visitors. This year we will be implementing the “Turkey tractor” to keep them contained, while still allowing them the benefits of free-ranging.

We also keep a few “just for fun” animals, including our duckies (although they do lay eggs, so they kind of pull their own weight ;) )

I’m also taking on a new challenge in homesteading this year, and that’s milking my own goat. Maebelle hasn’t kidded yet, but I’ve been getting her used to the stanchion I built, and the routine of feeding. My biggest mistake with Maebelle however, was that she has never been milked before, and she wasn’t hand raised, so she is not a fan of being touched. Let’s just say it’s has been an adventure getting to this point, and I think the party is just getting started. I’m sure there will be lots of spilled milk and tears, but I’m determined to make it work.

Although I love all my animals very much, there is one in particular that holds a special place in my heart, and that’s Pearl, our beautiful donkey. Pearl is the most affectionate, and gentle creature I’ve met. I’ve spent a lot of time with Pearl, crying in frustration when it feels like the world is against me, or enjoying a beautiful sunset after a long day, it doesn’t matter what my mood is, Pearl is always the same – sweet, gentle, and loving.

My dreams for our farm include the on-farm market we will be opening this spring. At the moment we sell eggs out of a fridge by our front door, but my goal is to have a designated place to sell not only eggs, but pork, chicken, and turkey as well. My Mom and my sister will be joining in this venture by growing cut flowers (glads, zinnias, Salvia and sunflowers ect.) Although it’s been years since I worked in the retail/fashion world, I still maintain my eye for all things esthetically pleasing, and I love all things vintage, rustic and girly (which is part of the reason my blog is entitled Plowing in Pearls) so I really see this stand as being something that could have been pulled from a story book.

My husband and I are so blessed to have the opportunity to live on and care for this land, and it’s not a job we take lightly. We would love to see our son be the fourth generation to live and farm here, with his own little “zoo” of critters. For the time being though, we’ll enjoy raising him in the best environment I can imagine. There’s no better way to raise a child than out in the sunshine and dirt where they can burn energy, learn the value of hard work, and play with real toys (i.e. sticks and mud!) not Nintendos and iPhones. This simple life is perfect for us and we’re so glad to be able to share it with anyone who is interested.

If you’d like to see a bit more of our farm and our life, please feel free to stop by the blog at www.PlowinginPearls.com, or our farm website at www.MillviewFarms.com

Countdown to Wine and Jam

Dreaming for now...

Ok,  so we may be jumping the gun a little with the title above.   In reality, we only have 6 grape vines in the ground, and those were planted just last year.   But this is the year that we will start to transform the hillside into our little dream “vineyard”.   Arriving in just a few weeks will be our much-anticipated grape vines that were ordered over the winter.  A large majority of our property includes a sloping hill which leads down to the barn, garden, and chicken coop area.  Our long-term plan is to site our future house at the top of the hill, overlooking the property.  From the day we first cleared the land, we began to imagine ourselves sitting on our back porch overlooking a small “vineyard” while gazing down at our barn and watching the chickens roam.  It’s hard to believe that the time is here to begin to make that dream a reality.

Last year, as an experiment, we planted a portion of our first row of grapes – which will be our table and jam grapes.

Looking up from the barn... The hill was covered with snow this past weekend - but soon enough grape vines will be planted, and someday at the top....a house.

These consisted of a few vines each from the Concord, Reliance, and Mars varieties. We planted them in early part of the summer, which wasn’t the most ideal time to plant grapes – but we got them on a clearance sale, and thought we’d give it a try.  We planted 12 in all – with six of the cuttings actually surviving. (we kept hoping for the best with the other six –  looking for growth each week – but we are now convinced they have been converted to compost!).

This year we are on target for a proper early spring planting for the rest of the table grapes and our wine grapes.  Our plans call for a total of four long rows consisting of 10 vines each, spaced 8-10 feet apart, and trellised on poles and lines.

What we HOPE our rows will look like in a few years!

Planting on the hillside slope allows for adequate drainage and for full sun, which is important for the production of quality grapes in the future.  We spent a lot of time researching which varieties of grapes that we wanted to plant, knowing that making our own wine and jam was in our “5 year plan”.   We selected the Concord variety for the jam.  Concord is the most common grape in the United States and is known as a heavy producer and THE grape to have when you plan to make jelly, juices, and jams. The Reliance and Mars grapes will provide us with an adequate amount of table grapes to eat.

The choice for our wine grape - The University of Minnesota's Marquette variety

Our wine grapes will make up the final three of the four long rows of our little vineyard. I guess it’s easy to see that wine may be more of a future demand for us than jelly and juice! :)   We just figure that the teenagers will soon be adults – so our demand for peanut butter and jelly sandwiches will be dropping in 5 years, and they will all be in college – so we will need the wine to get us through!

We considered using the Catawba, an Ohio staple wine grape variety.  However, due to it’s susceptibility to disease, we continued to research other varieties which would work well in our planting zone.  We finally decided on the Marquette grape.  This is a relatively new, cold hardy grape variety developed by the University of Minnesota. It has a great wine heritage being a cousin of Frontenac and a grandson of Pinot Noir.  It’s a high sugar, moderately acidic grape that produces a wine with hints of cherry and blackberry in a vibrant ruby color.  At least that is what it supposed to do – we will see how it actually turns out when we make it!

Although thoughts of sipping our own wine while we sit on that yet to be built back porch is our dream, we realize that it will be at least 3 years before we can harvest enough of the fruit to even make our first test batch of wine.  So for now, we have to concentrate on the task of planting the vines and setting the poles to provide support for them to begin to climb.  Those vines are due to arrive in just a few weeks from the nursery – and yes Jim, that means we need to dig 35 more holes!

- Mary

Our “New” Old Barn – Carrying on Dad’s Tradition

The Barn - Completed!

The Barn – Completed!


Me, our dog Barney, and my Dad’s barn in the early 70′s

Over the past year, one of the most rewarding and yet physically challenging projects for us has been the ever so slow process of building our “new” barn on the farm. The barn is our first “real” building on the property.  (The chickens might argue that their coop was up first – but in spite of their protests – we shall call this the first real one!)

Our barn is the marriage of two old barns into one.  One, a barn we found through an on-line posting that needed to be removed to make room for a driveway.  The other, a sentimental piece of my own life –  a barn that my father built that became a fixture in my parents yard for the last 40 years.

Our original drawing of what we wanted our barn to look like – we were pretty close except for the cupola

Both barns were getting older and in need of some repair – but both had beautiful wood and features worth preserving.  It was a slow process, but with help of family and friends, we worked to preserve them as part of a new barn to serve a new generation once again.

Like many barns of the past – it will hold our garden and farm equipment (in a little lean-to built onto the back).  However, the main portion of the barn is being built to house and share our way of life with friends and family.  The inside will hold a big summer table, a loft and plenty of space for events – such as canning, wine making or holiday parties.  The attached pergola and patio is for an outdoor kitchen where we can enjoy our garden’s harvest and hopefully make dinners in the open summer air.

We began the process at the end of June – trekking our way to Cardington, Ohio to take down a mid-sized barn that we found on craigslist for free.   Looking back – it was probably more than Mary and I could handle – but we stuck with it.  We had our moments – like straddling a half-torn down roof with a saws-all – only to have bats fly out under my legs.  A bit unnerving, but none the less, it gave Mary a great pause to laugh at me as she looked up and waited for me to stop screaming.

Dads barn getting down to the bones.  Note the 36 Chevy paneled truck – my Dad’s prize possession and now being restored by my brother Bob back to its original glory.

A month or so later – we began to take down my Dad’s old barn.  A rustic red barn with a past of its own. You see, it was this very barn that my Dad had deconstructed and moved from a relatives property almost 40 years prior in the fall of 1973.  My father took apart each board – and rebuilt it, where it stood at my parents house until Mary and I took it down to give it a new life once again.  My father passed away when I was just 12 – so it was incredible for me to see Dad’s handwriting on some of the beams and walls where he had painstakingly marked each board to put it back together.

diggin the holes – a long way to go!

Day 1 of the build…setting the poles!

So with both barns down, and piles of wood to work with - the day finally came to start our barn.  We had decided to utilize all new posts and  a metal roof for structural purposes – but to re-use everything else possible from the two old barns from there on out.  With our own design in hand that we developed from our inventory of  ”found” barn wood  - we broke ground for the holes.  We set our first pole in late August – and hoped, at the very least to have a roof in place by winter.

We worked when we could.  After work – weekends – vacation days – a little bit of time here and there to keep at it – and by fall – with the help of some great family and friends…we had the walls and roof up.

We recycled and reused everything we could.  We took my Dad’s old metal roof, flipped it around – and made it into our new lower sides.  We milled down the barn siding boards and made them into our battens for the new one.  The brick floor will be put back down with other reclaimed bricks to make the new floor for the inside, outdoor patio and kitchen.  The list goes on and on…but for us, it’s keeping history alive.

We used Dad’s corrugated roofing to become the “new” lower walls of our barn. We loved the look, and the bonus was that the patina of the painted side really gives the inside a neat appearance

From the Cardington barn we made our two sets of barn doors from the wall and floor boards.- the pergola and outdoor kitchen that will attach to the left side of the barn will be made from its post and beam skeleton.

Our “Farm Fresh Eggs” Sign. We couldn’t wait to put it up after we made it – so it went on before the roof!

Even the nine foot “farm fresh eggs” sign was made entirely from the floor boards.   We have also milled down additional floor boards and beams to create a big summer kitchen table to put in the middle of the barn.  One that we hope will host some big family style “barn” dinners on.

Cutting the big old beams to make legs for the big kitchen table – the beams are almost a 100 years old – but look a the beauty of the wood when cut.

Our barn will be used as a gathering place for family and friends – hopefully for the next 40 years.  We want it to be the centerpiece of our little slice of heaven.

Without the help of friends and family, we would never been able to get so much done! Here my brother-in law Brian helps put the finishing touches on the ridge vent.

This week, we are finishing up the loft and a few inside details, while getting ready to put on the pergola over the outdoor patio space.  Every time we work on it, I know that we both imagine it filled with our friends and families laughter.  We can’t wait till it’s all finished – but we cherish every moment we’ve had building it.

I wonder a lot what my father thought when he took it apart forty years ago.  I wondered if he struggled like we did with removing nails and beams, and in fact – the whole rebuilding process.  In fact – I can’t pass any barn nowadays without thinking about who built it, and what they went through to make it what it is today.  I have so much admiration for the builders and craftsman of our past who built our country’s barns and farms.

I love what building this barn has taught Mary and I.  We have worked side by side every step of the way during the building process – and that is a memory no one can ever take from us.   I’m sure barns of the past that were built by family members had the same type of connection – and it makes me proud to know we are carrying some of the past into our future.

My father, brother-in-law, and uncle working on re-assembling the barn in September of 1973. My brother-in-law Carlton got to perform double duty, as he and his son-in-law helped us tear it back down again this past fall.

I love our new “old” barn.  Every single time I drive into the farm and see it,  I smile.  I remember working through those hot days with Mary tearing down the old ones to make it. I remember all of the scrapes and cuts and bruises building it.  I remember Mary about to kill me as I asked to lay out the squaring lines “just one more time to make sure we got it right”.   And through all of the hard work – I remember the great friends and family who helped us tear down and re-build it into “our” barn.  I remember all of the laughter and all of the fun that went into it.

It was a lot of hard work and yes, all of that work saved us a lot of money…But more than anything – I get to remember by father every time I look at it – and that is priceless.

Our recycled barn as it looks today.

Our recycled barn as it looks today.