The List –

(October Update ( 10-15-2012 ) at the end of this post)

With the start of May just around the corner – and four months under our belt – we are 1/3 of the way through 2012.

Way back at the end of December,  (and hopefully every year in the future!) – we sat down and created a list of 30 goals to focus on and accomplish for the farm in 2012.  That works out to 2.5 goals per month -

How did we come up with them?  We simply followed a few simple rules.  First  - we wrote out our own lists of what we thought should be the 30 goals.  No talking, no peeking and no co-conspiring on the lists.  We then each ranked our 30 goals in order of our perceived importance.

The goals could fall under 3 categories.  1) Items we would like to purchase for the farm.  2) Things we need to build, install or create at the farm. 3)  Things we want to accomplish for the farm and or pergola business.

Then, we sat down and read them aloud to each other.  It was amazing to see how many items on the list we both had – and how close we were to the importance of the items.  Each of us had written down a few goals the other had not – and so we worked together to come up with the best combined 30 goals -and a plan to attack them together.

#7 on the list…the barn pergola.

Some might question the need to number – but I think it is a great way to be honest with yourself about what really needs to be done.  Everything becomes clearer when you have it in bold print in front of you.  We posted it on the fridge – right where we would both have to look at it every day – and be reminded of what we need to do.  It’s good to have goals – It’s good to have them in print.  It is amazing how much it helps keep your eyes and efforts focused on the future.   We both know if we can accomplish those 30 goals this year – that the farm is going to be on track and getting where we need it to be.

#1 Goal – Getting the Driveway In!!! We both were tired of muddy vehicles :)

So – how are we faring 1/3 of the way through?   So far so good.  We just crossed off #12 – so were 2 goals ahead of the 10 we need to be on pace at the end of April.  And we have about 4 more of the goal projects already in progress, and at varying stages of completion.  But we both know with prime gardening season approaching and pergola season in full swing – it will get tougher and tougher to complete.

It is amazing to both of us how much “The List” has helped – and it’s been great for the kids as well to see how important it is to set goals and work to achieve them.  It’s funny to see them look down at the list or ask if we are still on pace.

So happy 1/3 of the year!  And here is to hoping your on track to accomplishing all of your hopes, dreams and goals in 2012 as well!

OCTOBER UPDATE:

With 2 1/2 months to go…the we are 4 away from completing the list – here is the update:

Updated List…10/15/2012

Sweet Heat for Your Meat! Our Hot and Spicy Ketchup Recipe – Fresh Or Canned

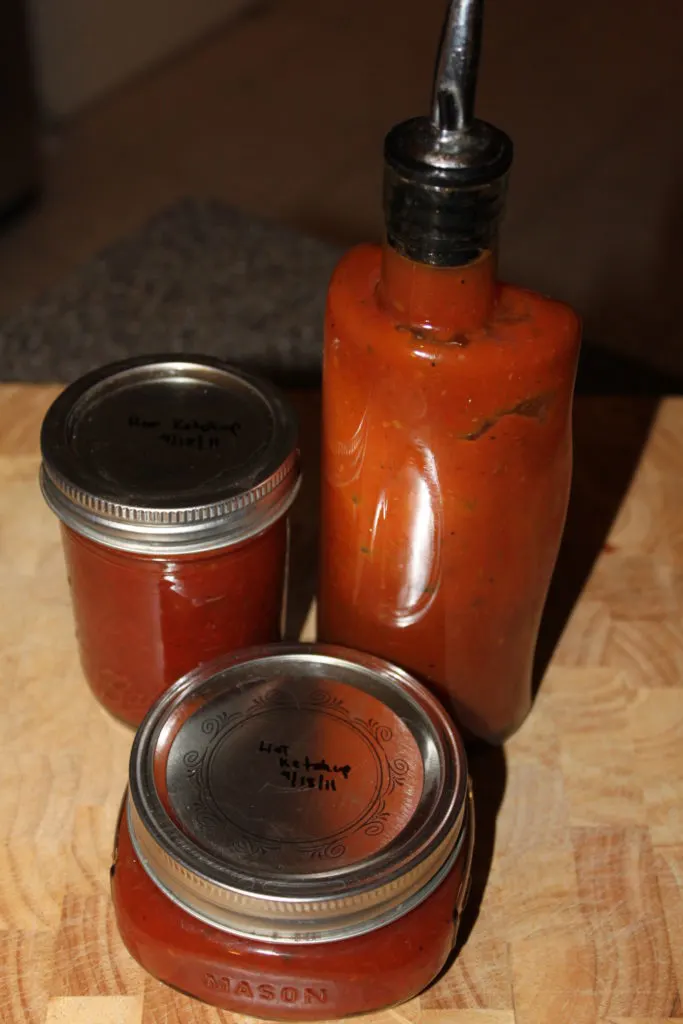
Sweet Heat for Your Meat.   That’s the name we jokingly came up with when we finally found the perfect blend of  ingredients to create our sweet and spicy home-made hot ketchup.  It’s surprisingly easy to make – and you simply cannot compare it to anything you can buy off the shelf in a store.  When it first hits your mouth – you can taste the pure sweetness from the tomatoes,  red pepper and brown sugar.  Then, slowly, the taste turns to a slow, low burning heat from the habanero and jalapeno peppers.  It’s a great condiment for hamburgers and hotdogs – or as a marinade for chicken.  You can even use it as a dipping sauce for potato chips, french fries or chicken nuggets.   My personal favorite though – is to substitute it in place of traditional ketchup for an incredibly flavorful meatloaf!  Once made, the ketchup will store in the fridge for months.  During our summer gardening season – we make larger batches and can it for use year round.

Old World Garden’s  “Sweet Heat for Your Meat”  Spicy Ketchup Recipe

The Ingredients :

7 medium tomatoes (Roma variety is the best)

2 jalapeno’s with seeds

1 habanero with seeds

1 red bell pepper

2 medium Vidalia onions

1/8 cup of chopped cilantro + 1 teaspoon of finely chopped cilantro

¼ cup of white vinegar

1 tablespoon of pepper

1 ½ tablespoons of sea salt

6 garlic cloves

½ tablespoon of red pepper flakes

¾ cup of brown sugar

1 can of tomato paste

Our Hot and Spicy Ketchup – Easy to make fresh – or can for year round use

Simply chop and dice your tomatoes, garlic, onions, cilantro and the red, jalapeno and habanero peppers.  Put all into a large pot, add the vinegar – and turn your burner on medium low.   As the pot starts to warm, slowly mash down the ingredients.  When it cooks down enough you can begin to blend it all together.  We use an immersion blender – but you can use a hand masher, hand mixer or food processor.  Once they are all blended together, continue to let the ingredients cook down and simmer for about another half-hour on low heat, then put through a colander to remove seeds and skins.  Put remaining product back into the  pot, add salt, pepper, brown sugar and tomato paste along with a tablespoon of finely chopped cilantro.   Let cook down until you reach your desired consistency.  Remember that once it cools it will become thicker.  We simply judge the consistency by putting a spoon in the pan, and if the ketchup doesn’t run off – it’s ready to go.  This is where the Roma tomato really helps, it is a great paste making tomato – and thickens the ketchup well.   If your mixture still seems a little too runny for your taste – you can add a teaspoon of corn starch to thicken it up.  Once it is ready – you are ready to bottle and use!  The ketchup will keep in the refrigerator for at least a month or two.  Or you can pressure can it for 20 minutes at 10 lbs. of pressure and have it ready for year round use!

The Groundhog Dilemma – Chuckie and Friends Have to Go!

Groundhogs can be a nightmare for plants, gardens and landscapes.

Spring has sprung – and so has a new den of groundhogs just South of the precious garden.  When I say just South – I really mean “just” – maybe 10 to  20 short paces from the front edge of the garden – and another twenty paces the opposite direction to the area where the new grape vines will be set in the ground in a few weeks.

We’re not opposed to sharing our food with others – but groundhogs are kind of like the relatives that come over and devours everything from your table, your fridge and your cupboards – and won’t leave.  They can tear a garden to pieces – let alone your landscaping and lawn with their massive holes.

So, with little choice – as it’s just about prime gardening season – we have decided Chuckie and his friends have to go.

So, that leads to our options – which are few and far between.

We are only a few weeks away from garden season - and the groundhogs will look at this like a big buffet.

We could:

A. Hope that they are a “good group” of groundhogs – and hope they will only eat a small portion of our garden, and leave the rest for us.  (NOT LIKELY)

B.  Trap and release them elsewhere.  However –  the Division of Wildlife  told us that they DO NOT want you to trap and relocate the animals due to the spread of disease.

C.  Fire a couple of warning shots in the air and see if they leave.  (HIGHLY DOUBTFUL)

Okay – so it’s not going to be as simple or easy as any of the above options, but – one way or another – we have to get them out – and definitely within the next few weeks before the tender garden plants go in.

Grilled Pizza Dough Recipe – A Summer Must!

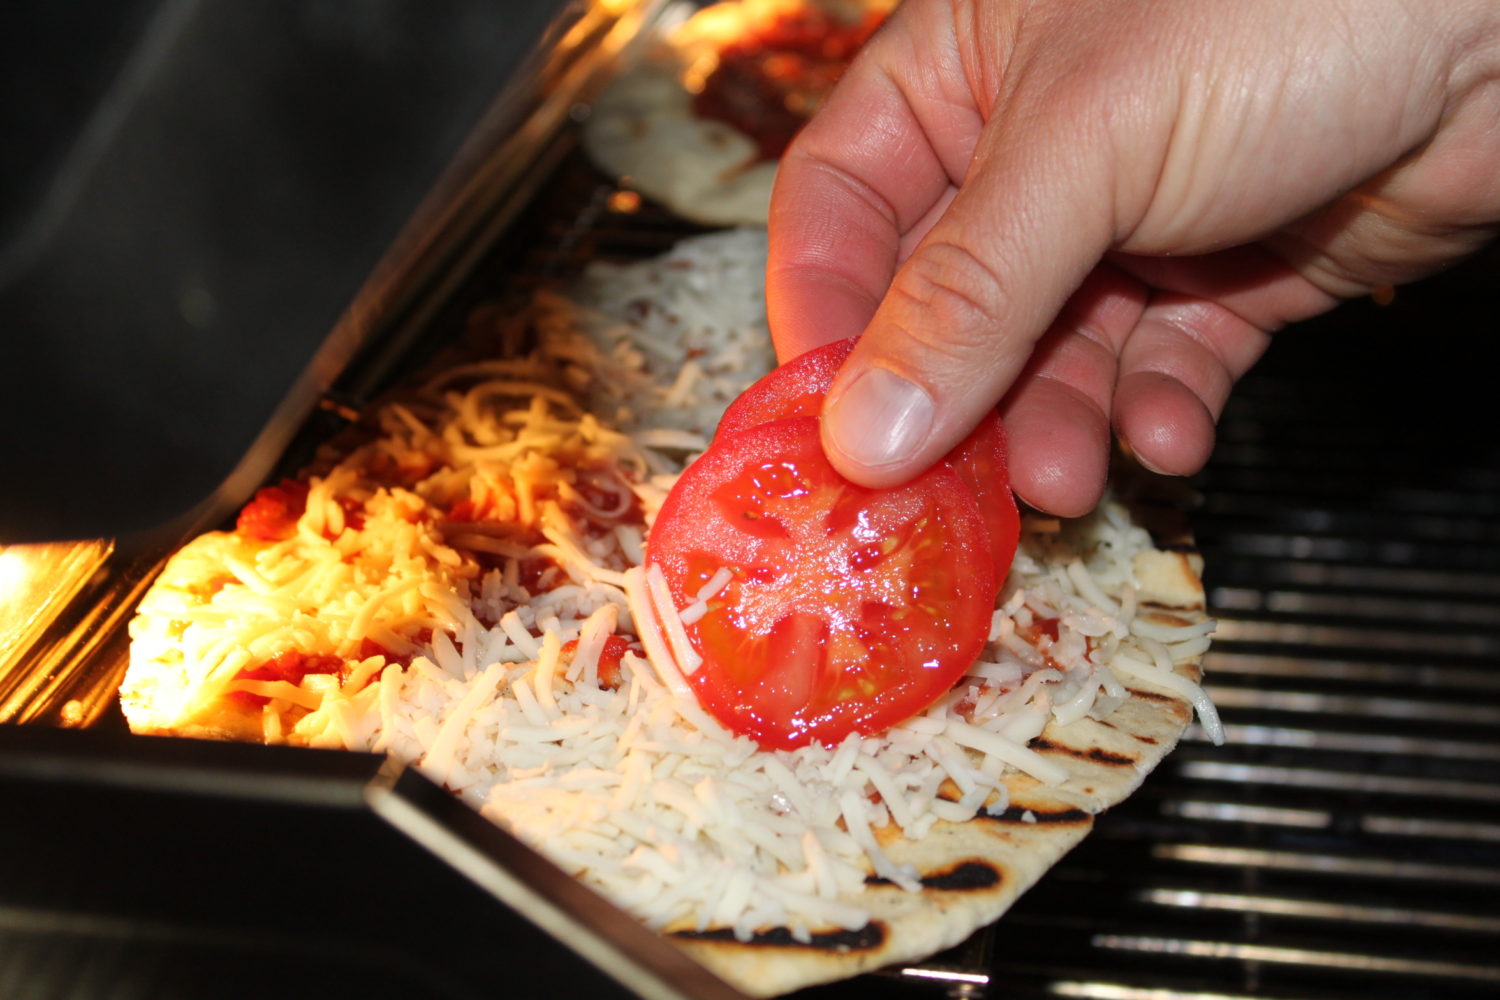
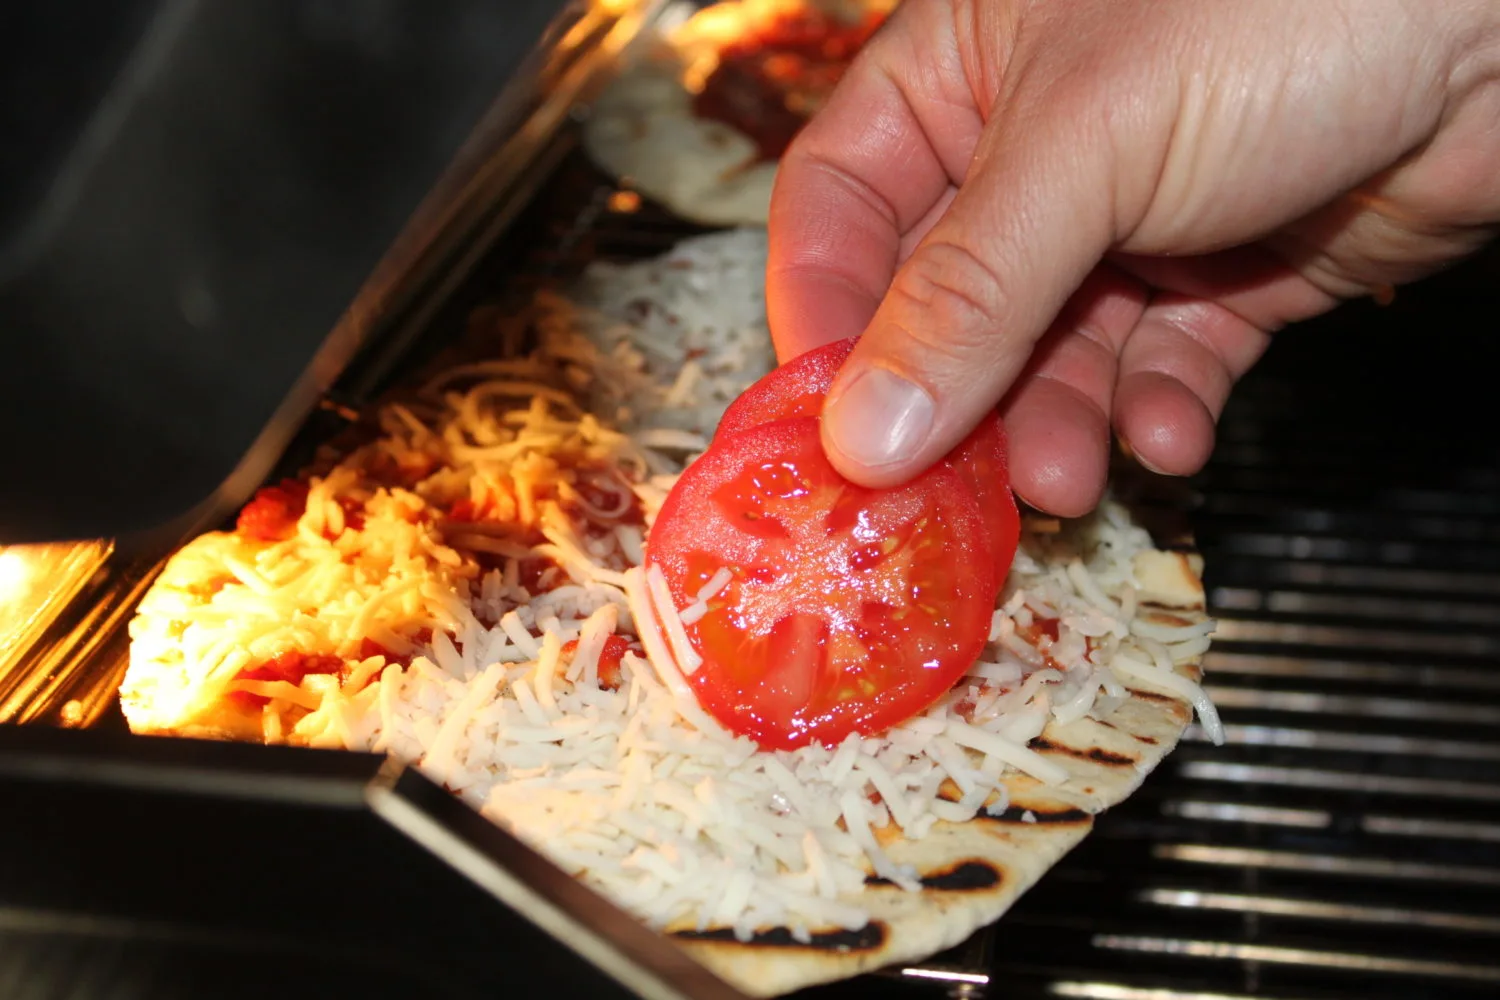
This quick and mess-free grilled pizza dough recipe is a great way to spend a spring, summer or fall night outdoors. Even better, when the garden starts to produce – you can make endless varieties of vegetable pizzas to satisfy any taste buds.

It also makes for a great “make your own pizza pie night” party among family and friends!

The biggest fear to overcome is to throw that dough on those grilling grates for the first time.  You always expect it to stick – but if you follow this simple recipe - it will turn out perfect every time!  The best part of all is the use of only 6 simple ingredients, a large bowl, a measuring cup and cutting board.  It makes for any easy night of clean-up!

Beer and yeast combined - Let stand for 10 minutes

The Ingredients

  • 4 cups all-purpose flour – A lot of pizza recipes call for bread flour – and that is fine – it will give more of a crisp crust – however, we just like the ease of rolling out the all-purpose flour – and like the thicker,  chewier crust of the all-purpose flour.  Chef’s choice!
  • 1 teaspoon sugar
  • 1 package of yeast
  • 2 teaspoons salt (we prefer kosher)
  • 1 1/2 cups beer heated / warmed to about 110 degrees F  (you can use water – the beer just really adds a great taste to the dough
  • 2 tablespoons olive oil, plus 2 teaspoons


The Directions

Dough mixed and kneaded in the bowl.

First, pour one and a half cups of your favorite beer (you can use water – we just like the taste the beer gives to the dough).  Warm in the microwave to about 105 to 110 degrees farenheit.  Pour in yeast, and let stand for 10 minutes to activate.

Pizza dough and toppings - almost ready for the grill!

While the yeast is starting – grease the large bowl with a thin coat of olive oil – then add the flour, sugar, salt, garlic salt and hot pepper flakes in the large bowl.  Then slowly add the yeast mixture to the dough – kneading and combining until the mixture forms into a dough ball.  If it still a little wet – add a little more of the extra flour mix to it – if it’s a little dry – add a little more water or beer.

Form into a ball and rub olive oil over the dough ball’s outer skin.– place back in the bowl and cover with a towel and let the dough

Quarter the bread into four even portions - each piece can be rolled our for a pizza

rise for an hour.  Once finished – knead down one final time on a floured board – and cut into four equal pieces – then roll into four equal dough balls.  Cover the dough with a towel and let rest about 5 or 10 minutes.  Then simply take out each dough ball and roll out.  We don’t worry about perfect symmetrical circles – in fact –we let the dough determine its own shape for that authentic Italian look – rolling it out any which way until it’s to your desired thickness.  (our’s usually turn out to be about 10″ x 8″ with uneven edges.  Then we simply drizzle a little olive oil onto each side – and gently rub it into the dough – it’s ready for the grill!

Pizza dough on the grill - don't worry - it wont stick!

Have your grill hot – in the 350 to 375 range – and make sure you give the grates a quick brush cleaning so they are fairly clean.  I even will sometimes brush a quick coat of olive oil on the grates with an old grill brush.  Then simply lay out the dough on the hot grill grates and let it on for at least five minutes..and no, it really won’t stick!  Don’t touch it for the first few minutes– let the oil do its job and in a few minutes using tongs or a spatula – lift up the edges and see if it’s got those nice grill marks. Let it finish off to your liking.   Here is where you can go two different ways with your pizza.

Pizza dough bubbling up on the grill

If you want a truly rustic pizza – take the pizza off the grill and add your pizza sauce, cheese and all toppings to the hot just grilled side –  then put the uncooked side back down and finish it all up on the grill.

OR

Sometimes, we will go ahead and lightly grill each side at the grill – and then bring in and finish with our sauce – cheese and toppings, and finish in the oven until done.  Either way is delicious – and a great way to enjoy an easy grilled pizza!  The best part – it’s an easy clean-up.  You wash out the bowl, the measuring cup and wipe off your board and you are done!

Grilled Pizza with home-made pizza sauce!

Looking back in time with photos

So yesterday was a long day at the farm – we had a HUGE load of large rock delivered for the purpose of building the stone retaining wall behind the barn and outdoor kitchen.  I have to admit it – is a bit depressing to have things starting to look “cleaned up” and “somewhat finished” –  only to have a massive pile of boulders dropped off that clutters it all up again, and reminds you you’re not even close to being done!  So last night, after a long day  - I took some time to reflect on a year and a half worth of photos from the top of the hill to see the progress of the last year and a half.  Sometimes, you have to take a moment to look back to see how far you have come – to give you motivation to get to the future!  So here is the development of the farm so far in pictures taken from the top of the hill:

September 2010. Top of the hill overgrown with brush and trees...seems sooooo long ago!

OCTOBER 2010 - Land finally cleared

June 22, 2011 Garden, Fence and Pergola are set up!

September 9, 2011 - Chicken coop added now and the barn appears - without a roof of course!


October 19, 2011 - Rafters in place - the metal roof starting to go up!

March 2012 - barn is closed in - and the chicken coop is now painted to match

April 17th, 2012 Driveway base in - barn pergola and patio started.

And after all that progress...now it's time to get back to the 18 tons of stone and rock that needs to be put into a wall :)

Happy First Birthday Girls – The Chickens Turn 1

Foghorn posing for an up close shot - Foghorn just enjoyed his first birthday on the farm

As Jim and I  took a small break last week between tasks at the ‘Farm’, we began to think of where we were last year at this time with our dream.  We sat up under the garden pergola and scanned the property and laughed about the day we spent hours researching how to raise day old chicks.  We had read about diseases, brooders, breeds, feed, etc….   until we felt comfortable that we could become suitable ‘parents’ to day old chickens.

Jazzy checking out the new chicks...

In fact, I am pretty sure we could have written the book ‘What To Expect When You Are Expecting…..Chicks”.

Just like new parents do, we brought them home to their well-prepared brooder and sat and watched them.  Yes,  sat and watched them sleep, wake up for a few minutes to eat and drink, and sleep some more.   We then introduced the girls to our black lab dog, Jazzy.  Now Jazzy is a ‘single child’ and hasn’t had to share love, affection, or snacks with anyone else.   She was very interested in the new arrival and wanted to be a part of the ‘watching’.  Of course, as nature progressed – and the girls got bigger – Jazzy also wanted to see what it would be like to try to put one in her mouth – so at that point – the dog and chicken show ceased!

The coop - now painted brown and black to match the barn.

So the day finally came.  We had finished building their coop and hauled it out the farm as the first “building” on the property.  We secured it with a wire mesh bottom – a brick floor, and a coop run that included burying a portion of the fence in concrete to make sure the raccoons and other predators couldn’t get to them.  And we watched them grow – and grow – and grow.  And every day we would check those boxes  waiting and waiting for that first egg.  And then it came – week 16 – a single tiny egg in the box!  I’d be lying if i didn’t say we jumped up and down.

Ready to lay eggs in one of their favorite nesting boxes.

We had done it – We had raised our girls to be egg layers.  Within another week – they started coming daily – and the chickens were established as our first succesful farm project.

The chickens have been one of the most rewarding and fun projects so far in the short time since we began the “farm”.

Chickens in the brooder - all lined up at age 4 weeks learning to perch

They not only provide us with an incredible bounty of eggs – but do an incredible job of keeping ticks, mosquitos and bugs of all sorts and kinds at bay.  They help control our weeds and give us great “material” to use in our compost pile.

We love sharing what we have learned with others, and how easy it can be to have and care for chickens in your back yard.  It’s somewhat funny – but it always seems that two questions come up more than any others when asked about our chickens.

1) Where is your rooster? and, 2) How did you train them to lay their eggs in those boxes?

Well, as many of you know – you don’t need a rooster to have eggs – in fact – in many cases – such as ours – the hens are much more tame and comfortable not having “Big Daddy” around :)    It also makes it a lot easier when not having to worry about the fertility of your eggs.  It’s pretty simple – no rooster – no checking for chicks!

As for that training part about laying in their boxes…I must confess we have a little fun now and then making up a tale about the intensive training process to get them to lay in the boxes – i.e. – placing music in the box, or special treats – or my favorite – the special “chicken” shock collars we use to train them …. only to break into laughter and let the perplexed faces know that it’s simply nature taking place – and chickens prefer to lay their eggs in those little boxes nests all on their own.    And please, no worries – we treat the chickens like family.  So even if there is such a thing for chickens as shock collars – we don’t use them!

A bountiful harvest of eggs from the ladies

So far – the chicken experiment has gone better than we could have ever expected.  We have yet to lose a single chicken in spite of many raccoon and coyote visitors to the outside of the coop.  Then, of course, the hawk  who came awfully close to snatching one late last fall put a little scare into us all as well.   In the last 365 days – our nine little hens  have given us an average of 56  eggs a week since about the 17th week of their lives – that’s about 2000 eggs – or 175 dozen eggs!  Not bad production for the ladies at all!  We have had plenty of eggs for family, friends and our own hungry kids.  We now sell a few dozen eggs each week to friends who want those great tasting farm fresh eggs – which has turned out to be more than enough to cover our feed and fresh straw costs for the coop (which run about $20 per month on average).

So Happy First Birthday Girls!   Thank you for a great first year on the farm – and here’s to another great one this year!

9′ long and made from recycled barn flooring – our egg sign for the barn.

Using rain to water our garden…our solar driven rain collection system takes shape

The water tote being connected to the diverter spout

The water tote being connected to the diverter spout

Our tanks still sitting on the truck in front of the barn waiting for us to unload!

***We have more updated pictures at the end of this post from installing the totes.

It’s a beautiful sight to us!  Two bright and shiny 275 gallon water totes that will become the backbone of our barn’s rooftop rainwater collection system.  They will be used to water our entire garden, grapevines, and flowerbed areas – and let us attain our goal of using 100% reclaimed water for all of our gardening needs.

Thanks to another craigslist find this past weekend – we picked up the two used totes for just $40 each from a manufacturing plant.  They were used initially to hold molasses syrup for the food plant – but they are in pristine condition, completely washed, cleaned out and ready to start holding our rainwater.  These tanks have a huge 6″ cap opening on top for filling – but more importantly – with just a little modification using simple garden hose adapters – we can turn the 2″ bottom outlet into a standard garden hose hookup, complete with a shut off valve.

Recycled water totes are a great way to store and use rainwater – just make sure your totes are clean and were not used to hold harsh chemicals that could leave harmful residues.

We will finally be installing our gutters on the barn in the next few weeks . Instead of directing the downspout into regular run off drains –  the rainwater from the metal roof will be carried by a small diverter installed in the downspout to fill the water tanks.

Our system is really pretty basic and very simple.  When both tanks are full – they will hold 550 gallons of fresh water – enough to water our garden every day for nearly a month if mother nature decides to send a drought our way.  We will keep one tank at the top of the back hill above the garden hidden within the compost bin fence.   The other tank will be installed at the back corner of the barn, hidden behind a decorative fence and large grasses. That tank will be connected to the downspout to catch the rain water coming off the metal roof of the barn.   A simple overflow tube will be installed on the main rainwater tank that will send all excess water to the regular drains when the tanks become full.

The biggest hurdle to overcome was how to get water to our top tank.  It makes sense to have the usable water up above the garden.  It’s the highest point of the property – and if the tank is there, we can simply use gravity to water all of our plants.  We first thought about using the tractor and a small wheeled trailer to move the bins when full – but we decided it would just be too difficult to do – and probably end up damaging our tanks with the constant movement.  So after a lot more thought and a little research - we have settled on pumping the water from the bottom tank to the top tank  when needed,  using a permanently buried hose and a small water pump powered by an inexpensive solar energy system

We will use a simple downspout rain diverter to take water to the tanks

How does it work?  - It starts with the use of a small solar panel that will attach on to the back of the barn roof.  The panel collects the sun’s energy and charges  a small battery panel in the barn.  That battery power can then run the small electric pump and push the water up to the second tank with a simple flip of a switch.  A great way to get all of our future watering needs at no cost!

So – hopefully with a little good weather and some luck – we can at least have the gutters and main tank connected within the next week or two and begin filling the main barn tank – with the solar pump and panel installation following shortly thereafter.   Our goal is to have the system operational by the main planting of our garden in mid-May.  We will be sure to post updated pictures when we have it all up!

If you would like to receive our weekly DIY and Gardening Posts – be sure to sign up to follow our blog via email, Twitter or Facebook in the right hand column of the blog

Filling Up With Rain

IMG-20120529-00370

Filling up about half full after a rain,,,

Filling up from a good rain

Filling up from a good rain

Back Barn Gutter

Back Barn Gutter

Moving on up! Ornamental Pepper plants get a new home.

The weather continues to warm here in Ohio – tempting us to cheat mother nature and skip the whole seedling transplant step and head straight for the flowerbeds and garden.  However – in spite of the temptation, reality set in and  Saturday we began to move all of our seedlings into larger individual pots.  Mary went to our local nursery, who has a recycled plastic pot program - where they gave her close to 75 16 oz. pots for a nickel a piece – an unexpected find that saved us some cash!  So we spent the morning transplanting the pepper plants into new homes – where they will spend the next four weeks expanding their root structure before finding their permanent home in our landscape and garden.

The transplanted Sangria Pepper plants get some much needed space to expand!

Ornamental peppers are an absolute favorite of ours.  They get big with hundreds and hundreds of tiny peppers of all different colors.  We grow and save our own seeds from our favorite variety – the Sangria Pepper – and this year have expanded to two additional seed varieties, the Poinsettia and Tangerine Dream.

Sangria Peppers in full summer glory

We use these for mass planting in the flowerbeds to give big blasts of color to our landscape.

The peppers have proven over the last few years to be one of the most durable, well producing and colorful editions to our landscape.   One of the most frequent questions we are asked  is “Can you eat them?”  The short answer is – most of the ornamental varieties – like Sangria have little or no taste and are not great for consumption.  However, there are some varieties – like Poinsettia and Tangerine Dream that produce a small edible pepper that are great to flavor soups or dips.

Transplants filling up the kitchen table!

This year, we expanded the pepper seedling production to several hundred plants – tripling what we have ever tried before. (and taking away our dining room for a few weeks!)  We will use about half of those for our own landscape – and sell the others to friends and a couple of small local nurseries.   We hope to build our own greenhouse on the property later this fall – and with a little luck, hit our goal of 1000 seedlings next year!

Farm Update – The Barn Pergola / Kitchen Project Underway

This isn’t exactly the best time of year to get major projects done!  Between softball and baseball games, spring planting, mowing, and building the pergolas we sell  - our own  ”to do” list sometimes suffers.  What’s the old saying…a plumber’s leaky faucets are always the last to get fixed…well…that is about how it has worked for building our own barn pergola!

Barn Pergola starting to take shape!! Putting down reclaimed pavers is up next!

We did however finally make some headway on our project this past week.  We are attaching a 12 x 22 pergola to the side of our barn and then putting down a patio with reclaimed pavers. We hope at some point to add an L shaped outdoor kitchen on the side with some more of the left over barn wood beams – and then be able to finally host some big family gatherings with food from the garden by this fall.

Putting the first coat of stain on the purlin boards before putting them up

It’s still such a long way from the dream…but at least it got a little closer this week!    On Friday –  we took turns digging the holes – each of us taking turns until our arms hurt before handing over the post hole diggers.  By day’s end we were able to set the four posts – and get the main header boards up – along with getting a large load of  the packing gravel delivered.  We will rake out about a 3″ base with the gravel pack for the patio area – and then follow with the pavers.

Chickens having fun playing teeter-totter while we dig out the holes for the pergola

I have to say that the gravel was soooo much lighter to move Friday before we got the three inches of rain in a big storm Friday night!   We pre-stained all of the main purlin boards – but decided after getting them up that we wanted to add a few more more to make it a little more shaded – so that’s why you see some unstained ones now in the picture.  Hopefully by weeks end we can have all of the top purlins as well as the posts stained – and the remaining paver base gravel spread out.   And hopefully…we can stop dreaming of having a dinner on the patio and make it a reality!

Earlier in the day - posts are up - still a lot of painting to do!

The Appeal of Old Barn Wood

One of our last projects in the barn will be the laying of the reclaimed brick floors – but before that can happen – we had to somehow find a home for all of the leftover wood from the two old barns we tore down last year to make ours.  From extra posts, beams and floor joists, to extra barn siding, old windows and flooring boards – the entire left side under our loft was filled with extra pieces.

My dad’s barn before being torn down. There is a lot of history in all that old wood

After sorting through and saving pieces for enough future projects to last us well into our 90′s – we had to come up with a plan for what to do with the rest.  I guess the easiest way would be to set a big bonfire and clean it all out – but love of old barns and barn wood, in addition to our recycle and re-use mentality just wouldn’t allow for that type of disposal of such beautiful and historic wood.  In addition, we knew there was some value to the wood – you just can’t walk into your local lumber outlet these days and order 100-year-old red oak boards.

One of the many old barn windows that we had – crafters LOVE them!

So, over the course of the last 6 to 8 weeks – we have advertised the left over pieces and parts of our barns on craigslist – and the resulting onslaught of visitors to our “farm” to purchase pieces and parts has opened my eyes to just how many people really do love the past and share our love of the re-use and recycle theme.

More than being able to make a little extra money for the “farm fund” – and much more than clearing out the wood – it has been wonderful to meet new people and hear their “new” plans for the old wood.

We have had a few couples getting ready to build new homes who carefully picked old  beams to use in their new construction.  One gentleman picked up old oak slat boards to build a coffee table for his wife as a present.  A future bride picked up 50 old barn slats to make table signs for their wedding reception.

Old red oak floor joists – many have been re-used as mantles

And the list goes on and on.  A gardener picking out old oak 4×4′s to make a new garden with raised  beds, a crafter picking out old window frames to make decorative art pieces, a table builder wanting massive barn beam legs – and one close to my heart – a gentleman using some of the old wood to make a chicken coop!

We have asked almost everyone that has stopped and purchased to please send pictures when their “project” is finished.  So, hopefully someday in the future we can share a post of updated pictures and stories of all of the items that were built.  But for now, it gives Mary and I a wonderful feeling to know that both old barns continue to give new life to projects everywhere – and it makes all of the hard work from last years dismantling efforts a little more worthwhile. Here are a few of the projects we have made from our collection of barn wood:

Our Old Barn Window Address Sign

Our Old Barn Window Address Sign

Barn Trestle Table with base from barn rafters

Barn Trestle Table with base from barn rafters

Our Barn Doors From Old Barn Floors

Our Barn Doors From Old Barn Floors

Farmers Market Sign We Made From Old Barn Door

Farmers Market Sign We Made From Old Barn Door

9' Farm Fresh Egg Sign We Made From Old Barn Wood

9′ Farm Fresh Egg Sign We Made From Old Barn Wood