8 Great Tips For Finding FREE Compost Materials

Organic matter makes the difference - especially when it comes to making and adding compost.

Compost is the key to great gardens and great plants – the key is finding materials to make it with.

Great Soil = Great Plants

Great Soil = Productive Plants

Compost is a necessity if you want to have great soil and healthy, productive plants.  Along with cover crops, compost is one of the two major components that are critical to our garden’s success year after year. However, for many people, finding sources to create that compost can be difficult.  Today’s post is all about finding endless supplies of cheap (meaning free) materials to build any size compost pile you like!

Every single day, in communities all over the world – millions if not billions of pounds of compostable materials are wasted by heading to a landfill.  Although many cities and townships are beginning to have their own composting facilities – most still don’t. And among those that have them – only a small portion of those materials actually make it to the facility.  So, what does that mean for you? It means that with just a little planning and leg work – you can have all the materials you want for free.

Whether you compost in 5 gallon buckets, fancy bins, barrels or in a huge pile “out back” – finding the resources to fill your pile should never be a problem.  A quick word of caution when finding materials – make sure the materials you collect are from a safe source.  Wood shavings made from treated lumber, or grass clippings from a chemically treated lawn are not good additions to your compost pile.  Just using a little common sense goes a long way when collecting.

The following list is by no means the end-all to finding free material – but it’s a great start:

1. Breakfast Diners and Cafes

Diners and Breakfast Eateries are prime places to pick up egg shelves, coffee grounds and vegetable peels for composting.

Cafes are prime places to pick up egg shells, coffee grounds and vegetable peels.

Diners and cafes can be the mother-load of free composting materials!  Most restaurants plow through dozens of eggs and potatoes each day, and left-over egg shells and vegetable peels make fantastic additions to your pile.  Once again – it’s all about asking – most places are more than glad to give their scraps away.  A local cafe here goes through over 12 dozen eggs during a single breakfast rush – not to mention pounds of potato peels and coffee grounds. One single pick up of a few five gallon pails of materials can be the beginning of a great compost pile.

2.  The Black Friday Composting Bonanza – Straw, Pumpkins, Gourds & More…

Black Friday – that crazy day after Thanksgiving.  Well, we think it should be called “Black Gold Friday”.  Why?  Because all of those people that decorated for Harvest Fests and Thanksgiving suddenly have no use for those straw bales, pumpkins, gourds and corn stalks.  They can be yours simply for the asking – and a quick way to get great material for your pile.  We scored over 7 bales of free straw and a slew of pumpkins and gourds from friends and family just this past year.

3. Coffee Houses

Coffee grounds are a great add to compost piles

Coffee grounds are a great addition to compost piles

Coffee grounds are a perfect choice for adding to your pile – and small coffee shops are a great place to find them!  In fact, many coffee houses routinely save their grounds for customers.  Some bigger chains even create a list of customers to save grounds for –  insuring that the by-product of all of their brewing doesn’t end up in the local landfill.  Many of those same coffee shops serve breakfast and lunch as well, so they might be a good source for additional materials.  Either way, you can get a great cup of coffee and get free compost materials!

4. Landscapers & Tree Companies

When you see those tree trimming and landscaping trucks in your neighborhood with the big shredders attached – ask them to drop off a load to your house.  You’ll be surprised how many are more than happy to accommodate you with tons of shredded goodness for free – many times saving them a costly fee and a trip to go dump them.  This is where that dose of common sense comes in handy –  it’s a good idea to see what will be in the load.  Shredded leaves and wood chips are a good source – but you might shy away from a tree company shredding up poison ivy vines :) .

5. Grocery Stores & Produce Stands

old produce is a great add for compost piles

Expired produce is an easy add to your pile

Small grocery stores and produce stands can be a goldmine for composting materials.  You might have luck with large chain stores as well,  but smaller mom and pop locations are usually easier to deal with on the local level, and more than happy to help.  Simply ask the store manager what is currently done with expired produce – and you might be surprised that they are willing to save it for you.  Those rotten tomatoes, potatoes and fruit may be past their prime as a food source – but they make great additions to any compost pile.

6. Local Horse Stables, Hobby Farms and Farmers

Get to know your local farm community.  Many local hobby farmers and owners of small horse stables are more than glad to give away their manure to gardeners.    And so what if you don’t have a truck –  keep a couple of five gallon buckets handy (with a lid of course :) ), and take some home to your compost pile.  The high nitrogen sources in chicken, cow,  horse and rabbit manure really helps to heat your pile to make quick compost.   For those that worry about the smell or odor – if you blend manure into your compost pile – little or no odor can be detected.

7. Fall Leaves & Clean Up Time

Fall is a great time to collect tons of falling leaves

Fall is the perfect time to collect tons of falling leaves

We talk about this one a lot, but fall is the easiest time to gather free materials for the compost bin!  Just take a short trip around a few wooded neighborhoods, and you can have an endless supply of leaves for your pile.  Most of the time, they are already bagged at the curbside for easy pick-up. We collect as many as we can each fall and store the extra for use throughout the season.  Its a great way for us to have a year-round supply for use in future compost piles or mulching garden plants.

8. Neighbors & Friends

Yes, neighbors.  You know the people that live beside and down the street from you?  The ones you have never met but wave to every day.  They are a great source of composting materials – and this is a great way to get to know them!  They eat eggs, they have morning coffee, and they have potato peels and grass clippings.  Now if they compost already – you may be out of luck.  But you would be surprised how many of them just might save and supply you with more scraps than you can handle.  What can it hurt to ask?  You might make some new great neighborhood friends!

So there you have it – 8 great tips to finding free compost materials. The list of ways to find free materials could go on and on, and with just a little work on your part, you can have an endless supply of materials to build your pile.  Your garden will thank you and reward you with great plants and produce!  If you want to know more about composting, you can follow the link here to our post on : Composting 101.

-  Jim and Mary

If you would like to receive our DIY & Gardening  Tips every Tuesday – be sure to sign up to follow the blog via email in the right hand column, “like” us on Facebook, or follow us on Twitter.

Cutting Back, Dividing and Preparing Ornamental Grasses For Spring – The Sunday Farm Update

Ornamental Grasses add beauty to the landscape year round - here they are in late fall in full plume.

Ornamental Grasses add beauty to the landscape year round – here they are in late fall in full plume.

Those same grasses can catch the beauty of a winter snow

Those same grasses catching the beauty of a winter snow

Even though its still cold in the Midwest – this past week was spent caring for our ornamental grasses. They are a big part of our farm’s landscape – and now is the perfect time of the year to not only cut them back, but divide and transplant new starts as well.

Ornamental grasses come in all sizes and shapes, adding vibrant texture and color to the landscape throughout all four seasons.  They require little care, are extremely drought tolerant, and can be used as the centerpiece or accent plants in flowerbeds. They can also be an extremely inexpensive way to landscape large areas, dividing a few existing plants into enough to fill a whole bed.

In just a few short years – we now have a little over 250 ornamental grasses in the landscape – grown from just 10 original plants from 5 different varieties.  All of which we have grown and planted for free – transplanting and dividing grasses from friends, family and our own home’s landscape.  We will be adding to that total this spring as we incorporate more into the front entrance and sensory garden areas.

Although many people cut them back in the fall – we leave our ornamental grasses up throughout the winter.  It provides texture to the winter landscape, especially when snow or ice coat their tall spikes.  Of even more importance, it’s a great refuge for birds and other wildlife that stay around through the cold winter months, providing them with wind breaks and easy-to-find nesting materials.

We use a reciprocating saw to cut the grasses off about 3 to 5" above the ground.

We use a reciprocating saw to cut the grasses off about 3 to 5″ above the ground.

However, once spring starts knocking on the door in late February and early March,  we begin the simple process of cutting back and dividing.   There are several ways to cut back ornamental grasses – but one of the easiest methods we have found is to use our reciprocating saw.  Yes, it’s good for more than just tearing apart pallets! :) . We use a long  12” construction blade that makes quick work of cutting the grasses back, slicing through with a sharp clean cut.  As a good rule of thumb, we cut ours back about 3″ to 5″ off the ground – leaving a little added support for the new grass as it sprouts up later in the spring.

Tranplants

We used 100% free ornamental grass transplants and perennials to landscape the barn patio area.  Here is how the area looked right after transplanting.

transplants by year end

By the end of last year- they had filled in beautifully –  adding texture and color to the hillside.  These should get big enough this year to grow into a nice privacy row.

As for what we do with the cut grass trimmings? Ornamental grass clippings are always one of the hardest materials we have found to compost in our piles.  They don’t seem to chop well in our shredder, and they can take forever to break down.  We speed the process up by piling them up in an open area, lighting them with a single match,  and adding the resulting ashes to our compost bin once they have cooled down.

Once your grasses are cut back, its a great time to divide them to get extra plants for your landscape. From a typical 2 to 3 year old plant, we can get as many as 6 to 10 new plants.   For those that want more information on the how to’s of dividing ornamental grasses, we  have a complete tutorial that can be found here : Planting And Dividing Ornamental Grasses.

With the grasses all cut back now – we are hoping that we can turn our focus to building the new chicken coop…after all, the new baby chicks will be arriving in a few weeks, and we need bigger living quarters for the soon to be expanded flock!

Here’s to Spring!  - Mary and Jim

**If you would like to receive our Sunday Farm Update each week – be sure to sign up to follow the blog via email in the right had column, “like” us on Facebook, or follow us on Twitter.

Strawberry Honey Jam Recipe – Just 4 Natural Ingredients With No Sugar Or Pectin!!!

Canned Strawberry Honey Jam

Canned Strawberry Honey Jam

I have had enough of Winter!  Snow continues to fall almost every day and my Spring Fever is in full go!  In order to get me through those February gloomy days in Ohio, I decided that this week I would dust off my water bath canner and put it into use.  Nothing makes it feel more like summer than hearing those jars “pop” as they cool on the counter top.

So, in my quest to break the winter blues, I decided to buy strawberries from the grocery store and begin my experiment for the perfect strawberry jam.  As most of you know, we are trying to make most of our food from natural ingredients.  We are trying to eliminate as much white flour and white sugar from our diet as we can.  If you have ever made homemade strawberry jam, you know that for about every 2 pints of strawberries, you need 7 cups (yes, 7 cups!) of sugar to make traditional jam.

Spreading the jam - it is a little thinner than traditional jam, but much better and healthier!

Spreading the jam – it is a little thinner than traditional jam, but much better and healthier!

Although I love a PB&J sandwiches as much as the next person, I don’t like the fact that the sweetness of jam comes from that much sugar.

I have to say that for a first attempt to make an all natural jam – it’s become a huge hit in the house! It’s a touch thinner than traditional jam since pectin is the traditional thickening agent, but oh so good!

The best part is it’s simple to make and uses only 4 natural ingredients, using apples, which are high in pectin, to thicken the jam.  It is the perfect consistency for that PB&J sandwich or the perfect topping on that bowl of ice cream.   Whatever you choose to do with it – you can rest easy knowing that all the ingredients are natural and not full of white sugar!

Strawberry Honey Jam

Strawberries, Grated Apple, Lemon and Honey - 4 simple ingredients for All Natural Jam

Strawberries, Grated Apple, Lemon and Honey – 4 simple ingredients for All Natural Jam

INGREDIENTS:

6 lbs of fresh strawberries

3 3/4 cup raw honey

2 small granny smith apples

1 1/2 tablespoons of freshly squeezed lemon juice (about 1/2 of a large lemon)

 
INSTRUCTIONS:
As the ingredients boil, skim off the foam and discard.

As the ingredients boil, skim off the foam and discard.

1. Hull strawberries and cut in each strawberry in half (or quarters if large), place in a large stockpot

2. Cut the sides of the apples away from the core and grate the apple leaving the skins on.  (I used my food processor) Place in pot with the strawberries.

3. Juice a lemon until you get 1 1/2 tablespoons of juice and poor into the stock pot.

Pour into hot mason jars to begin the canning process.

Pour into hot mason jars to begin the canning process.

4. Pour the honey into the pot and stir.

5. Heat mixture on high until boiling stirring occasionally.  As soon as the mixture begins to boil, reduce heat to medium low to simmer.

Water bath for 10 minutes, remove from heat and let cool overnight.

Water bath for 10 minutes, remove from heat and let cool overnight.

6. Simmer for approximately 15 minutes until the strawberries become soft.  Using a potato masher, mash the strawberries so there are no recognizable sections.  If you have an immersion blender, you can use this instead.

7. Simmer for another 15-45 minutes, stirring occasionally.  The longer the mixture simmers, the thicker the consistency.  (Remember, this will not be as thick as the consistency made with sugar and/or pectin).

8. Strawberry Honey Jam can either be placed in freezer safe jars, or canned using a water bath for 10 minutes.

Enjoy!

Mary and Jim

**If you would like to receive our Recipe Of The Week each Friday – be sure to sign up to follow the blog via email in the right had column, “like” us on  the Facebook, or follow us on Twitter

Shared On Savvy Southern Style

How To Build A Rustic Barn Door Headboard

Our completed "new" old barn door headboard

Our completed “new” old barn door headboard

One of our first recaimed projects -the building of our barn doors from old barn flooring

One of our first recaimed projects -the building of our barn doors from old barn flooring

We love the look of old barn doors. Ever since building doors from salvaged barn flooring for our barn –  we have wanted to build two more to make into a headboard.

So with the weather still snowy and cold over the weekend, and no ability to work on the chicken coop or recycled greenhouse project – it was time to cure the winter blahs with a building project! And yes, as the garage became a temporary workshop, sadly Mary’s vehicle was once again the victim and banished to the driveway :) .

The headboard can be made with a variety of materials.  If you want a rustic look – you could easily use pallet boards and old barn wood to create it completely from recycled materials.  It can also be built from simple framing lumber. Ours is a combination of both, along with some salvaged barn hardware saved when we deconstructed two old barns.

Since this was built for a king sized bed – we built it as two separate door frames and then attached them together once in the bedroom. It made it easier to move and work with, not to mention fit through tight hallways!  When finished – it measured 6′ high x 83″ wide.

Here are the basics on how we made ours:

Door Materials:
(4) 2 x 6 x 72″
(3) 2 x 4 x 80″
(4) 2 x 10 x 29″
(2) 2 x 4 x 29″
(12 to 16 pieces) of 3/4″ or 1″ thick, 48″ long boards
Tongue and groove wood, old barn siding or pallet wood would work great for this, we used some 3/4″ x 8″ wide tongue and groove boards we bought at the lumber yard for around $40.

Trim Boards:
(2) 2 x 4 x 72″
(1) 2 x 4 x 85″

Tools Used:
Tape Measure, Circular or Chop Saw, Drill, JigSaw, Nail gun, (30) 2 1/2″ screws, Biscuit Joiner (overkill)

IMG_0258

We cut all of our pieces to length to start, including the cured cuts for the top of the doors.

We then laid out the frames on the floor upside down.

We then laid out the frames on the floor upside down.

IMG_0283

We attached the tongue and groove boards to the back of the frame with a nail gun

We repeated the process until both doors were assembled

We repeated the process until both doors were assembled

We secured the doors together by attaching (3) 2 x 4 x 80" boards to the back of the doors

We secured the doors together by attaching (3) 2 x 4 x 80″ boards to the back of the doors

We added 2 x 4 trim boards to each side and the top for extra detail

We added 2 x 4 trim boards to each side and the top for extra detail

We added a single coat of stain, and it was time to attach the old barn hardware

We added a single coat of stain, and it was time to attach the old barn hardware

Step 1 – Cut Materials
We started by cutting all the materials to length – using  a mixture of scrap lumber and purchased wood from the local lumber yard. Scrap wood is actually a great choice, even if it is nicked up – adding a rustic feel to the finished piece.

Step 2 – Making The Top Curved Boards
Taking the two 29″ 2 x 10″ pieces – we traced a long curved line on one and cut it out with the jigsaw.  We traced the cutout to the second board to match, and made our second cut.

Step 3 – Laying Out The Doors:
Next, we assembled the two doors – one at a time. We built the doors face down, assembling it from the back.

We started with (2) 2 x 6″ x 6′ rail pieces. We then laid  (2) 29″ pieces between the 2 x 6″ side rails for the doors. We put the curved board at top, flush with the top of the 2×6′s.  We placed the other 29″ board  24″ from  the bottom of the door , and the remaining 2x4x29″ board  42″  from the bottom.

Step 4 – Gluing the Frame:

I applied glue to all of the joints and clamped them together while nailing on the backing boards.  I did take an extra step and added simple biscuits to the joints for added strength  - It’s a habit of “overbuilding” that I tend to have :) .   Simply applying glue to the joints and clamping would have been enough, especially with the backing boards and 2 x 4″ braces we attach later.

Step 4 Assembling the Door

Using a 2 x 4 as a guide on the outer edge of the back of the door frame – and with a nail gun, we nailed in all of the 48″ tongue and groove boards across the door opening – nailing on the top and bottom, and to the 29″ 2 x 4″piece as well.  You could use pallets or reclaimed boards here just as easily. By nailing in to the door frame boards, the door becomes one solid piece.  Once done, we repeated the process and built door #2.

Step 5 – Assembling The Headboard:

We took both doors to their permanent location before assembling into the final headboard. Placing both doors side-by-side with the fronts facing the wall – we screwed in the top 2 x4 x80″ piece to connect the two doors.  Then we installed the remaining two 80″ boards – one at the very bottom and one at the bottom of the 2 x 10 x 29″ board located below the tongue and groove boards.

Step 6 – Trim and Hardware:

Next, we flipped it around, and added a couple of 2 x 4″ trim boards on each side as well as the top to trim it out and give a little depth.  All that was left was to stain, and add the old barn hardware.  We finished it off with a couple of old lanterns, and the headboard was complete!

From start to finish – the entire project took about 4 hours.  Well, 4 1/2 if you count cleaning the garage back up :)

If you would like to receive our weekly DIY and Gardening Posts – be sure to sign up to follow our blog via email, Twitter or Facebook in the right column

- Jim and Mary

Shared on Savvy Southern

The doors with lanterns and  reclaimed barn track pulleys attached

The doors with lanterns and reclaimed barn track pulleys attached

Starting Our Seeds Indoors – Let Spring Begin!

Finally…A Sunday Farm update with some garden action!…well, sort of.

The planting of seeds indoors signals the start of Spring for us - no matter the weather outside!

The planting of seeds indoors signals the start of Spring for us – no matter the weather outside!

Using the plastic seed domes, or even a piece of saran wrap can keep the humidity level up to help seeds germinate

Using plastic seed domes, or even a piece of plastic wrap can keep the humidity level up to help seeds germinate

It’s always such an incredible feeling each year to finally start putting seeds into the soil.  It gives you that sense Spring is finally close at hand!  So what if there is still a little snow on the ground outside from yet another passing storm system  - once you put a few seeds into soil, it’s time to grow!  We finally planted the first of them yesterday – our ornamental peppers.  The Ornamental Peppers tend to take a little longer to germinate and grow to full maturity – so we like to give them an additional head start by planting in Mid-February.

As for the process…there are thousands of websites, television shows, and gardening experts that give all kinds of advice about starting seeds indoors – and quite honestly, it can get really confusing!  For us – as with all of our gardening – the more simple we can keep it – the easier it is to accomplish, and the more we enjoy it all.  Starting seeds indoors in no different.

Seeds need moisture to sprout – but struggle to germinate if there is too much water or not enough.  The easiest way we have found to remedy that is through using plastic seed domes or plastic wrap, and a spray bottle of water.  We start by placing two seeds in every cell  - that way we can almost ensure a sprout to every cell.   It’s easy to thin them out later – but hard to replace if one doesn’t grow.  For almost all of our vegetable and annual seeds – we make a small indention about 1/8″ to a 1/4″ down with the end of a plastic knife, drop the seeds in, and lightly cover them up with the soil.

We use a small water bottle with sprayer to lightly soak the soil.

We use a small water bottle with sprayer to lightly soak the soil.  It’s an easier way to water and prevents the soil from becoming saturated.

Then, taking the spray bottle – we spritz a fine mist over the entire seed tray – enough to make the dirt stick to your hand if you touched it – but not so much that the dirt clumps or becomes water clogged.  We do not directly water it other than the heavy spritzing.  After that – we place the plastic domes or plastic wrap over top – and place them back on the rack – with no lights on whatsoever.  You should start to see a good amount of moisture on the underside of the plastic dome or wrap in the days that follow – and that’s perfect for getting the seeds started.

The seed domes are on and the seeds are all planted.  The lights will stay off until the seeds begin to germinate

The seed domes are on and the seeds are all planted. The lights will stay off until the seeds begin to germinate

After that initial spritzing of water, we will check them about every other day and make sure there is still some level of dampness to the soil.   If we see moisture on the underside of the cover – we know they are fine and can leave them alone. If not – we take off the cover and give it a few more shots of water spray to keep the humidity up – and that’s it.  Nothing more.

When you see a few seeds starting to break through the soil - it's time to pull of the covers and turn on the lights!

When you see a few seeds starting to break through the soil – it’s time to pull of the dome covers and turn on the lights!

We keep our shop lights about 1 to 2" above the plants.

We keep our shop lights about 1 to 2″ above the plants.

All seeds germinate at different times. Our Ornamental Peppers have a longer germination cycle – more so than our tomatoes and peppers.  It usually takes around 14 to 21 days before the first seedlings emerge from the trays.  At the point we see more than 3 or 4 popping up in a tray (no matter what we are germinating) – we remove the moisture cover and start turning on the lights for the plants. Seeds do not need direct light to germinate – so our grow lights stay off in the beginning.  Even then we will only water by spritzing.

Lighting is another big topic with so many options- again – we just try to keep it simple using regular old flourescent shop lights.  Once those first sprouts start  - we give them about 10 to 12 hours of artificial light a day.  We usually will flip the lights on when we get up – and turn them back off around 7 or 8 at night or later when we go to bed.   We keep the lights down close to the plants – at about 1″or 2″ above the top of the seedlings.  It keeps them growing strong and slowly.  That  is important so they don’t become “leggy” and weak trying to reach up too high for a light source.

So now that our ornamental seeds are in – we’ll wait another few weeks or so before we get started on the other vegetable plants we will grow.  It’s just such a good feeling to finally be writing a Sunday update about some real gardening – even if it is indoors!

I hope everyone has a terrific Sunday!!!

Jim and Mary

Shared on Savvy Southern

The “Oh So Good” – “You Could Sell These” – Homemade Granola Bar Recipe

Home Made Granola Bars -All Natural!

Home Made Granola Bars -All Natural!

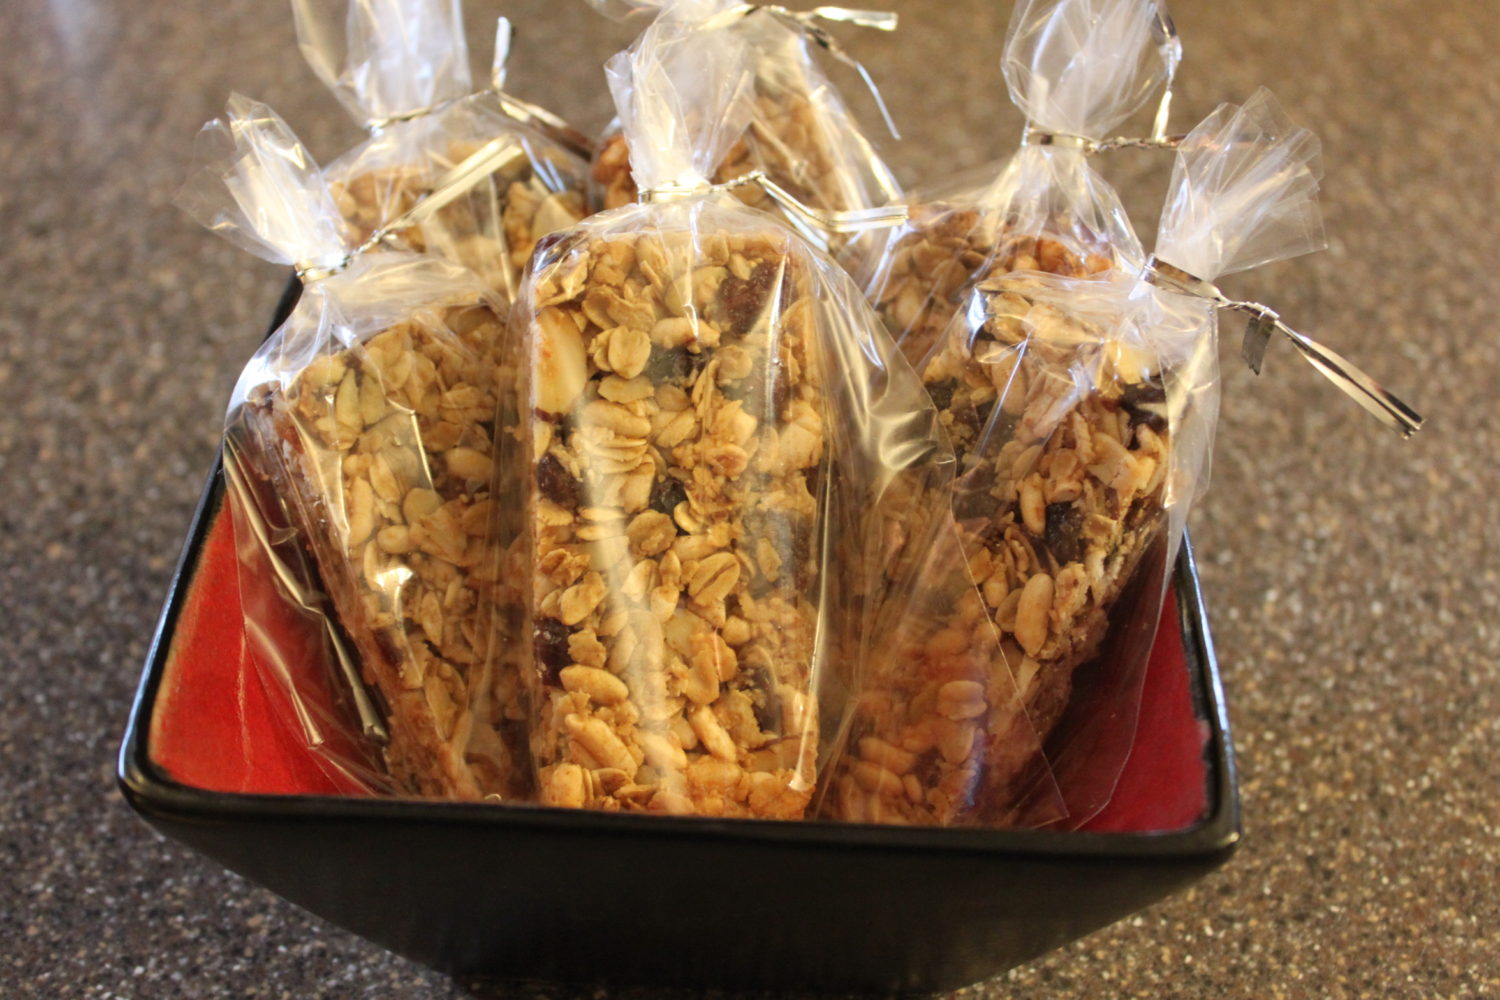
The true test of a successful recipe in our house is when the kids eat it, ask for more, and there are no leftovers. It is our goal to make sure that those recipes are made from natural ingredients, contain no preservatives and are easily accessible.  We have an easy time making healthy dinners, but after school snacks can sometimes be a challenge.  Of course we fill our house with fresh fruits and vegetables but let’s be realistic, sometimes you need that snack when you are ‘on the go’.  What better way to get that little boost of energy than from a granola bar. But don’t grab one of those boxes off the shelf at your favorite grocery store — have you ever looked at what those are made of????  Corn Syrup solids, High Fructose Corn Syrup, and BHT — where in the world do you buy that??

We have spent weeks trying to make the perfect ‘natural’ granola bar — and FINALLY have done it!!!  In fact, when I get a text that I should be selling these, I consider that a success! And when I got home…yes, they were all gone!  So no more, 100 calorie granola bars from a box — it is time this family makes their own Homemade Granola Bars for good!

Homemade Granola Bars

Ingredients:

Mixing the dry ingredients

Mixing the dry ingredients

1 1/2 cups old-fashioned oats
1 cup puffed or crispy rice cereal
1/2 cup chopped or slivered nuts (I used almond slivers)
3/4 cup raisins
1/2 cup honey  (or brown rice syrup to make it vegan friendly)
1 teaspoon pure vanilla extract
1/4 teaspoon salt
1 teaspoon cinnamon
3 tablespoons peanut butter (or any nut butter freshly ground)

Instructions

Line an 8x8 dish with parchment paper and press mixture down until firm

Line an 8×8 dish with parchment paper and press mixture down until firm

1.  Heat the oven to 325°F.  Line the baking pan with parchment, leaving extra parchment to hang over 2 of the sides. Lightly coat with nonstick cooking spray.

2. Mix the oats, cereal, nuts, and raisins together in a mixing bowl.

3.  In a small bowl, mix the honey, vanilla, salt, cinnamon, and peanut butter.

Cut Granola Bars with a very sharp knife into 8 pieces

Cut Granola Bars with a very sharp knife into 8 pieces

4.  Pour the honey mixture over the dry ingredients. Stir until the ingredients are completely coated and start to stick together in clumps.

5.  Pour the mixture into the prepared pan. Use an extra piece of parchment paper to firmly press the mixture into the pan.

Granola Bars wrapped in plastic baggies and ready to be eaten on the go -- but why - they didn't even make it out of the house!

Granola Bars wrapped in plastic baggies and ready to be eaten on the go — but why – they didn’t even make it out of the house!

6.  Bake for 20-25 minutes for chewy granola bars or 25-30 minutes for crunchy bars. As soon as you remove the bars from the oven, press them again with the back of a lightly oiled spatula for well compacted granola bars.

Of course you can customize this recipe to make to your own specifications — add cranraisins, or almond butter. Whatever you choose to do, experiment and I am sure you and your family will love the results!!

Enjoy!

Mary and Jim

**If you would like to receive our Recipe Of The Week each Friday – be sure to sign up to follow the blog, hit the “like” button on the Facebook sidebar, or follow us on Twitter.

Why NOT To Use A Rototiller – And How To Have A Great Garden Without One.

no rototiller

Rototillers can cause more harm than good to your garden soil.

Most people are completely shocked when they find out we don’t own a rototiller…and never will. The most common misconception about a rototiller is that they save time  - and that you need one in order to have a great garden.  It couldn’t be further from the truth.

In fact, you can save a tremendous amount of money, time and garden work by not owning one. That’s not a misprint – in addition to the cash saved by not having to purchase and maintain a tiller – you really can save time and work by not having one at all.  A rototiller can cause a great deal of harm to a garden’s soil structure, which in turn creates more than their share of weed and maintenance problems for the home gardener.

Here are 4 major reasons why NOT to use a tiller in your garden:

1. They Cause Soil Compaction:

Good healthy soil takes on the components of good compost - teeming with all types of microbial life and structure.

Good healthy soil takes on the components of good compost – teeming with all types of microbial life and structure.

Good healthy soil is all about its structure.  Great soil should be teaming with all sorts of organic matter in various stages of decay.   Those little bits and pieces of organic matter allow for water, air and nutrients all to be carried down through the soil to your plants.  Great soil is filled with billions of helpful bacteria, worms and microorganisms that play important roles in bringing nutrients to your plants. Tilling the soil can ruin all of that.

As soil is tilled over and over, that all-important structure is destroyed.  The active life in the soil is disrupted and exposed – and it becomes reduced to lifeless fine grains of sterile dirt. Without structure – the soil also becomes easily compacted around the roots of your plants – keeping out vital nutrients.   That makes it harder for water and air to get through - resulting in under performing plants. Poor structure also makes it difficult for the soil to retain moisture –  also a critical factor in a plant’s growth and success.   And last – whether you have a rear tine tiller, front tine tiller – you still have to walk behind it or beside it – compacting even more of the very soil you are trying to break up.

2. They Create More Weeds

Mulching is the better option than tilling between rows.  Here carrots benefit from straw mulch - keeping in moisture and keeping back weeds

Mulching is the better option than tilling between rows. Here carrots benefit from straw mulch – keeping in moisture and keeping back weeds

Rototillers actually cause more weeds than they ever come close to eliminating.  When a tiller is run through the garden rows or walking rows – every time those tines flip that soil, guess what else they are flipping?  That’s right – hundreds if not thousands of tiny weed seeds.  Seeds that have blown in from all over. Seeds that can now be buried  under enough soil to have a chance to germinate – and double if not triple the amount of weeds you had before you ever ran those tines  in the first place.   Thistle and quack grass are a big problem in our area  and we are often asked how are garden seems to stay free of them with little work.  The answer – we don’t own a rototiller.

3. They Create The “Bare Soil” Problem 

Bare soil makes it easy for  soil erosion to occur, and for weed seeds to blow in.  Cover crops solve both problems.

Barren soil makes it easy for soil erosion to occur, and for weed seeds to blow in. Cover crops solve both problems.

Here is another simple fact – bare soil in your garden is not a good thing:  In fact – in our garden – during all four seasons – we try hard to never have any of our garden soil or the row’s exposed.  Why?  For a couple of reasons.  Exposed, barren soil is primed and ready for two things…fresh weeds seeds to be blown in and become established – and wind and water to wash it away quickly through erosion.  We use large amounts of natural mulch like straw and shredded leaves in the rows and around our plants to keep the soil covered and mulched – keeping weed seeds from becoming established and erosion to a minimum.  In the fall and winter – cover crops then take over and provide protection.  I know that a lot of people think that those nicely tilled rows between the garden are a neat “clean” look – but they really lead to more weeds each season – and a huge loss of topsoil due to wind and water erosion.

4.  They Can Delay Gardening Season

Early season crops like lettuce and radishes can go in the ground earlier in raised row beds

Early season crops like lettuce and radishes can go in the ground earlier in raised row beds

How many times have you heard someone say – “I couldn’t even get my tiller in the soil until late Spring because it was so wet.”  With a no-till approach – your soil structure drains better, can be worked sooner, and leads to earlier harvest times.

Not only that – but tilling at the wrong time can do serious additional damage to your soil structure.  If it’s too wet – it can result in clumpy and muddy soil. If it’s too dry – a rototiller only serves to destroy the little soil structure remaining – making it less likely to hold in moisture and nutrients.  That in turn leads to the need for more watering and probably having to add synthetic fertilizers to the soil to make up for the lack of naturally available nutrients.  It becomes a vicious cycle that only causes more work for the gardener.

Gardening Without A Tiller…

Most visitors are surprised we never use a rototiller in our garden

Most visitors are surprised we never use a rototiller in our garden

Our low maintenance raised row garden requires about 10 to 15 minutes a day to keep weed free.

Our low maintenance raised row garden requires about 10 to 15 minutes a day to keep weed free.

No matter what type of garden you have – a raised bed, raised row, or traditional garden plot –  the more you can leave your soil alone and undisturbed – the better off your plants are, and the less overall weeds you will have.

We are big proponents of raised beds, or in our case, raised row beds (raised soil without wood or metal sides).   The benefits of raised beds or raised rows are that you only need to work the soil you plant in – and can concentrate adding organic matter and cover crops to that small portion – leaving your walking and maintenance rows for just that…walking in.  There is never a need to till the soil in the walking rows, and you can keep weeds out with thick layers of organic mulching materials such as straw, grass clippings or shredded leaves that keep the garden looking neat and healthy – and require little work.

The soil in our actual planting rows is only about 18″ wide.   This allows us to concentrate all of our soil building work in just that area – and not wasting effort and hard work all over the garden.  Why dig in and use up valuable compost or cover crops in the rows used only to walk in?  Now you can put it exactly where it’s needed – right in the soil where your plants grow!  Even our fall and winter cover crops are only planted in the 18″ wide raised rows – not the entire garden – allowing for maximum replenishment of the garden while conserving our cover crop seed.   With such a small area to work - they are easily turned over with a pitchfork to incorporate back into the soil for great organic matter.  For more on raised row gardening – you can check out our 4 part series on raised row gardening here :  Growing Simple – Raised Row Gardening

Happy Gardening – Jim and Mary

If you would like to receive our weekly DIY and Gardening Posts – be sure to sign up to follow our blog via email, Twitter or Facebook in the right column.

Shared on Savvy Southern, Gnowfglins

Our Top 12 All-Time Photos From The Farm – Looking Back To Stay Motivated Through The Winter

The coating of winter snow

When is Spring coming?…We need the snow to melt away to get busy on our long list of spring projects.

The seed trays in the indoor seed stand are filled with our starter soil and are ready to be planted.  The new chicken coop framework is complete and lays stored in the garage, waiting to be built. The design for the window greenhouse is complete – with all of the old windows stacked in the barn waiting to be used.   Even our chicken brooder, built from old shipping crates – is set up again and ready to raise the little day-old chicks that will becoming soon.  

All we need is for the first signs of spring to FINALLY arrive!

With temperatures scheduled to finally hit the mid 40′s today…we are definitely getting close! So to keep us motivated and sane as we wait for the final bit of snow to melt away from the ground – we thought for today’s Sunday Farm Post we would select our all-time top 12 photos from the farm over the last year.

OUR ALL TIME TOP 12 FAVORITE PHOTOS:

fall skies at the farm

Fall skies at the farm. I love the dark clouds contrasting with the deep red of the drying sangria ornamental peppers. The best part of this photo…Mary and I each think we took it…so who knows who gets the credit!

the rose bush

This is one of our rose-bush blooms. It was gift from my oldest sister and has a special place in our upper pergola flower bed

One of our first recaimed projects -t he building of our barn doors from old barn flooring

This will always be a favorite simply because it was one of the first reclaimed projects we completed -  the building of our barn doors from old barn flooring

I have always wanted an old tractor for the farm..and last year - we were lucky enough to get one.  We named it "Willie" after my dad.

I have always wanted an old tractor for the farm, and late last year, we were lucky enough to finally get one. We named it “Willie” after my dad.

Barn Wood Garden Signs1

This photo was taken right after we finished making the signs on our back porch – I love the fact that we were able to make them from left over old barn wood from my Dad’s barn

ffff

The barn pergola patio and planters in full bloom.  It is our favorite space to sit at the farm.

the gren pepper

This photo was snapped in the garden just after a rain.  It was taken by Nolan, the youngest in the family and an aspiring photographer.

the kids

The chicken coop photo.  This was taken by some friends of their 3 kids during our barn party last year.

george

Mary snapped this photo of George…yes – we know it’s a hen with a boys name…but George was so curious as a chick that it became her name

Poinsettia Ornamental Peppers

This photo captures why we love ornamental peppers so much. These are our Poinsettia Ornamental Peppers in full bloom at the upper pergola area.

The Garden In Full Swing.  One of our favorites form our very first garden in 2011.

The Garden In Full Swing. This is a photo from our very first garden in 2011.

The Barn we built from two old barns

Our recycled barn…this photo was taken in late fall 2012.

Shared On Gnowfglins

Red Velvet Whoopie Pie Recipe – The Perfect Valentine’s Day Treat

Red Velvet Whoopie Pies with icing drizzled over the top - Irresistible!!!!

Red Velvet Whoopie Pies with icing drizzled over the top – Irresistible!!!!

Valentine’s Day is next week, and although we don’t make a big celebration of the ‘Hallmark’ holiday, I do use it as an excuse to make (and eat) something sweet.  Because our house is filled with teenagers with a variety of tastes, I had to come up with something that would please everyone. This year I decided that I would make a version of the traditional Whoopie Pie, with a red velvet twist.

Who doesn’t like Red Velvet cake and cream cheese icing???? Although this recipe was made from scratch, it is also easily adapted for the semi-homemade version, using cake batter mix and store-bought icing. Either way, they are easy to make, adorable and beyond delicious.  Just a warning, if you don’t have teenagers in your home to clear them out in a single day, you might want to share them with friends and family.  Otherwise, you will end up eating more than you wanted to, they are so good!

Red Velvet Whoopie Pies

Ingredients:

Make sure to sift your dry ingredients - especially the cocoa powder.

Make sure to sift your dry ingredients – especially the cocoa powder.

2 1/4 cups all-purpose flour
1/4 cup unsweetened cocoa powder
1/2 teaspoon baking powder
1/2 teaspoon baking soda
1/4 teaspoon salt
3/4 cup unsalted butter, room temperature
1 cup granulated white sugar
1 large egg, room temperature
1 teaspoon pure vanilla extract
3/4 cup buttermilk
1 ounce red food coloring

Cream Cheese Filling:
1/2 cup unsalted butter, room temperature
1 – 8 ounce cream cheese, room temperature
3 cups confectioners (powdered) sugar, sifted
1 teaspoon pure vanilla extract

Instructions:

Notice the paper towel below the bowl in case of splashing of the red food coloring

Notice the paper towel below the bowl in case of splashing of the red food coloring

1. Preheat oven to 375 degrees F.

2. In a large bowl sift together the flour, cocoa powder, baking powder, baking soda, and salt.

3. With your mixer (use your paddle attachment if you have one),  beat the butter and sugar until light and fluffy. Add the egg beating until combined . Beat in the vanilla extract.  

The secret to good Whoopie pies, is a consistent size - the ice cream scoop helps regulate the size of each cookie

The secret to good Whoopie pies, is a consistent size – the ice cream scoop helps regulate the size of each cookie

4. In a small mixing bowl, mix the buttermilk and red food coloring with a spoon. * Hint – place a paper towel under your bowl in case the food coloring splashes out – it will stain.  

5. With the mixer on low speed,  add 1/3rd of the flour mixture and then 1/2 of the buttermilk mixture. Repeat the process until well combined.  

Cookies on the cooling rack, waiting for the icing.

Cookies on the cooling rack, waiting for the icing.

6. Using a small ice cream scoop (or a standard tablespoon),  drop heaping tablespoons of the batter, approximately the same size, onto baking sheets lined with parchment paper.  Space about 2 inches apart.

7.  Smooth the tops of the cookies to prevent any peaks with your finger or spoon dipped lightly in water to prevent sticking. 

Place a mound of icing in the center of the bottom of one cookie. Place the top cookie on and squeeze until the icing fills in to the edge.

Place a mound of icing in the center of the bottom of one cookie. Place the top cookie on and squeeze until the icing fills in to the edge.

8. Bake for 9-11 minutes. 

9. Remove from oven and transfer to a wire rack to cool completely.

Happy Valentine's Day!

Happy Valentine’s Day!

10. Cream Cheese Filling: Beat the butter and cream cheese until smooth and creamy. Add in the vanilla extract and beat until incorporated. Slowly beat in the confectioners sugar, and continue to beat until smooth and creamy

11. Match up similar sized cookies.  For each pair, take one cookie and spread a heaping tablespoon of the filling on the flat (bottom) side.  Top with the other cookie. Repeat until all cookies have cream filling. 

12. Optional:  Take a few tablespoons of the filling and thin it out in a small bowl with milk until it is able to be drizzled from the tip of the spoon. Place thinned icing in a small piping bag, plastic bag or over the edge of a spoon and drizzle lines back and forth over the tops of the Whoopie Pies.

13. If there are any left, the Whoopie Pies can be stored in the refrigerator, in an air tight container, for several days. Makes about 18 sandwich cookies.

For those who want the short cut version:

  • 1box of Red Velvet Cake mix
  • 3 eggs
  • 1/2 cup oil
  • 1/2 cup water
  • 1/2 cup flour

Mix the above ingredients, bake as directed above.  Ice with store-bought cream cheese icing.

Enjoy!!!!

Mary and Jim

**If you would like to receive our Recipe Of The Week each Friday – be sure to sign up to follow the blog, hit the “like” button on the Facebook sidebar, or follow us on Twitter.

How To Breathe Life This Spring Into Your Tired Garden Soil

The bright green texture of  4 week old annual rye - a great green manure crop

The bright green texture of 4 week old annual rye – a great green manure crop to plant in the early spring garden

No matter how healthy your vegetable plants start off in the spring – no matter how carefully you water – how perfectly it rains, or how much of the sun’s rays find their way to your garden  – your plants are only going to turn out as good as the soil you plant them in.   Period.

Vegetable crops like tomatoes, peppers, corn and cucumbers take a heavy toll on the soil’ structure and make-up.  They devour valuable nutrients as they grow to produce the very fruits and vegetables we love to eat.   Eventually, after a few years – even the best of soils will begin to break down and weaken if not replenished and re-energized.  Soil that becomes weak in nutrients will result in successively weaker crop yields that are also increasingly prone to disease and pests.

So what is the best way to keep your garden strong?  Feed your soil!

And no – we’re not talking about heaping on generous amounts of expensive synthetic fertilizers.  Those are temporary fixes to a problem that can leave your soil weak, unstable, and full of excess salts and chemicals.

The real answer lies in adding back natural nutrients to the soil – and one of the best ways to do that is with a “green manure crop” in the spring – before you plant your garden or raised beds.

Planting A Green Manure Crop In Your Garden Or Raised Beds In The Spring

Barren soil makes it easy for  soil erosion to occur, and for weed seeds to blow in.  Cover crops solve both problems.

Barren soil makes it easy for soil erosion to occur, and for weed seeds to blow in. Cover crops solve both problems.

We talk a lot about cover cropping in the fall – and for good reason.  Fall cover crops plays a vital role in developing and keeping garden soil beds full of rich organic matter.  They minimize soil erosion and hinder the establishment of weeds, and then feed your soil with organic matter when turned over in the early spring.

But in the spring – we add a green manure crop to put back even more organic material prior to the vegetable garden planting.  It’s quick, easy - and pays huge dividends!

A lot of people are confused by the term “green manure”.  First of all, it doesn’t smell and it’s certainly not a by-product from animals.

So why the name?

Green manure is the term given to a cover crop that is grown specifically to be turned right back into the soil to replenish valuable nutrients and organic matter.  Much like a farmer spreads horse, cow or chicken manure on his fields to fertilize and replenish – growing and digging in a bright green cover crop has the same effect and benefits.  It’s the same concept as why fresh-cut green grass is great to add to a compost pile.  In its fresh-cut green state, grass is a valuable nitrogen source that heats your compost pile up.  Green manure crops do the same, releasing nitrogen back into the earth as they slowly decompose.   Consider it almost a sacrificial offering to the soil :)

To have healthy tomato plants - you need healthy soil

To have healthy tomato plants – you need healthy soil

When a cover crop such as annual clover, rye or hairy-vetch are young, vibrant and bright green – they are at their absolute height of nutritional value.  Their root nodules below the soil help to “fix” nitrogen levels – and the green matter that is turned back into the soil gives off additional nutrients and nitrogen as it decomposes during the summer months.  All of which serves to replenish the soil and feed your summer crop of vegetables.

Green manure crops also provide many of the same benefits that fall cover crops give – helping to loosen the soil with their fast and deep growing roots and protecting the surface topsoil from heavy spring rains and erosion.  All the more reason to incorporate them into your garden plan!

So when and how do you plant them? 

Bright green annual rye about to be turned under to provide nutritents make room for tomatoes!

Bright green annual rye about to be turned under to provide nutrients for our tomatoes!

We will turn our fall cover crop over in the soil beds about 4 to 6 weeks before we plan on planting our vegetables (about mid-march if the weather allows).  At that point we will plant the spring  ”green manure” cover crop seed right into the soil, raking the soil out lightly after turning it over and spreading our seed. The new seedlings emerge in as little as 7 to 10 days, and by the time we are ready to plant our vegetables  in Mid may – it has filled in with a strong thick stand of growth. Then, we simply turn them under again with the pitchfork – and plant our summer garden.  As the green manure crop starts to break down – it releases its energy back into the soil and provides nutrients for the new crops.  If you didn’t plant a fall cover crop, a spring green manure crop can be even more valuable to getting your soil back on track!

Annual rye, annual clover and hairy vetch are all great choices as green manure crops – and can usually be found at your local feed store.

Will I get weeds from them later?

In short – no!  These are annual varieties  – so once you till them into the soil as young green plant material – they wont come back like stubborn weeds.  Furthermore – you incorporate them back into the soil quickly – so the plants don’t have the ability to establish seed heads or seeds that could become a problem.  In fact – using cover crops in the fall and spring can greatly diminish your weed problems by keeping the soil from being barren and open to drifting weed seeds – and the thick, fast growing growth crowds out competing weeds.

Cover crops and green manure crops simply work.  They keep your soil healthy and alive, let your plants thrive – and most importantly, are 100% natural.

If you would like to receive our weekly DIY and Gardening Posts – be sure to sign up to follow our blog via email, Twitter or Facebook in the right column.

- Jim and Mary

Featured on Shabby Creek Cottage, Gnowfglins