Making a sourdough bread starter from scratch is actually much easier than you might think. With just two basic ingredients and a bit of patience, you will be making a variety of delicious sourdough recipes right in your own kitchen!
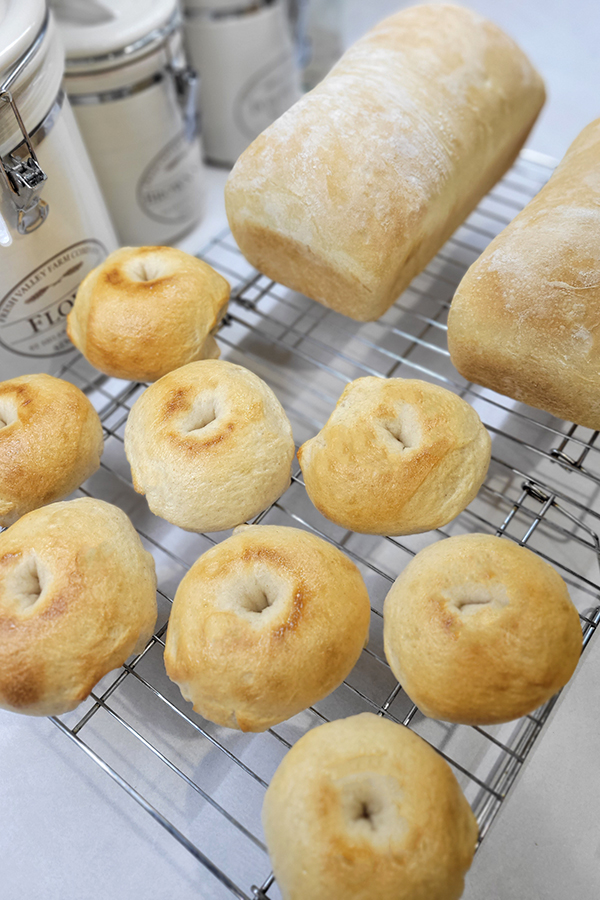
From crusty bread and pizza crusts to pancakes and cinnamon rolls, there are so many different recipes that can be made with a basic sourdough recipe. However, each one of these recipes begins with an active, bubbly sourdough starter.
Although you can purchase dehydrated sourdough starters online or get a starter from a neighbor or friend, it is actually very simple to create your own.
When you search on how to make your own starter you will find a variety of instructions. However, the following instructions show a simple method that even the novice baker can have success with!
And what is more rewarding than creating a sourdough starter from scratch using basic ingredients that you already have on hand.
What Is A Sourdough Bread Starter?
In its most basic form, a sourdough starter is made with the combination of two ingredients: flour and water. When you mix together these two ingredients and let them sit for a while, the flour begins to ferment.
This is done by natural “wild” yeasts that are found throughout your home.
These wild yeasts are found all around you including in the air you breathe, the flour you use, and even on your skin. Each of these yeast products is unique to you and your kitchen.
While it might sound strange, they are good yeasts and nothing to be alarmed of.
Eventually, this process of fermentation creates a live culture of beneficial bacteria and wild yeasts. This culture, much like yeast that you purchase in those small packets, is what allows bread dough to rise naturally and become what you know as Sourdough bread.
There are so many yummy baked goods you can create with a basic sourdough starter.
Items You Will Need
1. Flour
There are many different types of flours that you could use to make your starter. However, they will each react differently during the process.
Therefore, I prefer to use a combination mixture of unbleached bread flour and 100% whole wheat flour to create a strong starter.
No matter what type of flour you choose, be sure to use unbleached flour and a flour that has a high protein content.
2. Water
When it comes to adding water to the flour it is best to use filtered water. This type of water filters out chemicals that are in various sources of water.
Although, if you have good tap water you may find that it works just fine. If you don’t want to purchase filtered water, you can certainly give your tap water a chance.
If after a few weeks you still aren’t seeing desired results, then use warm filtered water to make your starter.
3. Jars
The next item you need is a jar to keep your starter in. The jar should be large enough to hold your starter once it doubles yet be easy to add your ingredients to.
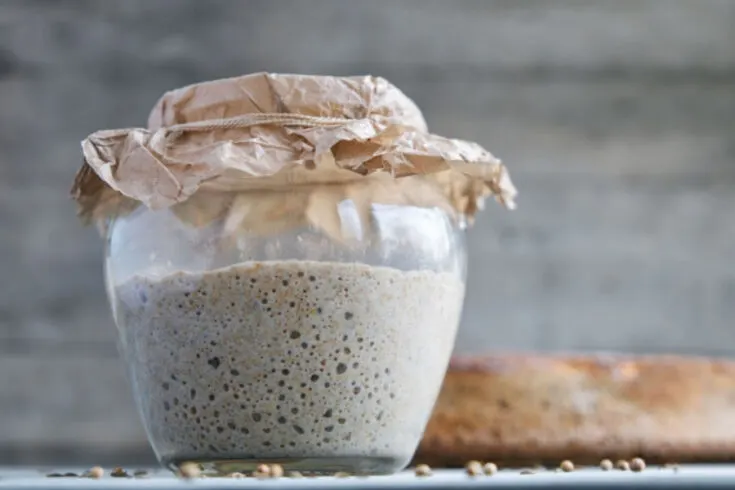
You will also need a way of covering your jar opening. Some use canning lids without the band, while others use a piece of plastic wrap or something similar. The important thing about the lid is that it can not be air tight.
I prefer to use wide mouth canning jars so that it is easy to add the ingredients.
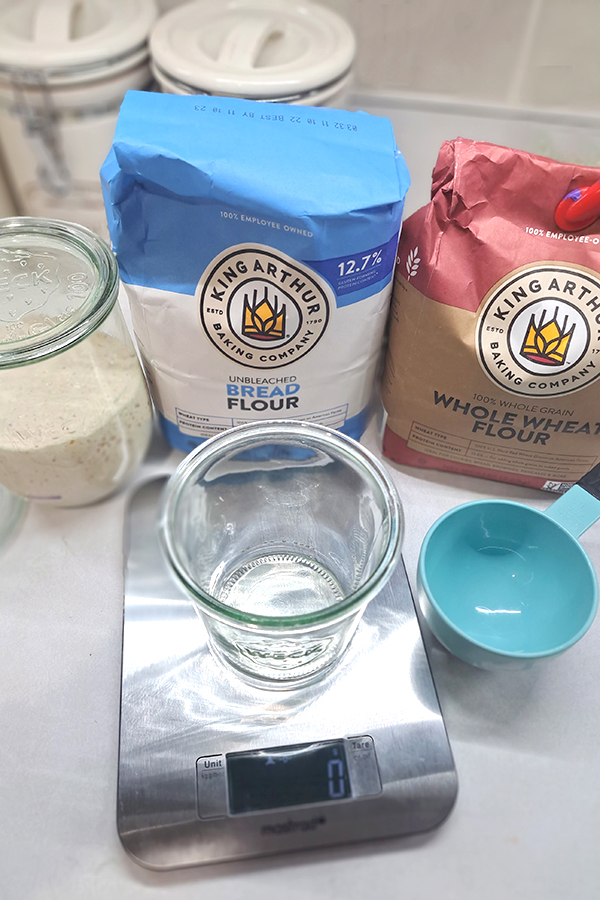
To create a sourdough bread starter, you only need a few basic kitchen items that you likely already have on hand.
For this starter recipe, half-liter jars or pint canning jars are the perfect sizes to use.
4. Other Supplies
The other three main supplies you need are a spatula or spoon for stirring your starter ingredients, a measuring cup, and a kitchen scale.
While my sourdough making process is simpler than most I still highly recommend a kitchen scale.
This is the only way to ensure that the exact amount of flour and water are being used. An inexpensive kitchen scale is really all you need, like the one that we use: (Product Link: Etekcity Food Kitchen Scale
Sourdough Bread Starter Instructions
Sourdough starter will take at least a week, if not longer before you start to see the desired, consistent active bubbling and a large increase in size. The goal is to have your starter consistently able to double in size within 4 to 12 hours of feeding.
However, the exact time frame that this will take will vary greatly. Depending on the environmental conditions, it can take anywhere from 7 – 30 days for this to occur.
Day 1: Create Your Starter
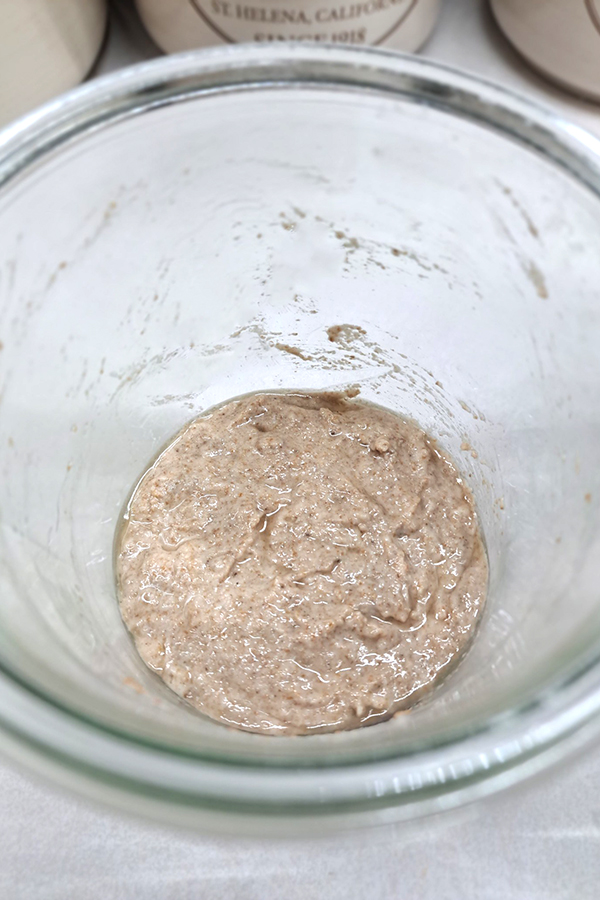
Measure out 30 grams (g) of whole wheat flour + 30 g of bread flour and place into your glass jar. Add 60 g of warm water and mix until all of the flour has dissolved.
The mixture will be rather thick and have a sticky consistency.
Mark the height of the mixture by using a dry erase marker to mark the outside of the jar. Although you could also place a rubber band on the outside of the jar as well.
Set the jar on your counter or in a warm spot for 24 hours.

Day 2: Discard And Feed Your Starter
Chances are nothing much happened over the course of those 24 hours. You might see some bubbles or you may see nothing different about the mixture at all.
However, you may notice a little bit of dark liquid form at the top of the starter. This liquid is called “hooch” and is completely normal and can happen at any time throughout this process. When you see this liquid, pour it off or mix it back into the starter.
After the 24 hours are up, remove half of the starter and throw it away.
With the leftover half of the starter in your jar, you are going to do what’s referred to as a “feeding”. Add another 30 g of whole wheat flour + 30 g of bread flour to the jar. Then mix in 60 g of warm water until all of the flour has dissolved. Mark the new height of the starter, cover, and set it in a warm location for 24 hours.
Days 3-7: Continue To Discard And Feed Your Starter
For the next 5 days complete the exact same process. Continue to discard half of the starter and feed the remaining half with 30 g of whole wheat flour + 30 g of bread flour. Add in your 60 g of warm water. Mix, mark, and set aside.
However, during this time start to take note of how your sourdough bread starter is reacting. You may start to see bubbles form or you may see nothing happening at all. Remember, the length of time that it takes will vary.
Even if your starter has doubled in size on days 4 and 5 it is not yet ready to use. Keep with the instructions through day 7.
Also, take note of the odor that the new starter produces. At first, it might smell like dirty socks. However, once you keep feeding the starter and it matures, the odor will take on a slightly sour, tangy aroma that doesn’t smell offensive at all.
Day 8+: Double The Feedings
After a week, if your starter hasn’t started to consistently double in size with lots of bubbling activity you can start feeding it twice a day.
Every 12 hours, discard half of the starter and feed with 30 g of whole wheat flour + 30 g of bread flour. Mix in 60 g of warm water. Mark the height and set it aside. Before long, you should start to see the starter double reliably.
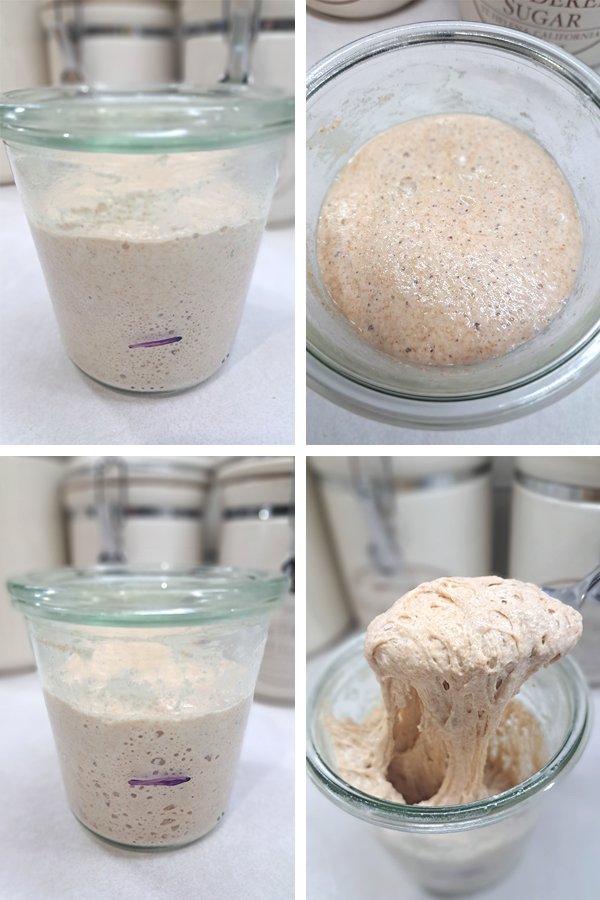
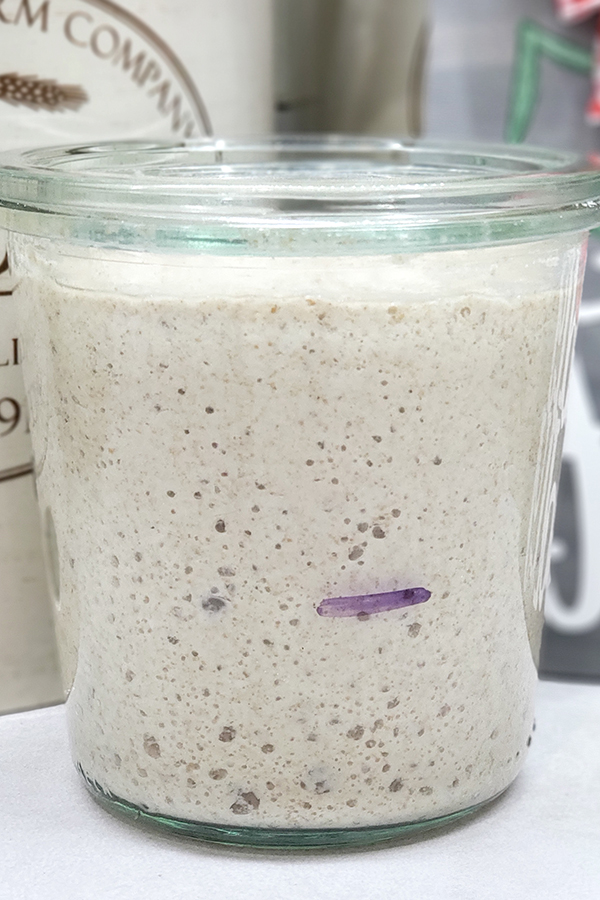
If your starter has lots of little bubbles and doubles in size in the 4 to 12-hour timeframe, it’s ready to be used for baking recipes. It will have an almost fluffy, melted marshmallow-like texture.
Once it gets to this point transfer the sourdough starter to a new jar.
Storing and Maintaining A Sourdough Bread Starter
You can continue to keep your covered starter on the counter and feed it every 24 hours, or you can place it in your refrigerator to be fed weekly or the day before you want to use it.
You can also now use the sourdough starter discard that you have traditionally thrown away to make bread or other delicious sourdough based recipes.
For simple recipes that begin with a sourdough starter be sure to visit The Clever Carrot’s website. She makes the sourdough-baking process simple and easy, and her recipes are perfect for beginners.
Enjoy!
Mary and Jim


Jim and Mary Competti have been writing gardening, DIY and recipe articles and books for over 15 years from their 46 acre Ohio farm. The two are frequent speakers on all things gardening and love to travel in their spare time.
As always, feel free to email us at thefarm@owgarden.com with comments, questions, or to simply say hello! You can sign up for our free email list in the subscribe now box in the middle of this article. Follow us on Facebook here : OWG Facebook. This article may contain affiliate links.
Sourdough Starter

Create a brand new, active sourdough starter in about week. The goal is to have a starter that consistently doubles in size within 4 to 12 hours of feeding with lots of active bubbling occurring.
Materials
- 100% Whole Wheat Flour, Unbleached
- Bread Flour, Unbleached
- Warm Water
Tools
- Wide Mouth Glass Jar and Lid
- Spoon or Spatula
- Kitchen Scale
Instructions
- Mix 30 grams (g) whole wheat flour + 30 g of bread flour in a glass jar. Add 60 g of warm water and mix until all of the flour has dissolved. Mark the height, cover loosely, and set some place warm.
- After 24 hours, remove half of the starter and throw it away. Add 30 g whole wheat flour + 30 g of bread flour to the jar. Mix in 60 g of warm water until all of the flour has dissolved. Mark the new height, cover, and set aside for 24 hours.
- For the next 5 days, continue to discard half of the starter and feed the remaining half with 30 g of whole wheat flour + 30 g of bread flour. Add in 60 g of warm water. Mix, mark, and set aside. Repeat every 24 hours.
- After one week, if the starter is consistently doubling in size within 4 to 12 hours of mixing, the starter is ready to use for baking. If not, feed the starter twice a day instead of just once. Every 12 hours, discard half of the starter and feed with 30 g of whole wheat flour + 30 g of bread flour. Mix in 60 g of warm water. Mark the height and set it aside. Once the starter is doubling reliably, it can be used in recipes.
- For long term continue to feed and discard every 24 hours. Alternatively, place the starter in a refrigerator and fed/discard it weekly or the day before using it for recipes.
Notes
While creating a new sourdough starter, toss the discard away in the trash. Once the starter is mature, the discard can be kept and used for sourdough discard recipes.
Process courtesy of Old World Garden Farms