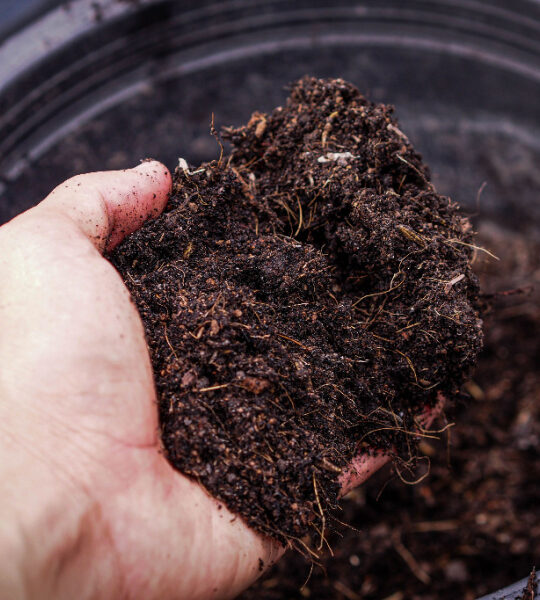
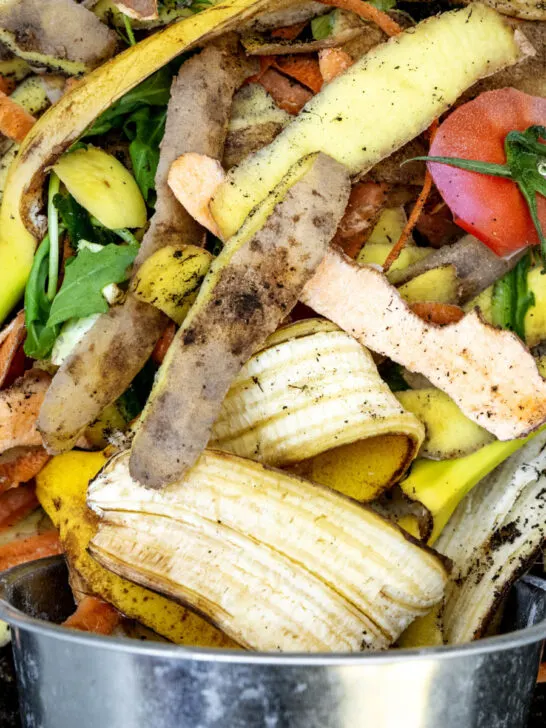
How To Make And Use Compost Tea – The Ultimate Organic Fertilizer

Compost tea is the perfect way to boost your plants growth and obtain higher yields – NATURALLY. Better yet, you can make it for free using your own compost!  We keep our garden productive year after year by following a simple and organic three prong approach.  We use compost (composting 101) and cover crops (planting cover crops) for building great soil structure and vitality - AND  we boost plants during the growing season with a simple homemade natural liquid fertilizer on our plants called compost tea.

Compost Tea takes full advantage of the rich fertile nutrients in compost.

Compost Tea takes full advantage of the rich fertile nutrients in compost.

All you need to make your own compost tea is a couple of shove fulls of compost, A 5 gallon bucket and water

All you need to make your own compost tea is a couple of shove fulls of compost, A 5 gallon bucket and water

Compost tea or “black liquid gold” is the all organic “miracle-growing” solution to fertilizing the garden – minus the chemicals and high salt content that commercial fertilizers add to your soil. It works its magic in two ways – feeding your plants through the roots (soil zones around plants) and the leaves (foliar zones). Unlike synthetic fertilizers, it won’t build up chemicals and salt levels that can slowly destroy your soil structure.  Instead, adding nutrients that build it!

If you follow along with our blog, you know how important compost is in building healthy soil. We add large amounts of compost to all of our planting beds each year, as well as a good shovel full in every single planting hole.  Well, that compost, made from our decomposed vegetable scraps, chicken manure, grass clippings, coffee grounds, and more – is teeming with all-natural, plant-boosting nutrients.  By converting those nutrients into a liquid form – we can utilize those nutrients as an organic fertilizer to naturally boost plants growth through the growing season.

How we use it:

Compost tea provides vital nutrients for strong, healthy plants like this tangerine orange pepper plant in our garden.

Compost tea provides vital nutrients for strong, healthy plants like this tangerine orange pepper plant in our garden.

Compost tea works through absorption via the leaves and soil

Compost tea works through absorption via the leaves and soil

Compost Tea can be applied about every two weeks to your garden plants once plants and transplants have become established. By established, we simply mean that they have been in the ground 7 to 10 days and are over the initial shock of transplant.

We apply ours with a watering can or a simple garden sprayer – soaking the area around the root base and the leaves of each plant with the solution.  The minerals and nutrients are then absorbed through the leaves (foliar absorption) as well as through the root zone – doubling the effect.  As with watering, it is best to apply early in the day before the sun is too hot and the tea can burn the leaves of plants.

We repeat the compost tea applications every two weeks until about mid July.  Why stop? Too much of a good thing can also be bad. You want plants to develop strong roots and stems – but too much and the plant will spend all of its energy creating thick foliage and not much fruit.  We have found that 4 to 6 total applications seem to be the perfect mix for giving plants the boost they need for good higher yields. The best part – its 100% natural, with no fear of having to use any chemicals in your garden.

How we make it:  

There are many ways to make compost tea – but we have found this method to be easy, effective, and most importantly, simple!

BASIC COMPOST TEA RECIPE:

Start by filling a clean bucket 1/3 full of compost

Start by filling a clean bucket 1/3 full of compost

Next, fill the bucket to within a few inches of the top and stir thoroughly.

Next, fill the bucket to within a few inches of the top and stir thoroughly.

Let the mixture steep for 5 to 7 days, stirring a few times each day.

Let the mixture steep for 5 to 7 days, stirring a few times each day.

Strain the mixture through a strainer or cloth after 5 to 7 days.

Strain the mixture through a strainer or cloth after 5 to 7 days.

You will need a 5 Gallon Bucket, stir stick, water, and a few shovel fulls of finished compost.

Start by filling your bucket about 1/3 full of compost.  Use compost from the bottom of your pile, where organic matter has decayed the most and is teeming with life.

Next – fill the bucket to the within an inch or two of the top with water.  It is best to use well water (we use our rain water) because there will be no chlorine or other chemicals. Chlorine can kill off many of the helpful bacteria and organisms that are alive in compost.  If you only have access to city water, no worries – simply fill the bucket a few days in advance and let sit outside.  The sun and air will work its magic and within a few days, almost all of the chlorine will be gone.

Stir the compost good with a stick or the end of your garden shovel.  Over the course of the next 5 to 7 days, stir the bucket a few times each day.  This aeration of the water and the stirring of the compost helps to release more nutrients into the water, much like dunking a tea bag releases more tea into your drink.

At the end of 5 to 7 days, simply strain the mixture through a piece of burlap, mesh screen or a strainer, and you are left with the magical liquid gold fertilizer called compost tea!

Store in an air tight container to keep the “liquid gold” at it’s best nutrient levels.

Bonus Info:

You can get a little more fancy in your compost tea making if you desire.  It has been shown that adding a simple aquarium pump to the bucket and letting it run to percolate the mixture will increase the potency of the finished mixture, and can be completed in as little as 2 days.  Others also add molasses or sugar to the mixture to increase the absorption of the water and organisms.

Although not appetizing to drink -compost tea is great for your plants!

Although not appetizing to drink -compost tea is great for your plants!

However, for us, the simple bucket and stirring method has certainly worked wonders for our garden.  Besides, the extra few days we let ours steep in the water is worth not having to go through the trouble of setting up a pump, wires, etc. For us, keeping it simple is the key!

So how about trying your own liquid gold this year and get those plants growing big and strong!

Happy Gardening – Jim and Mary

If you would like to receive our DIY & Gardening Tips every Tuesday – be sure to sign up to follow the blog via email in the right hand column, “like” us on Facebook, or follow us on Twitter

8 Great Tips For Finding FREE Compost Materials

Organic matter makes the difference - especially when it comes to making and adding compost.

Compost is the key to great gardens and great plants – the key is finding materials to make it with.

Great Soil = Great Plants

Great Soil = Productive Plants

Compost is a necessity if you want to have great soil and healthy, productive plants.  Along with cover crops, compost is one of the two major components that are critical to our garden’s success year after year. However, for many people, finding sources to create that compost can be difficult.  Today’s post is all about finding endless supplies of cheap (meaning free) materials to build any size compost pile you like!

Every single day, in communities all over the world – millions if not billions of pounds of compostable materials are wasted by heading to a landfill.  Although many cities and townships are beginning to have their own composting facilities – most still don’t. And among those that have them – only a small portion of those materials actually make it to the facility.  So, what does that mean for you? It means that with just a little planning and leg work – you can have all the materials you want for free.

Whether you compost in 5 gallon buckets, fancy bins, barrels or in a huge pile “out back” – finding the resources to fill your pile should never be a problem.  A quick word of caution when finding materials – make sure the materials you collect are from a safe source.  Wood shavings made from treated lumber, or grass clippings from a chemically treated lawn are not good additions to your compost pile.  Just using a little common sense goes a long way when collecting.

The following list is by no means the end-all to finding free material – but it’s a great start:

1. Breakfast Diners and Cafes

Diners and Breakfast Eateries are prime places to pick up egg shelves, coffee grounds and vegetable peels for composting.

Cafes are prime places to pick up egg shells, coffee grounds and vegetable peels.

Diners and cafes can be the mother-load of free composting materials!  Most restaurants plow through dozens of eggs and potatoes each day, and left-over egg shells and vegetable peels make fantastic additions to your pile.  Once again – it’s all about asking – most places are more than glad to give their scraps away.  A local cafe here goes through over 12 dozen eggs during a single breakfast rush – not to mention pounds of potato peels and coffee grounds. One single pick up of a few five gallon pails of materials can be the beginning of a great compost pile.

2.  The Black Friday Composting Bonanza – Straw, Pumpkins, Gourds & More…

Black Friday – that crazy day after Thanksgiving.  Well, we think it should be called “Black Gold Friday”.  Why?  Because all of those people that decorated for Harvest Fests and Thanksgiving suddenly have no use for those straw bales, pumpkins, gourds and corn stalks.  They can be yours simply for the asking – and a quick way to get great material for your pile.  We scored over 7 bales of free straw and a slew of pumpkins and gourds from friends and family just this past year.

3. Coffee Houses

Coffee grounds are a great add to compost piles

Coffee grounds are a great addition to compost piles

Coffee grounds are a perfect choice for adding to your pile – and small coffee shops are a great place to find them!  In fact, many coffee houses routinely save their grounds for customers.  Some bigger chains even create a list of customers to save grounds for –  insuring that the by-product of all of their brewing doesn’t end up in the local landfill.  Many of those same coffee shops serve breakfast and lunch as well, so they might be a good source for additional materials.  Either way, you can get a great cup of coffee and get free compost materials!

4. Landscapers & Tree Companies

When you see those tree trimming and landscaping trucks in your neighborhood with the big shredders attached – ask them to drop off a load to your house.  You’ll be surprised how many are more than happy to accommodate you with tons of shredded goodness for free – many times saving them a costly fee and a trip to go dump them.  This is where that dose of common sense comes in handy –  it’s a good idea to see what will be in the load.  Shredded leaves and wood chips are a good source – but you might shy away from a tree company shredding up poison ivy vines :) .

5. Grocery Stores & Produce Stands

old produce is a great add for compost piles

Expired produce is an easy add to your pile

Small grocery stores and produce stands can be a goldmine for composting materials.  You might have luck with large chain stores as well,  but smaller mom and pop locations are usually easier to deal with on the local level, and more than happy to help.  Simply ask the store manager what is currently done with expired produce – and you might be surprised that they are willing to save it for you.  Those rotten tomatoes, potatoes and fruit may be past their prime as a food source – but they make great additions to any compost pile.

6. Local Horse Stables, Hobby Farms and Farmers

Get to know your local farm community.  Many local hobby farmers and owners of small horse stables are more than glad to give away their manure to gardeners.    And so what if you don’t have a truck –  keep a couple of five gallon buckets handy (with a lid of course :) ), and take some home to your compost pile.  The high nitrogen sources in chicken, cow,  horse and rabbit manure really helps to heat your pile to make quick compost.   For those that worry about the smell or odor – if you blend manure into your compost pile – little or no odor can be detected.

7. Fall Leaves & Clean Up Time

Fall is a great time to collect tons of falling leaves

Fall is the perfect time to collect tons of falling leaves

We talk about this one a lot, but fall is the easiest time to gather free materials for the compost bin!  Just take a short trip around a few wooded neighborhoods, and you can have an endless supply of leaves for your pile.  Most of the time, they are already bagged at the curbside for easy pick-up. We collect as many as we can each fall and store the extra for use throughout the season.  Its a great way for us to have a year-round supply for use in future compost piles or mulching garden plants.

8. Neighbors & Friends

Yes, neighbors.  You know the people that live beside and down the street from you?  The ones you have never met but wave to every day.  They are a great source of composting materials – and this is a great way to get to know them!  They eat eggs, they have morning coffee, and they have potato peels and grass clippings.  Now if they compost already – you may be out of luck.  But you would be surprised how many of them just might save and supply you with more scraps than you can handle.  What can it hurt to ask?  You might make some new great neighborhood friends!

So there you have it – 8 great tips to finding free compost materials. The list of ways to find free materials could go on and on, and with just a little work on your part, you can have an endless supply of materials to build your pile.  Your garden will thank you and reward you with great plants and produce!  If you want to know more about composting, you can follow the link here to our post on : Composting 101.

-  Jim and Mary

If you would like to receive our DIY & Gardening  Tips every Tuesday – be sure to sign up to follow the blog via email in the right hand column, “like” us on Facebook, or follow us on Twitter.

5 Simple Tips To Grow A Healthy, Vibrant And Organic Garden!

Green onions fresh from the garden...it's hard to beat the taste!

Green onions fresh from the garden…it’s hard to beat the taste!

The color and vibrance of fresh radishes pulled from the soil

The color and vibrance of fresh radishes pulled from the soil

Between all of the frenzied arguments on both sides of the organic vs. non-organic fence – there are some simple, basic processes that we can all follow to improve the fertility and viability of our backyard gardens and raised beds…naturally.

Mary and I do not practice as chemists, scientists or biologists in our spare time –  nor is our garden officially certified as “green” or “organic”.   But we do have senses - and the sense to know that the food we grow organically tastes and looks great, doesn’t contain any pesticides or sprays  - and grows abundantly.

How? by following one simple rule.  Take care of the soil that takes care of you.  Oh, and by the way – it also make good “cents”…because it’s much cheaper to grow our food organically than buying and applying expensive fertilizers and pesticides.

So through it all…we simply choose to grow organically.  And no…we’re not weird!  Well, our kids might not agree with that last statement – but in all honesty, we’re a regular couple who just wants to grow and know where our food comes from – and more importantly – know what’s in it, and what’s not.

So with that in mind, here are 5 simple and practical tips we use in our gardens and landscape to grow all of the fruits and vegetables we need – without chemicals or pesticides.

1.  Composting:

Compost is the key to organic gardening.  The single best way to great soil

Compost is the key to organic gardening.  It adds valuable nutrients and structure to your soil.

Composting is the backbone of any organic garden. In fact, compost comes straight from the word decomposition..the very heart of organic matter breaking down into fertile soil.  Plant matter, leaves, food, etc. all eventually break down into the soil to add nutrients.  However, once you turn that soil and plant your first garden – you begin to take nutrients back out of the soil.  So adding compost is a must to keeping your soil strong and vibrant. By adding compost – you are in essence recharging your soil.

Here is how we use it:  Every year – we will work a 2 to 3” top-dressing of compost into each of our raised bed rows.  Then, at planting time – we will put another cup or so in the average vegetable planting hole, mixing it in with the existing soil. We use it one more time to top dress and mulch our garden plants – doing this once the plants have grown for a few weeks in the soil.  We put a good shovel full or two around each plant’s base.  This not only provides great weed control and moisture retention – but the compost slowly releases additional nutrients when it rains or when we water – providing a natural fertilizer for the plants.

There are a million ways to go about making compost – in a bin, a tub, a barrel or a plain old pile in the middle of the garden.  But whatever you do – get that pile started!  Add all of those kitchen remnants – potato peels, coffee grounds, egg shells and more.  You can find out more about composting at our link here : Composting 101.  Remember that finished compost should be fine and sweet-smelling and cool to the touch. If you are turning the pile and still feeling heat – it’s still cooking and not ready to use on or near plants just yet.

2.  Cover Crops:

Our beds planted with their fall blanket of cover crops - which well help protect the topsoil through winter, keep weeds from germinating, and add tons of organic matter when we turn it under in the spring

Our raised bed rows planted with their fall blanket of cover crops.  These help protect the topsoil through winter, keep weeds from germinating, and add tons of organic matter when we turn it under in the spring

Cover crops are really the key to a long-term garden’s success – and are easy to plant!  Just like the big time farmers on big time farms – our gardens and raised beds get all the same benefits of a well-grown cover crop.  They add back tons of nutrients including Nitrogen to the soil, keep other weeds from getting established in your beds, and build organic matter back into the earth. They also play a key role in keeping soil erosion to a minimum.

So what are they and when can they be planted? Cover crops are a planting of an annual crop like annual rye or clover to your empty garden beds. Early fall is a great time to plant a cover crop in your garden or raised beds.  A crop like annual rye will emerge in just a week or two and create a thick, grassy bed that will fix nitrogen levels in the soil and keep the beds from being exposed to the winter elements that can erode precious topsoil.  In the spring, you simply dig them under to add organic matter back into your soil.  You can even plant a quick spring or mid summer crop and turn it over into the soil before planting your summer garden.  This is called a “green manure or cover crop” and can be a great boost to the plants going into the space.

It’s easy to plant one. No need to till your soil – next, rake out your rows, existing garden, or raised beds  – and scatter the seeds as if you were throwing grass seed on your lawn.  Rake it over and you’re done!  It’s okay if you still see seeds on top – they will sprout soon enough and you will have a great cover crop growing!  We don’t use a tiller at all in our raised row beds – just a pitchfork to turn it over, and we are ready to plant.  We actually have a complete tutorial dedicated to cover crop benefits that you can check out here :  Planting Cover Crops

3.  Crop Rotation:

The 2013 Garden Plan.  There is a full size picture at the bottom of the post

The 2013 Garden Plan – with plant spaces rotated from last year’s plan

If you keep planting the same pepper, tomato or cucumber plants in the same spot, year after year – you won’t keep getting the same results.  Why? Because plants use certain specific nutrients from the soil - and the soil becomes depleted of those nutrients if the same crops keep going into the same place.

In addition – soil borne diseases that are prone to affect a certain type of plant have a better chance to become established with repeat plantings. So, in addition to providing compost and cover crops to recharge your soil – it’s important to rotate your crops each year so that they give the soil time to recover from that specific crop.

For us – we have 34 raised beds in our garden – and we flip and rotate what we grow so that the same crop will not go in the same space until every fourth year.  With just a little planning – it’s easy to do.

4.  Mulching: 

We use mulch around our plants and in our walking rows to keep the garden clean and weeds to a minimum

We use mulch around our plants and in our walking rows to keep the garden clean and weeds to a minimum

Remember that statement about plants using nutrients from the soil?  Well guess what – weeds are plants too – and they compete for the same nutrients and water your vegetable plants do.  So the less weeds they compete with – the more nutrients in the soil for the vegetable plants.  And you can suppress those weeds naturally, without spraying, and keep your garden looking great.

How? By mulching.  Mulching is a great way to keep out unwanted weeds.  We like to mulch around our plants with a healthy dose of finished compost.  It not only hold conserves moisture in the soil, but it blocks out weeds, and adds valuable nutrients back to the soil while it decomposes.  If you don’t have compost on hand yet – then mulch with straw, shredded leaves or grass clippings. They all accomplish the same thing – keeping moisture in while suppressing weeds.  We also mulch all of our walking rows with straw and shredded leaves to keep weeds out from there as well.   When after a few weeks we get a few weeds popping up here and there…we simply use a weed-eater and cut them down, add a little more straw, and the garden looks great.

5.  Proper Watering:

One of our green peppers after a gentle summer rain.  Proper water is the key to a good garden

One of our green peppers after a gentle summer rain. Proper watering is the key to a good garden

No matter how good your soil is – without water – plants struggle. Too little water and plants shrivel up.  Too much water and they won’t develop the good and deep root structure needed for healthy, mature plants.  A good rule of thumb is that a garden plant typically needs to receive about 1 inch of water a week.  If mother nature isn’t supplying that  - then you need to supplement.  But that doesn’t mean the 1″ of water should come all at once.  If you are experiencing a prolonged dry spell – water every two to three days with a slow, soaking 1/2″ of water.  This allows enough water to go deep into the soil and build deeper roots – and gives the plants more consistent watering.  Why not every day?  The plants never send their roots deeper to look for water – and you end up with underdeveloped roots, and a weaker plant.  Call it tough love watering  to develop stronger plants – but it works.

Water early in the day or in the evening to keep evaporation to a minimum. Try to water the ground around the root area and not the foliage – wet leaves can become burned from the sun’s rays. When our plants are young – we use a 2 gallon sprayer (see, there is room for a sprayer in an organic garden :) )  – and water directly to the plant’s base to conserve water and get right to where it’s needed most.

There you have it.  Our 5 simple, organic tips to a healthy, vibrant and chemical free garden!

If you would like to  receive our weekly DIY and Gardening Posts every Tuesday – be sure to sign up to follow our blog via email, Twitter or Facebook in the right hand column of the blog.

- Jim and Mary

Shared on Savvy Southern, Gnowfglins Simple Lives

Use Pallets To Build Your Own Double Compost Bin for under $15!

Our 2 compartment compost bin made from pallets for under $15

Our 2 compartment compost bin made from pallets for under $15

Compost Bin before staining to match the barn.  We only stained the exterior - leaving the interior free of all paints and stain

Compost Bin before staining to match the barn. We only stained the exterior – leaving the interior free of all paints and stain

There are few things that can make your garden more successful than compost. Compost, or “Black Gold” as it is so often called, improves soil vitality and structure – and significantly bolsters your plants health and yields. The best part of all – you can use your own coffee grounds, kitchen scraps, grass clippings, and leaves to make great compost right in your own backyard.

The market place is flooded with all kinds and type of compost making systems – from wood and plastic bins, to compost tumblers, barrels and buckets. Although they all work – they also can be expensive to buy.  So here’s a way to use a few a pallets and 2 x 4′s to make a great looking double bin system for under $15.

The double-bin pallet composter is a simple structure that looks and works great! We built our 2 bin system from 3 free pallets and (5) 2 x 4 x 10’ boards in just a couple of hours.

Here’s how we did it:

Materials Needed:
3 or 4 pallets
5 ea. 2 x 4 x 10’ lumber – cut into the following lengths : 2 ea. @ 72″ long, 9 ea. @ 27″ long, 6  ea. @ 30″
2 ½” screws or nails – approx. 40
1.5″ screws or nails – approx. 50
Tools Needed : Reciprocating saw, screw gun, tape measure and hand saw or circular saw.

Building The Frame:

If you can, find 3 similar pallets to help make the project go smooth

If you can, find 3 or 4  similar pallets to help make the finished project look great!

Once you have disassembled the pallet - you will end up with nice slats to cover your compost bin with

Once you have disassembled the pallet – you will end up with nice slats to cover your compost bin

blah blah blah

The front frame of the compost bin

blajh balh ablah

One of the (3) three square frames

You can attach the 3 squares to the back with screws to the front panel - then cover with the pallet boards to finish

You can attach the 3 squares to the back with screws to the front panel – then cover with the pallet boards to finish

You will want to try to find 3 pallets that are in decent shape and similar length and size. First – disassemble the pallets to end up with about 30 or so slat boards. It’s an easy process and can be accomplished in minutes with a reciprocating saw.

(Click Here to view our post : How to Easily Disassemble A Pallet In Minutes)

The frame is a simple assembly of 2 x 4 rectangles and squares. A 6′ front rectangular frame, and 3 smaller square frames attached to it to make up the 2 bins. You will want to use regular framing 2 x 4’s and not treated lumber. We get a lot of questions about using treated lumber – but we use standard everyday framing lumber. I don’t like to use treated because we are making compost to put on our garden plants –  and I don’t like the thought of any chemical byproducts leaching into the soil and compost.

The front frame is made from 2 pieces of 2 x 4 that are each 72″ long. They will lay flat and make up the top and bottom of the frame. In between we add three sandwich boards that are each 28” long. Simply screw the top board into the three sandwich boards on the top and bottom. When all assembled – your front frame will be 6’ wide x 30” high.

Next – we need to make the three square frames for the two ends and the middle section. Once again – it is simple assembly. Using two (2) 30″ boards for the top and bottom and two more 27” boards on each end. Assemble all 3 squares,  and your ready to put your quick 2 bin compost bin together.

Simply assemble each of the 3 squares to the front frame with a few screws.  One on the end of each side, and one directly in the middle attached to the middle support of the front frame.   The flat 2 x 4′s should be centered right on the middle of the vertical front board.

Now you have your compost bin carcass. The rest is easy. Starting on the front side – lay out your pallet boards all along the front – leaving about ¼” to a ½” space between boards. I lay all of mine out first so that I can get it to work out perfectly even on the ends.  You want the spacing so that your compost can get air flow.
Once that is done – I lay out the boards for each side using the same method – and finish by putting up a double set of board in the middle section to separate the two bins.  With a two bin system – you can make twice as much compost.  Or, even better, you can have one side to store finished compost – and the other to keep “cooking” the next batch!

When finished – you can leave the compost bin completely natural and unstained and it will weather to an “old barn wood” grey.

Finished compost ready to use!

Finished compost ready to use!

To make it even more pleasing to the eye – you can paint or stain the outside of your pallet boards. We never stain anything inside – once again to not allow any paint or chemicals near the pile.
There you have it – an inexpensive yet beautiful 2 bin compost system that you can use for years and years – all for under $15!

If you would like to follow along through the coming year and receive our weekly DIY and Gardening Posts – be sure to sign up to follow our blog via email, Twitter or Facebook in the right column.  -  Jim and Mary

Shared On Gnowfglins, Shabby Creek Cottage

3 Steps To Keeping Your Garden Beds Productive

PART 4 of 4: Today is the 4th and final post of our four-part series, Planting A Simple Garden Using Raised Row Beds. If you missed any of the the previous weeks (part 1,2 or 3) – you can click on the highlighted text below to view.
1. Growing Simple – Raised Row Gardening –  Click Here For Part 1 
2. Preparing And Planting The Garden – Click Here For Part 2 
3. Planting And Maintaining Your Garden - Click Here For Part 3
4. Keeping Your Beds Productive – Today’s Post

Keeping Your Beds Productive:

Whether you have a raised row bed garden, a sizeable garden patch, or plant your garden in containers – keeping your soil productive and full of life is the key to good yields year in and year out.  With a few simple steps, you can have great fresh vegetables every summer.  Here are 3 ways to keep that garden soil working for you!

1.COVER CROPS:

Cover Cropping

Cover crops add organic matter to your soil and keep valuable topsoil from eroding over the winter months

In the fall, after your plants have run their course and the last of the harvest has been brought in – it’s time to really increase your soil’s vitality.  Cover crops are really the key to a long-term garden’s success – and they are easy to plant!  They add back tons of nutrients to the soil, keep other weeds from getting established in your rows, and help keep soil erosion to a minimum.  No need to till your soil – just rake out your rows, existing garden, or your raised beds in the fall after harvest – and scatter the seeds (annual rye is a great choice) as if you were throwing grass seed on your lawn.  Next, just gently rake it over and you’re done!  It’s okay if you still see seeds on top – they will sprout soon enough and you will have a great cover crop growing!  Early next Spring, simply dig it under and plant your garden.  We don’t use a tiller at all in our raised row beds – just a pitchfork to turn it over, and we are ready to plant.  We actually have a complete tutorial dedicated to cover crop benefits that you can check out here :  Planting Cover Crops

2. Add Organic Matter Any Chance You Get:

Organic matter makes the difference - especially when it comes to making and adding compost.

Organic matter makes the difference – especially when it comes to making and adding compost.

In addition to using cover crops – adding even more organic matter to your garden will pay huge dividends.  One of the great advantages to the raised row system is that you can conserve by adding available materials to only areas you grow your crops in – not wasting it in the walking rows.

What can I add?  Leaves, Grass Clippings and Compost!

If you have access to extra leaves or clippings in the fall and spring – you can add directly to the rows – and let them decompose right in the soil as your plants or cover crops grow.    Make a small 6″ trench in the middle of each row and bury a 3 to 5 inch layer of the shredded material, then cover back up with soil. You can do this in the fall before you plant your cover crops, or in the spring before you plant your beds.  This is also a great way to add compost to your rows if you have a lot of it available.  We also use generous amounts of compost in every planting hole and as a mulch and side dressing for plants to keep enriching our soil.

If you don’t currently compost – get started now! Compost is the key to long-term healthy plants, soil and gardening – and without having to use expensive and soil damaging fertilizers! We have written several articles on composting  - but here is one that really sums it all up for those that want to get started: Composting 101

3.Rotate Your Crops:

Rotating what you grow and where will help to keep your plants and healthy and soil borne diseases at bay.

Rotating what you grow and where will help to keep your plants and healthy and soil borne diseases at bay.

It’s so important to practice crop rotation – even on a small-scale garden basis.  If you keep planting tomatoes in the same spot – you won’t keep getting the same results.  Different plants require different nutrients - and soil begins to lose those nutrients if the same crops keep going into the same place.  In addition – soil borne diseases that can wreak havoc on garden plants can take hold easier if the same soil and plants are together year after year.  So make sure you plan out different spaces for plants in your garden plan each year to rotate those crops.

So there you have it!  The end of our four-part series on Raised Row Gardening!  Make sure to look for more posts in the coming months about gardening, DIY and more.  If you would like to follow along through the coming year and receive our weekly DIY and Gardening Posts – be sure to sign up to follow our blog via email, Twitter or Facebook in the right column.

Shared On Gnowfglins, Transformation Thursdays

Salad Straight From The Garden

Salad Straight From The Garden

Composting 101 – Tips To Make Easy Compost

“I’m not sure Amelia…but I think they may only be keeping us around to put our crap in that pile!”

One can spend a lot of money on the various products made to help us produce compost – compost tumblers, compost bins , barrels, etc.  But the simple truth remains that you can make compost in almost anything to have your own supply of what is considered “black gold” among gardeners.

Our two bin system – made from recycled pallets

We use a two bin system at Old World Garden we made for free from recycled pallets – one to hold finished compost, the other to contain our latest batch.

There are major books dedicated to the topic of how to create compost, and we could get into all of the nitrogen vs. oxygen vs. moisture content details and arguments – but today’s post is all about keeping it simple.  The important thing is to not get so caught up in it the science that you never get around to starting a pile.

Organic matter makes the difference - especially when it comes to making and adding compost.

Organic matter makes the difference – especially when it comes to making and adding compost.

Compost is eventually going to be made in your pile no matter what you do.  The act of decomposition works on everything at some point – even that old truck slowly rusting in the weeds will put it’s iron back in the soil eventually!

Here are three basic hints for composting that can carry you far in your efforts to make great compost. By following them, it’s made our little two bin system crank out plentiful amounts of the high quality soil additives – helping bump up our garden yields year after year.

Good Compost Is The Key To A Great Garden

Good Compost Is The Key To A Great Garden

1. Chop Up Items You Add To The Pile  The smaller the item going in – the quicker it will decompose.  You don’t have to buy expensive shredders or grinders – a simple run over with the lawnmower can shred leaves or straw before you put it in.  And when you throw in those kitchen scraps – cut them up a few times on the pile with a sharp shovel to slice them up – they will begin to decompose so much quicker with the exposed smaller pieces

2.  Keep your pile moist but not wet.  Too wet, and your pile can get slimy.  Too dry, and it loses the ability to decompose faster.  You should be able to pick up the compost in your soil and feel moisture like that of a damp paper towel or rag.    But don’t fear – it won’t ruin your pile if it gets either way – it will just slow down the process.  If you get a ton of rain and your pile is out in the open, mix in some dry materials (i.e. chopped straw) to help it out.  Maybe even cover it with a tarp to help it not get so wet. On the other hand, if you have a huge dry spell – spray it with a little water when you turn it to get it cooking again.

3.  Keep your pile turned.  If you turn your pile over every couple of days – it really helps add vital oxygen and air flow to the mix – and distributes the moisture more evenly.  All of which result in a compost pile that decomposes quickly.  When you see steam rising when you turn it – you will know your pile is really cooking!

Here are some basic things that are great to include in your pile, and a few to avoid:

Egg shells are great for the compost pile

Great items to compost:

Coffee grounds, peanut shells, banana, orange, grapefruit, potato peels, eggshells, lettuce cores, carrot tops, celery ends, chopped leaves, straw, green grass clippings.

Things we avoid:

Meat and fish products,  cooked foods, cooking oils or oily food remnants, diseased or unhealthy plants,  weeds or invasive plant material, dog or cat feces.

Although meats and oils can be successfully composted in high temperature piles – for the average weekend gardener – these spell trouble.  They bring in unwanted vermin like raccoons, possums, mice, even rats…and they can smell awful.  We really try to do a good job just saving and consuming our leftovers so we are not throwing out much anyway – but for us – we just avoid putting these types of things in.  Weeds and unhealthy plants are a no-no because if your pile isn’t hot enough, it may not kill the resulting seeds that can germinate in your soil.  As for the dog and cat by products – for numerous potential health reasons, it’s best to avoid altogether.  However, chicken, rabbit, cow and horse manures are a great source of nitrogen for your pile and can be used if you have available.

So now that you’re making it – how can you use all of this valuable compost that is commonly called “black gold”?

Compost is the key if you want big, healthy plants!

In the early spring – a few weeks prior to planting, we will work a 2 to 3” top dressing of compost into our raised bed rows.  Then, at planting time – we will put a cup in the average tomato planting hole, mixing it in with the soil from the hole.  We use it one more time to top dress and mulch our garden plants, doing this once the plants have begun to take hold (at the 2 to 4 week stage).   A good shovel full or two around the plant’s base will give great weed control and moisture retention.  In addition, the compost slowly releases nutrients to the plants when it rains or we water.

I do need to point out here that this is finished compost we are applying – not the hot stuff from a cooking pile.  If your compost is still warm and cooking – you DO NOT want to put it near your plants or it can burn them and kill them.

The biggest step in composting is simply to take one and try it!  Even if you make mistakes, remember – everything turns to compost eventually :) !

Happy composting!  If you would like to receive our weekly gardening and DIY tips – make sure to “Like” us on Facebook, Twitter, or sign up to follow the blog via email in the right hand column of the website.

Jim and Mary

Rear view of recycled compost bin – 2 bins – one for finished compost – one for new

Recycled Compost 2 Bin System – Made from old pallets with a recycled brick floor

Recycle, Re-use and Re-Purpose in Style!

If you really think about it – we all have a little repurpose in us.

After all – didn’t we all learn the great art of repurposing from our youth?  First, as children making that incredible fort from an empty box and blankets.  Then progressing to our college dorm room or first apartment with fine furniture like “milk crate shelving” and the “empty case of beer box” coffee table.

We found this solid wood armoir top for free – the bottom was damaged on delivery – so we turned it upside down, repositioned the shelves and added a top. Now it holds and displays all of our kitchen wares

For us – it’s now taking those early repurposing skills and “growing them up” to speak  – to truly craft useful and appealing things from what otherwise would end up in a landfill.

I never realized until looking around the house and farm just how many things we have created and now utilize through the art of repurposing.  I have to go back to our beginning for just a second, and borrow a few lines from our “about us” page to get across the point that you don’t have to live on the fringe to be resourceful by repurposing and recycling:

“We’re far from “hippies”…we don’t aspire to live “off the grid”, and in spite of our children and friends constant ribbing, we don’t wish to make our clothes from hemp. What we are – are two individuals committed to a more simple approach to life, who want to be responsible for a majority of the food we eat, and conserve the resources we consume”.

It’s that last line above about a simplistic approach and conserving resources that defines repurposing to us.

The re-use and repurposing of materials has become not just a way to live more responsibly while cutting costs, but evolved into a hobby and an art for us.

Buffet Hutch made from pallets, an old desk top, and piano lid top – the bottom opens up to hold additional serving plates

Yes, it’s true – it really helps us make and build things less expensively – and sometimes far better than we could build or buy new.   But, moreover, it gives us the added benefit to create history and stories into the things found in our home.

Reclaimed bricks create the patio floor for our pergola at the farm

We take pride in making the finished product aesthetically beautiful AND functional while repurposing. Realizing that it’s pretty easy to stack a couple of dirty crates underneath a piece of found plywood and call it a  repurposed table, we strive instead to find balance between re-use and beauty…hence the term “art”.

In some cases – the money we have saved truly has been amazing.  Our signature farm piece – our barn, has been built with repurposing in mind from the beginning.   We knew we wanted a classic “old world” barn, with beautiful space clearing rafters instead of trusses, a  true loft, and real wood instead of pole barn metal for siding.  It was also a barn that we knew would cost upwards of $20,000 to $30,000 to have custom-built – until the art of repurpose entered.

The Barn Project – taking pieces and parts from two old barns to create our “new barn”

Our cost to this point has been just shy of $1600.00 – and that includes $500.00 for having to have massive amounts of grading done.  How did we do it – by repurposing the hell out of two barns we tore down.

We’ve include more on that story along with other repurposed projects at the end of this article – but before I get too carried away with our project’s – let me share some of the keys to how we have successfully repurposed – and where we have found our materials.

The How:

Stand alone bar made from two old doors cut down and a remnant from a structural beam

Have Ideas in Mind.

Have an idea in mind for what you need when you’re out looking.  Don’t become one of those…oh..that’s neat – ill use it someday people.  That can really contradict the living simple theory.  “I’ll use it someday” is a term I have found to end up somewhere between a garage you can’t park in and a barn full of junk.   We never want to be there…ever!  So when looking at something that has crossed your path – really have an idea in mind for what you can use it for – or don’t bring it home.

Think Outside The Box.

If you take anything from this article – this is one to take!  You don’t have to use things for their intended purpose.  Sure, it’s great to be able to find an old table and refinish it into a new purposeful table…but when  you think outside the box.. really unique and inspired pieces happen.

Think outside the box…barn doors made from the walls and floors of a barn we tore down for free

I like to call them conversation pieces.   For us it was making barn doors from floors and walls!    Or using my father’s old roof to become the lower walls of our new barn.  It’s life as a roof was over…it had some surface rust – and some nail holes, etc.  – but by bringing it down to the ground level turning it around so the good galvanized side was out – it became a wall covering.  It made a great appearance – in fact – the rich patina of the reds and greys from the old painted roof looked so good inside – we kept them in tact to the delight of visitors.

I find the easiest way to look outside the box is to take points 1 and 2 together.  If you already have an idea in mind – you can look at materials that are not normally used  - and begin to think it through to see if they would work.

Made to hang inside the barn for decor – our 9′ Farm Fresh Egg sign

Don’t be afraid of Failure…it was already going to the junk pile!!!

Don’t be afraid to try things – what is the worst you can be out when your already starting with junk?  It becomes junk!

I have had my share of mistakes, but i’ve learned it’s not the end of the world.  There was the massive crate I brought home to try to make my first chicken coop out of…about two hours into it, and with the crate collapsing around me…it made a wonderful bonfire starter for an outdoor party that weekend.  The point is, things won’t always turn out, but don’t get discouraged – have fun with the attempts and it just makes you smarter for the next one.  And make sure you don’t keep those old failures around…it’s clutter.

SO – WHERE DO I LOOK FOR THINGS?

 CRAIGSLIST

Craigslist find : The post and beam frame shown here will become a massive pergola frame for our outdoor kitchen at the farm. We have re-used almost 75% of this barn on various projects after tearing it down this last summer

Well –I must admit we are both avid craigslist readers.  It is where we found our barn for free, the bricks for our barn floor, etc.  I will usually take a few minutes early in the morning or late at night to scan through the categories that interest me and see what deals I can find.  Sometimes, people truly just want to get things out of their house.   You know the saying, one’s person’s junk is another’s treasure.

LEARN THE ART OF ASKING

However , an even better tip is to learn the art of asking!   If you see something laying out, or something at work that is being thrown out – don’t be afraid to ask!  The worse that  can happen is a no.  Asking has been a great blessing for us – Mary mentioned to a builder last year that if he ever came across old bricks to let us know.  A week later – he dug up an old patio with a ton of great old bricks..he dumped them for free at the farm.. We made our pergola, chicken coop and compost bin floor from them, and used the broken ones to fill a small ravine – now that’s re-use!   If Mary would not have asked – they would have ended up in a landfill.

Compost bins made from old pallets – an easy start to repurposing!

We get great leaves and compost material from another landscaper who is looking to drop off leaves he collects..we save him a dumping fee…we get great compost material.  It can go on and on.

This tip goes so far beyond just repurposing…and into really helping save space for the landfills.  Ask your local breakfast shop to save their coffee grounds, potato peels and egg shells for you – its incredible in the compost pile and they are usually happy to be doing something good that they can promote too!

YOUR LOCAL HABITAT FOR HUMANITY RESTORE

Many areas now have a great store for repurposers.  A Habitat for Humanity ReStore.  You get great deals on overstock, unused or donated items…and they get to make money for their charity.  It’s a win –win.  The biggest thing here is to go by often – you never know what will be there and you have to see it first to get the good stuff!

KEEP  YOUR EYES OPEN

Yes, I get accused of driving like a grandpa when I go down the road by our kids.  They just somehow think it’s because  I am old…but truth be told but a lot of the reason is because I’m always looking around.   If I see something I really wanted at the side of the road – I’ll look. Once again – I don’t collect junk to collect junk…I have a purpose in mind and a use already .  Then I take action on it to get it where it needs to be.

The Chicken Coop was made from used shipping crates and pallets. The only cost was the shingled roof that was purchased at a quarter of the cost at our local Habitat for Humanity ReStore

AVOID THE  “Sanford And Son Syndrome”

Now the really difficult part – is to balance all of this with the simplistic approach.  We call it, avoiding the Sanford and Son Syndrome – in reference to the old TV show with their house and property amidst a junk yard.

The best way to avoid it is to really concentrate on the ideas you have in mind and what will work for them.  Second – if you do pick something up and can’t or don’t have a use for it anymore – get rid of it – don’t become the “collector of junk” .  If you struggle with this – just watch one episode of “hoarders” and it should cure you of the Sanford and Son Syndrome.

So with that said – here’s a closer at some of the projects we have accomplished with repurposing the last few years:

The Barn

This was the granddaddy of our repurposing projects for sure!  The barn was built from remnants of two old barns we tore down last summer.  The metal roofing we reused to skirt the bottom 4’ around the barn.  We re-used the boards from my dads barn to remill and make all of the battens for the board and batten look.  All four doors were made from the floors and walls of the Cardington barn.  And we salvaged the entire frame of the Cardignton barns post and beams to create  a massive outdoor garden pergola that will attach to our barn this spring.

The Bar (picture above)

We took 2 old solid wood doors form an old building that were to be thrown away.  Cut one down to have the two ends, and left the other whole as the front.  The massiveness of the found items made the piece work.  The heavy oak top was then salvaged from an old beam from a building in Tiffin, Ohio.  We simply added a plywood top and a little cement board and tile, and we have room for our keg and tap on the left – and shelves on the right.  Not a bad bar for less than $25

Canning Pantry Cupboard:

What can you u do with old shipping crates and a couple of pallets?  Well in this case we came across a supply of shipping crates that used lounge and groove boards as the casing.  We carefully dissembled them and had wood for many projects including this one (see below for more of the uses we made from shipping crates).  Using  remnants of 2 x4’s from the pallets – we built a casing for the canning cupboard – then sheathed it in tongue and groove boards and created space to hold over 200 jars of canned goods – even better – the rustic look makes it a perfect fit in the dining room.  The boards work perfect and give a great finish either stained painted or left to weather naturally.

I hope you found this helpful, and if you have any stories as well – please feel free to share.  That’s my last point for sure…never stop learning from others.  Who knows, one of your tips might just inspire me for my next project like I hope one of mine did for yours.

Happy recycling, repurposing and re-using!

Jim and Mary

If you would like to receive our DIY & Gardening  Tips every Tuesday – be sure to sign up to follow the blog via email in the right hand column, “like” us on Facebook, or follow us on Twitter