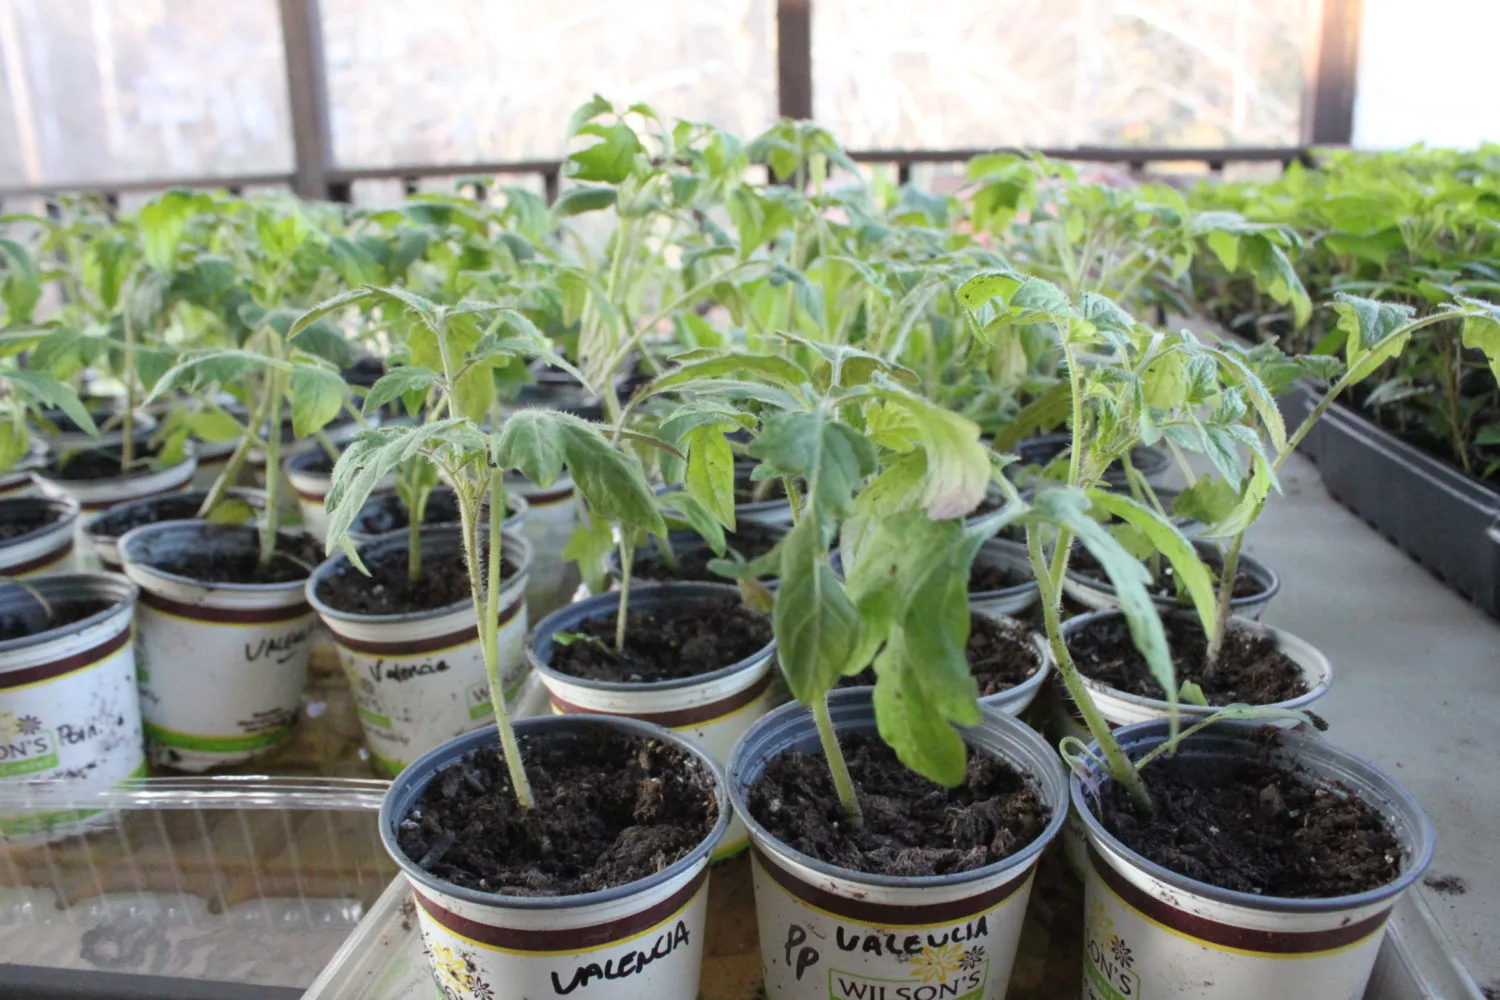
The New Chicken Coop Rises And The Farm Comes to Life!

Finally!  A Sunday Farm Update with some activity to report at the farm! The temperatures, although not “warm” – have at least begun to reach the 40′s and 50′s – so things are getting in full swing.

The chicks love the space of their new holding pen in the garage...and Jazzy still loves to watch them

The chicks love the space of their new holding pen in the garage…and Jazzy still loves to watch them

The new coop rises at the farm.

The new coop rises at the farm.

We used bolts embedded in the concrete filled block to secure the coop to the foundation

We used bolts embedded in the concrete filled block to secure the coop to the foundation

The new Chicken Coop emerges behind the old one.  The original coop will have new life with my sister and brother in law once our is complete - as they raise a few chicks of their own.

The new Chicken Coop emerges behind the old one. The original coop will have new life with my sister and brother in law once our is complete – as they raise a few chicks of their own.

Our 18 baby hens have outgrown the comfy surroundings of their brooder in the basement.  Mary’s vehicle once again is the loser in the deal – as the garage space now serves as a home for the chicks.  We made a 4 x 8′ makeshift chick pen out of some left over 2 x 4′s and chicken wire – and they seem to love the added room as they feather out.  They turn 6 weeks old on Tuesday, which means they are just two weeks away from heading to the farm.

What does that means for us? It means we need to get the new coop complete!  So this past week – it took center stage.  We have taken some time in designing and constructing this one – building in some careful details we have learned from experience.

We finished up the foundation with a few hours of work here and there on nights throughout the week.  It is made up of 5 inches of packed limestone dust, with 8″ of concrete filled cement block on top for the main foundation.  We set anchor bolts in the concrete within the block to make sure the coop stays secure for years to come.

On Saturday – we were finally able to get building!  We had pre-built the front and back walls way back in January – so they went up fast – as did the sides and rafters. By the end of a long day, the coop started to rise from the ground.  To match the barn, we will use reclaimed windows and metal siding, along with a board and batten finish on the exterior. Weather permitting – we hope to have most of that completed by tonight.  That leaves us about two weeks to finish the attached 10 x 12 covered run, and get things painted and stained.

With the recent issues of unwanted guests to our old coop – we have added a lot of extra security to the new coop design to hopefully eliminate any predators.  We will be burying two staggered rolls of heavy-duty, close-knit welded wire fencing 12″ down in the ground and pouring in concrete to prevent digging in.  The coop will also have mesh installed under the floor, and all of the walls will have a layer of sheathing behind the metal and board and batten exterior to prevent entry.

The bee hive after getting a second of 3 coats of stain.

The bee hive after getting a second of 3 coats of stain.

The seedlings are up and growing strong - hopefully  ready to put outside in a month or so.

The seedlings are up and growing strong – hopefully ready to put outside in a month or so.

The honey bee hive received a few coats of stain and is now complete and ready for the bees! Our official delivery date is April 19th – we can’t wait for the hive to become full of activity and hopefully this fall – honey!

The seedlings we started indoors are really starting to take off.  We keep our shop lights about 1 and 1/2 inches from the top of the plants to keep their growth strong and prevent them from getting spindly or leggy.  It really works well with the ordinary shop lights, keeping the growth low and slow, and developing strong seedlings. They continue to get about 10 to 12 hours of artificial light each day.

With the temperatures expected to finally start climbing into the mid 60′s this week – we are hoping to move them to the back porch soon to get them acclimated to natural daylight and daily temperature fluctuations. It’s a great idea to get your plants used to the outside conditions a few weeks before planting time in the garden, a process called “hardening off”.  We usually will keep ours on the porch for the final two to three weeks – only covering them or bringing them in at night if there a threat of frost.

Spring is always one of the most exciting and yet challenging times of the year for us.  With one off to college and 3 others all playing high school and junior high baseball, it makes for some long and creative days attending games and getting in work at the farm.  But as with all of them, you find time to do the things you love – and we wouldn’t trade the madness for anything in the world! :)

Happy Gardening!

Jim and Mary

If you would like to receive our Gardening / DIY and Farm Updates each week – be sure to sign up to follow the blog via email in the right had column, “like” us on Facebook, or follow us on Twitter.

How To Easily Start Garden And Flower Seeds Indoors On The Cheap!

We start all of our ornamental pepper plants indoors.  Here are our

We start all of our ornamental pepper plants indoors. Here are our poinsettia peppers in mid summer bloom.

Our Sangria Seedlings At The Tender Age of 4 Weeks

Our Sangria seedlings at the tender age of 4 weeks.  The low hanging lights allow them to grow steady and strong.

I think one of the most rewarding experiences for a home gardener is starting their own seeds indoors. For one, it’s an incredibly satisfying feeling to make a tiny seed grow into a beautiful plant for you and your family to enjoy. It also can be a tremendous cash saver – plants can be expensive when purchasing them all at your local greenhouse. Especially if you want to grow specialty or heirloom seeds that are hard to find.

We use a low-cost, simple set up to grow our seedlings indoors.  It has allowed us to expand our garden and landscape without breaking the bank.

Let’s start with a few, money saving tips of what you won’t need: Heating Mats and Specialty Lights.

It’s not that heating mats don’t work – they do. They help warm the soil and help to germinate seeds.  But unless you live in a 40 degree barn…normal room temperatures will work. It make a take a day or two longer to germinate than if you use heating mats – but the seeds will grow just fine.

There is also no need to waste big money on high-priced “grow lights” or bulbs with a special light spectrum for raising seedlings. They do have a place for certain types of special growing applications – but if your goal is to start and raise seeds indoors – a couple of good old-fashioned inexpensive flourescent “shop lights” work incredibly well. Most of us have a few already around the house.  If not, they can be had at your local hardware store for about $10 to $15, and can be used year after year. I am a big believer in the lights.  Yes, it’s true that you can use a sunny window of your house – but it’s hard to get seedlings to grow straight using natural winter sunlight from a window.  You need to turn them constantly – and the seedlings tend to grow thin and skinny trying to reach up for the light.

What you will need to start up to 4 flats of seeds indoors:

A couple of inexpensive double shop lights -and we can raise 4 whole flats of seedlings.

A couple of inexpensive double shop lights are more than enough to grow 4 whole flats of seedlings.

One (1) 32 quart bag of potting soil or seed starter mix.  We make our own from equal parts of our compost, sand and soil, but if your starting out, you can buy a good bag for around $10.  It will be more than enough to fill four flats and have some left over for next year.

Two (2) inexpensive dual-bulb 4′ flourescent shop lights. (4 bulbs total)  You can pick them up at your local hardware store for about $10 – $15 – and most all of them even come with little hooks and a chain for hanging over your plants.

Plants ready to head for the garden and landscape!

Plants ready to head for the garden and landscape!

Four (4) empty flats with seed tray inserts.  (we like the 36 cell plant trays – the individual cells are big enough that you won’t need to transplant the seedling into anything else before they go into the ground)

A few blocks of scrap wood and two 5′ 2×4′s to hang your lights from.

Your seeds of choice.  Whatever seeds you use – make sure to label your flats with what you plant in them – it’s easy to get them mixed up as they grow into mature plants.  As for when to start your seeds – the back of each seed package will usually tell you the optimum time, however, a general rule of thumb is 6 to 8 weeks before planting outdoors.

The Process:

1. Fill your seed trays with soil mixture — pack lightly – you want the soil to be light and fluffy to allow room for root growth and water filtering through.   Moisten the soil –don’t drench.  You just want to have the soil wet to the touch – An empty spray bottle of water works great for the first few weeks of starting.

A young seedling emerges from the soil

A young seedling emerges from the soil

2. Plant your seeds at a rate of 2 per space – preferably not on top of each other, but in slightly different areas towards the center. Each seed packet will tell you the depth that the seeds should be planted — most are about 1/8″ to 1/4″ inch deep. Planting two seeds ensures that you can get at least one seed to germinate in every space. Yes, you will have to thin later – but better to have too many than none at all! After planting your seeds, lightly moisten the soil again and then cover with a clear plastic sheet or lid and keep out of direct sunlight.

The seedling emerges with two full leaves - now is the time to thin

The seedling emerges with two full leaves – now is the time to thin

3. I know it sounds strange to put them out of direct sunlight – but covering them allows moisture to build up and helps to achieve optimum conditions for the seeds to sprout. You will most likely not have to water during this time — just make sure the soil remains moist.

By using clear plastic you can see when the plants  actually come up without taking off the cover and disturbing the plants and releasing the moisture.

Young seedling growing into a nice plant

Young seedling growing into a nice plant

4. Once you see 1-2 seedlings sprouting out of the soil, remove the lid and place onto a table or flat surface.   You can now set up your shop lights.  You want the lights to hover down about 1 to 2″ from the top of the plants.  We do this by putting blocks of wood at each end and running a 5′ 2×4 over all of the flats of seedlings.  We then simply screw a little hook into the 2×4′s and hang them with a little hook.  (usually included in the shop light kits)  When we need to raise the lights as the plants grow – we just add another block of wood to each end.  You will want to give your plants about 12 to 14 hours of light each day.  (For how to build a cool indoor seed rack stand on the cheap – check out our latest article here : Indoor Plant Rack Stand – On The Cheap)

Plants need to be "hardened" off to adjust to real light and temperatures before planting outdoors

Plants need to be “hardened” off to adjust to real light and temperatures before planting outdoors

You will also need to water more frequently now — most likely once a day – and as the plants grow in the coming weeks – you will continue to adjust those two lights to keep them at 1 to 2″ above the top of the plants. You want the soil to stay moist but not water logged.  This is also the time to start thinning to allow for one seed per container. If you have an empty cell, you can replant extra sprouts into the empty cells.  We just use a flat head screwdriver to lift out the extra seedling and plant into the empty cell.

The shop lights at such close range keep the seeds growing straight up and at a slower, stronger rate. One of the problems with using just direct sunlight is that the plants will get leggy as they reach to the light source. With the shop lights at such a close range..they grow nice and slow and develop strong roots and leaf structure.

The Sangria Peppers we grew from seed in full bloomAfter about 6 to 8 weeks – your plants will be ready to go. As the weather begins to warm – we will take our plants out onto the back porch to get some regular sun and start adjusting to the temperature and light. One thing to avoid is to take your plants directly from the shop lights and plant them in the yard – you want to give them time to adjust to sunlight and temperature – a process called hardening off. Usually by the end of March – we start to keep them on the porch longer and longer – and near the end – only bring them in or cover them if there is a threat of frost to get them ready for the great outdoors!

- Jim and Mary  

If you would like to receive our DIY and Gardening Post each week – be sure to sign up to follow our blog via email, Twitter or Facebook in the right column.

Shared on Frugally Sustainable

Moving on up! Ornamental Pepper plants get a new home.

The weather continues to warm here in Ohio – tempting us to cheat mother nature and skip the whole seedling transplant step and head straight for the flowerbeds and garden.  However – in spite of the temptation, reality set in and  Saturday we began to move all of our seedlings into larger individual pots.  Mary went to our local nursery, who has a recycled plastic pot program - where they gave her close to 75 16 oz. pots for a nickel a piece – an unexpected find that saved us some cash!  So we spent the morning transplanting the pepper plants into new homes – where they will spend the next four weeks expanding their root structure before finding their permanent home in our landscape and garden.

The transplanted Sangria Pepper plants get some much needed space to expand!

Ornamental peppers are an absolute favorite of ours.  They get big with hundreds and hundreds of tiny peppers of all different colors.  We grow and save our own seeds from our favorite variety – the Sangria Pepper – and this year have expanded to two additional seed varieties, the Poinsettia and Tangerine Dream.

Sangria Peppers in full summer glory

We use these for mass planting in the flowerbeds to give big blasts of color to our landscape.

The peppers have proven over the last few years to be one of the most durable, well producing and colorful editions to our landscape.   One of the most frequent questions we are asked  is “Can you eat them?”  The short answer is – most of the ornamental varieties – like Sangria have little or no taste and are not great for consumption.  However, there are some varieties – like Poinsettia and Tangerine Dream that produce a small edible pepper that are great to flavor soups or dips.

Transplants filling up the kitchen table!

This year, we expanded the pepper seedling production to several hundred plants – tripling what we have ever tried before. (and taking away our dining room for a few weeks!)  We will use about half of those for our own landscape – and sell the others to friends and a couple of small local nurseries.   We hope to build our own greenhouse on the property later this fall – and with a little luck, hit our goal of 1000 seedlings next year!

The Infant Years….from Seedling to Sprouts

Now that the weather has continued to stay at above normal temperatures in our area, several of you are getting the ‘gardening’ bug.  Typically the word bug would not be good in garden terms, however, we all began gardening because we saw the immense benefit that it provides to ourselves and our families.  These benefits may be more than you bargained for – the most obvious is the nutritional benefit, but many don’t realize the additional benefits that derive from planting your own garden: emotionally, physically, and even spiritually for some.

Our 4 week old seeds have grown to this

Several times in our lives we get the desire to do something, but have no idea where to begin.  Over the last several weeks, we have continued to filter questions from individuals that would like to start a garden from seed but don’t know how.  We always tell everyone, don’t be afraid to try — the worst thing that could happen is that you are out a couple of dollars from buying those seed packets.  You have to make the jump and get started…..now is prime time to start your seeds if you plan to get them in the ground right after the threat of the last frost.

Basic instructions for seed planting:

1. Purchase your seeds from your local garden center  (we will get into harvesting your own seeds in other posts)

–if you are an organic gardener, make sure you purchase heirloom or organic seeds — Don’t worry, the packet will tell you what type you are purchasing

– if you buy F1 seedlings, you will not be able to harvest the seeds from your produce next year, as these will produce genetically modified organisms that are designed to increase disease resistance in your crop but not produce the exact reproduction in future years

2. Purchase planting soil and compost  (if you don’t make your own — which by the way is very simple to do)

—Composting 101 http://oldworldgardenfarms.wordpress.com/2012/03/02/composting-101-tips-to-make-easy-compost/

3. Decide where to plant your seeds

Seed beginning to sprout

– peat pots are biodegradable containers that can often be planted right in the ground with your seedlings.

– we have reused yogurt containers to start some of our seedlings — just make small slices in the bottom of the container to allow for adequate water drainage

–check out your local garden store for various seedling containers

4. Mix the potting soil and compost in a 1:1 ratio

5. Fill pots with soil mixture — pack lightly – you want the soil to be light and fluffy to allow room for root growth and water filtering

6. Moisten the soil –don’t drench the soil so it turns to mud, you just want to have the soil wet to the touch.

6. Plant your 2-3 seeds per pot – preferably not on top of each other, but in different areas for easy thinning.

–each packet will tell you the depth that the seeds should be planted — most are about 1/4inch deep — It doesn’t seem like very deep, but it will pay off when you are waiting for them to sprout.

7.  Lightly water the soil

8. Cover with a plastic sheet or lid and keep out of direct sunlight

– Really?  I thought sunlight made seeds grow???  I know, I know, but you have to get the seedlings to sprout first.  The moisture that will build up between the plastic and the pots will allow for optimum seed sprouting.  You will  most likely not have to water during this time — just make sure the soil remains moist.

Sprouts have been thinned

9. Wait

10. Wait again, but continue to check to make sure the soil is moist

11. Once you see 1-2 seedlings sprouting out of the soil, remove the lid and place in direct sunlight (or use a shop light placed 2 inches above the soil)

12.  You will need to water more frequently now — most likely once a day.

13. Once seeds begin to sprout, thin the growth to allow for one seed per container.

– you can attempt to replant the seedlings in other containers if you have a steady hand – and yes, you will feel like a Surgeon.

–or compost your non-preferred sprouts

–or if you are afraid to disturb the roots, cut the non-preferred sprouts down to the soil and let die off, which will become compost in the current soil

Seedlings under shop lights

13.  If you are using direct sunlight, rotate the plants to allow for even growth — the plants will get spindly as they search for the sun…but don’t worry, when you plant them you will just have to plant them deeper (up to the first leaves) than the shorter versions.

14. If you use shop lights – keep the lights at 1-2 inches above the plants.

Sangria pepper plant in a yogurt cup - now ready to be trained to tolerate outdoor temperatures.

15.  After your plants have gotten 2-3 sets of leaves, you can begin to train them to tolerate outdoor conditions.   On a warmer day in your climate, set them outside for a few hours.  Increase the time that you leave them outside each day and even overnight if there is no chance of frost.

Plants being trained to the outdoor climate

16.  Don’t get greedy — you can’t plant them in pots/gardens until the last chance of frost in your zone — In our area, May 15th is the ‘safe’  planting day.  Of course, we live on the edge and usually plant by May 5th :)

In a few weeks, we will discuss our garden planting system — the No-Tiller method.  But right now you need to concentrate on getting those seeds started!!!

Happy Planting!