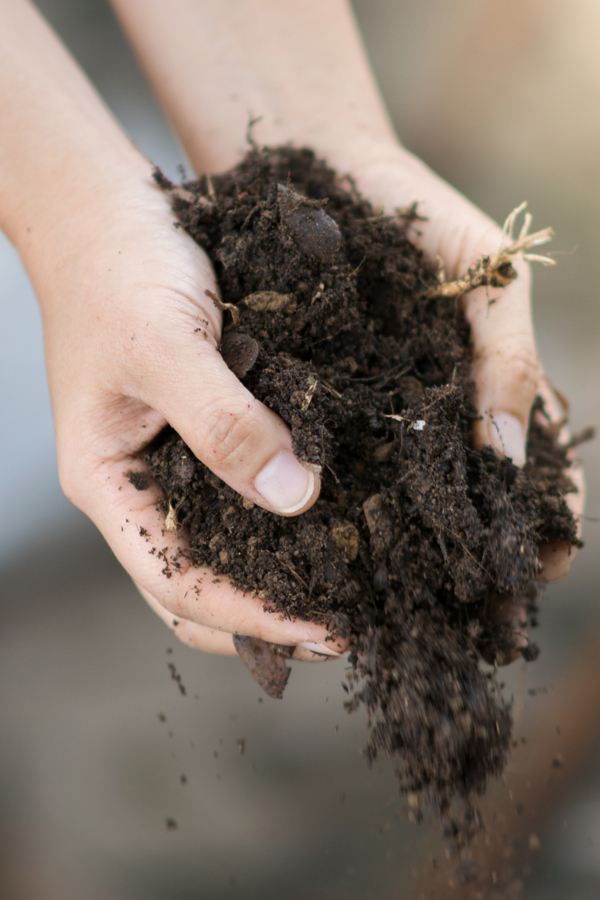
There is no doubt about it – when you make great compost, great things happen for your plants!
Compost is an amazing organic powerhouse of nutrients. Nutrients that help to keep soil loose, workable, and most importantly, completely energized. We use it absolutely everywhere we can to enrich our soil and power our plants.
In our vegetable garden and flower beds, we add a few cups of compost to every single planting hole. Not only does it help to build incredible soil strength and structure, it also acts as the perfect slow-release fertilizer.
Compost gently releases a low-dose of nutrients to a plant’s root system all season long. And as it does, it gives the perfect balance of nutrients for strong, steady growth, and higher productivity .
The Many Benefits Of Compost
In addition to using compost in the soil, we also use it on top of the soil surface around plants. Once a plant goes in the ground, we add a 2″ thick layer of mulch as a “mulching ring” around the base of every single plant.
The mulching ring first insulates the soil from temperature swings. And it also protects plants by suppressing weed growth, all while holding valuable moisture in to the roots below.
But perhaps best of all, the compost ring also acts as a slow release fertilizer. And every time we water or it rains, it leaches powerful nutrients to the roots below. Talk about a win-win for the plants!
The accolades go on and on for having compost at the ready. It is perfect as a powerful additive in homemade seed starting mixes and potting soil. It also is the sole ingredient for creating homemade compost tea. Which, by the way, just happens to be on the of the most incredible all-natural fertilizers for vegetable plants, flowers, herbs and more. (See: How To Make And Use Homemade Compost Tea)
So now that you know just how great compost can be – let’s take a look at the 6 simple secrets to make your own incredible stash this year!
How To Make Great Compost For A Great Garden – The 6 Simple Secrets!
#1 – Build The Right Size Pile
One of the biggest mistakes a composter can make is to create a pile that is too small to work efficiently, or too big to manage.
If a pile is too small, the materials never “heat up” enough to decompose quickly. But if it gets too big, it can become difficult to turn and mix. And as you will see later in the article, turning and mixing can be a big part of creating a successful pile.
So what is the best size? For best results, a pile or compost bin between 3′ x 3′ x 3′high, to 5′ x 5′ x 3′ high works best. It allows for a pile big enough to have thermal heat, but not so big that it’s hard to turn. The 3′ x 3′ formula has worked really well for us in our home bins, allowing for plenty of heat, but easy for both of us to turn with ease.
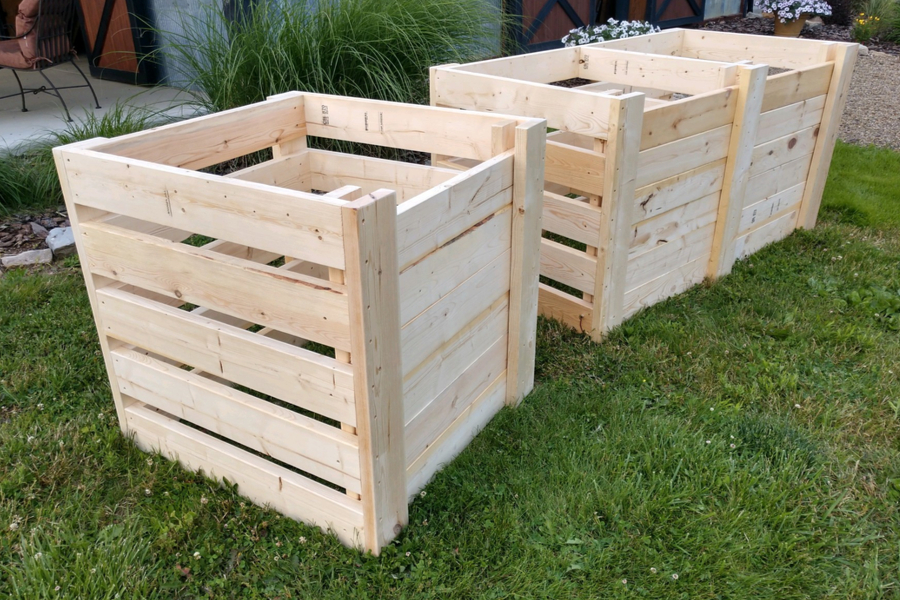
There are some good options available for purchase, but you create a great looking compost bin or bins right at home with ordinary lumber. We created our single and double bins above from 2x construction lumber.
Not only have they lasted for years, they actually look quite attractive too. Best of all, they can be built in just a few hours! See : Compost Bin Step By Step Plans
#2 Get The Right Mix Of Materials Into Your Pile
To get the most from a compost pile, it takes a proper balance of Brown (Carbon) and Green (Nitrogen) materials. It can all sound intimidating, but it’s actually quite simple.
Brown materials consist of leaves, straw, wood shavings, dead grass, small twigs, etc. Greens on the other hand are materials like vegetable peels, coffee grounds, green grass, and plant clippings.
Greens can also be animal by-products such as chicken and rabbit manures. In fact, they are one “hot fuel” that gets a pile really cooking!
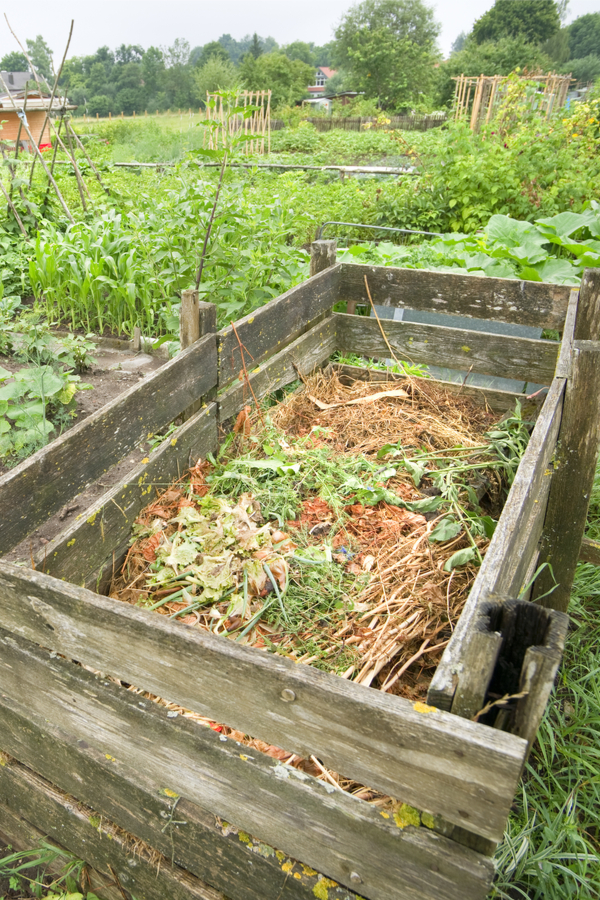
So what is the perfect ratio of browns to greens for a great compost pile? A good rule of thumb is for every 3 to 4 parts of brown material, add in 1 part green. For instance, if you add in 4 buckets of shredded leaves, then a bucket of vegetable peels or fresh green grass needs to go in at some point to balance it out.
And don’t fret about being exact or putting materials in at the same time. Add materials as you get them. Just try to stay as close to the ratios as you can over time to make the pile work at maximum efficiency.
#3) Chop The Ingredients!
One of the biggest and most underrated keys to a fast-working compost pile is to chop the ingredients before tossing them in.
As a rule, the smaller the item going in, the quicker it decomposes. The more finely a material is cut up, the more surface area it has exposed to break down. And as the surface area comes into contact with bacteria and organisms at a higher rate, it breaks down more quickly.
But don’t think you need to run out and purchase a fancy shredder. If you have one, by all means, use it. But you can also use your push or riding mower to easily shred ingredients if needed. And as you are saving those kitchen scraps, just be sure to give them a few more chops before tossing them into the pile.
#4) Turn That Pile!
Just as chopping your ingredients up will speed up decomposition, so will turning your pile often. Like all living creatures, the organisms that help to break down a compost pile need oxygen.
Turning your pile frequently (with a spade or pitchfork) helps to add oxygen to the center core where it is needed most. A compost pile’s hottest area will always be the center. And because of that, it burns through oxygen quickly.
But by turning and mixing your pile at least once or twice a week, you resupply oxygen to the core. In addition, the brown and green materials become mixed more thoroughly as well, helping to speed decomposition even faster.
Check out our podcast episode on how to make great compost!
Turning a pile at least a few times a week will speed up the decomposition process greatly. But ideally, if you can turn your pile once a day, you will achieve maximum efficiency. It is just one more reason keeping your pile close to where you work (or near the garden) is always a great idea. The old saying out of sight out of mind certainly applies to compost piles!
#5) Keep The Pile Moist
In addition to oxygen, compost needs water to keep it cooking as well. And that is why having moisture present in your pile is a must. The moisture and oxygen work together to create the hot temperatures needed to break it all down quickly.
Keep your pile moist by adding water if it begins to dry out. A good compost pile should feel like a well wrung, slightly damp sponge. If you live in areas with extreme heat or a lot of rain, covering your pile might be a good idea.
It not only helps keeps moisture and heat in, but can keep soaking rains from deluging it. As much as a dry pile can slow decomposition, a water-logged pile can stop it in it’s tracks too. You can cover with a tarp or roof, or make a swinging lid if needed.
#6 What Not To Put In Your Compost Pile
Finally, it is also extremely important to know what not to put in your pile. Meat is a big no-no. It attracts rats, mice, raccoons and other unwanted animals. Even worse, it can lead to foul smelling piles that are anything but pleasing.
In addition, always refrain from using dog or cat manure as it can contaminate your pile, as well as the plants and vegetables you use the compost on. Here is to creating and making the perfect compost pile in your backyard this year! Happy Gardening – Jim and Mary.
Jim and Mary Competti have been writing gardening, DIY and recipe articles and books for over 15 years from their 46 acre Ohio farm. The two are frequent speakers on all things gardening and love to travel in their spare time.
As always, feel free to email us at thefarm@owgarden.com with comments, questions, or to simply say hello! You can sign up for our free email list in the subscribe now box in the middle of this article. Follow us on Facebook here : OWG Facebook. This article may contain affiliate links.