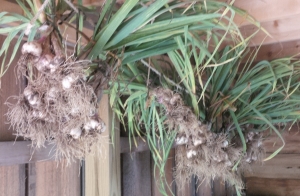
Garlic Season has arrived at the farm! There is something so special about the intoxicating aroma of fresh garlic coming out of the earth during the harvest – and knowing that you have just grown and a crop that will last you the whole year around! In addition – with today’s Sunday Farm Update – we add a new “Tips From The Garden” video to go along with the article. We would love to hear your feedback in our comments section below to see if it something you would like to see more of.
We love garlic and our home-grown crop finds its way into everything from homemade pasta sauce to salsa, marinades, dishes and more, including being the main ingredient in an effective all-natural bug spray. ( see: Natural Garlic and Hot Pepper Bug Sprays)
Garlic is actually quite simple to grow and stores extremely well, making it a great crop for the home gardener. If you throw in that commercially grown garlic is renowned to be one of the most pesticide laden crops – it makes even more sense to grow your own! (see: How To Plant Garlic)
[youtube https://www.youtube.com/watch?v=ePExbiVMa2E]
Here in Ohio – we plant our garlic in early to mid-September – allowing it just enough to time to get a head start and shoot through the soil before winter sets in. As the Spring thaw begins – the garlic takes off again and is usually ready to harvest by the last week of June or the first week of July. The tell-tale sign that garlic is ready to harvest is when the leaves and stalks turn about half brown.
It is important to harvest garlic when the soil is more on the dry side – and with the recent deluge of rains – we were starting to wonder if we would ever be able to pull them out of the ground. But with a couple of dry days this weekend – and the advantage of planting the crop in raised rows – it was harvest time!
The Harvest…
Using a pitchfork (a shovel will work well too) – we made working down both rows, carefully digging down about 4 to 6 inches beside each stock – and then lifting slowly up to reveal the bulbs. We then gently brush off the soil from around the garlic bulb and roots – taking care not to damage any of the cloves or stems. The more careful you are in this stage – the better chance your garlic has to cure and then store later without losing any to rot. If there is a little dirt left on them while curing, it will dry and brush off later.
Curing and Storing…
It’s best to get the garlic out of the direct sun right as soon after the harvest as possible and begin the curing process. Curing is different from long-term storage.
To cure our garlic – we hang it on hooks inside the barn where it can air dry out of the direct sunlight. I love coming in the barn for the next few weeks and smelling the rich flavors as it cures – in fact, it makes me more ready than ever for the tomato harvest so we can start to make our homemade pasta sauce!
Selecting This Fall’s Seed…
Once we have it cured, the very next thing we do is select the biggest and best bulb for this fall’s planting of next year’s crop. This “best of the best” selection process ensures our garlic will grow a little better each year by picking the healthiest and largest for seed. Garlic also begins to grow better each year as it becomes accustomed to your soil and conditions. I am amazed at how much our harvests improve each year from selecting the best from our seed.
If you would like to receive our Sunday Updates each week – be sure to sign up to follow the blog via email in the right hand column, “like” us on Facebook, or follow us on Twitter.
Happy Gardening! – Jim and Mary


