If there are two things that we both enjoy more than any other – it’s spending time outdoors and cooking.
For us, the opportunity to combine the two together with an inexpensive outdoor kitchen area at the farm is a dream come true!
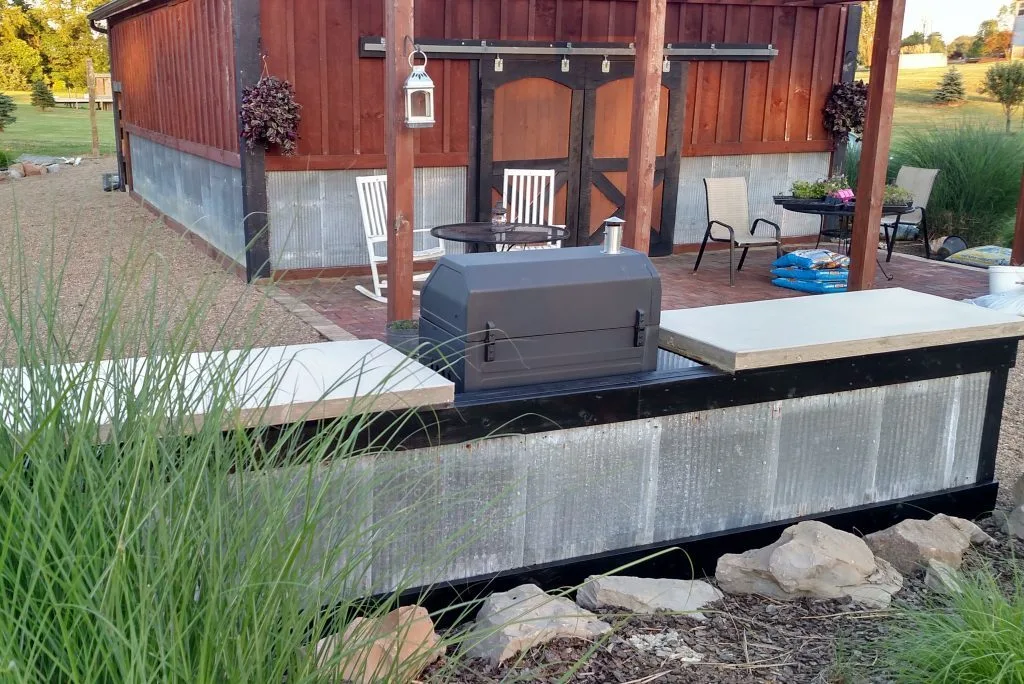
A few years back, when we built our recycled barn, we used a few scrap 2 x 4’s, left over reclaimed metal roofing, an off-the-shelf grill to create an extremely inexpensive rustic outdoor kitchen.
The only thing really missing was a countertop for the area that was both durable and fit in with the surrounding rustic feel.

Initially, we stained and sealed a few untreated 2 x 6″ boards to create a temporary surface, but as anyone knows, wood isn’t exactly a great long-term solution for an outdoor countertop.
After a few years of wear – and a few warping boards – it was time to create the permanent solution.
We wanted something tough and durable that would blend in well with the existing barn and reclaimed brick patio – and a simple concrete countertop was the perfect answer!
In this day of patio and outdoor spaces that can cost more than a new car – I think it’s important to realize that if you are willing to think outside of the box a bit, utilize recycled and non-traditional materials, and put a little DIY muscle into it – you can create a beautiful outdoor space without breaking the bank.
Creating The Outdoor Kitchen With Concrete Countertops
The concrete countertops were surprisingly inexpensive and easy to make – and we couldn’t be happier with how they turned out!
We decided to create the forms right in place to avoid having to lift or move the countertops once complete.
After we removed the old warping 2 x 6″ boards that served as the old surface, we started by screwing down a heavy-duty 3/4″ sheet of plywood on top of the existing 2 x 4″ kitchen frame.
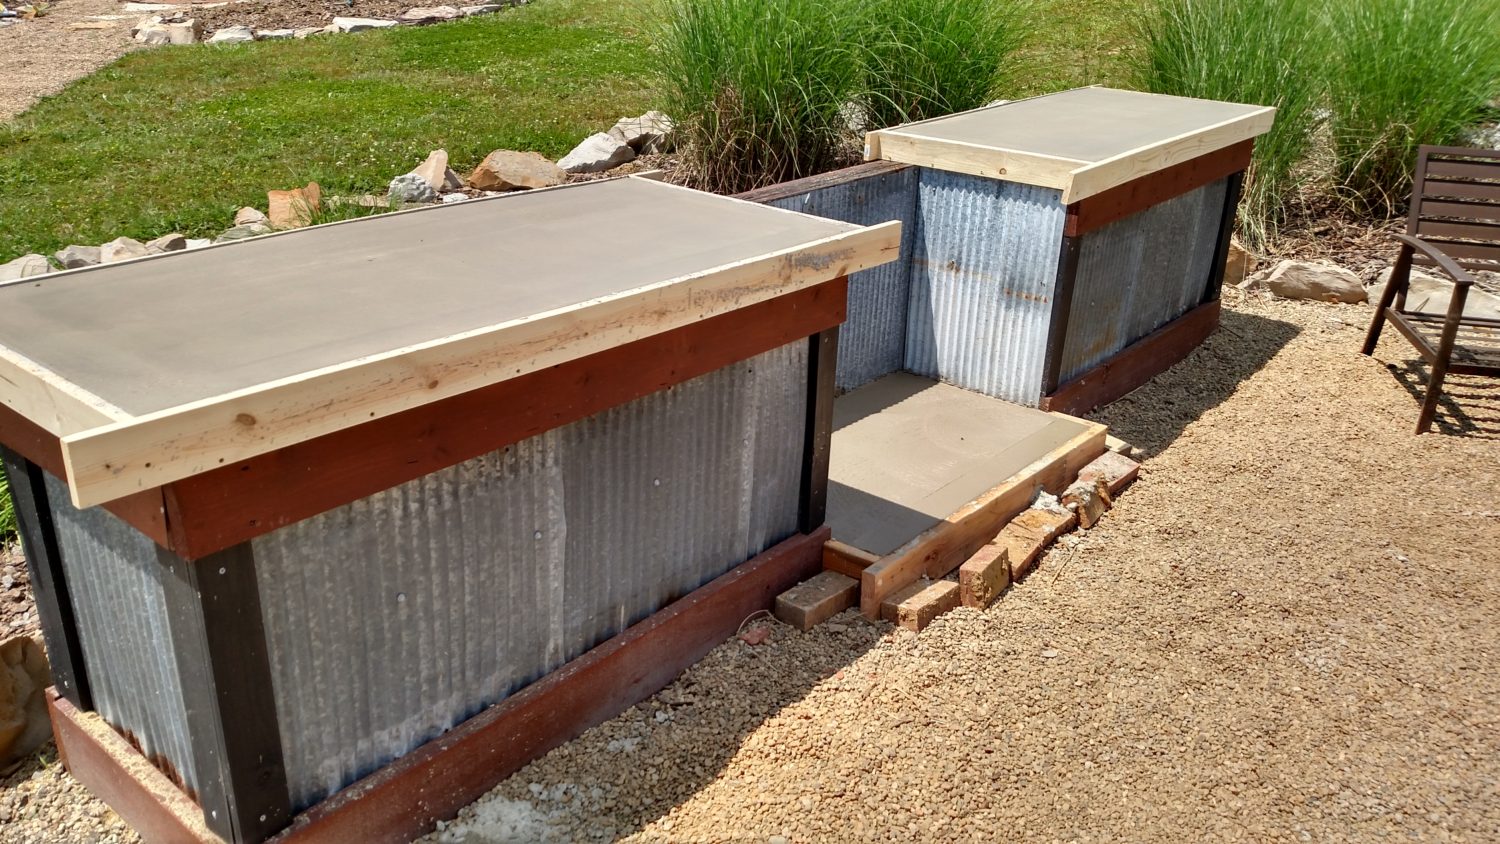
Next, using 1 x 4″ pine boards, we created a left and a right countertop form by screwing the boards into the edge of the plywood.
Each finished form measured 66″ long x 30″ wide x 2 and 3/4″ deep. We then used a few pieces of old chicken wire and placed it into each box form to help add a little strength to the two tops.
Now, I will admit this is where we got a bit lucky. Our plan was to use bagged concrete, mix it up, and pour into the forms.
But knowing we would be having concrete trucks coming by for our house foundation pour – we simply let the truck come on down the hill and fill our forms too!
Work smarter not harder – right? It certainly saved us a bit of time and sore muscles.
As the forms were poured, the chicken wire mesh was pulled up into the center of each piece, and then the surface was troweled and that was it!
After a few days, we removed the boards and just like that – we had permanent countertops!
We will let the concrete cure for the next 30 to 45 days, then clean it with a solution of muratic acid before applying an acid stain and sealer to give it a little more character.
The Cost
The recycled metal panels and the 2 x 4 framing for the main unit were left over from the barn project and were assembled for free.
The plywood and 1 x 4″ boards for the forms were just under $75, and the 10 to 12 bags of high strength concrete mix needed would have come in around $60 to $75.
All in all, when you add in the cost of the grill, the entire project came in well under $400 – not too bad for a space that should let us make quite a few meals at the farm in the coming years!
If you would like to receive our Recipes, DIY and Gardening articles each week, you can sign up to follow the blog via email in the right hand column above, “Like” us on Facebook, or follow us on Twitter.
Happy Building! Jim and Mary