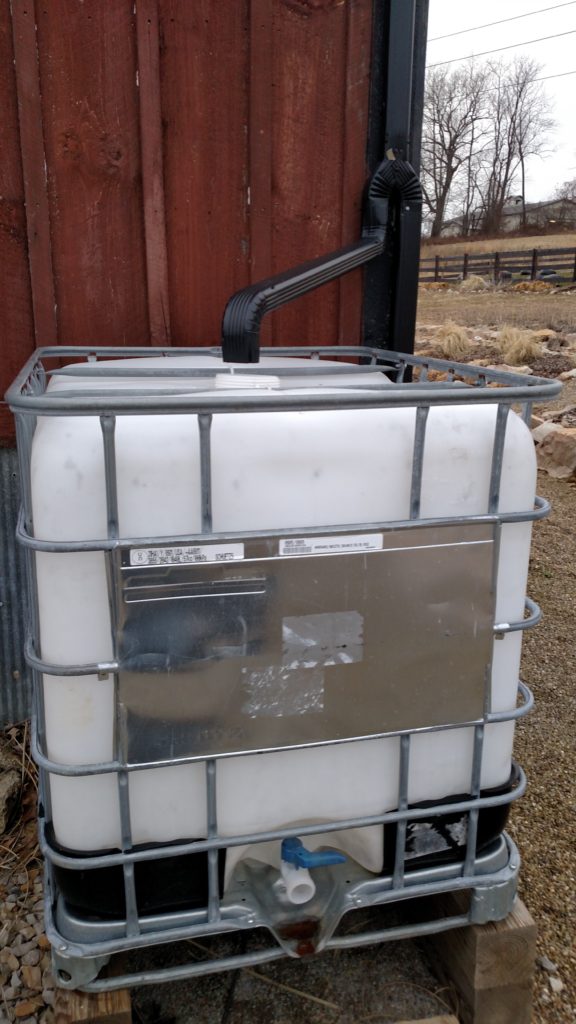
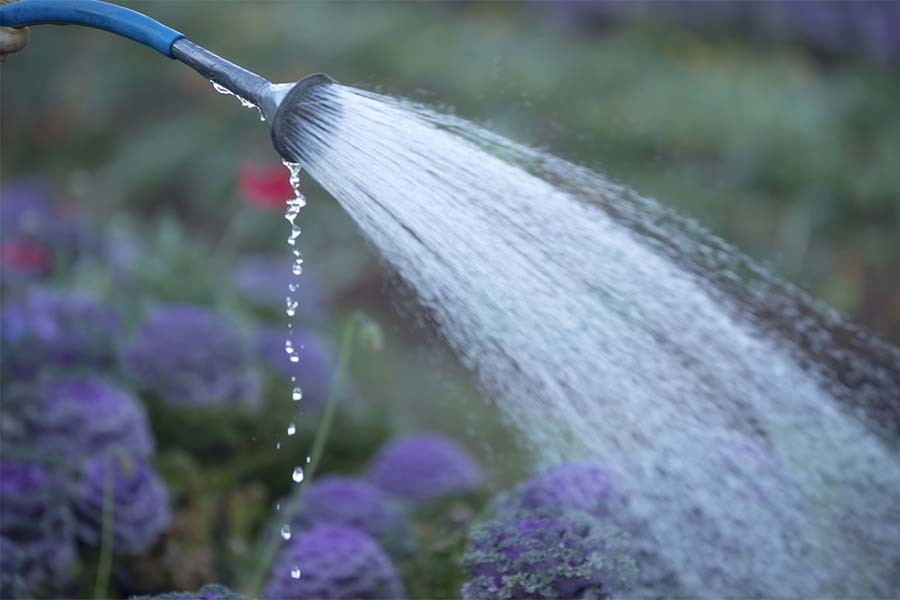
Creating A Simple And Inexpensive Rain Water Collection System

Our entire farms watering needs are met 100% with reclaimed rain water

100% of our watering needs are met using collected rainwater

Our barn's metal roof is our supply of water for the entire farm

Our barn’s metal roof is our supply of water for the entire farm

Visitors to the farm are usually surprised to learn that we water the entire garden and landscape with reclaimed rain water. Our system, which collects and stores rainwater from our barn’s metal roof, provides 100% of our annual watering needs. The best part, it was extremely easy to install, and can be inexpensively adapted to almost any home, shed or roof with a gutter.

We spent the past week hooking our tanks back up from winter storage – and within 24 hours  - we had just over 150 gallons stored from a single rain.  It’s been over a year now since we first completed the rain collection system – and I honestly don’t know how we survived without it.

It gives us access to free water, and with our two plastic tote tanks, can collect as much as 550 gallons from a single downpour.  And that’s only using rain from the back portion of the roof!  This spring, we will add a third tank fed by the front gutter – increasing our storage to just shy of 900 total gallons – enough to handle our watering needs for nearly two months of complete drought.

How it works:

Our system starts with the rain coming into simple gutters and downspouts

Our system starts with the rain coming into simple gutters and downspouts

Through a simple in-line diverter - the rainwater is carried to our main capture tank

Through a simple in-line diverter – the rainwater is carried to our main capture tank

The water then empties into our main storage tank

The water then empties into our main storage tank

This is from one single rain last week - about 125 gallons

We quickly filled almost 150 gallons from a single rain last week, the day after we hooked the totes back up.

A second tank sits above the garden for watering all of the plants with simple gravity and a hose

A second tank sits above the garden for watering all of the plants with simple gravity and a hose

We connect a standard garden hose to the tanks with a simple threaded adapter

We connect a standard garden hose to the tanks with a simple threaded adapter

The system collects rain water from a simple adapter made to fit our existing barn’s gutter. The barn has a standard gabled metal roof measuring 13 wide’  x 32′ long on each side.  A  32′ section of guttering runs along the bottom of each side of the metal roof, slanted slightly to carry all of the water to the eastern side of the barn.   From there, both sides empty into standard downspouts.

The front downspout (not used currently), runs down and out to the field for normal drainage. On the back downspout however, we installed a simple 2-way in-line diverter (See Picture). When the metal lever is slid to the left, rain water is diverted into a 275 gallon storage tank located below the downspout. When all tanks are full, the switch can be slid back for normal drainage.

From the main storage tank, we pump and fill a second 275 gallon tank installed above our garden. With that, we can water all of our plants quickly, using gravity and a standard garden hose connected to the tank.

To increase capacity and mobility, we are adding a second diverter to the front gutter this year.  That will fill a 3rd tank mounted on wheels – giving us the ability to pull water anywhere it’s needed with our tractor.  That will be a huge time saver when it comes time to water the newly planted grapevines and fruit trees on the hill this year.

Here is a look at the system’s components and cost:

Totes: $40 each  We found ours for $40 each after searching on Craigslist.  You can also check with local food plants that may receive their raw materials in them.  One word of caution – make sure you know what was originally in your tanks and that it is safe.  Our tanks were used to hold maple syrup and molasses – simple food products that can be cleaned out and re-used.  You will want to avoid using tanks that held harsh chemicals. Most tanks come with a 6″ threaded cap on top, and a 2″ threaded outlet valve at the bottom.  You can convert the bottom 2″ valve to accept a standard garden hose with a few adapters found at your local hardware store.

Diverter Switch :  $15  You can find standard gutter diverters at your local home improvement store for about $15 – they install in minutes with rivets or screws.

Threaded Valve and Hose Adapter: $15 Your local plumbing or hardware store can hook you up with a simple threaded connection valve to convert the 2″ drain at the bottom of your tank to handle a regular garden hose.  We also installed a ball valve ($10) on our tank for an extra shut off point.

A couple of final notes on collecting and using rainwater:

Keep It Dark:  You will want to keep the water from getting direct sunlight to keep algae from growing in the stagnant water. Algae can only grow if there is light.  If your tank is translucent like ours, you will want to cover it.  We use a black covering like a grill cover to cover them up once the sun and algae become a problem. Not only does it dress it up, but it keeps the water and the flow line crystal clear.  For the pictures here, we have the covers off to show the tanks.

Keep It Covered: No matter what system you use to store your water, you will want to keep closed.  Water that sits is an open invitation to mosquito larvae .  Our totes came with 6″ caps and lids on the top.  We simply cut out the hole for the downspout, and then sealed the edge with some inexpensive foam.

Know What To Use The Water For:  We only use our reclaimed water for watering plants or washing off equipment ,etc.  Since we do not treat it in any way, we do not use it for drinking.

Check to make sure your allowed to collect rain water.  Although it sounds crazy, in some states out west you are not allowed to collect rain water, as the water rights still belong to the state.  So to be on the safe side, check with your local or state government to make sure it’s legal where you live.

Happy Gardening!! - Jim and Mary

If you would like to receive our Gardening / DIY and Farm Updates each week – be sure to sign up to follow the blog via email in the right had column, “like” us on Facebook, or follow us on Twitter.

Shared On Gnowfglins

Have Gutters…NEED RAIN!

The hanging baskets we planted are doing well – but we need to keep them watered daily to stay alive!

June is almost here..and so is the heat!  It’s been a steady diet of no rain (going on our 12th dry day today) and ever-increasing temperatures here.   That means constant watering of the plants in the garden as well as the flowers and hanging baskets. Watering is quite a chore right now – as we have to tote every ounce of water out to the property from the house.  Because the plants are still on the younger side – we can get by with about 15 gallons each trip to get all the plants and chickens watered – but that amount will double if not triple as they all grow.

All the more reason to finally get the barn roof watering collection system functional.  We had hoped to have it up at the beginning of May – but it kept getting pushed back by  other more pressing farm chores.  So we spent today finally putting up the fascia boards on the eaves of the barn.

They have to be all up and at the least primed by the time the gutter crew comes on Monday morning to install.

Before the gutters can be installed – the fascia board needed to be put up on the eaves

Our hope is we can find some time tomorrow night to get them painted as well – and not have to worry about painting around the gutters after they are all up.

I have mixed feelings about having our gutters installed by someone else – it will be the first thing we haven’t built ourselves on the barn, but we wanted seamless gutters and in all honesty, our quote to have them purchased and installed was cheaper than we could buy them!

Once the gutters are installed on the barn – the roof water collection system will be complete.

The fascia board up and getting primed.

As we noted in a post a few weeks back  - the two 275 gallon tanks are in place and waiting for water. Now all we need is some rain to fill those gutters and fill those tanks!    We should be able to fill them each with a couple of good rains – and that should end our water carrying days from the house.  So stay tuned..hopefully Monday evening we can have some pictures of the complete system up…and waiting for rain!  The good news…rain is forecast for Tuesday!

Day Lillies in full bloom – even without the rain

Using rain to water our garden…our solar driven rain collection system takes shape

The water tote being connected to the diverter spout

The water tote being connected to the diverter spout

Our tanks still sitting on the truck in front of the barn waiting for us to unload!

***We have more updated pictures at the end of this post from installing the totes.

It’s a beautiful sight to us!  Two bright and shiny 275 gallon water totes that will become the backbone of our barn’s rooftop rainwater collection system.  They will be used to water our entire garden, grapevines, and flowerbed areas – and let us attain our goal of using 100% reclaimed water for all of our gardening needs.

Thanks to another craigslist find this past weekend – we picked up the two used totes for just $40 each from a manufacturing plant.  They were used initially to hold molasses syrup for the food plant – but they are in pristine condition, completely washed, cleaned out and ready to start holding our rainwater.  These tanks have a huge 6″ cap opening on top for filling – but more importantly – with just a little modification using simple garden hose adapters – we can turn the 2″ bottom outlet into a standard garden hose hookup, complete with a shut off valve.

Recycled water totes are a great way to store and use rainwater – just make sure your totes are clean and were not used to hold harsh chemicals that could leave harmful residues.

We will finally be installing our gutters on the barn in the next few weeks . Instead of directing the downspout into regular run off drains –  the rainwater from the metal roof will be carried by a small diverter installed in the downspout to fill the water tanks.

Our system is really pretty basic and very simple.  When both tanks are full – they will hold 550 gallons of fresh water – enough to water our garden every day for nearly a month if mother nature decides to send a drought our way.  We will keep one tank at the top of the back hill above the garden hidden within the compost bin fence.   The other tank will be installed at the back corner of the barn, hidden behind a decorative fence and large grasses. That tank will be connected to the downspout to catch the rain water coming off the metal roof of the barn.   A simple overflow tube will be installed on the main rainwater tank that will send all excess water to the regular drains when the tanks become full.

The biggest hurdle to overcome was how to get water to our top tank.  It makes sense to have the usable water up above the garden.  It’s the highest point of the property – and if the tank is there, we can simply use gravity to water all of our plants.  We first thought about using the tractor and a small wheeled trailer to move the bins when full – but we decided it would just be too difficult to do – and probably end up damaging our tanks with the constant movement.  So after a lot more thought and a little research - we have settled on pumping the water from the bottom tank to the top tank  when needed,  using a permanently buried hose and a small water pump powered by an inexpensive solar energy system

We will use a simple downspout rain diverter to take water to the tanks

How does it work?  - It starts with the use of a small solar panel that will attach on to the back of the barn roof.  The panel collects the sun’s energy and charges  a small battery panel in the barn.  That battery power can then run the small electric pump and push the water up to the second tank with a simple flip of a switch.  A great way to get all of our future watering needs at no cost!

So – hopefully with a little good weather and some luck – we can at least have the gutters and main tank connected within the next week or two and begin filling the main barn tank – with the solar pump and panel installation following shortly thereafter.   Our goal is to have the system operational by the main planting of our garden in mid-May.  We will be sure to post updated pictures when we have it all up!

If you would like to receive our weekly DIY and Gardening Posts – be sure to sign up to follow our blog via email, Twitter or Facebook in the right hand column of the blog

Filling Up With Rain

IMG-20120529-00370

Filling up about half full after a rain,,,

Filling up from a good rain

Filling up from a good rain

Back Barn Gutter

Back Barn Gutter