Garden season is around the corner – so how about making this the year to create an incredible low-maintenance vegetable garden!
You can actually do it quite easily. And, believe it or not, it can be weed-free. All without having to spend hours upon hours in the garden.
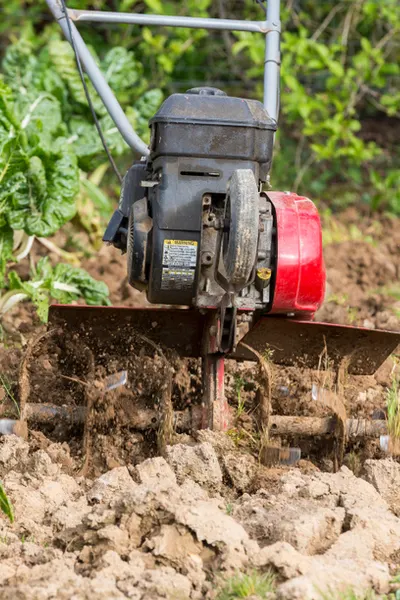
Even better, you don’t need a rototiller or costly equipment to make it all happen.
Sound impossible? It’s not!
A Simple Way To Create A Low-Maintenance Vegetable Garden
If you have always wanted to garden, but think you can’t because you don’t own a rototiller, have great soil, or the time to spend endless hours caring for a garden, its time to try Raised Row Gardening.
Check out our Podcast episode on How To Create A Raised Row Garden!
The Raised Row Method puts gardening all together. And does so in one simplistic, easy to follow, entirely organic approach.
We have been “Growing Simple” with our Raised Row Garden for over 8 years.
And as easy-to-maintain and productive as it was in year one, it has only continued to get better every year.
A Raised Row Garden is all about simplicity. It allows you to maximize yields. All while minimizing the daily and yearly work chores.
In addition, the unique method allows you to keep your garden neat, tidy, and manageable. All in just minutes a day.
Best of all, it is a no-till garden method. That means there is never a need to till and re-till your soil. See : Why You Don’t Need A Rototiller For A Great Garden
It has allowed us to grow nearly 75% of our food every year. And judging by the thousands of comments and emails we get from others now gardening the Raised Row way – it is doing the same for them!
We love seeing how it has worked for others…
This will be our second Spring of raised row gardening, and the results the first year were spectacular! …at 71 y.o. it’s extremely important to me that this method is something I can do. My sister/garden partner is a few years younger but she appreciates the approach as well. – Diana
I did raised row gardening in my front yard this year. The tomatoes were twice the size of the ones I planted in the back yard, and the yields are great! In a few weeks I will add several more rows. I am a believer!!! – Patricia
Here is a look at how a Raised Row Garden works. And, of course, how to set up your own this year!
How A Raised Row Garden Works
Raised rows utilize the same concept as raised beds. However, this is no hassle or expense with building and working within walls.
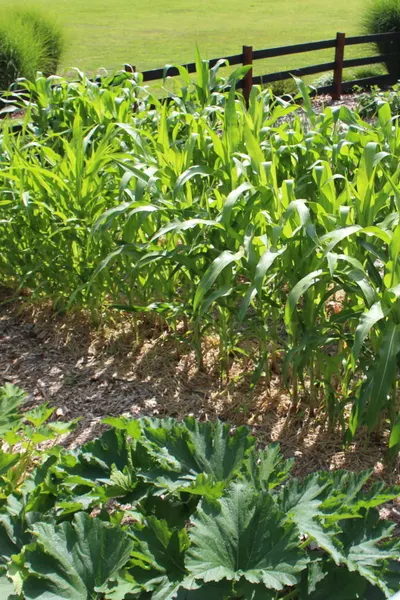
Instead of using rock, wood or metal to create “sides”, the soil is simply tapered down on the edges.
This saves time and money when creating. But moreover, it is easier to work in and around.
Soil in raised beds can often be difficult to work, especially at the edges.
Many times, the sides of raised beds get in the way of common garden tools. But with Raised Rows, that simply is never a problem.
Raised row garden beds are initially created using a combination of organic materials and top soil.
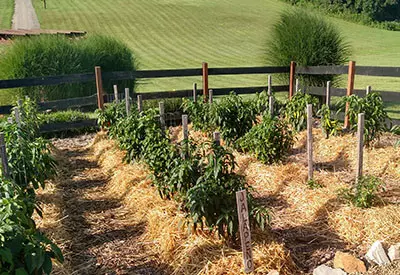
They can be created in an existing garden, or right on top of an existing grassy area. Both with ease.
Eliminating 75% Of Traditional Garden Work From The Start
For starters, the growing space in a raised row garden is composed of 6″ high x 18″ wide rows. As for the length, it can be whatever works best for the gardener.
The growing space is the only space where a raised row gardener will ever concentrate their time. As a rule, it is the only place the growing “action” will happen.
In between each growing row, 24 inches of space is left for walking and garden maintenance. These are aptly called the walking rows.
In a “regular” garden, walking space requires a lot of weeding and / or tilling maintenance. But with raised rows, that work load is eliminated by using a heavy application of mulch.
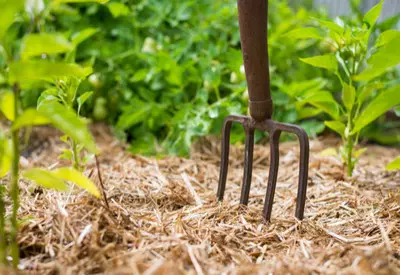
With that one simple adjustment, work and maintenance is reduced drastically.
There is never a need to work the soil in between crops. Or weed it.
Instead, all of your efforts can go only to the growing rows. It is also conserves greatly on resources such as water and compost.
And the advantages only grow better from there.
Raised Row Garden Beds – Setting Up From Scratch
Here is a quick look at the basics of setting up a simple, easy-care vegetable garden – the Raised Row way.
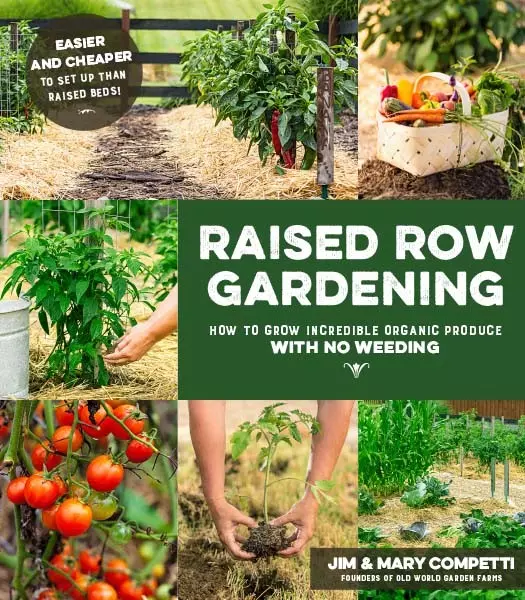
For those wanting even in-depth info, be sure to check out our top-selling book above: Raised Row Gardening.
It is loaded with full color photos and illustrations that take you through every facet of the method! In addition, it also include full planting and companion guides.
So let’s get back to setting up that perfect garden!
Creating Your Raised Rows From Scratch
Start by marking out the location of your growing rows.
As noted earlier, the ideal raised row gardening growing row is 18″ wide. Then, be sure to leave about 24″ left between rows as a walking path.
Again, the length of each row is up to the gardener. We use 20′ long rows in ours, and it has worked very well.

Once everything is marked, it is time to build the garden.
Creating The Raised Rows
Start by laying down a thick 4 to 6″ layer of organic material in the middle of each growing row. Spread it out about 10″ wide, leaving 4 inches on each side bare.
For the organic material, shredded leaves, straw and compost are great choices. Even better, use a combination of all 3 as your base.
Next, if you are creating from an existing garden, use the soil in the garden to rake or pile up over the top of each row.
Do this to create a growing row with about 6″ of height in the middle,. Your growing rows should then taper down to the edges of each side of the walking rows.
The heavier soil placed on top of the organic material will act to compress down the organic material. But the finished height in the middle should be about 6″.

It is important to not have a steep slope. Just a gentle taper to the walking row edges.
If creating from scratch on top of a grassy area, you can purchase a topsoil or garden soil blend to create the raised rows. This only needs to be done once.
We constructed our first raised row garden beds on top of a freshly mowed grass field. And we have never looked back.
Cover The Walking Rows
Next, it is time to cover those walking rows!
Start by putting down a thick layer of straw, leaves, wood bark or wood chips. We use bark chips in our garden. And it works extremely well.
As an added benefit, it lasts for years as opposed to a single season.
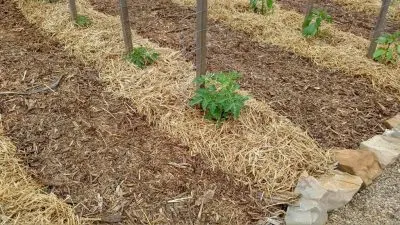
If you built your beds on top of a grassy area that was not tilled, use landscape fabric, newspapers, or even plastic in the walking rows first. Then place on the leaves, straw or chips.
This will give an extra layer to help kill off the grass for the first year. If you used a non-biodegradable material (plastic, fabric, etc.), you can remove it for good at the end of year one.
Long Term Gardening And Maintenance
All planting is done within the growing rows. Straw or shredded leaves are used as mulch in-season around plants to keep weeds out.
The raised rows allow plants to grow deep, healthy roots. The mulch keeps weeds out and moisture in.
At the end of the season, when plants are removed, a cover crop is planted in its place. This covers and protects the growing rows for winter. It also helps rebuild the soil for the next growing season. (See Our Article – When and How to Plant Cover Crops)
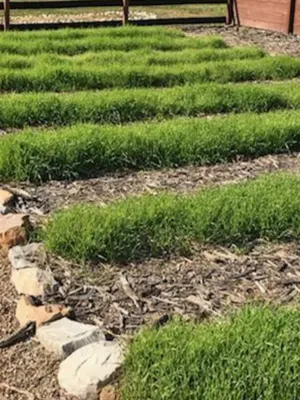
The following spring, the cover crop is mowed off a few times and eventually dies off.
Plants and seeds for the garden are then planted directly through it. No tilling. No weeds. And little work!
So what is holding you back this year? Isn’t it time you get started planning and creating your own low maintenance vegetable garden?
Happy Simple Gardening! – Jim & Mary. If you would like to receive our DIY, Gardening and Recipe articles each week, you can sign up to follow the blog via email in the right hand column above, “Like” us on Facebook, or follow us on Twitter. This article may contain affiliate links.


