Every year, as the spring and summer garden harvest swings into full gear – the robbing of our kitchen equipment begins!
We start off using a few of our large colander bowls to pick sugar snap peas and cucumbers – and before you know it – we have used every pot, pan and container we can find in the kitchen to hold the growing harvest.

Needless to say, it makes dinner preparation a little tricky when your favorite pans are holding tomatoes and peppers on your back porch!

With the added pressure in the coming years of apples, cherries and grapes to be harvested from the newly planted fruit trees and vineyard area – we thought it was time to address the problem by creating a stash of our own harvest crates from scrap lumber and pallet wood.

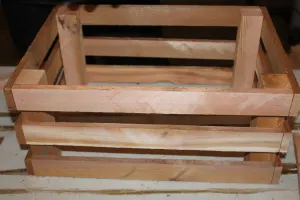
The crates are strong, easy to make – and best of all – inexpensive to create! Even better, besides holding the fruits of your garden – they make great gift crates if you give any of your home-grown harvest away. We made a few before the holidays for a gift exchange – and the crates were as big of a hit as the homemade mustard, salsa, and pizza sauce we put in them!
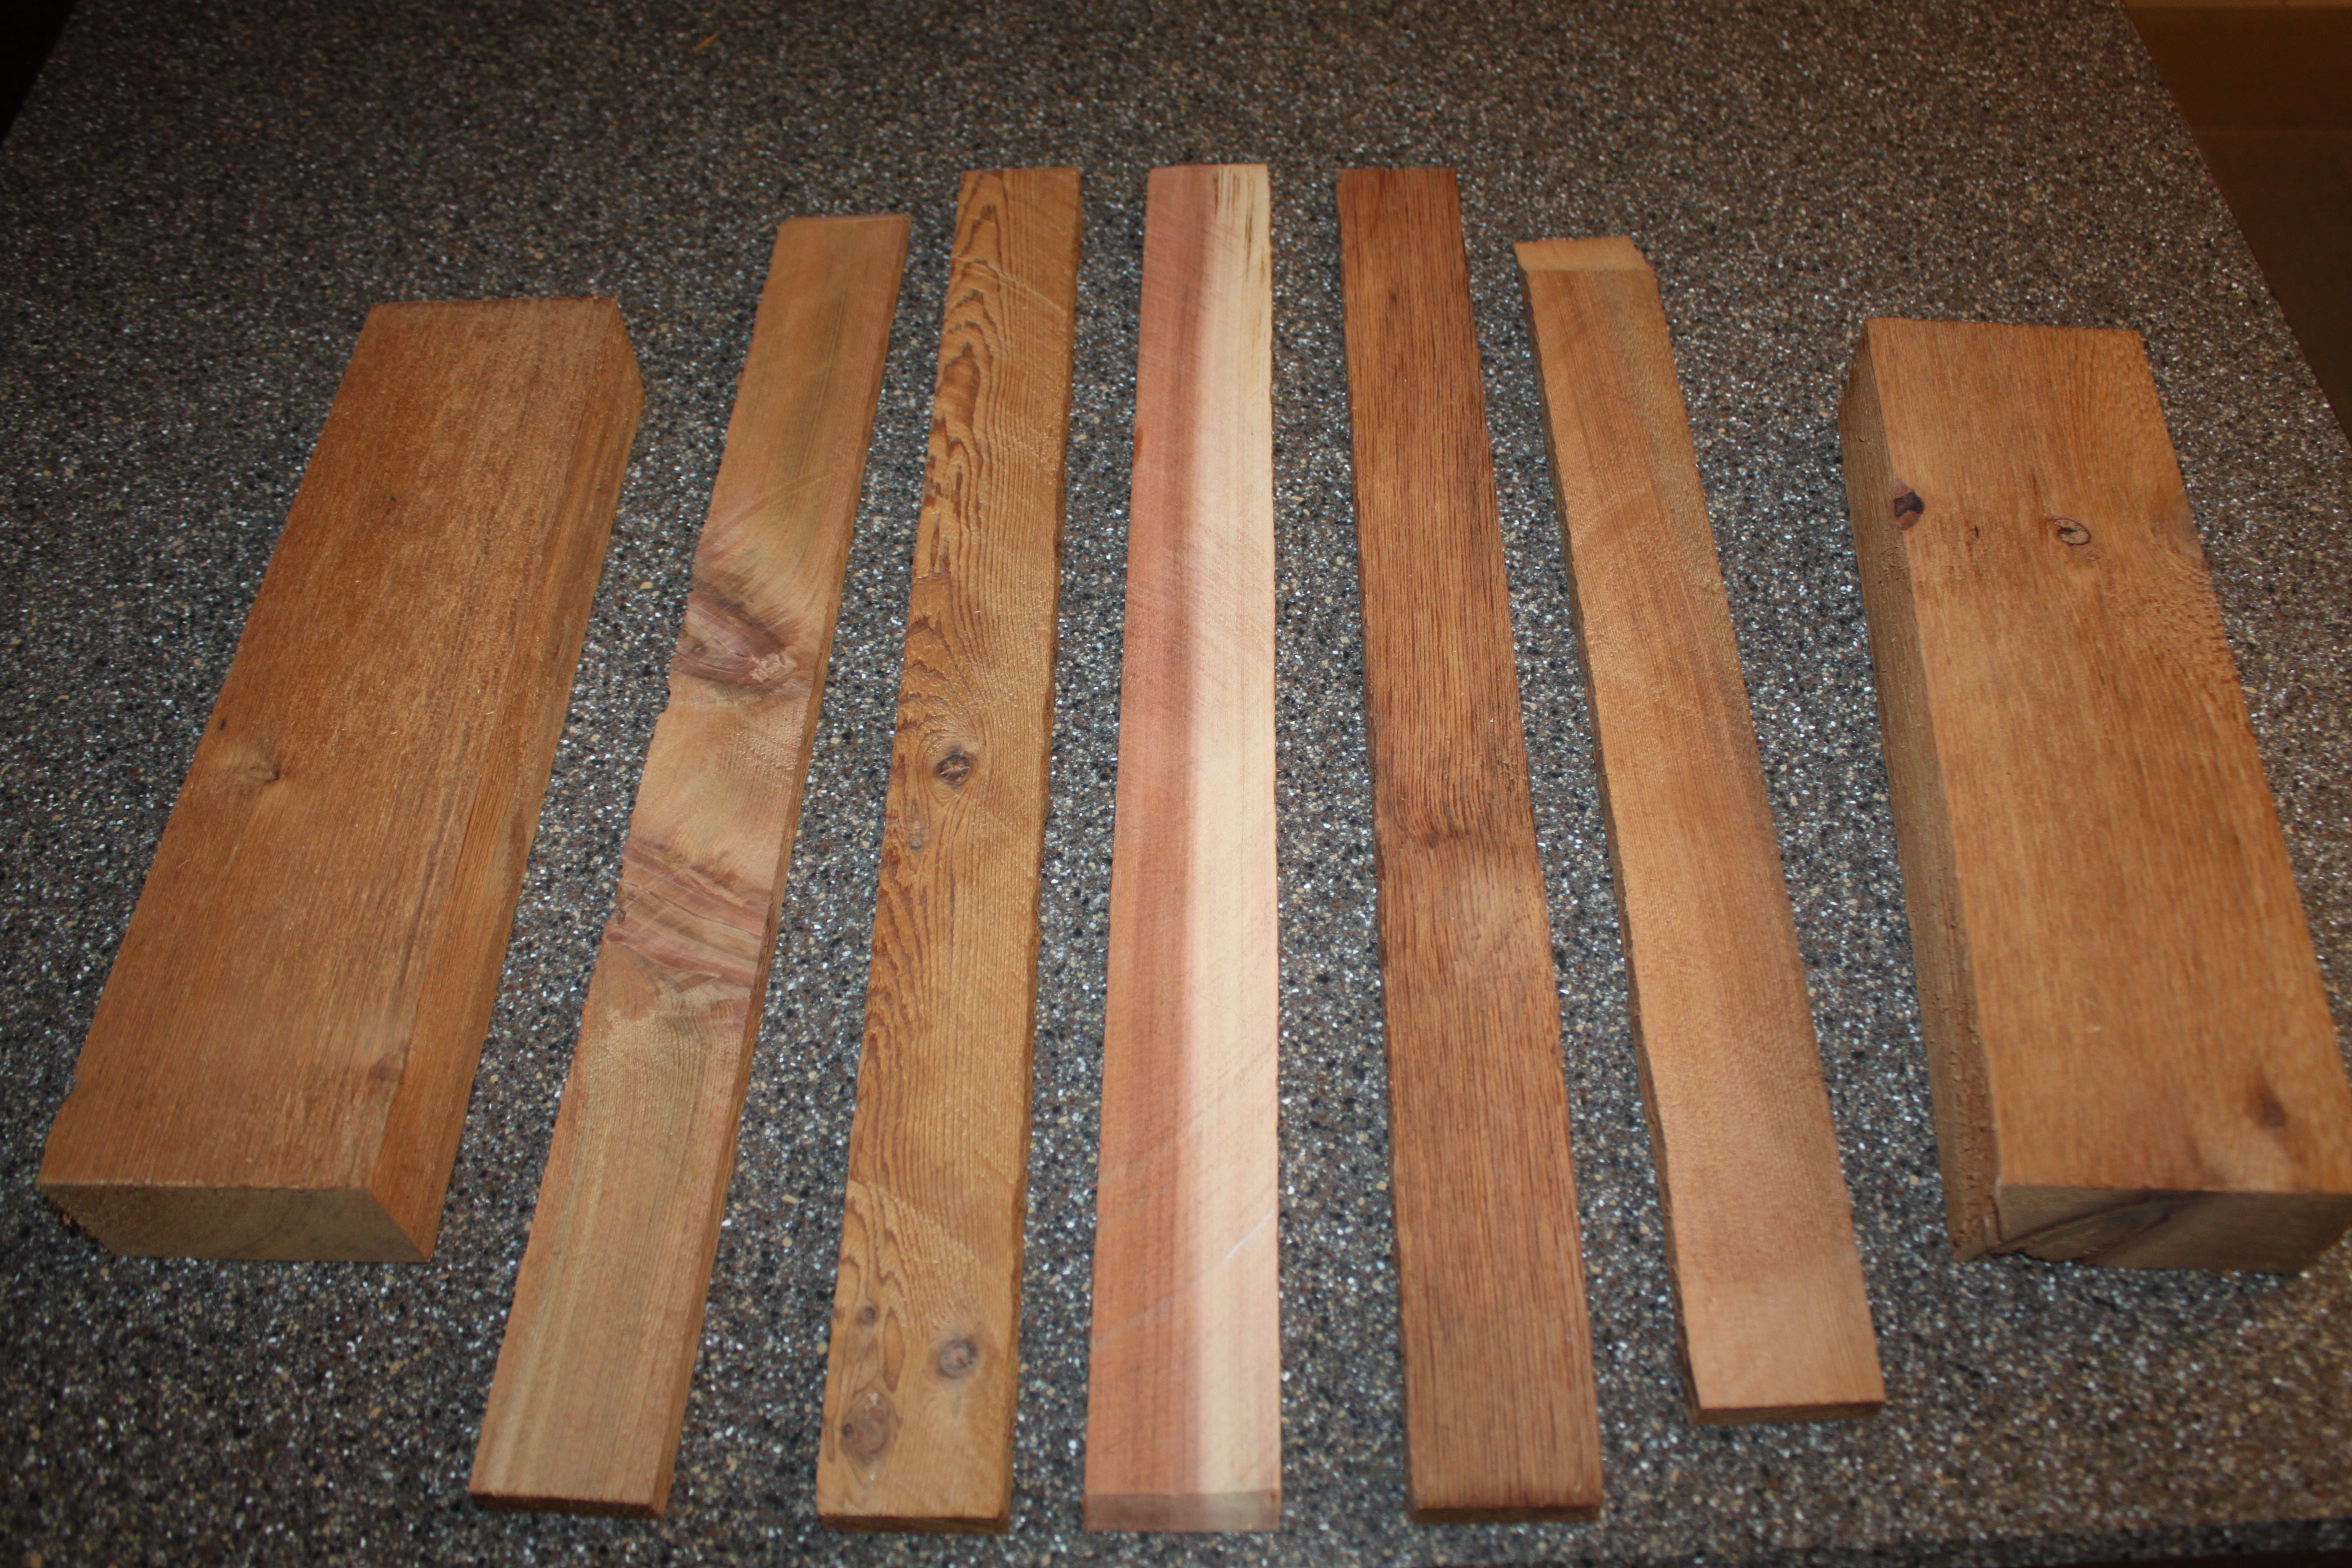
For safety of any food that may be placed in them – we use only untreated lumber or pallet wood when building ours.
Here is how we make them:
To create a basic crate, you need slats and 4 corner posts. You can make the crates without the corner posts – but if you plan to put any type of weight in the crate – you will want to use them.
The crates we made here are 18”L x 9”W x 6”H. These seem to be an ideal size for us, but you can adjust your crate size as needed simply by creating longer or shorter slats. For our crates, we needed a total of (4) 6″ posts, (11) 18″ long slats, and (6) 9″ slats.

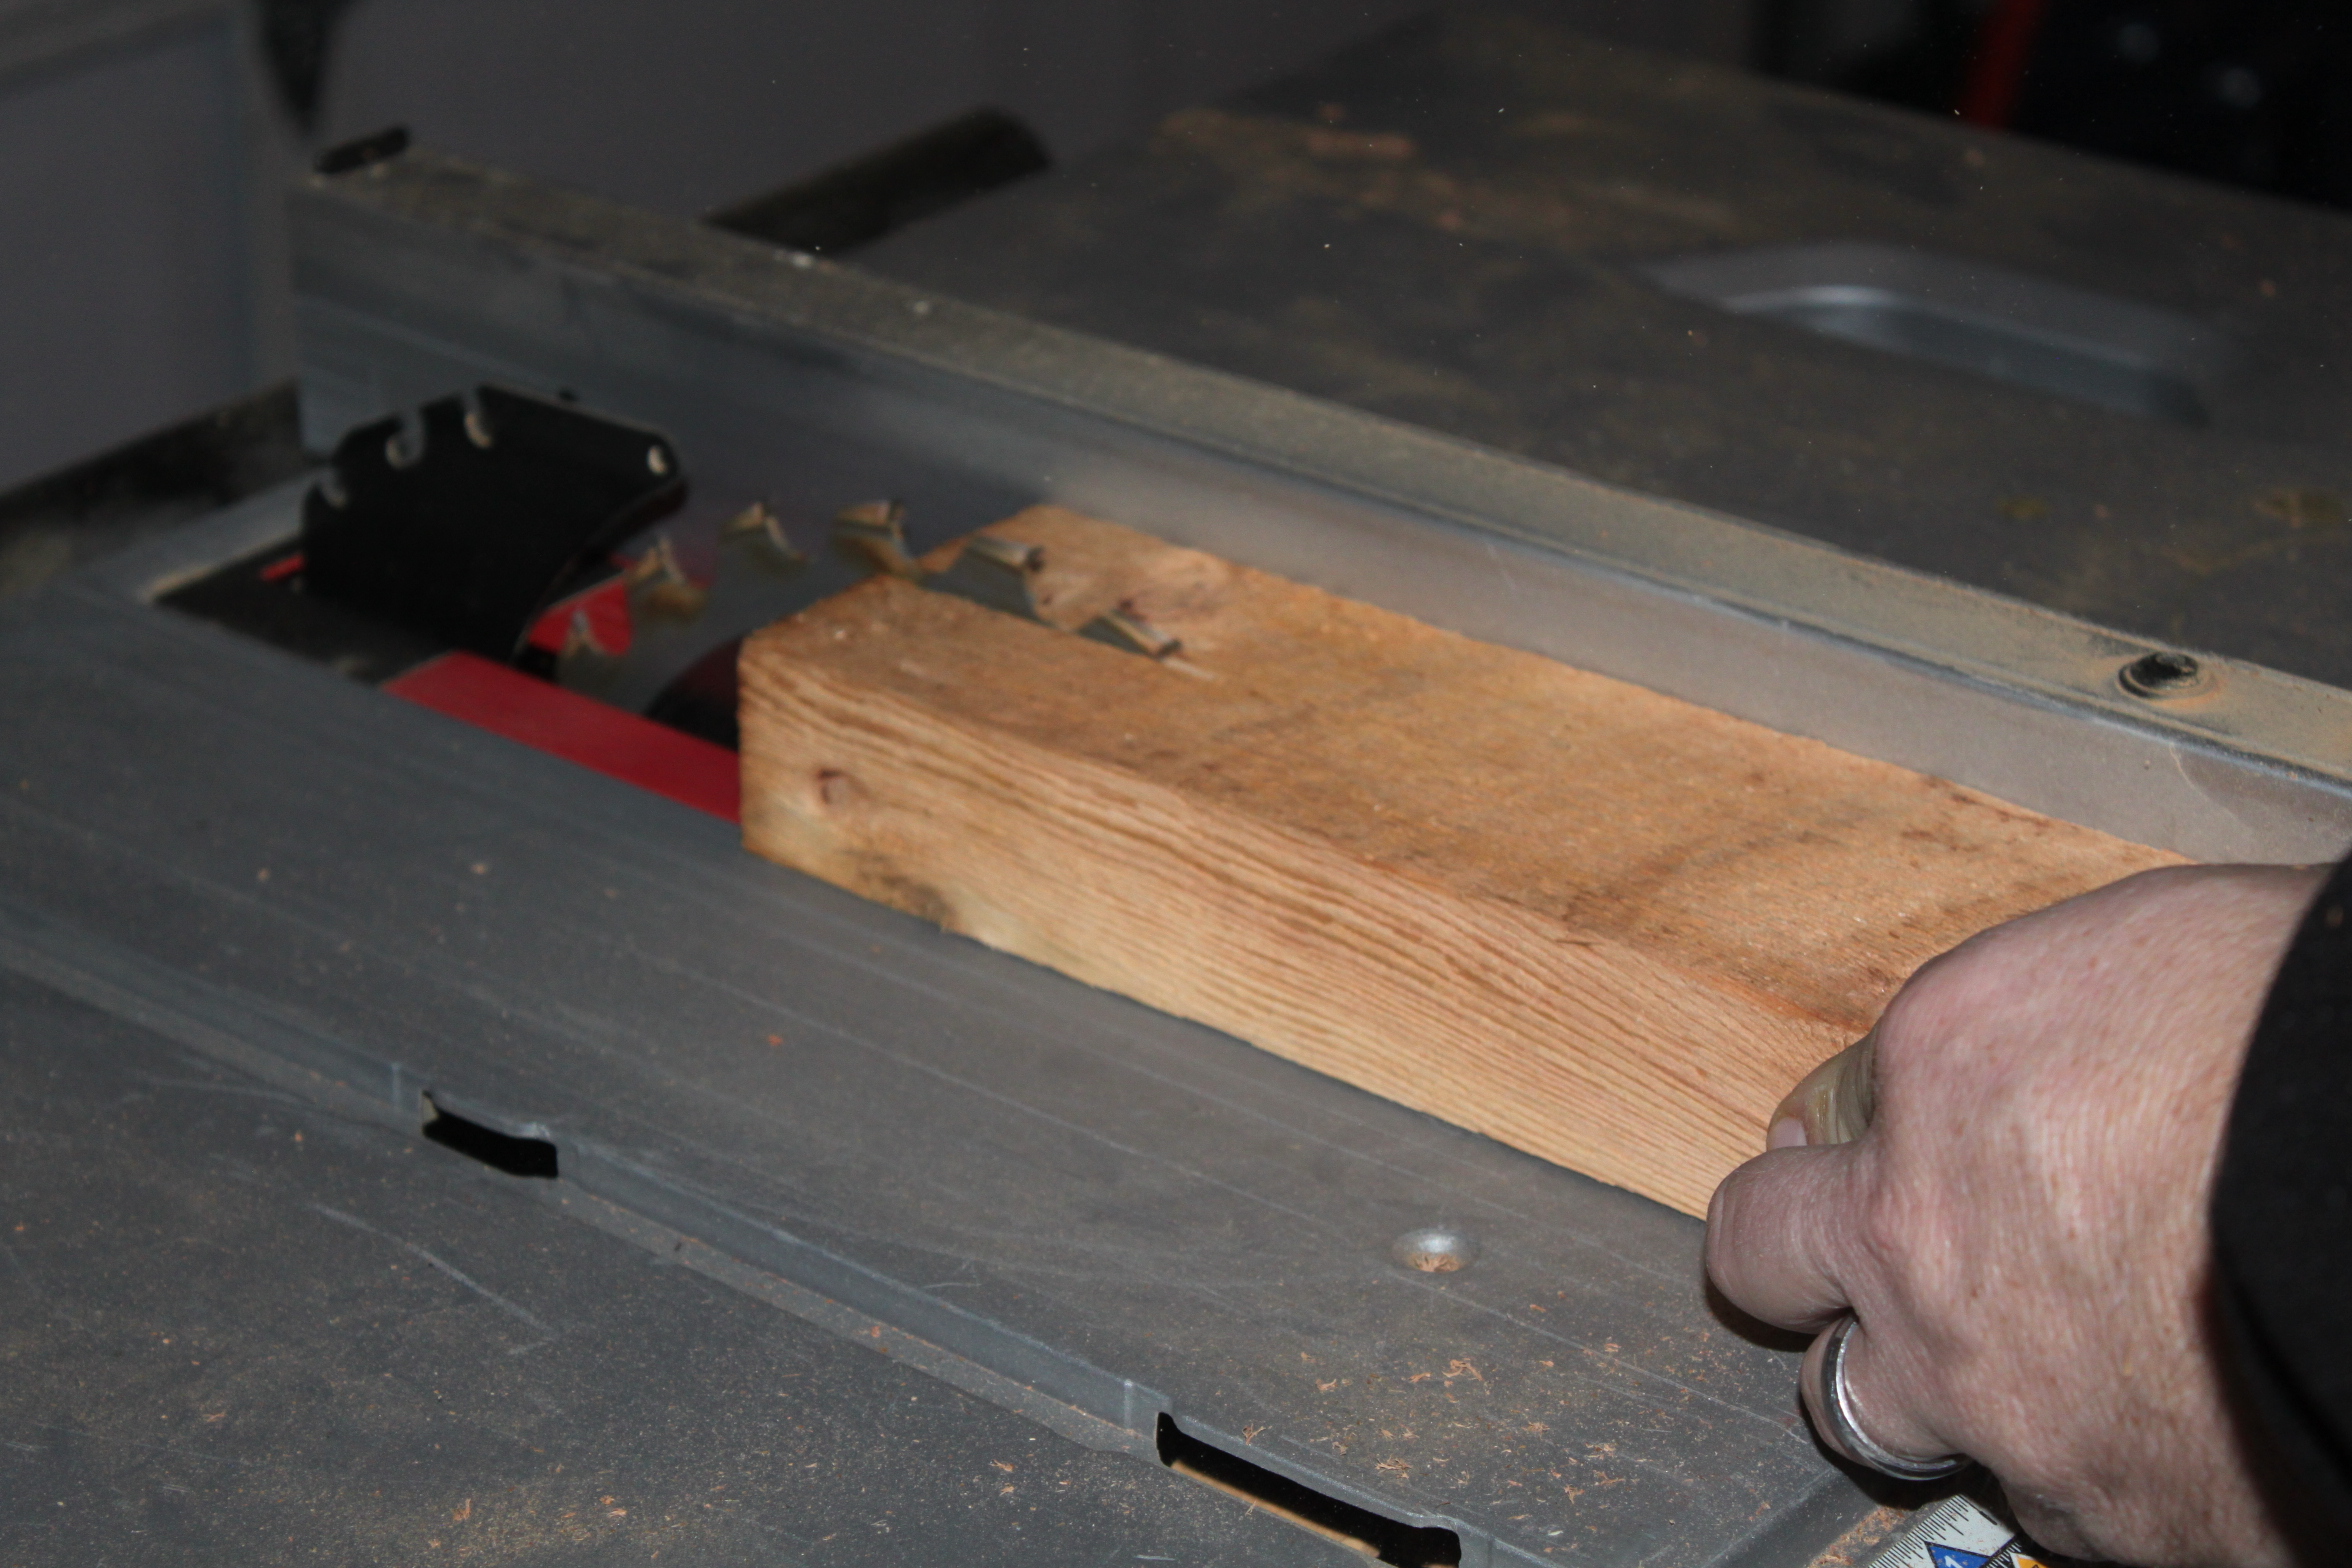
If you are using scrap 2 x 4’s, you can make your strips by setting your fence guide to ½” and running the 2 x 4’s flat through the blade. With a typical 2 x 4 (which really measures 3 ½” wide), you can usually get six to seven slats out of each piece, depending how thick your blade is. A single 5′ piece of lumber can make a crate. You can also of course, use smaller scrap pieces that are long enough to make the slats.

Pallet wood works great for making slats as well. Some of the lighter weight pallets use ½ rough-sawn lumber for the top boards. For these – we just cut the boards into 1 ¾” wide strips and have a near endless supply of pieces to make crates with.

Assembly is pretty simple. We started by fastening the 18″ sides together first. We spaced out three of our 18″ strips to the ends of two posts, and then used a staple gun and a little glue to attach.
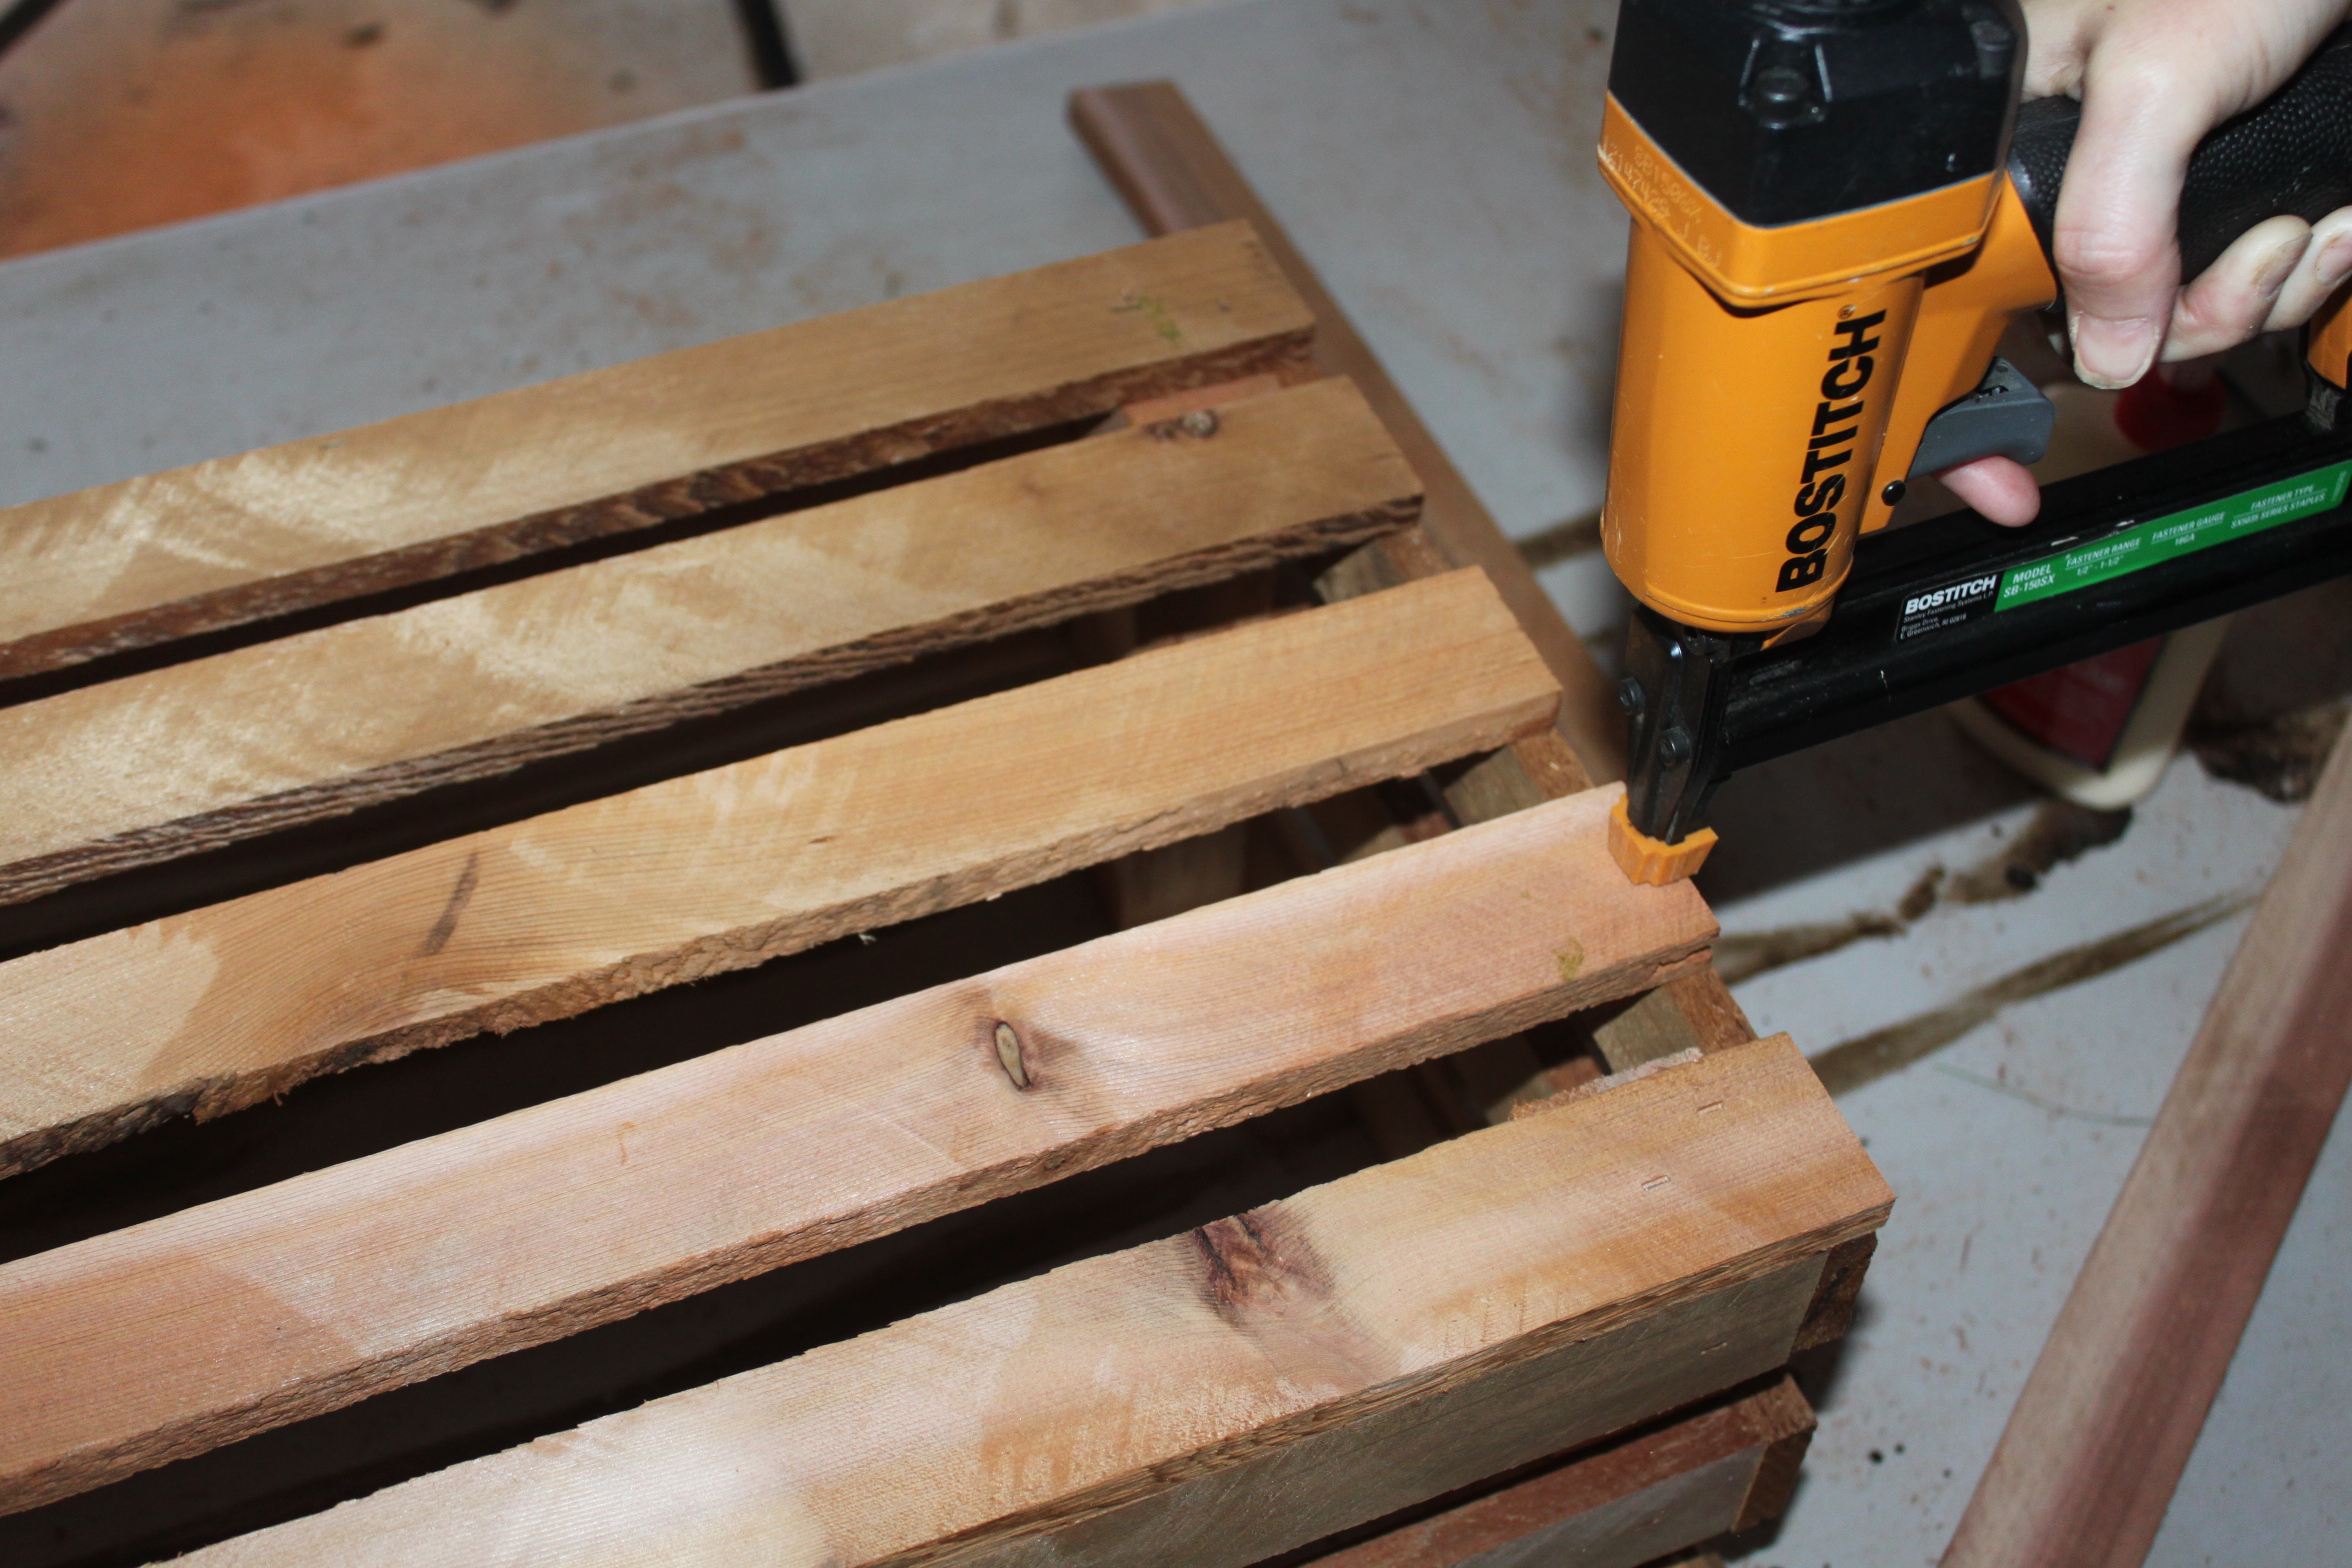
We repeated the step for the other side, and then attached the 9″ ends to create the crate rectangle. By stapling into the corner posts – the crate is much stronger.
To finish it off, we spaced 5 strips along the bottom. We stapled the two sides first – putting a couple of staples into the bottom of the corner posts. For the 3 slats in the middle – we glue and stapled the slats into the side slats. With that – your crate is finished!
We spent a little time before-hand cutting out a stack of slats and corner posts – and once we got to assembly – we were able to put the crates together in just a few minutes.
Now – all that is left is to repeat the process a few more times and we will have a nice stash of crates to handle all of our harvest in the coming years!
If you would like to receive our DIY & Gardening Tips every Tuesday – be sure to sign up to follow the blog via email in the right hand column, “like” us on Facebook, or follow us on Twitter.
Happy Gardening and Building – Jim and Mary!