Whether it’s a big roaring bonfire to sit around and enjoy with friends – or a small little campfire to cook a simple meal over – there seems to be something special about an outdoor fire.

The Fire Pit Area. This picture was taken right after we laid down the gravel limestone pathway base.
Our outdoor fire pit project has been on our goal list for the last two years – and it has been on Mary’s brother Rob’s list for us to complete for three! 🙂
So we decided with the garden in growing mode, and still a few weeks before we can start the cabin project – it was time to make it a reality and finally be able to give Rob his wish of sitting by a roaring fire on his next visit to Ohio.
Our goals for the project were simple: create it from stone to match the existing landscape rock, make it large enough to have 10 to 15 people sitting around it comfortably, and build in removable pipe sleeves to hold a soup kettle or cooking grate when we want to cook on it. Oh yes, and one final thing – do it as cheaply as we can! 🙂
We have actually had the space picked out for the pit since we first created the farm – a small sitting area off the main walkway to the barn and upper pergola, and with a really good view of the garden, coop, barn and vineyard area.
Getting Started…
So, a few weeks back, with little more than a few shovels and a wheelbarrow, we began. Simply using a string tied to a round stake in the center of the pit, we used an old can of spray paint to mark off the pit and the circular sitting area.

The trench ready for the pour with gravel base and old fencing used for reinforcement of the concrete base
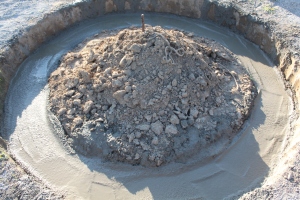
We dug down 18 inches to form the main pit – and then dug an 18″ wide trench around the outer edge of the circle to create a strong footer base.
To form the base for the sitting area outside of the pit – we used inexpensive limestone packing dust and created a 10′ wide area.
Once everything is completed, we will come back and add a few inches of pea gravel on the surface to finish the sitting area off.
We have used this limestone dust/pea gravel combination for all of the paths and walkways on the farm. Not only is it extremely inexpensive, it looks great as well and is easy to maintain.
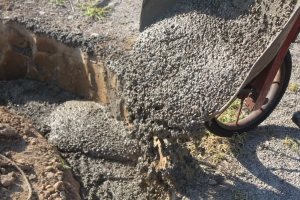
With everything dug out for the pit, we poured the concrete footer this weekend. It took 13 bags of 80 lb. mix, about 26 gallons of water, and nearly every muscle that we had in our bodies – but we mixed and poured it all in a little under two hours. To add a little strength to the foundation, we cut up some old fencing wire and placed in the trench before pouring the concrete.
Final Steps…
With the concrete footer poured and in place – we will now give it about a week to cure and begin the process of building the stone walls of the pit. We are fortunate to have a quarry just a few miles from the house – so we took the ol’ Ford down and picked up 1.5 tons of 6 to 10″ boulder stone to build the walls at a grand total of $19.30.
Now comes the fun. Over the next few weeks, as time allows, we will begin the process of stacking the stone wall and mortaring it into place one stone at a time. It’s actually as simple as working a puzzle, working with the pieces until you find what fits, and then “glueing” them in place with the mortar.
Once the walls are complete – we will bury 24″ long hollow pipes on the inside and outside of the pit to hold the grate and kettle stand when we use the fire pit to cook.
Hopefully within a few weeks we will be able to sit around the new fire pit and enjoy a meal from the garden. I think more than anything I am most proud of the fact that when it is all said and done – the whole project should come in at right around $125 – not bad when you consider all of the good time we should be able to have there!
If you would like to receive our DIY & Gardening Tips every Tuesday – be sure to sign up to follow the blog via email in the right hand column, “like” us on Facebook, or follow us on Twitter.
Happy Gardening,
Jim and Mary Old World Garden Farms


