Fall is usually the time to begin our normal routine of planting our over-wintering crops of garlic and onions – and putting the rest of the raised rows to bed with a nice thick cover crop of annual rye. Although these chores will still take place in the coming weeks – this fall will include some additional work as we start to make a few upgrades to our garden space.
The garden and raised rows have performed beyond our wildest imagination the last four years – but that doesn’t mean there are some things we have figured out through experience that might work a little better. So we decided it was time for a garden re-design with a little tweaking here and there.
The Garden Pathways – Switching to a deeper mulch and a more permanent look.
We have always kept the main garden walkway and the paths surrounding the outside in grass.
It was easy to maintain, inexpensive and quite honestly worked very well. But it had some drawbacks. Mowing and trimming it each week are two that come to mind immediately :). In addition – the grass really held in the morning dew, and could pretty much soak through to your socks.
This fall – we are going to replace the main grass walkway with the packed limestone and pea gravel that has worked so well for other walkways around the farm.
Re-sizing the Growing Rows and Walkways
The next chore will be to re-work the growing rows and walking paths in the actual garden space. All of our current growing rows range anywhere from 18″ to 28″ wide.

We will re-size all of the growing rows to a uniform 18″wide x 20′ length raised row to allow for better use of the garden space.
One thing we have really noticed over the last few years is that the 18″ planting rows work just as well as the wider ones to grow all of our crops – and has of course much less space to keep weed free. It also allows us to conserve our valuable compost and other organic materials even more – applying it in just the 18″ wide x 20′ long rows where the plants actually grow.
As one final added benefit – creating all of our rows to be just 18″ wide allows for our walking rows between plants to be a little more spacious – going from around 24″ to 32″. That extra space will make it easier to walk between for watering and harvesting.
Adding A High Fence – Recycling For A Better Look

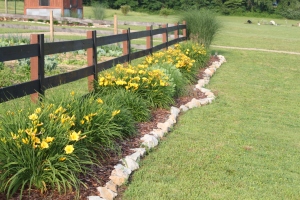
The post and board fencing currently around the garden – and about to be moved to the chicken coop area.
A little over two years ago – we installed post and board fencing all around the garden – which has worked well to define the space and deter deer. But a few weeks back we created a few larger decorative fencing panels in another area of our farm – and we both instantly realized this should be the look for the garden as well. (yes – it’s true – unfortunately – projects always lead to more projects around here 🙂 )
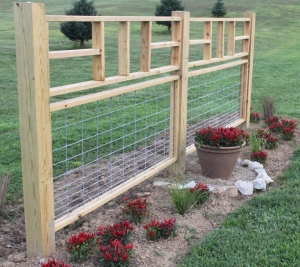
The new fencing that we will put up will be 6′ high – and is actually created from livestock fencing and scrap 2 x 4’s we had on hand.
To make the fencing – we use inexpensive livestock panels (16′ x 3′ high for $24). Using 2 x 4’s as the frame – we just ran a simple groove cut around the middle of the board for the panel to rest in – and then assembled the frame around it. It creates a great looking wire fence.
For the top – we had plenty of 2 x 4 24″ scraps on hand from making pergola cuts – so we used those to make a decorative design for the top half of the fence.
The end result – we can create 16′ of heavy-duty 6′ high fencing that looks great and should last forever much less than purchased fencing. And although we are lucky enough not to experience too much trouble with animals – it will certainly help to deter deer and smaller animals with the fencing at the bottom.
So – what to do with the old post and board fencing?
As for that old post and board fencing – you know we had to find a good use for it. In fact – we have the perfect place for it – our chicken coop run area!
We have been wanting a more permanent look for our chicken runs in the back of the coop – and this re-work of the garden fence provided the perfect opportunity. For the last few years – we had used simple T-posts and chicken wire to create open spaces for the chickens to roam – although it worked well – we just never really liked the look.
As we build the new sections of the garden fence – we will disassemble the old post and board fence and relocate it to the chicken coop area for a permanent fencing structure for their outside runs. It will be nice to simply open a gate every few weeks to give them a new area to scratch and run – and will look a lot more pleasing to the eye than the chicken wire we had on the T posts.
We will build two separate fenced-in areas to the right and left of the back coop awning. In between the 4 x 4 posts – we will attach welded wire fencing to keep a nice clean look – and the chickens out of our garden 🙂
The Potato Crate…that never had to be built…
Then there is the potato crate project for next year.
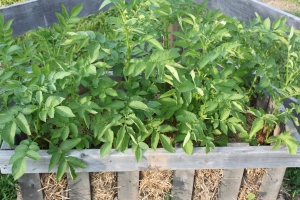
As we talked about a few weeks back – we experimented with a couple of our small wooden crates to plant our potatoes in this year. The experiment worked so well – we decided to expand into using long home-built crates for next year to grow all of our potatoes.
I was all set to begin building the crates from pallet wood when a little luck had them built for me.
I happened to be at a farm implement dealer this past week purchasing a few things – when out of the corner of my eye I spotted a long crate outside. I walked out and realized it was a simple 16′ packing crate for a combine head – and asked if I could have it when they unloaded it.
And that was that – the potato crate is complete! Well – minus a little work to put in some chicken wire to hold the soil mix. It never ever hurts to ask!
If you would like to receive our Sunday Farm Update – be sure to sign up to follow the blog via email in the right hand column, “like” us on Facebook, or follow us on Twitter.
Happy Gardening,
Jim and Mary
Old World Garden Farms


