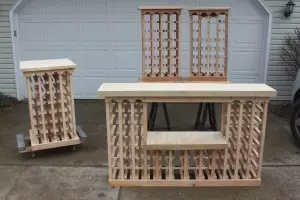
Sometimes, simple can be elegant. A few years back, when we featured our large 60 bottle DIY wine rack built from pallets and old barn wood – we had a lot of followers email and ask if there was a way to make a smaller version.


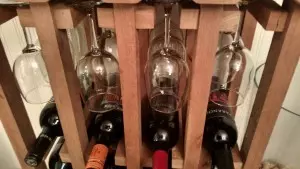
The 20 Bottle Wine Rack
So, using much of the same methods in building the larger rack – we created a mini version for today’s DIY post. The rack holds a modest wine collection of 20 bottles – and a set of 12 wine glasses to boot!
The entire piece measures just 21″ wide x 11″ deep x 36″ high – and can be painted or stained to fit in with any decor.
Better yet – it can easily be created in an afternoon from scrap lumber or pallets – for free! This can make the perfect Christmas gift for those friends and family who enjoy wine!
Tools Used : For this project, we used a table saw, chop saw ( a jig saw or hand saw can be used in place), nail gun and a hand sander.
Selecting The Wood:
Whether you are using new boards, pallet wood or reclaimed lumber – you will want to make sure your boards are somewhere between 3/4″ to 1″ thick. Any thinner, and the boards may not be able to support the weight of the wine.

The wine glass holder
Any larger – you will end up with a monster sized wine rack! As for the quantity of wood needed, you can create the entire rack from just a couple of 12″ wide x 6′ long boards, or a mixture of smaller pieces if available.
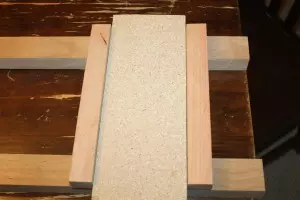
For our project, we used salvaged pieces of 1″ rough-sawn oak.
Not only was it free – but the rough edges of the wood make for a great rustic look.
One quick note – if you plan on staining or painting your rack – do it BEFORE assembly. Trying to stain or paint all of the nooks and crannies makes for a difficult job once the rack is put together.
Building The Rack
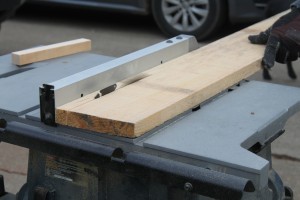

We used the table saw to quickly rip down the boards into 3/4″ strips
The wine rack is a basic assembly of small ladders with rungs that are separated by 3.5″ of space – enough to easily hold and store a standard 750ml wine bottle.
The ladders are then spaced 3.5″ apart as well, and are held together by attaching a top and bottom board trim board to the front and back, and finishing off with board for the top.
Much like our previous rack, we started by cutting the wood into 3/4″ wide strips with our table saw. These will make up the rungs.

Cutting the 2″ rails
If you don’t want to cut the wood, or don’t have access to a table saw – you can always purchase 3/4″ x 3/4″ strips of wood from most lumber stores. It’s a little more expensive – but can make quick work of the project.
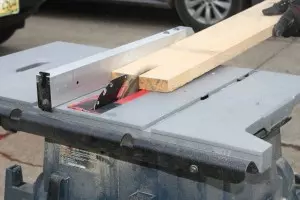
Once the strips are cut, we used a chop saw (you can use a jig saw or hand saw as well) to cut the rungs into 9″ lengths. You will need a total of (48) 9″ long strips to complete the rack.
Next, we again used the table saw to cut a few boards into 2′ wide strips. These will make up the “rails” of the ladder and the top and bottom assembly pieces.
You will need a total of (8) 2″ wide x 36″ long strips for the rails, and (4) 2″ wide x 18.5″ long pieces for the top and bottom pieces.
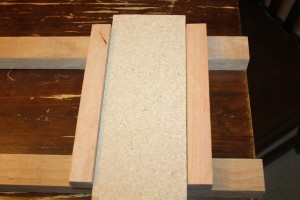
You can make a 3.5″ “cheat” board to help keep the rungs spaced perfectly
All that is left is to cut a piece of wood for the top. For ours, we used a 3/4″ thick board that measured 12″ wide x 23″ long. This allowed for a nice overhang around the rack.
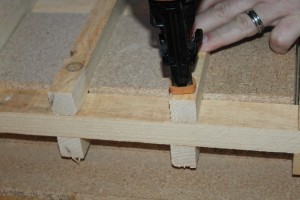
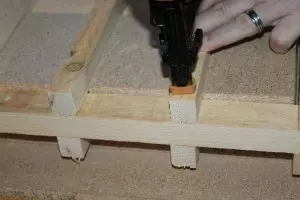
Now that you have all of your pieces cut – its time to assemble! Lay two rails flat, and make a mark 2″ from the bottom of your rails.
Using a nail gun (you can also screw together) – attach the first rung to each of the rails. The 2″ left at the bottom allows for the trim board to attach without affecting the wine storage.
Next, from the top of the rung – measure up another 3.5″ and make a mark, and attach another rung, making sure to leave 3.5″ of space between the wood.
Finishing the back of one of the three double-sided ladders.
To make this easy, we used a scrap piece of lumber cut to 3.5″ to make perfect spacing. Repeat this 3 more times until you have five rungs on your first ladder.
Now it’s time to add the rung for the wine glass holder. Measure up 32″ from the bottom of the rails (where you attached wine rungs), and make a mark on each rail – and attach a final 9″ rung.
Once you have your first ladder built – you will need to repeat the process to make 4 more ladders exactly the same way.
At this point, to make it easy – you can use your first ladder as a guide for where to put the rungs on each successive ladder you build. The two outside ladders will only need one set of rungs facing in, and your middle 3 ladders will have rungs on each side.
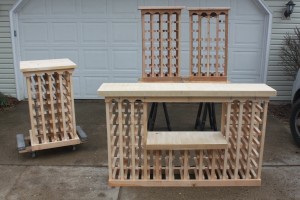
You can use the ladder system to build all sizes and shapes of racks
Next comes attaching the top and bottom trim boards to the ladders. Starting with the bottom trim board, attach the end of the board to the outside edge of the first ladder sections, repeat the process for the top board.
Next, leave 3.5″ of space between the first set of attached rails, and attach the next ladder. Continue on and work across the piece until you have all 5 of the ladders nailed in – making sure the last ladder nails to far edge of the trim board.
Once the sections are together, all that is left is to attach the top piece – and your set!
Happy Building! – Jim and Mary
If you would like to receive our weekly garden, diy and recipe updates – be sure to sign up to follow the blog via email in the right hand column, “like” us on Facebook, or follow us on Twitter.