Building Your Grow Boxes. Today is our second installment on creating the DIY Any Age Anywhere Garden. A container garden that lets anyone of any age – grow some, most, or nearly all of their food – even when space is limited.
Today’s article focuses on building your own grow boxes for the garden. You can view the first installment here : The Any Age Anywhere Garden
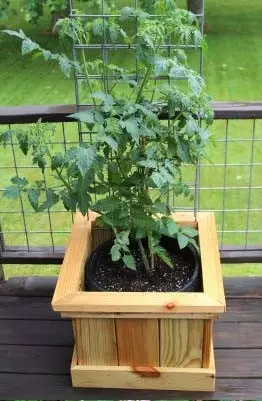
You can easily grow vegetables in containers on patio and porches.
The Grow Box is the workhorse of the Any Age Anywhere garden. It consists of 3 elements – a bucket, box cover – and attached trellis.
The cover not only makes the garden aesthetically pleasing – but also helps keep the soil temperature and moisture levels regulated. It also serves as a strong anchor for the trellis – which keeps plants growing strong in any environment.
The grow boxes virtually eliminate weeding. and make chores such as planting, watering, harvesting and fall clean-up a breeze.
Combine multiple grow boxes with a few small raised beds for crops such as lettuce and beans – and you have a full-fledged low-maintenance vegetable garden!
Even better – by scouring up a few 5 gallon buckets, making home-made compost, your own soil mix, and using pallet wood to build your boxes – you can virtually make an entire garden for free.
So let’s get started on how to create a Growing Box.
Selecting Your Growing Containers
Before building your grow box covers – it’s important to know what type of containers you will be using.
The size of your growing buckets will determine the size of your grow box covers. In our test garden this year – we will be using traditional 5 gallon buckets, along with 10 and 15 gallon nursery pots.
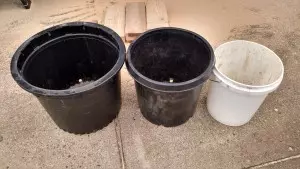
The 5 gallon bucket – and 10 and 15 gallon nursery pots used for our garden
All can be purchased of course – but with a little digging – you can usually find them for free. (Check your local nurseries – many times they will have left over containers at little to no cost)
As always – especially with 5 gallon buckets – make sure the containers are clean and have not been used to hold harsh chemicals.
As for what is best to use: 5 gallon buckets easily grow the more compact to mid-size vegetables – this would include determinate tomato varieties such as cherry, roma, celebrity and more.
They also work great for nearly all hot and mid size peppers – such as lunch box, banana, mini-belle, cayenne, cajun belle, habanero and jalapeno.
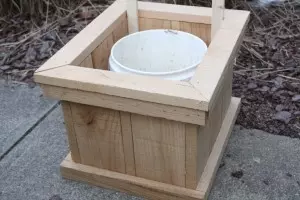
A finished grow box for a 5 gallon bucket
We will be using the 10 gallon nursery pots for our larger indeterminate varieties like amish paste, purple cherokee, brandywine and black krim tomatoes – along with green, red and yellow bell peppers and our climbers like cucumbers and zucchini.
You could use the 5 gallon containers for these – but the additional soil content gives those larger varieties more room to grow a full root system.
We will use the 15 gallon containers to trial a few huge tomato varieties like the mortgage lifter – seeing if the extra soil adds to the plant’s vitality.
A final note on the containers – whatever you use – make sure they have plenty of holes drilled in the bottom to allow for drainage.
For the 5 gallon buckets – we drill (8) 3/4″ holes in the bottom, and a couple on the side a few inches from the bottom. Most nursery containers will already have holes in them and are ready to go.
Building The Grow Boxes
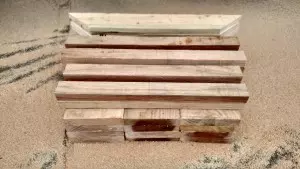
You can use any wood material to build your box. These are pieces of rough sawn barn lumber cut and ready to assemble.
Since the soil and plants never come in contact with the wood – you can use reclaimed lumber or pallets to build your boxes – meaning they can be made for little to no cost.
You can also use traditional 2 x 6 framing or treated lumber as a low-cost alternative. All work and look great – and can be painted or stained to dress up the finished box.
No matter what size – the building process is the same. You need to simply make sure that the completed box is large enough to fit over the container you will be using – and that there is enough room left to install either the metal or wooden trellis.
Let’s use a 5 gallon bucket as an example.
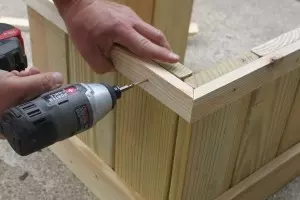
Attaching trim pieces
Most 5 gallon buckets measure 12″ wide and about 14″ to 14.5″ high. So by creating a grow box with a minimum 14″x 14″ inside measurement and a height of 15″ – you leave plenty of space for the bucket and the trellis inside, and enough height to cover the bucket.
2″ x 6″ framing or 1″ x 6″ decking lumber actually work great for the 5 gallon bucket grow boxes – creating a perfect 15″ x 15″ inside diameter when put together and overlapped on the ends. (see picture). To hold the boxes together – we attach a simple trim piece to the bottom and top of the grow box.
You can get as basic or fancy as you like with the trim. Straight corners are strong and quick to assemble, but you can miter the corner trim pieces at a 45 degree angle for a more “elegant” look.
For those that learn by watching – stay tuned – we will post a video with next week’s article showing the complete process of a 5 gallon bucket cover build.
Building and Attaching the Trellis
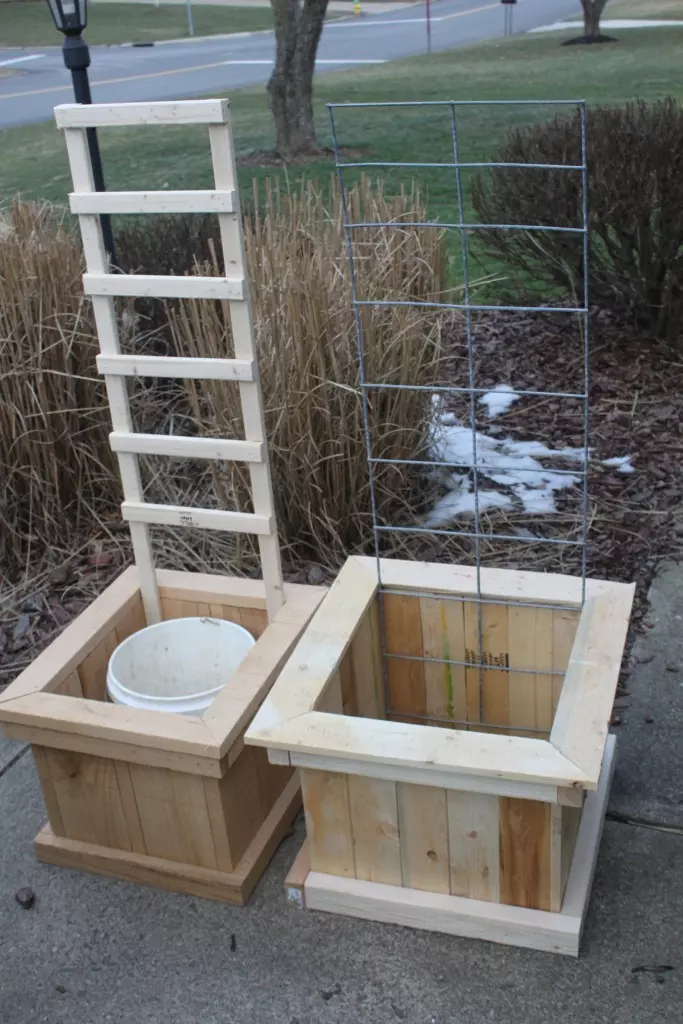
Finished boxes with a wire grid trellis and wood trellis
Once your box is complete – all that’s left is to build and install your trellis. For our trellises – we purchased a 48″ x 16′ long cattle panel for about $22 – cut it down into 15″ wide strips, and then fit them inside of the grow boxes to form an instant sturdy 4′ high grid.
If you like the “all-wood” natural look, or you are looking to build these entirely for free – you can also quickly make your own from 1/2″ to 3/4″ strips of wood assembled together into a homemade trellis.
In addition to the building video, next week we’ll cover setting up the entire garden space, and how to create the soil mix to grow your Any Age Anywhere Garden.
Be sure to sign up for our free email newsletter to get our 3 articles each week – delivered straight to your inbox. You can do so in the upper right hand side bar of this page.
Happy Gardening! – Jim and Mary
