When it comes to building with shiplap, the sky really is the limit! This incredible wood can be used for so much more than just great looking walls.
It is actually the perfect wood for DIY’ers looking to build nearly any type of project.
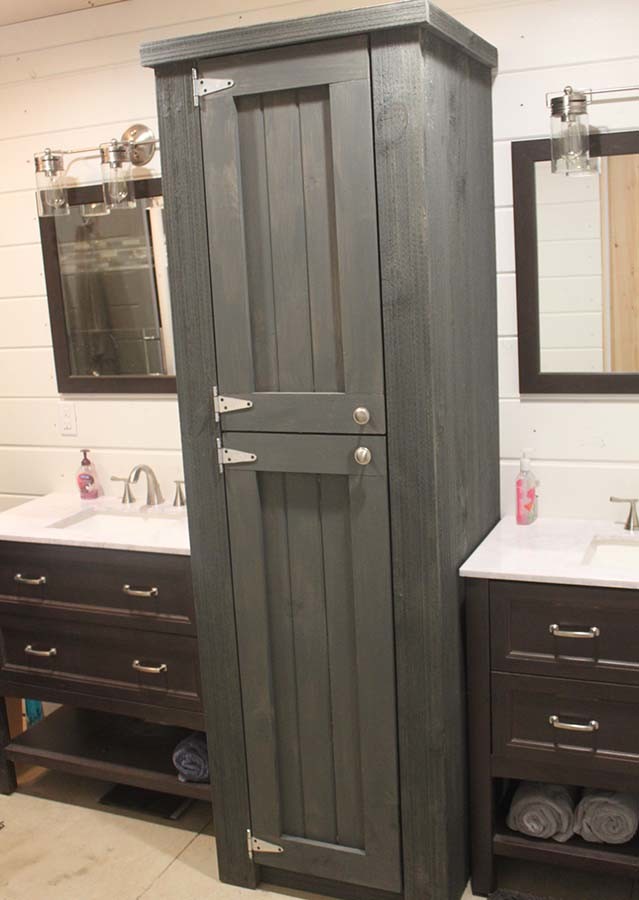
The shiplap vanity built for the bathroom
In fact, we have used it create much of the furniture in our home. That includes a kitchen island, vintage hutch, bathroom vanity cabinet, wine rack, and even a chicken coop!
Shiplap is 3/4″ thick pine wood that can be purchased normally as boards ranging from 6″ to 10″ wide. The surface can be smooth (planed), rough sawn, or with one side of each.
Not only is the wood extremely beautiful and durable, it is easy to work with. The pine saws and shapes easily.
Best of all, it’s inexpensive when compared to working with most woods. We sourced ours locally from a sawmill for around .70 to .80 a board foot.
Here is a look at just a few of the projects we have created from shiplap. We included a rough estimate of the total cost, along with the basic tools used for all the projects below.
I think the fact that you can create so much without a huge collection of tools make it best of all.
It’s easy to see why shiplap really is the all-purpose, DIY craft wood!
Basic Tools Used
Porter Cable Multi Tool 20v Kit
All Purpose Construction Star Screws
Swanson Speed Square – One of my favorites!
Building With Shiplap
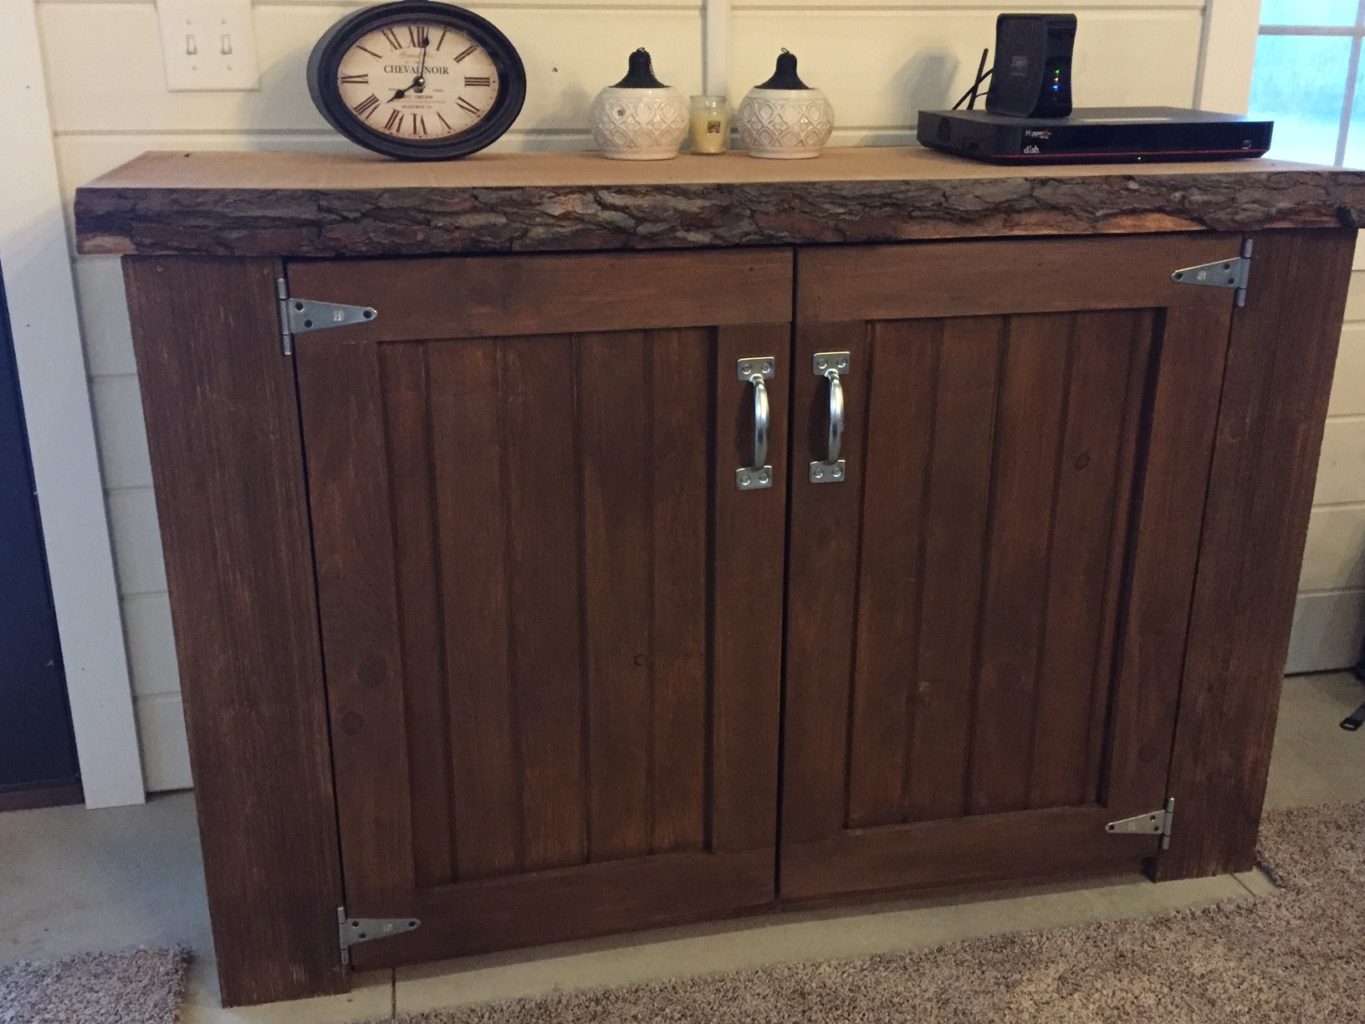
The shiplap blanket / tv hutch
Shiplap Blanket / TV Hutch – Total Cost : $60
With a wide open living space in the house, we needed to come up with a storage solution that fit the decor.
So we turned to shiplap to create our Blanket /TV hutch.
We used basic 2 x 4’s to create the frame, then wrapped the piece with rough-sawn shiplap. We used the smooth side of the shiplap to create the doors and a shelf inside the cabinet.
To finish, we added hinges, a live edge piece of cherry for the top, and stained to match the room.
The Shiplap Kitchen Island – Material Cost : $225.00
This piece will be covered in an upcoming DIY article, and was a huge savings to our home building budget! We framed our large 7′ x 3′ kitchen island from 2 x 4’s.
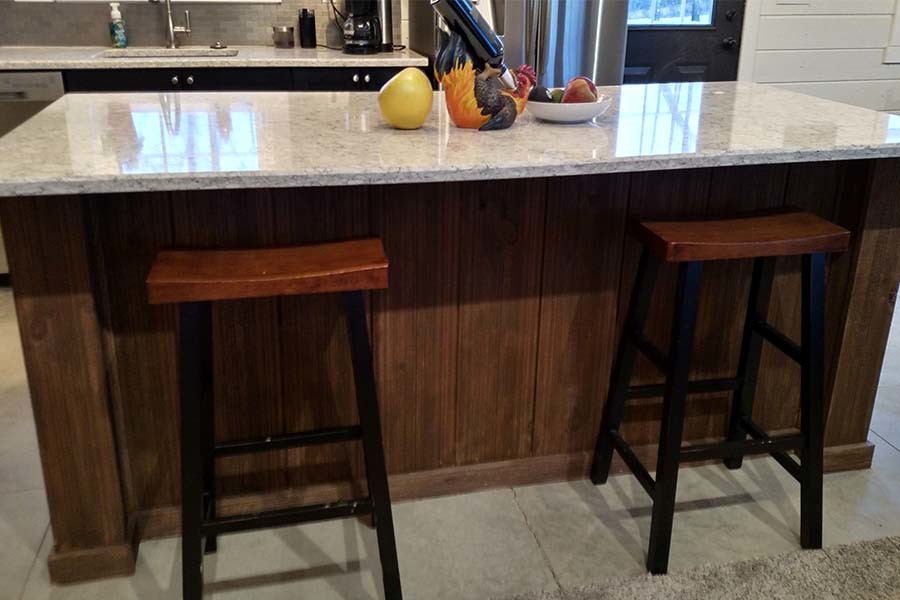
The shiplap kitchen island
Using cabinet grade plywood – we covered the inside of the frame and portioned off into 4 large and deep shelves.
We then covered the exterior with, rough-sawn shiplap, and made sliding doors for the side facing the kitchen. To attach the sliding doors, we used inexpensive closet hardware.
We then covered it with a quartz countertop to match the piece to the remainder of the kitchen. The price listed is for the complete island construction only, not the countertop.
The Shiplap Chicken Coop – Material Cost : $110.00
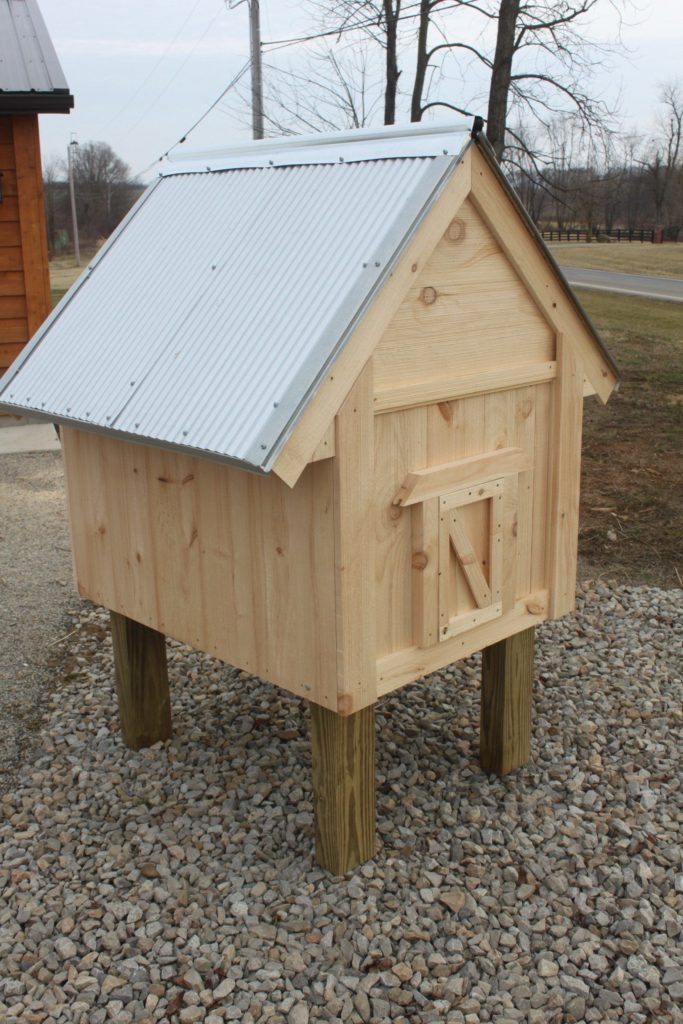
The shiplap chicken coop – building with shiplap can be fun!
What do you do when you have some leftover shiplap? Why not build a little chicken coop!
Ever since creating our plans for our large and mid-sized coops, we are often asked by readers to come up with a small backyard coop version that could hold 2 to 4 chickens.
So, with some left-over shiplap from our house projects, we spent a little time to create this little shiplap chicken coop. We will have this featured in an upcoming post, and make the plans available as well. I have to say, it might have been our favorite thing to build!
Happy Building! – Jim and Mary.
We hope you enjoyed this week’s gardening article! If you would like to receive our DIY, Gardening and Recipe articles each week, you can sign up to follow the blog via email in the right hand column above, “Like” us on Facebook, or follow us on Twitter. This article may contain affiliate links.