Now is the time to get ready for a successful canning and preserving season! One of the best things about growing your own food is keeping it the year around for great homemade taste! For an individual who wants to start canning for the first time, or for the seasoned veteran, here are a few secrets to help you have a successful canning season this year.

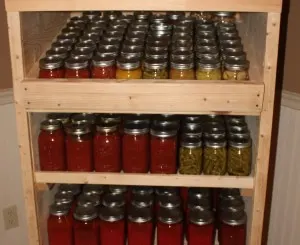
The results of our canning efforts one summer.
The most important thing to remember about canning is to simply not be afraid to try! Maybe you have only water bathed before and never uses a pressure canner. Whatever it is, if you are feeling a little nervous, ask someone to help you or try it out with you.
Having the support and accountability of a second person will make you take the leap and feel more comfortable trying something new.
We have been canning for many years, but one thing that we realize is that we can never stop learning. We like to stay on top of approved canning methods and provide recipes that are safe and healthy for our family and friends. If there is one rule of successful canning, it is just that – be sure to use approved, try and true methods.
So as canning season approaches, we thought it would be a good time to reveal our 7 secrets to a successful canning. Feel free to share your own thoughts in the comments at the bottom as well!
The Products That We Use
We get many emails about the products we use when we can. So we thought it would be helpful to list them here:
Ball Water Bath Canner
Presto Pressure Canner
Canning Utensil Set
Portable Kitchen Timer
Kitchen Towels
Canning Jars
Canning Lids
7 Secrets to a Successful Canning Season
1. START SIMPLE

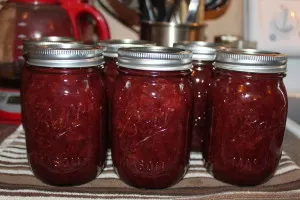
Canning jam is an easy way to get started.
If this is your first time canning, start with simple recipes such as jams and jellies. Most of these recipes require only a few ingredients and use a more simple method of canning which includes a hot water bath (not pressure canning). If you are going to try pressure canning for the first time, do so with small batch recipes. Pressure canning requires more time in order for the canner to come up to and release the pressure so you will want to start off with recipes that will fill your pressure canner, but not require multiple batches to be processed.
2. RECIPES AND PROCESSING RECOMMENDATIONS
Always, Always, Always follow an updated and approved USDA recipe for canning. Just because you have a recipe from Grandma’s recipe book, it does not mean that it is safe to use today. The acid content in many vegetables have changed over the years and many methods used for canning decades ago are no longer safe. You must also follow the recommended processing procedure. For instance, those canning recipes that sealed naturally, without a water bath or pressure canning, are no longer safe to use. Follow the updated and recommended processing guidelines.
3. JAR SELECTION
Use the correct jar for the correct use. Not all jars are created equal. There are freezer jars, canning jars, and jars for decorative use only. They are not interchangeable. After you have your jars selected, inspect the rims for any chips or cracks in the glass. If you see a defect, do not use them for canning.
4. NEVER OVERFILL YOUR JARS
Food expands when it is heated so there must have enough room at the top of the jar to allow this to happen. Each recipe will give you guidance on the amount of ‘headspace’ that a jar needs before processing. If the jar is too full, it could cause leakage and may result in a jar not being sealed.
5. ALTITUDE ADJUSTMENT
You must adjust canning times based on your altitude. Most recipes that you will find are listed for locations that are 1,000 feet below sea level. Check out this altitude adjustment guide for the specifics adjustments required for your area.
6. TEST YOUR JARS

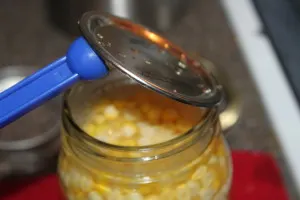
One of the best tools that we ever bought!
Test all jars after they are completely cooled by pushing down in the center of the lid. A properly sealed jar will not have any movement. If you can push your lid in, it did not seal properly and needs to be placed in the refrigerator for use within a week.
7. LABEL EVERYTHING
Mark your jars by writing with a permanent marker on the lid with the name and date. You might think you will remember what was in each jar, but many items all look the same (pizza sauce and taco sauce) in the middle of winter. If you are making multiple batches of the same recipe, you will also want to write the batch number (ex. 1, 2, 3) on the lid as well. The batch number will help you identify jars made from the same recipe.
This is helpful when labeling variations in tastes, for example the various spice level in salsa. Also, if there is a problem, you can easily pull out all the jars made with that specific batch. I had to do this one time when I forgot to add the preserving ingredient when canning tomato juice and it was nice knowing I was able to pull off the shelf only the jars that I needed to fix.
I am sure there are many other tips that our readers can provide to make it a successful canning season for both the new and experienced canner. Feel free to share those ideas in the comment section for all our readers to enjoy!
Happy Canning!
Mary and Jim
To receive our articles each week, sign up to follow the blog via email in the right hand column above, “Like” us on Facebook, or follow us on Twitter. You can also check out our book, Growing Simple, available on Amazon.com. This post may contain affiliate links.
