There is no better time to divide perennial plants than in late summer and early fall!
Dividing and transplanting perennial plants is more than just a great way to create loads of new plants. It’s also an excellent way to keep plants healthy and manageable in your landscape.
Plants with too many years of continued growth can begin to have crowded root structures. Almost all perennial plants grow from the center out. As they mature, the old center growth can start to fail, leaving dead spots in the center of plants. Overgrowth can also lead to a plant blooming less, or simply not at all.
By simply digging up and dividing perennial plants such as coral bell, hosta, daylillies, liriope and more, you can create four or more plants, and keep them all growing vigorously. Dividing perennial plants really is the ultimate way to create on a slim budget! If you are just starting to add plants to your landscape, be sure to check out our recent article : Perennial Plants – 5 Great Choices For Summer Planting And Lasting Color!
Why Divide Perennial Plants In The Fall?
By dividing and replanting in early autumn, it gives transplants enough time to re-establish before going dormant for winter. It also allows plants the luxury of settling in without the extreme heat and burning sunlight of summer.
Let’s take a look below at some of the biggest keys to success when you divide perennial plants:
How To Divide Perennial Plants – Tips To Success
Select Mature and Healthy Plants – The best way to create new, healthy perennials is to start with a healthy, mature plant. Select plants that have grown large and have large root structures. This will allow for plenty of new growth when dividing.
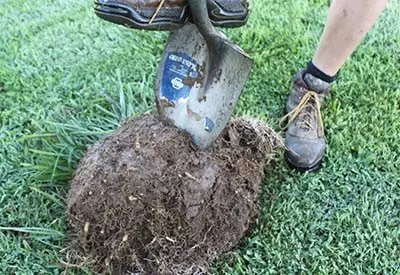
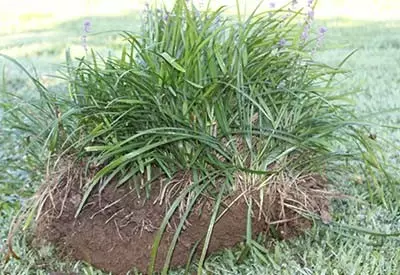
Dig Up The Entire Plant Around The Outer Edges of Root Zones – Use a sharp shovel to dig an inch or two out from the edge of the root zone. For most perennials, the root zone will be equal to the outer most edge of the foliage. Dig around the entire plant and then lift from the ground.
Split Plant from the Bottom Up – Once you have your perennial out of the ground, turn it over so the foliage is face down. Then take a sharp shovel and divide by cutting through the root zone down. By flipping the plant over, you can see the entire root structure. This allows you to make sure you are splitting the plant in even sections. If you keep these even, the new plants derived from them will all be about the same size as well. This can be a big key for helping to space new plants, and for a balanced look in your landscape.
Don’t Wait To Replant…

Flip the plant over to see the entire root ball. Dividing from the back side makes it easier to divide equally.
Replant Immediately – Don’t wait around for a few days to plant. The quicker the plant goes back into the ground, the better chance of survival it has. If you do not have the space available for your transplants just yet, pot them up, or place them in a holding bed in your garden. By planting immediately, you allow the roots to begin settling in before winter hits.
Amend The Soil – When transplanting, be sure to add in a generous amount of compost or potting soil to your planting hole. A shovel-full of rich fertile soil around the severed roots will allow them to re-establish more easily. It also provides needed nutrients, while better holding in moisture to the new plants. Adding in a tablespoon or two of worm castings is an excellent start-off for new plants too! The worm castings act as a slow release fertilizer, and help plants get off to a great start. Product link : Worm Castings, Perfect Compost
Keep Watered – Last but not least, water your plant in well when transplanting, and for the first 4 to 6 weeks afterwards. Transplants need to keep their root structure’s moist to heal and begin new growth. Water every 2 to 3 days after transplanting, especially if there is little to no rain.
Here’s to dividing those perennials! – Jim and Mary. If you would like to receive our DIY, Gardening and Recipe articles each week, you can sign up via email at the very bottom of this post. You can also like and follow us on Facebook, Twitter or Instagram to receive all of our latest tips and articles. This article may contain affiliate links.


