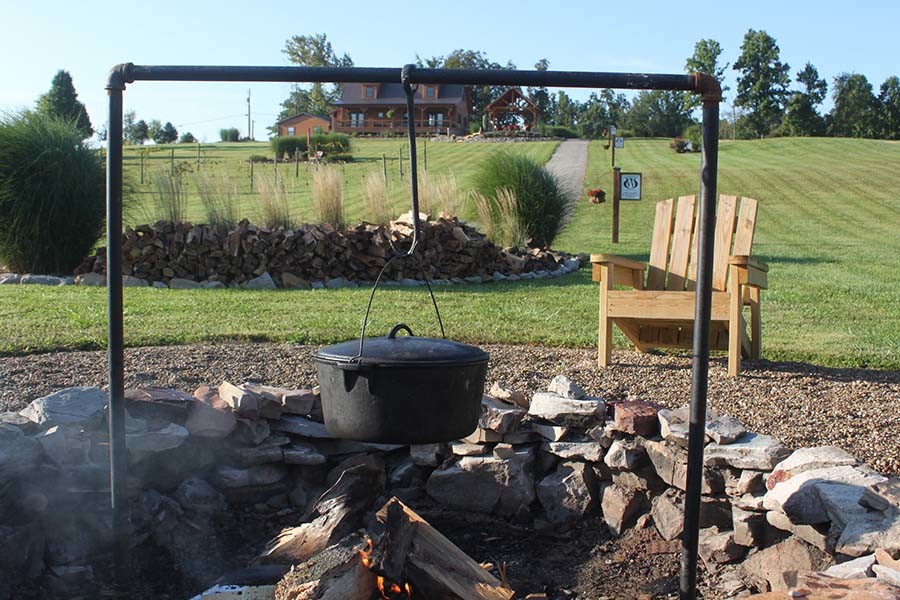
If you have a backyard fire pit, campfire or bonfire area, then the open fire cooking bar needs to be in your future! It’s simple, inexpensive, and can be made with just a few tools in about 20 minutes!
Nothing quite says Fall like an outdoor fire, especially when you can create some amazing soups and more while enjoying those warming flames.
When we built our fire pit a few years back, we knew we needed to come up with a simple solution to cook over the open fire. (See : How To Build An Inexpensive Backyard Fire Pit)
Tripods seemed to be either too expensive (upwards of $200 or more), or too flimsy to work.
So, we came up with a simple, inexpensive solution we now call our open fire cooking bar. It’s easy to build and install, and lets us make homemade soups, cornbread, coffee and more.
In fact, we keep finding new ways to use it – including smoking whole chickens!
And forget the $200 price tag – we were able to create the open fire cooking bar for about $35!
The best part, all of the pieces needed to create this simple project can be found at your local hardware or home improvement store. Here is how we created ours:
Creating An Open Fire Cooking Bar
Materials Needed
2 pieces – 1 1/4″ Black Iron Pipe 24″ long
2 pieces – 1″ Black Iron Pipe 3′ to 6′ long
1 piece – 1″ Black Iron Pipe 4′ long
2 pieces – 1″ 90 degree elbows
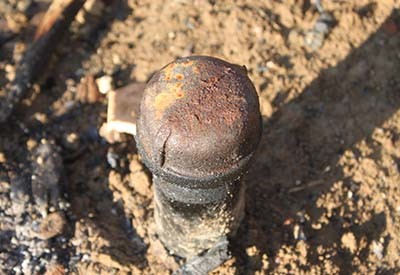
2 pieces – 1 1/4″ black iron caps
2 ea. 1/4″ bolts, 3″ inches long with nuts
1 80 lb. bag of all-purpose concrete mix
Tools Needed
Post Hole Digger
Measuring Tape
How To Create
Start by measuring across the width of your fire pit or campfire area to determine how long your cooking pipe will need to be. It really comes to down to personal preference for this part.
Our fire pit measures 6′ across, so we created our top post at 4′ wide so it could be set up inside of the pit. The important part is to make sure your top cooking pipe is centered over the fire to have as much space as possible to hang your pots.
Once you have determined your overall length across where you will build you can purchase that length of pipe and the other materials.
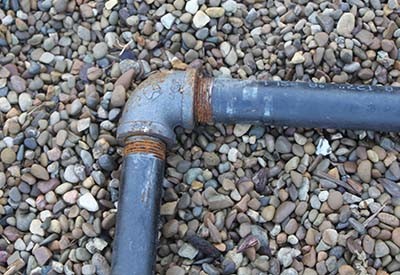
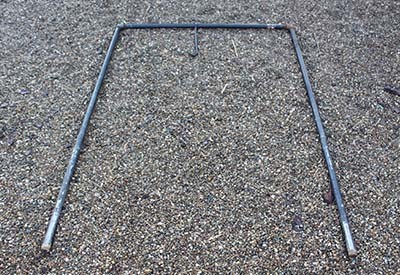
Start by assembling your top section that will slide down into the fire pit when needed. On each side of your top 1″ black iron cross bar, thread on a 90 degree elbow. Next, thread in a 6′ long 1″ pipe on each side to form a U-shaped.
Now, using the assembled “U”, place it over the fire pit or camp fire area to determine the best place to center it over the fire. Set the bottom of the pipes down on each side of the ground and mark each side where the posts come in contact with the ground.
Next, using your post hole diggers, dig down 20 to 22″ deep for each side marked. Try to dig your hole directly over where the pipe was resting. There is no need to dig much wider than a traditional post hole digger’s spacing. It will make digging easier, and the width is more than enough to hold the pipe in with a little bit of concrete.
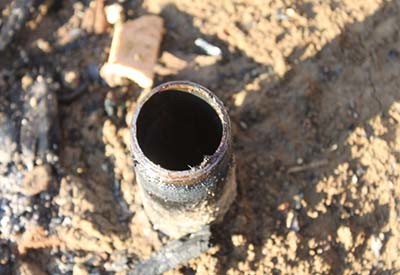
Next, drill a 1/2″ hole about 1/2″ up from the bottom, through each of your 24″ long pipes. Place the 3″ galvanized bolt through the hole securing with a nut. This will help anchor in the post when buried in the hole with the concrete.
Now place the 24″ pipes in each hole. You should have about 2 to 4″ of the pipe showing above the fire pit. By leaving this above ground a few inches, it will make taking your pipe in and out a breeze.
To make sure the pipes go in level, insert your “U-shaped cooking bar into each side of the holes and into the 24″ pipe. If you do this before you cement in the bottom pipes, you can easily make sure the bottom posts are spaced perfectly. It is much easier than trying to measure perfectly, only to find out you are off a 1/4” and the pipe won’t fit!
All that is left is to mix a little of your concrete up in a bucket with a little water, and pour into each hole to secure. Directions for how much water is needed can be found on the outside of the concrete bag. Be careful not to get any concrete into the joint area where the 1″pipe slides into the 1 1/4″ pipe. Once the concrete is poured, let the posts stay in for a full day to make sure the concrete sets.
Your cooking bar is all set and ready for use! We have had up to 3 cast iron cooking pots on ours at one time with no problem at all. The iron is not only strong, but looks very rustic over any fire pit or campfire. When done, all you need to do is slide out the “U-shaped cooking bar, and screw on the two caps to keep your bottom posts clear of debris. It is a great idea to put a little oil on the threads to keep from ever rusting too much.
Here’s to simple and delicious open fire cooking! – Jim and Mary. If you would like to receive our DIY, Gardening and Recipe articles each week, you can sign up via email at the very bottom of this post. You can also like and follow us on Facebook, Twitter or Instagram to receive all of our latest tips and articles. This article may contain affiliate links.