If you are looking for a simple, inexpensive, and labor-free way to grow potatoes, then potato crates are the answer!
Over the past few years, we have switched to growing our entire potato crop (traditional and sweet potatoes), in homemade potato crates.
I honestly can say it is one of the best gardening decisions we have ever made.
From planting, maintaining to harvest, it couldn’t be more simple. (See : A Harvest Beyond Belief)
If you have ever grown potatoes in traditional rows – you know firsthand how difficult it can be.
First, there is the tilling up and digging of the rows. Next comes planting. And then the real work begins!
Constant hoeing and raking rows to keep the soil hilled up over the growing spuds. That doesn’t even cover the weeding chores!
It can be tough work for sure, especially when it comes time to dig and harvest.
Not only is digging potatoes from rows labor-intensive, its easy to damage the crop as you uncover. But all of those tedious chores and issues are a thing of the past with potato crates.
The Ease Of Using Potato Crates
Creating A Potato Crate
You can create homemade crates out of inexpensive framing lumber, scrap wood or even pallets. They certainly don’t have to be fancy or expensive to work.
We created our first few crates from 2 x 4’s and pallet boards for a few dollars each. They are still going strong today.

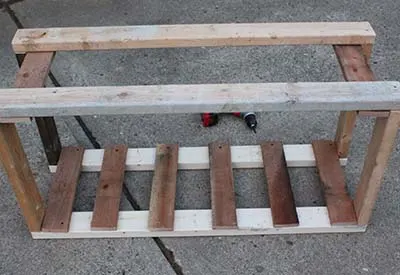
You can make your crates easily from a variety of inexpensive materials, Here we used 2 x 4’s and pallet wood.
Our homemade crates are 36″ long x 24″wide x 18″ high with open ends on the top and bottom.
We started by making two rectangles from the 2 x 4’s that were 36″x 24″. Next, we attached 2.5″ wide x 18″ long wooden slats (pallet boards) to the top and bottom to form an open-ended crate.
We spaced slats roughly 2″ apart to help keep our soil mixture in place. You could also use chicken wire or mesh in place of the slats. All that is needed is something to keep the soil in place.
Planting The Crates
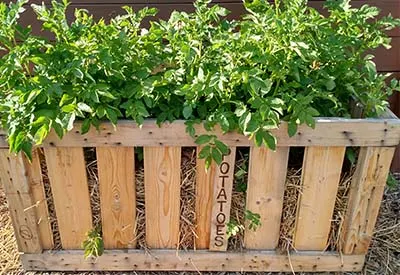
We sit our crates in the back edge of our garden, right on top of the soil.
Next, we place a few inches of our light homemade soil mixture to fill the bottom.
We make our mix from equal parts straw, shredded leaves, compost and garden soil. This light soil works wonders in letting the potatoes grow without struggle.
We start by planting our seed potatoes or sweet potato slips in the bottom layer of soil, making sure the seed potatoes or slips are covered by at least and inch of soil.
We plant about 5 pounds of seed in each crate. It takes a total of about 5 minutes to plant each crate.
As the plants grow, you simply add soil up to the top inch of the plants. Continue this until the plants have reached the top of the crate, and then you can stop.
Straight garden soil can be used, but the lighter mix is easy to work with. It also makes harvesting much easier.
As for what we plant – we have found some varieties to work better than others. Yukon Gold does extremely well, as do. For sweet potatoes, Beauregard is our go-to choice. It performed incredibly well last year.
Seed Links : Yukon Gold / Red, White & Blue Mix Potatoes
Harvesting The Crates
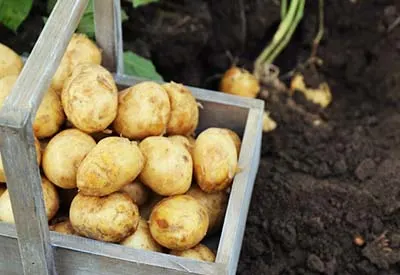
Harvesting is easiest part of all! Simply tip over the crate and sort through the soil to reveal the potatoes.
There is no stabbing or ruining of potatoes with a pitchfork. Just easy harvesting!
We usually get somewhere between 25 to 30 pounds of potatoes from each crate.
Last year, one of our sweet potato crates grew so well we had nearly 50 pounds from one crate. One thing is for sure, we will never grow our potatoes any other way!
Here is to growing a great crop of potatoes this year! Jim and Mary.
To receive our 3 Home, Garden, Recipe and Simple Life articles each week, sign up for our free email list. You can also follow us on Facebook, Twitter, Pinterest, or Instagram. This article may contain affiliate links.


