Growing your own fresh vegetables doesn’t need to be difficult or time consuming – that is – if you grow the Raised Row Gardening way!
The Raised Row garden method continues to grow bigger every year, and it’s easy to see why. It makes gardening fun, all with a simple, low-maintenance and entirely organic approach. Even better, it doesn’t require anything more than the most basic of tools.
There is no need for a rototiller. Nor will you have endless weeding, hoeing, and many of the other tedious tasks often associated with tending to a backyard vegetable garden.
Check out our Podcast Episode All About Setting Up A Raised Row Garden!
Why? Because creating and maintaining a Raised Row Garden is all about simplicity. Allowing you to maximize yields, all while minimizing daily, weekly and even annual work chores.
Growing Simple With Raised Row Gardening
We have been “Growing Simple” with our Raised Row garden for 11+ years now. And as easy-to-maintain and productive as it was during the first few years, it has become even more fruitful with each passing season.
And judging by the hundreds of emails and photos we get from fellow gardeners showing off their Raised Row garden with pride, it’s working well for others too!
One of the best attributes of a Raised Row garden is that it allows you to keep your garden not only productive, but neat, tidy, and manageable. All in just minutes a day. Best of all, there is never a need to use a rototiller to till and re-till your soil.
How is that possible? As each growing season ends, instead of tilling or leaving the garden empty, an easy-to-plant cover crop is planted in the rows. The cover crop protects and re-energizes the soil over winter. And the following spring, it’s simply mowed off and planted through.
Sound impossible? Not only is it possible, it’s easy to do! Here is an in-depth look at how a Raised Row Garden works, from start to finish. And, of course, how to set up your own Raised Row Garden this year. Also be sure to check out Raised Row Gardening, our 200 page, full-color in-depth book dedicated to simple gardening.
How A No Till Raised Row Garden Works
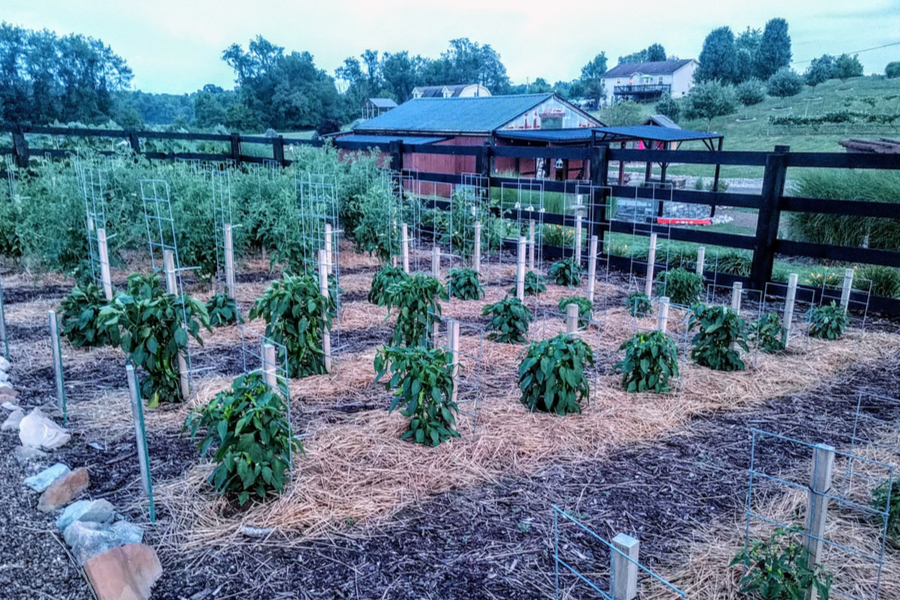
Raised rows utilize the concept of raised beds, where growing is confined to a specific area. But instead of using rock, wood or metal to create “sides”, the soil in a Raised Row garden is simply tapered down on the edge of each row.
First off, this saves valuable time and money when creating. But moreover, it makes it easy to maintain over time. Soil in raised beds can often be difficult to work, especially at the edges where hard sides can get in the way of tools.
The growing space in a raised row garden is composed of 6 to 8″ high x 18″ wide rows. The length of the rows can be designed for the space available, but it is in the 18″ growing row space where the magic happens.
The growing space is the only space where a raised row gardener concentrates their time, effort, and energy. This allows the gardener to conserve on resources such as water, compost and fertilizer. Resources that in a traditional garden is often wasted in areas where nothing grows at all.
Saving Time & Energy With Raised Rows
We leave 24 inches of space between each growing row for walking and garden maintenance. In a Raised Row garden, we refer to these as the walking rows.
In a “traditional” garden, the area between rows (walking rows) requires a lot of time and effort. First, you need to till all of the space. And that alone can be difficult if the soil is still wet.
But then, as the season progresses, the work continues. Either with more tilling to keep the walking rows clear, or hour upon hour of weeding. It is an endless cycle of work. And all to keep an area clear that takes up nearly 75% of the garden, but where nothing grows!
But with raised rows, that work load is eliminated. The walking row areas are simply covered over with a heavy application of mulch. Mulch that eliminates weeds and weeding forever.
How To Create A Raised Row Garden
A Raised Row garden can be created from an existing garden, or a plain open patch of soil or grass.
If starting from a grassy, never before gardened area, mow the area as close to the ground as possible. This is the one and only time you could use a rototiller to break up the sod, but it’s certainly not necessary.
We built our first raised rows right on top of the ground, without ever using a tiller at all. We simple mowed it off, and built our growing and walking rows right on the surface.
If you do till to start your first garden, it will be the last time you ever need to. Tilling only creates more work, and more weeds. In addition, it can actually harm your soil in the long run. See : 2 Reasons To Never Use A Rototiller In The Garden
Creating The Growing Rows
We created our raised rows at 18″ wide x 20′ long, and left 24″ inches between the edges of each row. Again, the length of the rows can be whatever works for your space.
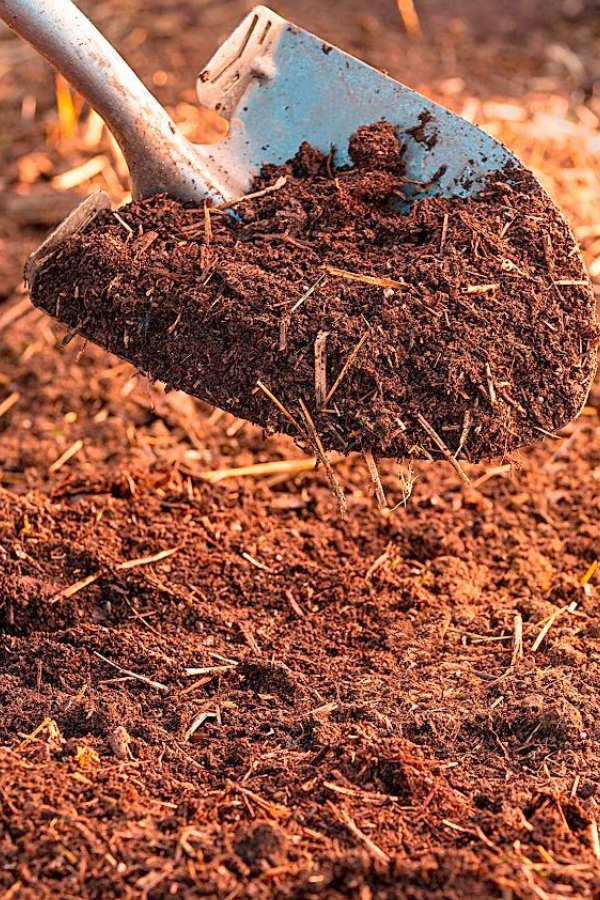
To create our first rows, we laid down a combination of straw and compost about 4 to 6″ high. Next, we added a 3 to 4″ layer of topsoil on top, tapering it down to the edge of the rows. The finished rows will settle down to about 6″ in height in the middle, tapering down on each side.
If you happen to be starting from an existing garden space, create your rows with the straw / compost mix, and use the existing soil to place on top. If starting from scratch, you can till the soil, or bring soil in to lay on top.
Mulch Your Walking Zones
Once your growing rows are ready to go, it’s time for mulching the walking zones.
For walking zones, we use a thick layer of inexpensive organic material to block weeds permanently. As noted above, this allows a large portion of the garden from ever having to be maintained.

We use hardwood bark chips for our rows. With that said, you can also use straw, leaves, or whatever is available locally and inexpensively. To provide extra weed control the first year, you can also put down cardboard or newspaper to help snuff out any existing weeds.
Planting And Mulching Your Growing Rows
Planting time is a snap with a Raised Row garden. For transplant crops like tomatoes, peppers, cabbage and more, we use a post hole digger to plant in minutes.
We dig our planting holes with one drop of the blades, remove the soil, and plant away. It works through the cover crops in succeeding years as well.
For seed crops, we use a hoe or pick to create small seed furrows to plant our seeds. A pick works quickly and only disturbs a small area of the soil. This helps to keep future weed issues down, a big plus for seed crops.
After planting, we mulch around each of our plants with a bit of compost. A few inches around each plant helps to insulate the soil, and provide nutrients that leach down into the soil over time.
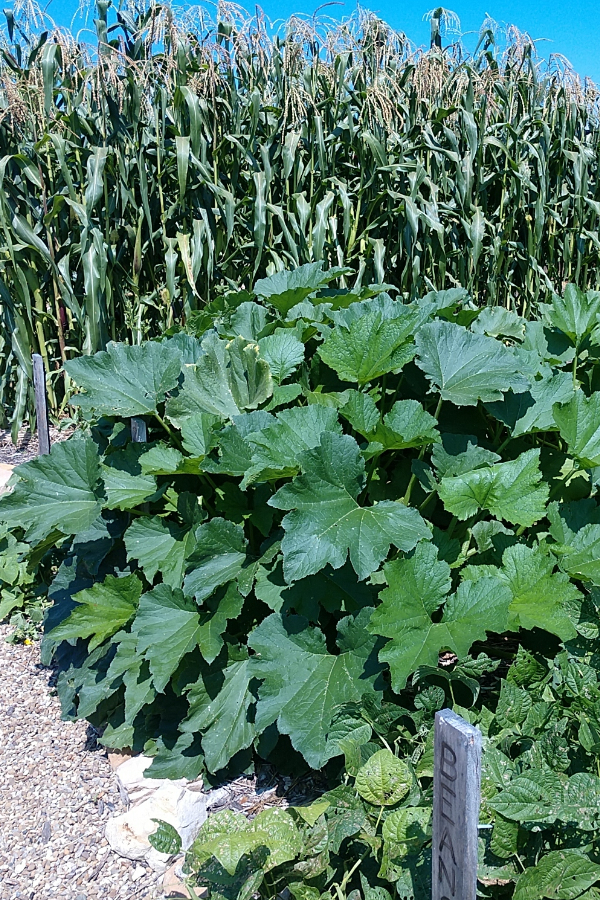
We cover the remaining space in each growing row with straw, shredded leaves or grass clippings. This past year, with the ever increasing cost of straw, we actually started to experiment with growing our own mulch.
We planted a patch of annual rye, and then mowed it off to use as the mulch. The results were promising for sure, especially since it is nearly free except for the seed. See : How To Grow Your Own Garden Mulch
The key, no matter what you use, is to keep the soil covered at all times so weeds can’t take over.
The Garden In The Fall – Planting No Till Cover Crops
At the end of the first year, the no-till action all takes shape in a Raised Row garden. Each fall, we plant the growing rows with a thick cover crop of annual (cereal) rye. It quickly fills the rows with a lush, protective, dark green mass of turf. (See : How To Plant A Cover Crop)
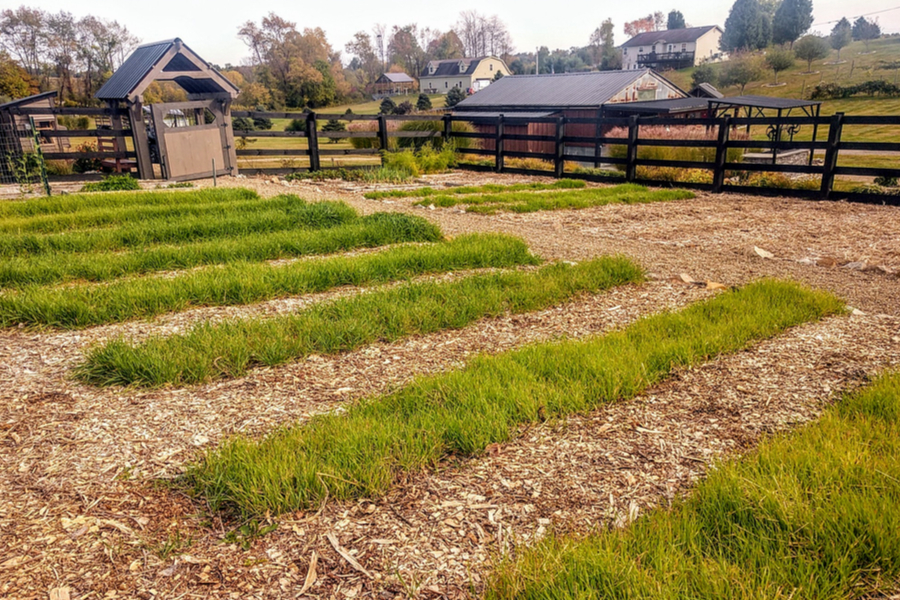
A cover crop recharges your garden soil as it grows and then breaks down the following spring. It also helps to fix nitrogen in the soil, and replenish valuable nutrients and minerals.
More importantly, the thick growth in late fall and early spring protects bare soil from weed seeds blowing in. It eliminates a large portion of any weeds that can ever find space to grow in the garden. It is amazing to see how with each passing year, there are less and less weeds to deal with.
But if that isn’t enough, the roots of the cover crop help break up and loosen the soil below the surface. The result, subsequent crops find it easier to grow deep into the rich soil.
Spring Arrives – Replanting The Garden
The absolute joy of Raised Row gardening really comes forth the following year, and every spring after. You will never need to use a tiller again, or use back-breaking muscles to turn over your soil.
All you need to do is start mowing off the cover crop in the early spring, and after a few times, it dies off. There is never a need to disturb the soil, or replant thousands of weed seeds by tilling.
And even better, the cover crop clippings can stay in the growing rows to break down as well. By the time you are ready to plant, the annual rye has died off. You can then use a post hole digger to easily create planting holes.

The soil below gets better every season. Better yet, planting chores take only minutes, not hours! To complete the process full circle, we mulch the growing rows again after planting. And it once again protects growing rows from weeds during the growing season.
So what is holding you back this year? Make this the year you create your own low-maintenance vegetable garden! Happy Gardening – Jim and Mary.


Jim and Mary Competti have been writing gardening, DIY and recipe articles and books for over 15 years from their 46 acre Ohio farm. The two are frequent speakers on all things gardening and love to travel in their spare time.
As always, feel free to email us at thefarm@owgarden.com with comments, questions, or to simply say hello! You can sign up for our free email list in the subscribe now box in the middle of this article. Follow us on Facebook here : OWG Facebook. This article may contain affiliate links.