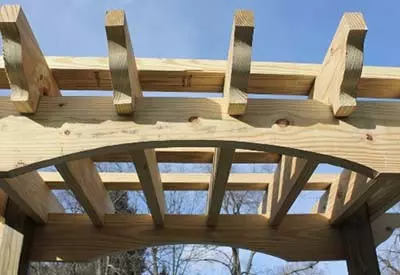
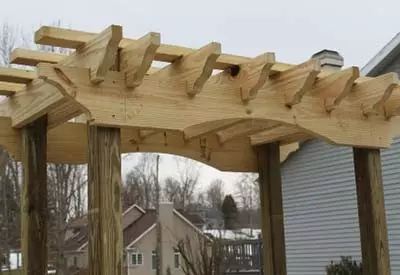
Creating a classic arbor for the entrance to the garden has been on our to-do for a long time.
In fact, ever since we first fenced in the garden back in 2013, we knew it wouldn’t truly be complete without an arbor to grace the path into the garden area.

There is something special about the look and feel of an all-wooden classic arbor. When placed correctly, it can serve as the focal point for nearly any landscape.
It can also double as a sturdy and elegant structure for gorgeous climbing perennials like climbing roses, clematis or wisteria.
Whether their winding vines and branches are in full bloom, or sprawled out in bare winter dormancy, climbing perennials formed against the classic lines of a classic wooden add year-round interest to outdoor areas. See : Clematis – Deep Purple or Blue Wisteria
And that is precisely why we have always wanted one for the garden entrance at the farm. We can all but imagine heading into the garden under a canopy of blooms.
We have actually built this simple DIY project several times. And yet, we still don’t have the arbor installed at the farm. Why? Well, the first one ended up in the backyard of a friend’s house for a wedding. That led to building a few others for folks who wanted one as well.
We even completed entire step by step plans for our Etsy shop when asked. And yet, still don’t have our own up at the farm. See : Classic Arbor DIY Plans
Somehow I think that follows along the lines of how a plumber’s leaky faucets never get fixed. But this is the year we build one for our own garden, and here are the basics.
Building A Classic Arbor Without Breaking The Bank

Much like building our pergola, we wanted the structure to be elegant, strong and durable. But most of all, to not cost a fortune.
Too many of the arbors available in stores are either too flimsy, expensive – or both! Many are created with just 3/4″ thick lumber, which simply will not stand up to the outdoors.
We created our classic arbor from heavier grade traditional 2 x 4 lumber. You can use treated, untreated, or even cedar if you wish, but it is important to have more than 3/4″ thickness for longevity.
The selection of wood really comes down to personal choice, and whether you will be painting, staining, or leaving it natural to age.
The Tools
The arbor can be made with just a few simple tools. We built ours with a circular saw, jigsaw, level, tape measure and electric drill and screws.
All in all, it can be cut out and assembled in just a few hours.
For the top, we use 2 x 10’s for the main headers We cut a decorative curve on each side, and in the middle. We used 2 x 6 cross boards for the top of the arbor.
To add strength and beauty to the piece, we created a single notch on each side with the jigsaw. This allows the piece to look snug and complete, without having to use metal anchors.
We created the same curved edge for cross boards as well to give the arbor a true decorative touch. To complete the process, we used 2 x 4’s flat across the top.

For the posts, we used treated 4 x 4’s. They can be surface mounted, or purchased a bit longer and then sunk into the ground.
They 4 x 4’s provide more than enough support for the top, and are also strong enough to hold lattice or a bench seat if desired.
Now all that is left for us is to build one for us to keep! For more on all of our DIY plans including the arbor, pergola, and more – check out our DIY plans page on the blog. See : OWG DIY PLANS
Happy Gardening – Jim and Mary! To receive our 3 Home, Garden, Recipe and Simple Life articles each week, sign up below for our free email list. You can also follow us on Facebook, Twitter, Pinterest, or Instagram. This article may contain affiliate links.
