One of our all-time favorite and most rewarding DIY projects was the building of our homemade wood fired pizza oven. We get questions quite often about the whole process, from making the oven to making the pizza.
So we thought we might answer a few of those questions with today’s article.
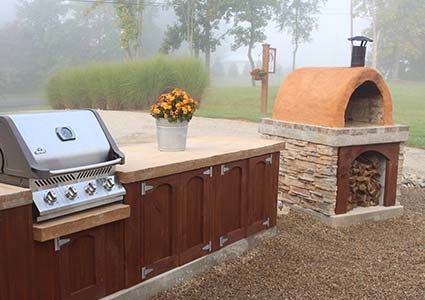

Our homemade wood fired pizza oven at the farm.
For starters, yes, it took a few weeks to build from start to finish. And yes, it was a little labor intensive. But wow was it ever worth it! See : The Building Of A DIY Pizza Oven
You truly haven’t tasted pizza until you taste the amazing flavor of pizza from a wood fired pizza oven.
The ultra thin, crispy, slightly charred crust. The fresh light flavor of brushed olive oil and fresh-melted mozzarella cheese coming together. And the pure goodness of simple toppings like sun-dried tomatoes, pepperoni melting in your mouth. It is pure heaven.
Making Homemade Wood Fired Pizza – The Process
Once we completed the oven last year, it took us about 3 “trial” pizza nights to really get the hang of it. But once we did, it has been a flavor town experience like no other!
Once the oven is fired up and running, it only takes about 4 minutes to make a pizza. That means you can feed a lot of hungry friends, family and neighbors in a hurry!
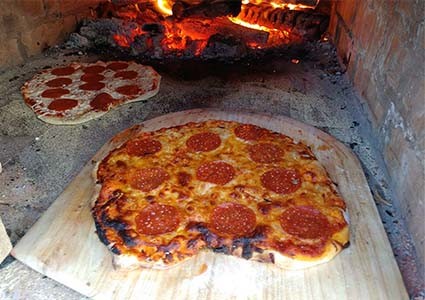
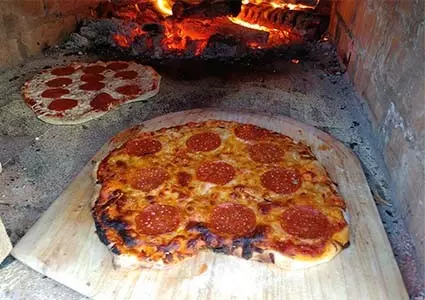
Nothing compares to the taste of wood fired pizza
Making The Pizza Dough
The key to a perfect pizza all starts with creating a super thin crust. The thin crust makes it easy for the heat of the oven to bake both the dough and the toppings quickly. We learned early on that putting too many toppings on is an easy way for failure.
The pizza dough recipe is simple. It all starts with just 5 simple ingredients. Water, flour, salt, yeast and a bit of olive oil. We let the dough sit for about an hour to rise, and then roll out thin 8 to 10″ pizza crusts.
Making The Pizza

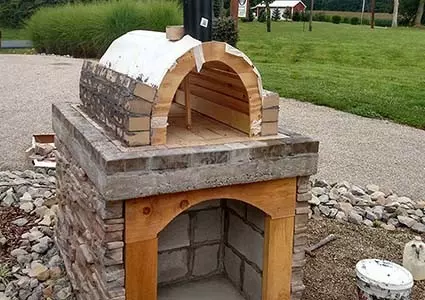
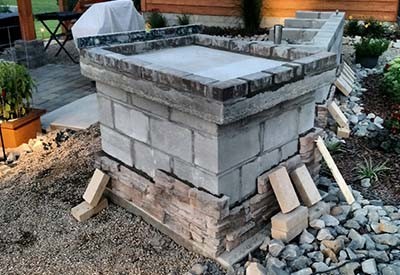
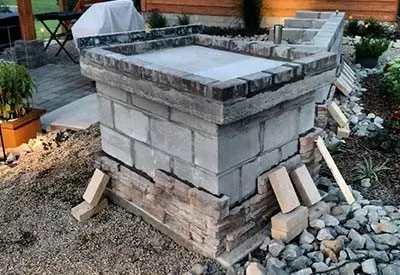
The wood form we used to build the pizza oven
The key is heating up the oven prior to sliding in that first delicious pie. It’s important to heat up the fire bricks and the oven to around 700 degrees. That hot fire is needed to crisp up the pizza crust fast. The whole pre-heating process takes about an hour.
To start, we build a small fire in the front middle section of the oven. This is the spot where the pizzas will eventually cook.
By building the fire here, the bricks below preheat quickly. Once the fire is going steady for about 40 minutes, we push the logs to the back of the oven.
Once the fire is in the back portion of the oven, we wipe down the middle oven bricks with a damp cloth on a stick. At this point the fire just needs to be fed evenly.
We put in just a few small split logs at a time to keep the oven hot. It is vital to have good dry wood for high heat. Hickory and oak are the two we use with really good results.
Time For Pizza!
Building the oven took awhile, but it was worth it!
After an hour of total pre-heat time, its time to make pizza! Before we slide in the dough, we sprinkle cornmeal onto the oven surface. The corn meal works beautifully to keep the dough from sticking to the brick.
We then start sliding the first pizza crust off a long wooden board into the center of the oven. I actually purchased a few long pizza paddles to just “look” authentic.
But after the first time sliding a pizza into 700 degrees of heat, I realized they were actually needed! Once the cheese melts and the fire facing edge of the dough begins to slight char, we use the pizza paddles to twist around the pizza for two more minutes and it’s done!
We can usually have two 8″ pizza pies in at once. As one is rotated, we put the next in to start. It is amazing how quickly they can be consumed! 🙂 Product Links : Wooden Pizza Paddle – Stone Ground Cornmeal
Building A DIY Wood Fired Pizza Oven
So how hard was it build the wood fired pizza oven?
All in all, it was really more of a battle of patience than anything. The process simply can’t be rushed. We started by pouring a 4 inch footer for the base. From there, we laid inexpensive concrete block to form the base for the oven.
Once that was complete, we created a curved form from old slats of wood. It allowed us to lay the fire brick and mortar into the dome shape needed.
After the bricks were laid, we then applied two coats of castables to the outer surface. Castables help to insulate the entire oven.
Once the oven was complete, we then fired it up to burn out the wooden template. This process also helped to cure the castables. It may have been a bit time-consuming and labor intensive to build, but it has been incredible to share pizza nights with so many.
Here is to enjoying a little wood fired pizza! Jim and Mary.
To receive our 3 Home, Garden, Recipe and Simple Life articles each week, sign up below for our free email list. You can also follow us on Facebook, Twitter, Pinterest, or Instagram. This article may contain affiliate links.