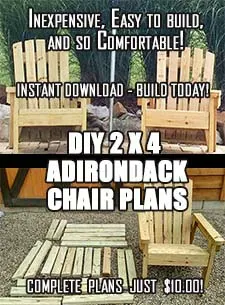
It has been exactly one year since we built our DIY Outdoor Chairs at the farm. And all we can say is we wish we had built them 5 years ago!
They have simply been the most comfortable and durable chairs we have ever had outdoors at the farm. So much so, that we have built and now use a total of 16 around the farm!
The heavy-duty 2 x 4 construction has stood up to the toughest weather, without warping, bowing or failing under the weight of the folks sitting in them.
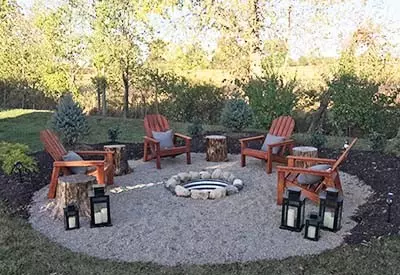
This photo is courtesy of Jeremy Rider from Indianapolis. He sent us this photo after completing his own set of DIY outdoor chairs from our plans.
And judging by all of emails from others that have now built them from the plans – they are a hit elsewhere too.
They simply make the perfect patio, pool, deck, fire pit, and all-around outdoor chair.
Perhaps the most amazing part is it takes just (8) basic 2 x 4’s to create a chair. And with the most basic of wood working skills, it can be built easily in 2 hours or less!
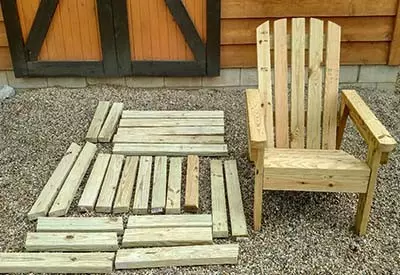
The 2 x 4 DIY outdoor chairs are made with only (8) 8 foot 2 x 4’s
The idea for the chairs came after we simply couldn’t find a reasonably affordable outdoor chair that could stand up to the wind, rain and harsh elements of the great outdoors. Most notably, in our fire pit area.
The Ultimate DIY Outdoor Chairs – An Answer To Fire Pit Seating Issues
The fire pit is one of our favorite spots to hang out at the farm. Whether enjoying a bonfire at night with neighbors, family and friends – or cooking a huge pot of chili over the open flames, it is our place to both relax and socialize. See: Creating A Stone Fire Pit On The Cheap
A fire pit isn’t exactly the easiest area to find durable seating for.
For one, it has to be able to stand up to the heat. It also has to be ready for the occasional burning ember that might pop and fly from a bonfire.
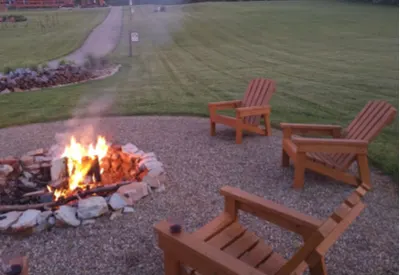
Our 2 x 4 DIY outdoor chairs around the fire pit. They have held up incredibly well.
We tried everything – plastic chairs, wooden chairs, benches and even metal and aluminum chairs. The plastic chairs simply didn’t hold up. The wooden chairs and benches were uncomfortable and flimsy. And the metal and aluminum chairs both bent at the legs.
After trying, buying and replacing chair after chair, sometimes within the same year, we needed a better solution. We needed an outdoor chair that was heavy-duty, comfortable, and most of all, wouldn’t break the bank.
And so late last year, we finally decided to try our hand at building our own from sturdy 2 x 4’s.
Building The 2 x 4 DIY Outdoor Chairs – The Process
We started with an old Adirondack chair as a model for our chairs. Adirondack chairs have a classic look, and are well-known for their comfort level when seated. From there, we re-designed the back and legs to sit a little more square to the ground. It helped both with comfort and stability.
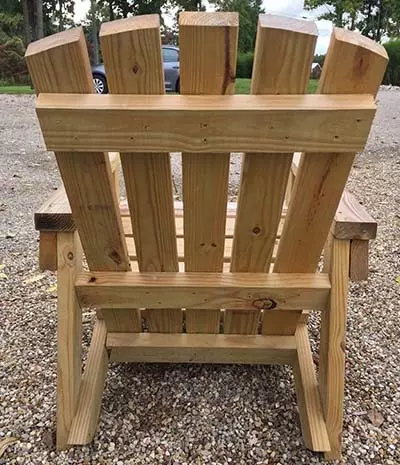
The sturdy 2 x 4’s make the back of the chair strong
The original chair had been created from 3/4″ thick wood, and simply wasn’t strong enough to stand up to the elements.
In place of the 3/4″ thick lumber, we used traditional 2 x 4’s to create a more solid frame and sitting area. The result is a chair that is comfortable – and will last for years.
We have used both non-treated and treated 2 x 4’s to build ours. When painting, it is easier to use the untreated for better coverage. Our stained chairs around the campfire and on the patio were created from treated lumber. They take stain well, and the extra protection will keep the chairs around for years and years.
Below, we have included the material and tool list for those interested. As you can see, it doesn’t get much easier. We also have complete step by step plans in our Etsy shop as well. See : 2 x 4 DIY Outdoor Chair Plans
2 X 4 DIY Outdoor Material and Tool List – What It Takes To Build The Ultimate Outdoor Chair
As you can see below – it doesn’t require a whole lot of tools or materials to complete the chairs!
Tools
You can complete the entire chair with simply a jig saw, speed square and a power screw driver or impact driver. If you do happen to have access to a circular saw or compound miter saw, it will make the project go even faster.
▪ Jig Saw. Circular Saw or Compound Miter Saw (if on hand)
▪ Power Screw Driver or Impact Driver
▪ Tape measure
▪ Speed Square or Miter Square
Materials
You can use either treated lumber, cedar or traditional lumber. If you are painting,
we recommend using traditional untreated lumber, it will be a smoother finish if
you apply a coat of primer and two coats of enamel paint. If using treated lumber,
be sure to let the wood dry out before staining or painting.
▪ (8) 2x4x8’s
▪ (60) 2 ½” exterior wood screws
▪ Liquid Nails or Wood Glue is optional
Happy Building – Jim and Mary! You can sign up to follow the blog via email in the right hand column, or “like” and follow us on Facebook.

