Want to know the 5 biggest mistakes gardeners make all too often when starting seeds indoors for their vegetable and flower gardens – and even more importantly, how to avoid them?
If there is one thing many gardeners struggle with, it is starting seeds indoors. Whether it’s not getting seeds to sprout, having young seedlings die off, or growing plants that end up weak, skinny, and unable to survive outdoor planting, it can certainly be frustrating.
But here is the good news – starting your plants indoors from seed doesn’t have to be difficult. In fact, by simply following a few tried and true practices, it can actually be quite easy. And to boot – more rewarding than you ever thought possible!

Growing your own plants from seed is one of the most fulfilling experiences a gardener can have. Watching something you plant sprout from a tiny seed and grow and mature to a beautiful flower or vegetable plant simply never gets old.
But to get to that beautiful mature plant, you need to get your seedlings off to a good start. And to do that, you have to avoid a few common pitfalls that can doom your plants early on. With that in mind, here is a look at 5 all too common miscues to avoid this year for great transplants!
The 5 Biggest Mistakes Made When Starting Seeds Indoors
1) Growing Seedlings In A Window
By far, the number one mistake gardeners make when trying to start vegetable or flower seeds indoors is using a sunny windowsill to provide the light needed for their plants. Plain and simple, growing in a windowsill with seedlings is a recipe for disaster.
The young seedlings will certainly grow quickly to the light of the sun. But the issue is they grow way too fast to develop into strong plants. The light from the sun through a window is simply too far away. Even worse, its winter arc doesn’t allow enough sun to come through for a long enough period.
Because of that, seedlings grow tall, spindly, and weak. In addition to growing thin, they also grow sideways trying to stretch out to the light. Even if you constantly turn the plants, they simply won’t develop properly.

The Lighting Solution…
So what is the solution? To grow great plants from seed indoors, the only real answer is to use artificial light. But before you think that might be costly, all it takes is ordinary and inexpensive LED or fluorescent shop lights.
Ordinary shop lights set an inch above seedlings as they grow promotes slow, steady growth. Simply turn on the lights for ten to twelve hours each day and your plants will grow and fill out perfectly. With no need to clutter up your windowsill, or purchase expensive grow lights!
We use our DIY homemade seed starting stands and hang a few LED shop lights from them to grow all of our plants from seed. You can also lay lights across a few bricks or blocks to keep them above plants as well. See: DIY Tabletop Seed Starting Plans
2) Using The Wrong Soil – The 5 Biggest Mistakes Made When Starting Seeds Indoors
Plain and simple, great plants start with great soil. And if you are planting your seeds into plain old topsoil or garden soil, your plants will have a tough time developing strong roots and stems.
To germinate and grow well, seeds need lightweight, nutrient-filled soil that drains well. The first six to eight weeks of a seedling’s life are vital to its overall success. By providing a lightweight, nutrient filled soil, plants can quickly absorb the energy and nutrition they need to grow strong.
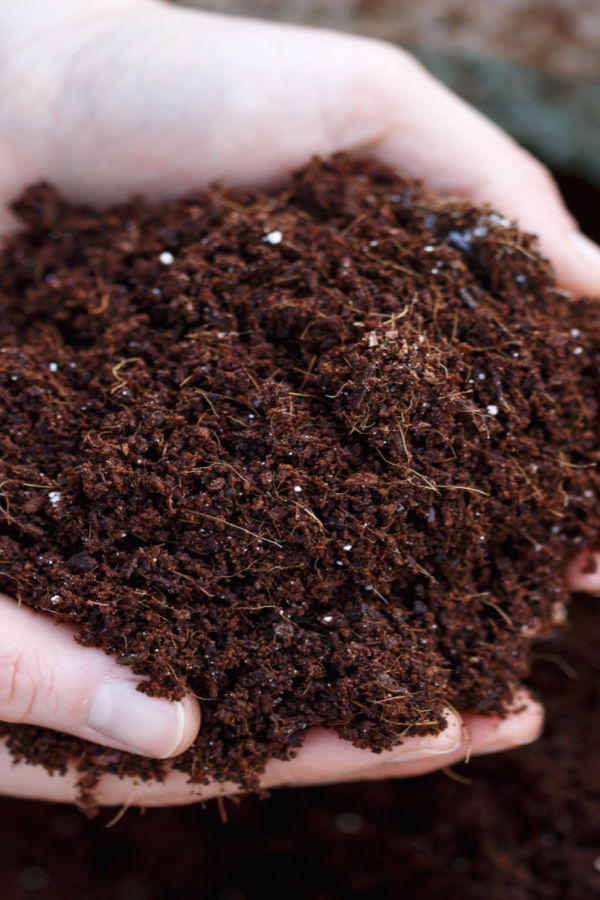
A good seed starting soil will allow roots to expand quickly. The soil should also be able to absorb moisture but be loose enough to allow excess water to drain away. There are a slew of great seed starting mixes on the market perfect for starting seeds.
One of our favorites is Espoma Organic Seed Starting Soil. Not only is it organic, it’s super lightweight. It also happens to be filled with natural power to help seedlings develop strong roots and foliage.
You can also make your own amazing seed starting soil at home using a good potting soil as a base. By adding in worm castings, compost, and perlite, it can have more than enough power to grow your seedlings to size. Check out our article: How To Make The Best Seed Starting Soil Around!
3) Starting Seeds Too Early, Or Too Late – The 5 Biggest Mistakes Made When Starting Seeds Indoors
Starting seeds indoors at the wrong time is another common mistake when it comes to growing your own plants. But again, there is an easy fix!
If you start seeds too soon before garden season arrives, your plants can become large and overgrown well before it’s time to transplant outdoors. And if you start your seeds too late? Unfortunately, they may not get large enough to transplant outdoors when the time comes. And that can lead to plants that die out or don’t have enough time to produce.
Listen In To Our Podcast On Starting Seeds Below!
So when should you start your seeds indoors? It all comes down to knowing your specific area’s average last frost date. From there, simply count backwards the number of weeks required to grow for each seed variety to be ready for transplanting.
Most vegetable and flower seeds need about six to eight weeks before getting to transplant size. But to be sure, always check the back of your seed packet. Nearly all seed packets contain transplant and seed starting information right on the back of the packet to help you find the right starting date.
4) Inconsistent Watering – The 5 Biggest Mistakes Made When Starting Seeds Indoors
Another big mistake made with seedlings is giving plants too much or too little water. Seeds need moisture to sprout. And as seedlings grow, they certainly need it to mature and develop into strong plants. But if they get too much or not enough of it, it can harm or even kill plants before they ever develop.
When first planting seeds, simply spray or dampen your soil lightly so it is moist but not wet. If your seed trays come with a plastic dome, put it over them. If not, you can place a piece of plastic wrap over the top. This will keep moisture in and allow the seeds to germinate far easier and faster.
Until seeds sprout, light is not important to them. Place seed trays in a warm area and as long as there is moisture on the dome or plastic wrap, they are good to go. By covering them, we rarely need to water our seeds after we plant them until after they sprout.

Once the first seeds sprout, put them under the lights and water with a spray bottle, lightly misting the seedlings and soil. Again, keep the soil moist but not wet. At this point, we usually water once a day lightly. As they then grow to an inch or so, you can begin watering plants a bit more.
The key is to never allow the soil to dry out, but not have it become saturated either. As your plants grow, they will require more water. Again, being consistent is the key. Allowing them to get too dry will slow growth and injure plants. As will overwatering!
5) Not Allowing Transplants To Harden Off – The 5 Biggest Mistakes Made When Starting Seeds Indoors
Last but not least, to get your transplants ready for outdoor planting, you must first harden them off.
Plants grown indoors have had an easy life. And if they are taken out and planted directly into the soil without ever being outdoors before that day, they have a poor chance of survival. That is exactly where the process of hardening off prepares your plants for life outdoors.
Begin by setting plants out for a few hours to adjust to fluctuating temperatures and winds. Start this process a few weeks before plants will go into the ground. The first week or so, make sure they are protected from strong winds or rain.
As the days lengthen and warm, leave them out longer to continue to adjust. Finally, keep them out overnight as temperatures allow. Your plants will “toughen up” and be ready when it comes time to be planted in their final outdoor spot. Once it’s time to give your seedlings the boost they need to thrive, be sure to see: How To Boost Indoor Seedlings – Feed Your Transplants For Fast Growth!
Here is to growing your own plants this year from seed – with BIG success! Happy Gardening, Jim & Mary.
Old World Garden Farms
Jim and Mary Competti have been writing gardening, DIY and recipe articles and books for over 15 years from their 46 acre Ohio farm. The two are frequent speakers on all things gardening and love to travel in their spare time.
As always, feel free to email us at thefarm@owgarden.com with comments, questions, or to simply say hello! You can sign up for our free email list in the subscribe now box in the middle of this article. Follow us on Facebook here : OWG Facebook. This article may contain affiliate links.