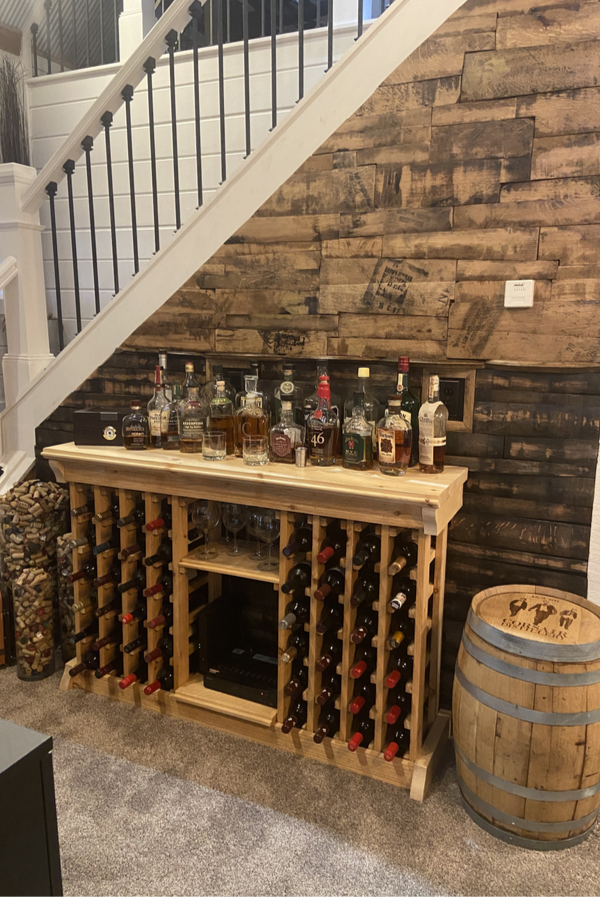
Who knew you could create an amazingly unique, attractive and stunning accent wall for next to nothing – all by simply recycling old whiskey barrels and lids!
After we finally completed the iron and wood stair railing project at our old farmhouse last summer, we knew we needed a different look for the main stair wall. When we first built the house back in 2016, we used galvanized metal on the wall to tie in the look of ceiling.
We actually loved it as the time, but when we added the iron and wood railings, the wall seemed to too stark and uninviting. Especially against the backdrop of the white rails, stained steps and the square black steel posts.
We knew we wanted something unique to highlight the stairs, but just couldn’t find the right look. And did we ever look high and low. In fact, I think the Pinterest search bars on our computers and phones were wore out from accent wall searches!
The Inspiration – How To Create A Whiskey Barrel Wall
It is always amazing how inspiration can come at the oddest of times and in the strangest of places. For us and the whiskey wall, it happened to be at the Tangled Wood restaurant in Bettendorf, Iowa. Which by the way, happens to be a full three states west from our Ohio home!
It was actually the first time we had ever been to Iowa. Lucky for us, it was the perfect time to check it out. Looking for a good place to have lunch, we asked a local for a recommendation. Before we knew it, we found ourselves walking through the front door of the Tangled Wood.
As soon as we stepped inside, the wood whiskey walls caught our attention. By the time our eight hour drive home was over, we knew we had to try to make our own DIY version for the farm house wall. The rest, as they say, is history!
Perhaps the best part of all was that creating it all was not only easy, but extremely affordable. Here is a look at how we built the wall, along with a few photos of the process along the way.
Building The Wall – How To Create A Whiskey Barrel Wall
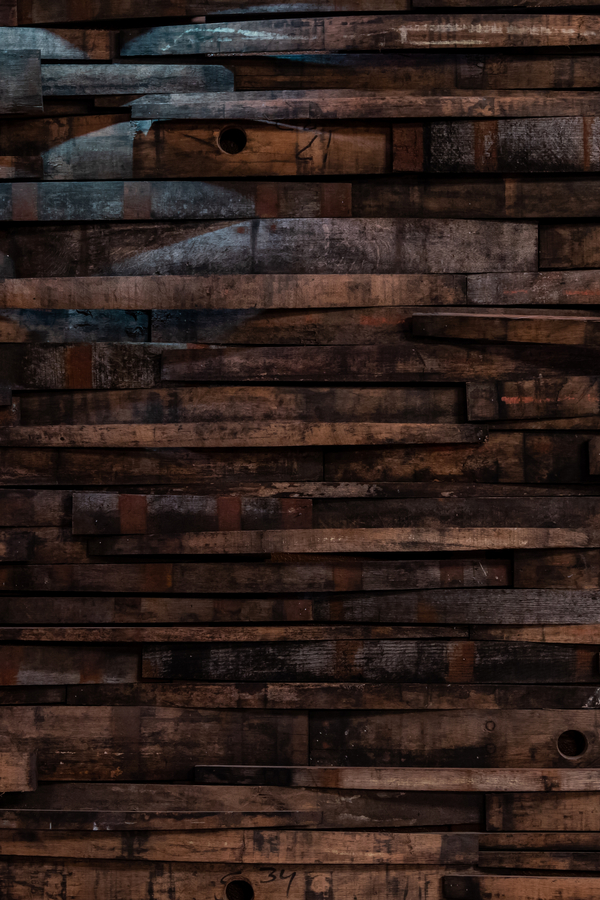
The wall is made using wood from the entire barrel. The body of a whiskey barrel is made up of long, slightly curved pieces of oak called staves. The staves are not glued, but banded together by metal to form the barrel shape.
The barrels are then set over a hot flame and the insides are charred. This charring gives incredible flavor and color to the whiskey as it ages in the barrel. A wooden lid (assembled with pegs and not glue) is then used on each side to tightly seal the barrel. The whiskey is then added, and the magic of the aging process begins.
Whiskey barrels are used to age whiskey one time. Although some barrels are reused to age and add flavor to other spirits for a second life, many others are simply sold off. One thing is for sure, if you take the time to look around, used barrels and the individual staves and lids can be found quite easily for sale.
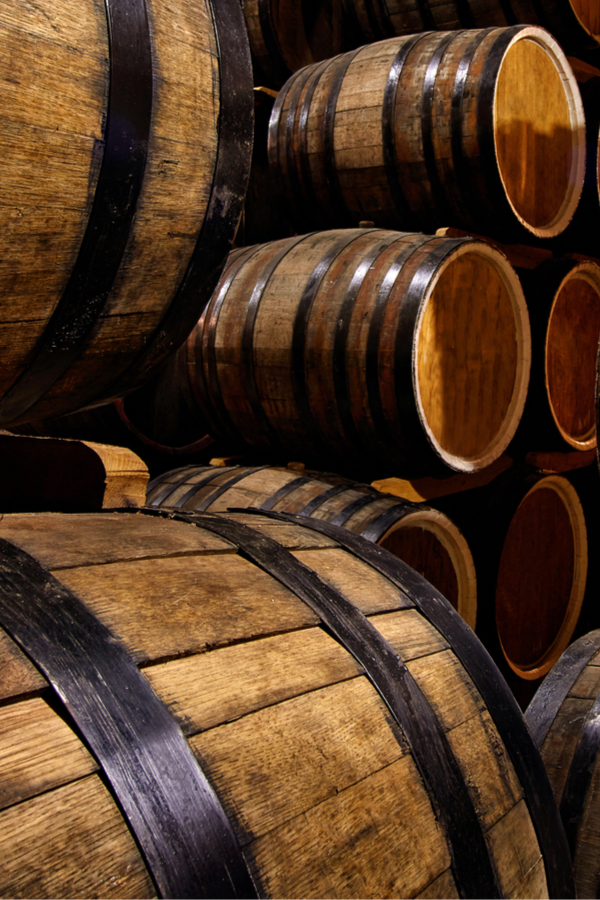
After a bit of research, we found a used whiskey barrel supplier about 20 minutes away from our home. Although prices can vary, we were able to purchase staves for around $2 a piece, and the lids for $6 to $10 based on their condition.
When looking for barrels or individual pieces, don’t get too alarmed if the wood is grey or looks worn. It cleans up well and will shine with a coat of polyurethane. However, always avoid wood that is warped or split, it simply won’t work well for creating walls.
Using Whiskey Wood To Build A Barrel Wall
You can build an accent whiskey wall out of staves or the lids. We decided to use a combination of the two for a really unique look. In fact, one of the best parts of this project is there are so many ways to make it your own.
Using a sander, we started by lightly cleaning off the exterior of the staves and lids. We were extremely careful not to sand too deeply to rub off the patina or any of the stamped words on the aged barrel wood.
Light sanding is the key to success for making the barrel wood really look good again. Wiping and cleaning is too time consuming, and really won’t get rid of the old, grey wood look. But light sanding will!
Installing The Backdrop – Creating A Whiskey Wood Wall
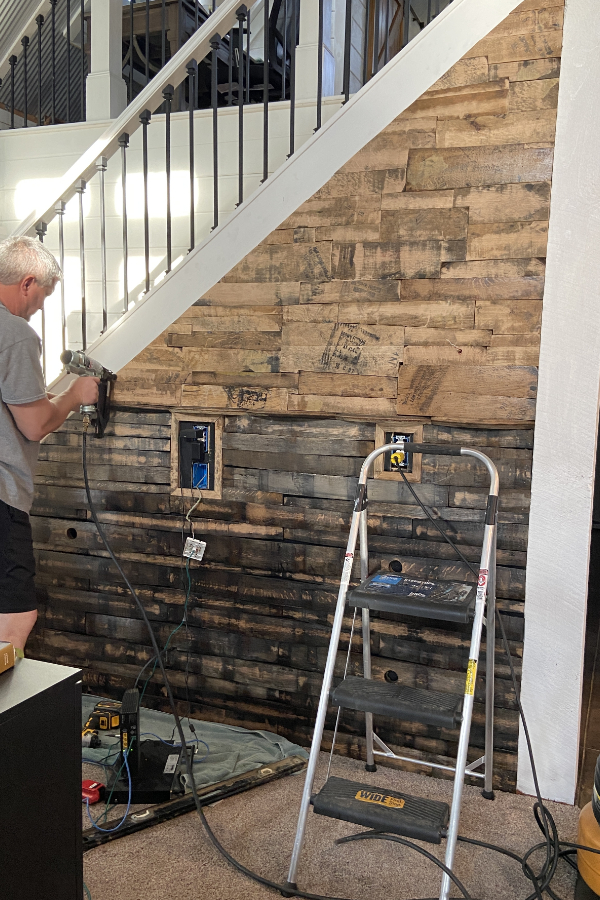
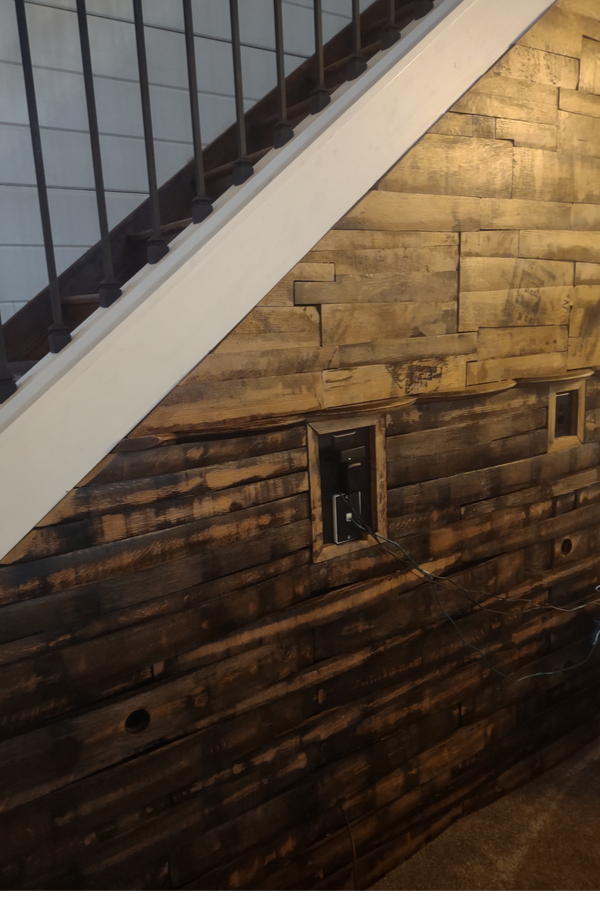
Before assembling the staves and lid pieces, we needed to first darken the back wall that we were fastening them to. Without doing this first, it allows the back wall to show through between the edges of the whiskey wood.
Since we had metal in place before, we took our wall down to bare studs. Next, we covered it using 11/16″ thick OSB board. Once the wood backing was in place, a quick coat of black paint darkened the backdrop perfectly.
You can use plywood or OSB if covering studs, but OSB will be the less expensive option. They both hold nails perfectly fine when attaching the whiskey boards.
So what about drywall? If you have an existing wall of drywall, it can work, but it will be difficult when nailing the boards to it. With drywall, you need to make sure to nail into the studs or the wood simply won’t stay in place. And with small pieces, it can make it very hard to always find a stud.

Although gluing is another option, it too has drawbacks. Because the wood is not always flat, the glue just doesn’t have enough surface contact to work. For us, the OSB or plywood boards are the best option of all. It allows you to nail anywhere you need, no matter the size of the wood piece.
Assembling The Wall – How To Create A Whiskey Barrel Wall
Once the backing is in place, it is time to put all of the individual whiskey barrel “puzzle” pieces together. By far, this was our favorite step of all. Not only was it fun to fitting them all together, it was fast and easy to do!
For the bottom portion of the wall we used the longer staves to create a weaving effect. To attach each stave, we shot 2″ nails from a nail gun through each end. Because the staves curve, the only place to secure them is on the ends.
Although I am sure you could nail the boards by hand, a nail gun is really a must. The hard, aged oak is really tough to drive a nail through. In fact, I had to turn the pressure up a bit on my nail gun just to get it to set into the wood.
With each new row of staves, we staggered the staves so they would not align with the previous row. This is easy to do by using a portion of a stave to begin a row, and then continuing on with full pieces. Staggering really gives the wall a great profile look. Even more, it helps hide the space of the bow between each stave.
Creating A Middle Transition With Barrel Lids – How To Create A Whiskey Barrel Wall
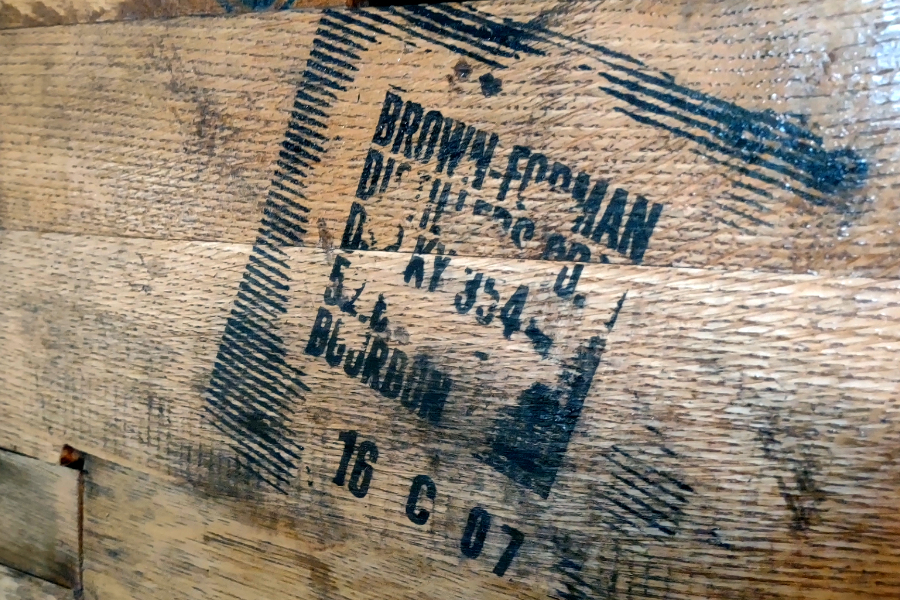
We could have created the whiskey barrel wall entirely from staves. In fact, we almost did just that. But to add a little more interest, we decided to throw in some of the lid pieces too. The lids are often stamped with the distillery name and branding, and for us, the look was too cool not to use.
To make a transition from the stave wall to the lid wall, we nailed in a small row of barrel lid edges. With their half-moon shape, the rounded edges are perfect for creating a natural transition. But even better, by jutting out above the lower wall, they are great for holding bottles or photos too!
The Top Barrel Lid Wood – How To Build A Whiskey Barrel Wall
Once the transition edges were in place, we started putting in pieces of the whiskey lids for the top section. As mentioned above, we used the rounded corner ends of the lids for the transition – but that gave us the center area of the wood lids to square off and use for the top wall.
The lids came apart quite easily. In fact, it is as easy as prying between the edges of each piece of lid wood to separate them. The dowels that hold each board of the lid in place come out quite easily as well using a pair of pliers.
Once the pieces are separated, we took our chop saw (you could use a jig saw as well) to cut off the round edges of each piece to square them off. We kept some of the stamped lids in tact. The wording from the distilleries really turns the wall into quite the conversation piece. To use whole lids, we cut the corners off to make them into larger squared-off pieces.
Just as with the staves, we used a nail gun to tack the lid pieces on the wall. We used the jigsaw to cut off any pieces that didn’t quite fit together. In the end, it was really like creating one big puzzle!
Finishing With A Top Coat Of Sealer – How To Build A Whiskey Barrel Wall
Once the wall is all together, the final touch is adding the polyurethane sealing coat. And trust me when I say the seal coat makes all the difference!
We brushed on two coats of polyurethane over the wood on the wall. The poly really darkened the wood, and made the stamped names come to life. It also helps protect the wall and keep dust from sticking to it as well.
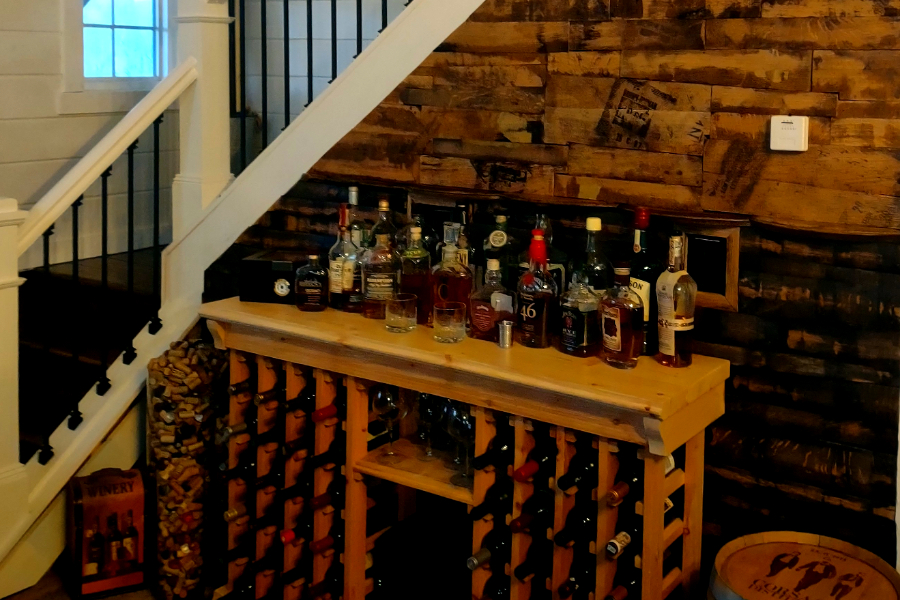
How much do we love the wall? So much so that we will are creating an entire accent wall in the great room from the staves and lids in our new farmhouse! It really is such a unique and beautiful look, we just couldn’t imagine not recreating it!
Here is to creating your own DIY whiskey accent wall! Happy DIY’ing, Jim and Mary.
Jim and Mary Competti have been writing gardening, DIY and recipe articles and books for over 15 years from their 46 acre Ohio farm. The two are frequent speakers on all things gardening and love to travel in their spare time.
As always, feel free to email us at thefarm@owgarden.com with comments, questions, or to simply say hello! You can sign up for our free email list in the subscribe now box in the middle of this article. Follow us on Facebook here : OWG Facebook. This article may contain affiliate links.

