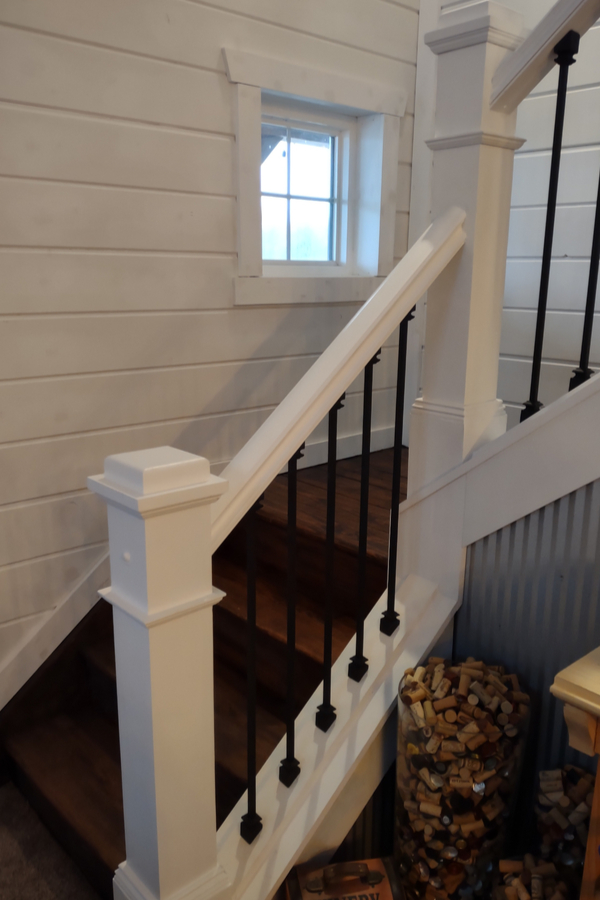
So just how easy is it to install shiplap in your home, garage or basement? It’s actually easier than you might ever imagine. And can it ever create an amazingly beautiful look!
Whether creating a beautiful accent wall for a room, covering a ceiling, or revamping an entire garage or basement to create a whole new living space, shiplap can make quick work of the project.
Shiplap continues to be a popular choice for adding a rustic, yet refined look anywhere. Not only is it extremely durable, it is fast, easy, and fairly mess-free to install. Especially when compared to the hassles of trying to install drywall.
Any DIY’er who has ever been through the process of hanging drywall know that all too well. The cutting, screwing down, taping and mudding of the panels are bad enough – but then comes the endless mess and hassle of sanding it all smooth. And, of course, the clean-up!
The frustration of working with drywall is one of the reasons we first started using shiplap many years back. That, and we simply wanted more than what the cold, boring look of drywall often brings to a space. Shiplap turned out to be the perfect solution.
The Ease & Beauty Of Shiplap – How To Install Shiplap
Once we started using shiplap, we quickly fell in love with the warmth that real wood brings to a space. In fact, so much so that we used it in almost every structure as we built our original farm – and continue to use it today in so many of our projects at the new farm as well.
As you will see below, not only can shiplap be installed with just a few basic tools, the process is quite simple. In fact, so much so, even the most novice of woodworkers can complete a shiplap project with amazing results.

How To Install Shiplap – The Simple Steps To Success
Selecting Your Shiplap
Although shiplap has become extremely popular as of late, it has been around for decades. It was first used in many southern states as a durable and inexpensive covering for both the exterior and interior of homes.
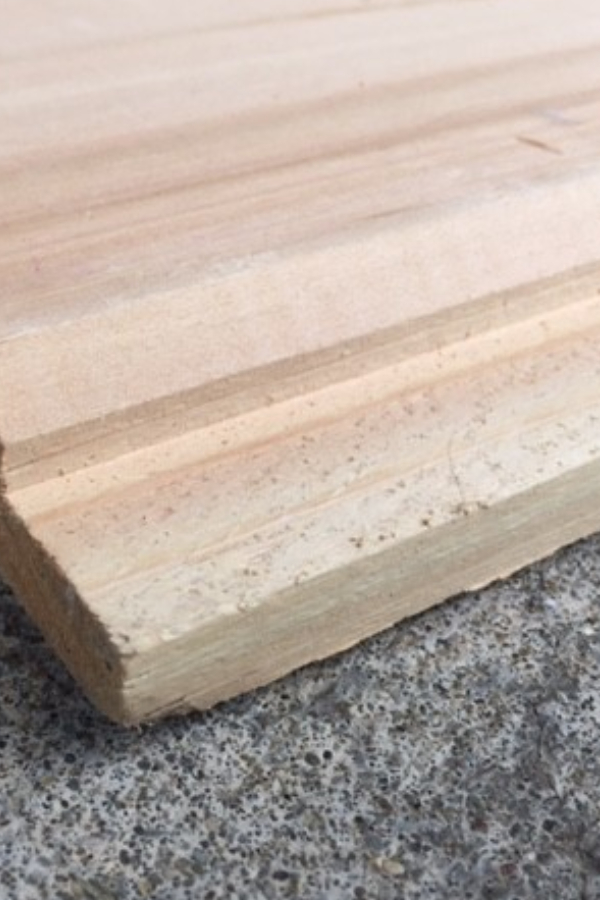
True shiplap boards are wooden boards that have a rabbited edge on either side. When installed on walls or ceilings, the boards overlap one another to form an even, interlocking bond that can be watertight when done correctly.
One of shiplap’s best qualities is that because it is wood, it expands and contracts. This keeps it from cracking, unlike drywall or plaster, which can form hairline fractures when they expand or shrink. Almost all shiplap will have a rough edge side and a smooth finished side. Either side can be used for your project, it really comes down to a choice of personal preference.
Choosing The Right Shiplap Side For You
The smooth side is easy to paint or stain if desired, and gives an ultra-clean look and feel to a wall or room. The rough edge side can also be painted or stained, and will give a more rustic, cabin type feel. As for width, shiplap can come in a wide variety, from four to six inches, all the way up to twelve inches wide if desired.
As a side note, you can use tongue and groove boards in place of true shiplap boards to create the shiplap look. When working with tongue and groove, you can simply leave a bit of a gap to create the same look. Installed with a slight gap, it is actually hard to tell the difference between shiplap and tongue and groove.
Getting The Best Price
One little hint when sourcing your boards, check around with local sawmills to see if they sell direct. We purchased our shiplap direct from a nearby sawmill. By doing this, you can often find a much better price and selection than the big box lumber stores offer.
It always amazes us just how much mark-up there can be in the “shiplap board” sections of the large chain stores!
Tools You Will Need – How To Install Shiplap
The tool list for installing shiplap is surprisingly short. All you really need is a tape measure, long level, nail gun, jigsaw, and either a circular saw or chop saw to cut your wood pieces. The jigsaw is great for cutting out small pieces or for trimming around outlets and switch boxes.
As for the nail gun, it really is a must as far as completing the job quickly and with the best results. You can install shiplap by hand nailing, but it is time consuming and easy to dimple and damage the boards when hammering. Product Link ; Bostitch 2.5″ Nail Gun
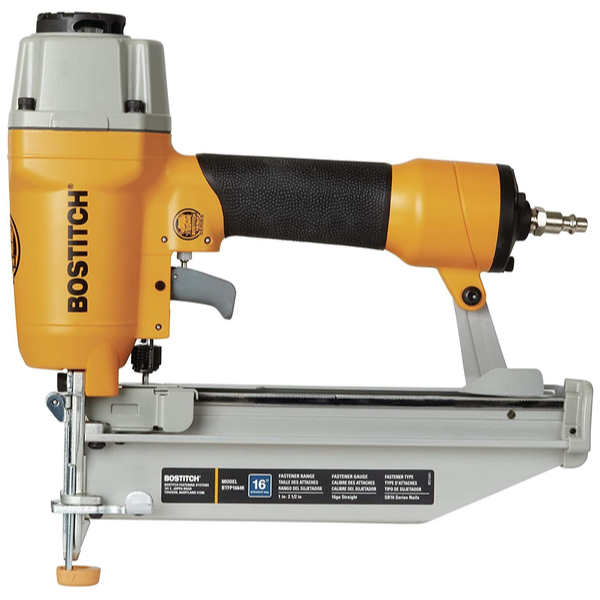
It is well worth spending a little to rent a nail gun and compressor if you do not own one. For the nail gun, look for a finish nailer that can handle up to 2.5″ finishing nails. The deeper you can drive your nails into your studs, the stronger the bond will be. Especially if you happen to be nailing through a layer of drywall.
What About Glue?
We are often asked about using glue for shiplap boards. Unfortunately, gluing shiplap is never a good idea. As a natural product, wood will expand and contract with changes in temperature and humidity. If it is glued down, this can prevent that natural process and crack, split or bow the wood.
Now that you have your tools ready – let’s take a look at how to install your shiplap boards with ease!


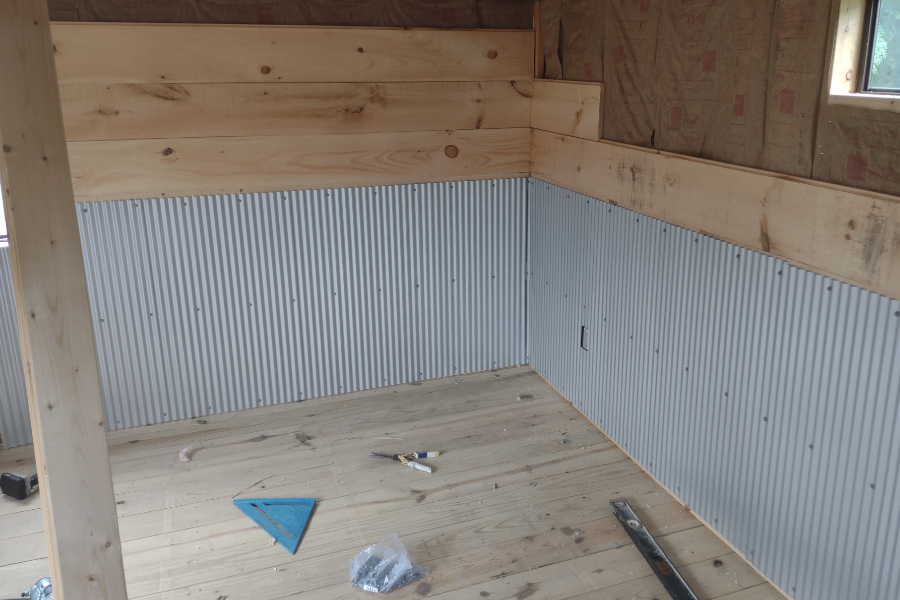
Installing On Bare Studs Vs. Drywall – How To Install Shiplap
If you are installing over bare studs, the process is straightforward and simple. As you install your shiplap on the wall, you will nail directly into each stud. Since you are working up, it is easy to see where to nail.
For installing into stud walls, use nails that are 2-1/2″ long. This will allow enough space to hold into the studs for a good grip. Even if you are nailing through drywall, it still gives you a full inch of grab into the studs.
If you will be installing over drywall, it is important to first locate the studs behind the wall to make nailing easier. Using a stud finder, mark the location with a sharpie. Mark each stud at several heights, and then draw lines to help match up where your nails will go as you move up the wall.
Start From The Bottom – How To Install Shiplap
The first key to installing shiplap is to always, always, always start at the bottom of your wall! This little piece of advice is actually good for two very important reasons.
First, by starting at the bottom, it allows gravity to be a helpful aid as you work your way up the walls. Shiplap, with its rabbited edges, can stack on top of each other.
By working your way from the bottom to the top, you can rest it on the previous board while getting ready to nail. Starting at the bottom also means that all of your boards will be full width boards going all the way up the wall until the top, making it much more pleasing to the eye.
Installing The First Board
Begin in a corner with the first board going all the way against the edge. Place your boards so that the rabbit on the top can be seen and is facing out, and the bottom rabbit is facing down and looks like a full board.
Why is starting in the corner important? By nailing your first board starting in the corner, it will be easy to line up a board going down the other wall so they match and line up in the corners. This isn’t a big deal if you are simply creating a single accent wall of shiplap, but it can really make a difference if you are installing shiplap all around the room or on multiple walls.
Installing The First Board – How To Install Shiplap
Use a few paint stir sticks under the first board to lift it directly off the floor about an 1/8 or 1/4 of an inch. This gives a bit of space for movement of the board, and gives you a chance to level the board off the floor.
Most floors are not plumb or level – so be sure to use the level on top of your first board before securing. Trim will cover any gap when complete at the bottom, so don’t worry if there is a bit of space below that might be appear to not be level to the eye.
Using your nail gun, shoot a nail into each stud about 1″ up from the bottom of the board. You can nail at every stud if you choose, but with shiplap, every other stud will keep the wood very secure. Work your way all the way across the bottom of the wall.
To Gap Or Not To Gap – Installing Shiplap
You can place your next board flush, but most prefer a bit of a gap to give the true look of shiplap. To do this, you can use several coins to space evenly before nailing. In fact, many shiplap boards are still called nickel-gap boards in reference to using a nickel between boards as they were installed for an even gap.
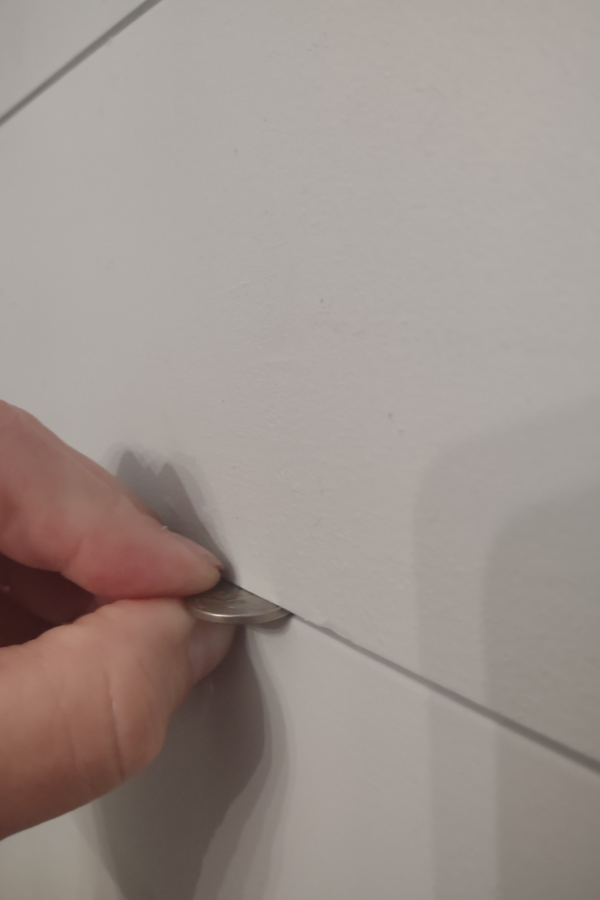
Over the years, we have learned that paint stir sticks make perfect spacers in place of coins. They are longer and help hold the boards much better while nailing.
Once you have the gap set, place the level on top of the board, and nail away. Repeat this process all the way up the wall. Be sure to use the level each time. With the small gap, it is easy to correct if the boards are off level a bit as you go.
Multiple Walls – How To Install Shiplap
Once you have one wall complete, move to the next adjoining wall. Line up the bottom board so that the top is perfectly aligned with the completed wall. Butt the end board against the completed wall board so the corners are flush and nail in.
As you work up the wall, make sure the top of each new board lines up with the completed wall’s corresponding board. Then level the board across, and nail in place. It is actually quite simple, and once you get the hang of it, the project goes fast!
Finishing Looks
Once your wall or walls are up, it is time to add a bit of trim to finish it all out. Although wood can certainly be used, we use thick rope for trimming. It is perfect between the ceiling and walls, and even in corners as well. It installs easily with a pneumatic staple gun.

Because the rope is pliable, it is easy to install without having to make hundreds of difficult cuts. Even better, it goes up in minutes compared to hours!
Here is to installing shiplap like a pro – and to creating a great look in your home with the beauty of all natural wood. Happy DIY’ing – Jim and Mary
Jim and Mary Competti have been writing gardening, DIY and recipe articles and books for over 15 years from their 46 acre Ohio farm. The two are frequent speakers on all things gardening and love to travel in their spare time.
As always, feel free to email us at thefarm@owgarden.com with comments, questions, or to simply say hello! You can sign up for our free email list in the subscribe now box in the middle of this article. Follow us on Facebook here : OWG Facebook. This article may contain affiliate links.