It has certainly been exciting to see the interior of our barndominium begin to come to life over the past few weeks!
With all of the interior framing, electrical and plumbing now in place, we thought it was the perfect time to update the building process with an in-depth look at the interior spaces. One thing is for sure, with spring now here, progress is happening at a fast pace!
Along with the photos and descriptions throughout the article, we have also included a video walk through for those that want a more “virtual” walk through experience.
The Inside Comes To Life – Creating The Barndominium Interior
One of the scariest moments of any building project is to see if what you planned out on paper works in real life. It certainly leads to you asking yourself a lot of questions in the middle of the night.
Are the rooms going to feel big enough? Are the hallways wide enough? Is the kitchen going to be as user-friendly as we thought? And those are just the tip of the iceberg for the questions that keep popping into your head. That is, until you can see the actual space for real and not just on paper!
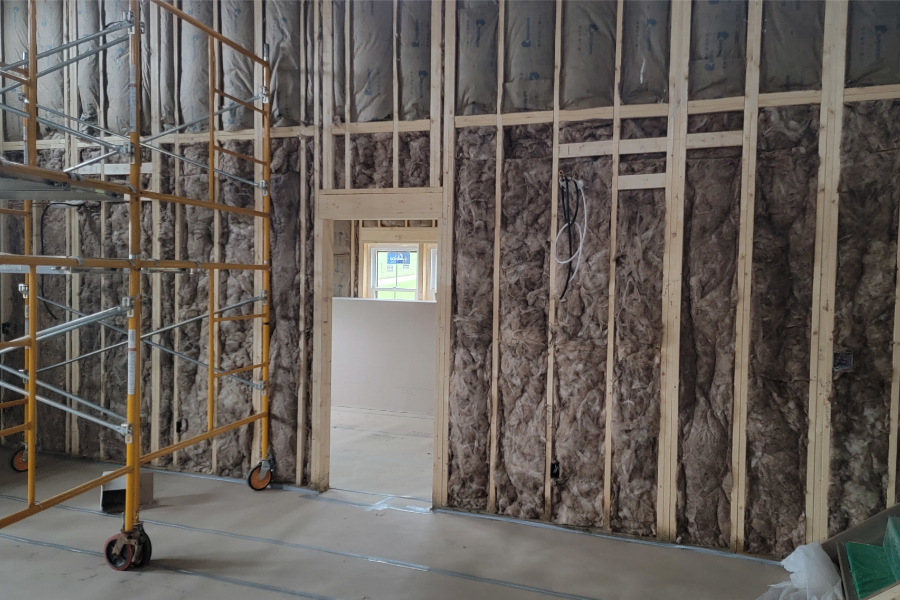
For us, finally seeing the interior framing, electrical, plumbing and insulation all in place brought our barndominium space to life. And thankfully, put all of those questions to rest!
The Kitchen
When indoors, we spend 95% of our waking hours in 2 rooms – the kitchen and great (family) room. We wanted a spacious feel to those two areas, so we simply combined them into one big open space.
The kitchen uses a large portion of one side of the barndominium’s two lean-to structures. But to connect the kitchen to the main structure, we kept that portion of the lean-to open to the great room.
The kitchen’s ceiling is vaulted as well to keep it spacious feeling as well. With a large island in the middle, it will give plenty of space for food prep, eating, and still conversing with those in the great room.
Once we saw the framing in place, we did opt to move the island out a bit more towards the great room. This allows for a full 5′ of space between cabinets and the island, which is perfect for allowing plenty of working space in the kitchen.
The kitchen really is the hub of the house for us, and it was important to make it part of the everyday living space. We will be excited to finally see the cabinets and island put in place in the coming weeks!
The Great Room – The Barndominium Interior
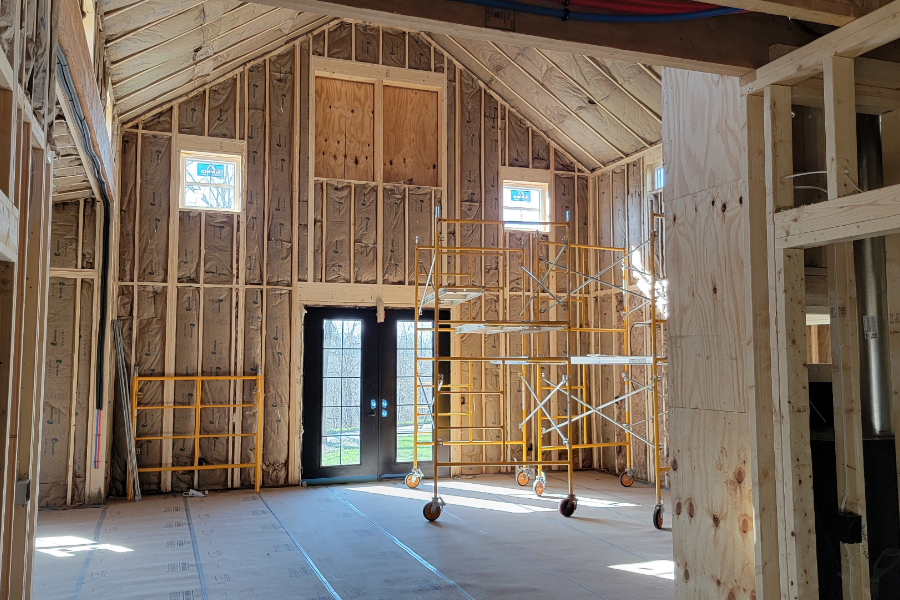
The great room is completely open all the way to the top of the 2nd story ceiling. We learned from our last build that having this area vaulted really makes a smaller space seem quite large.
To help blend in with the higher ceiling, we scaled up both the front doors and the great room’s fireplace. For the doors we went with 8′ high glass panels to allow in plenty of light, and to help make them look big enough to fit in with the large front wall.
The doors will also have exterior barn doors that can slide over them to close off light if needed. We tried to keep a mix of barn / modern home style throughout the barndominium project, and the barn and glass door combo certainly helps blend the two styles together.
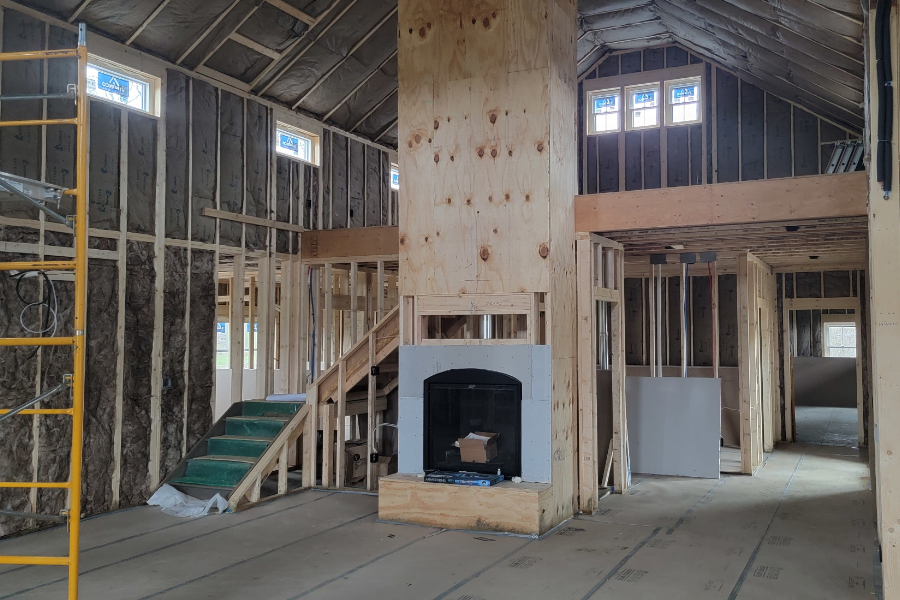
The Fireplace
One of the things we are most excited to see take shape is the fireplace. The fireplace will have stone on the 3 facing sides all the way to the top. Hopefully, it will really help bring the room to life. The fireplace is gas and should be a great source of supplemental heat on cold winter days.
All of the floors in the house have radiant heat running within the concrete, but it’s nice to have supplemental heat – and the fireplace should provide plenty of it when needed.
Speaking of the floors, as you can tell from the photos and video, they have all been covered and protected for the remainder of the building process. We were fortunate enough to have them acid stained before any finish walls or drywall went in, which makes that process way easier and less complicated! (See : Acid Staining Concrete Floors)
Pantry – The Barndominium Interior
The pantry will be a much welcome addition to the barndominium living space. It sits right off of the kitchen in the same lean-to space.
One of our favorite features of the pantry is that it has its own outside entry door. It will be nice to bring groceries and supplies directly into the pantry. Especially since we will not have to go through the house, garage or kitchen to get there!
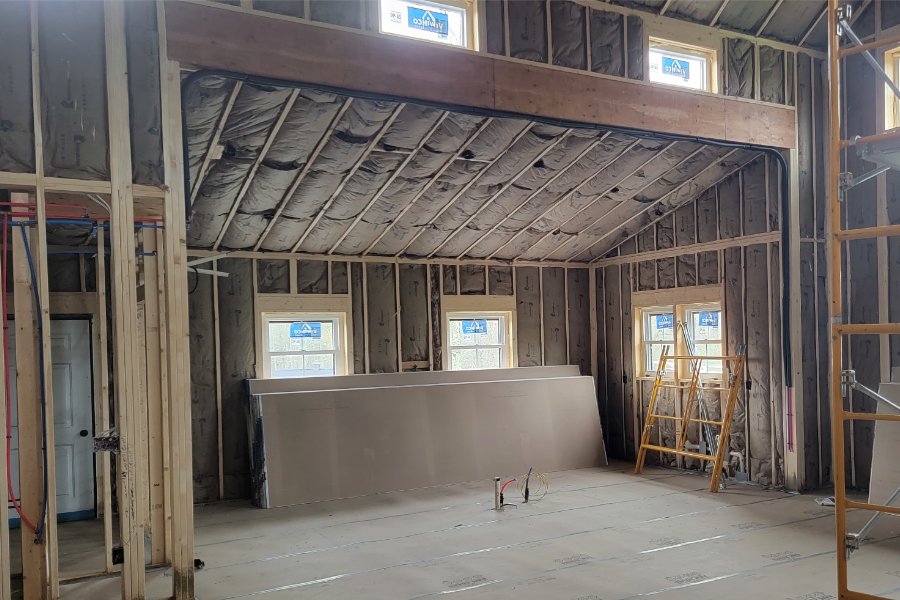
Loft
Now that the framing is up for the loft, we were surprised at how spacious the area is. We are going to use this space as more of an entertainment area, so the added feel of the space works out well.
The steps to the loft area go around the stone fireplace, and should make for a warm and cozy feel. One of the features we love most is how it looks down over the main living space and kitchen. It really does a nice job of connecting the activity space with downstairs.
Bedrooms – The Barndominium Interior
The master & guest bedrooms and bathrooms are located on the opposite lean-to of the barndominium structure. Since these are sleeping areas, we had the wall between the main structure and lean-to insulated for soundproofing.
It will be nice to have these spaces a bit more secluded from the rest of the living space. We kept the main hallway wide at 5′ to the guest bedroom to make for easy access. There is also an additional half-bath off of the kitchen for easy bathroom access.
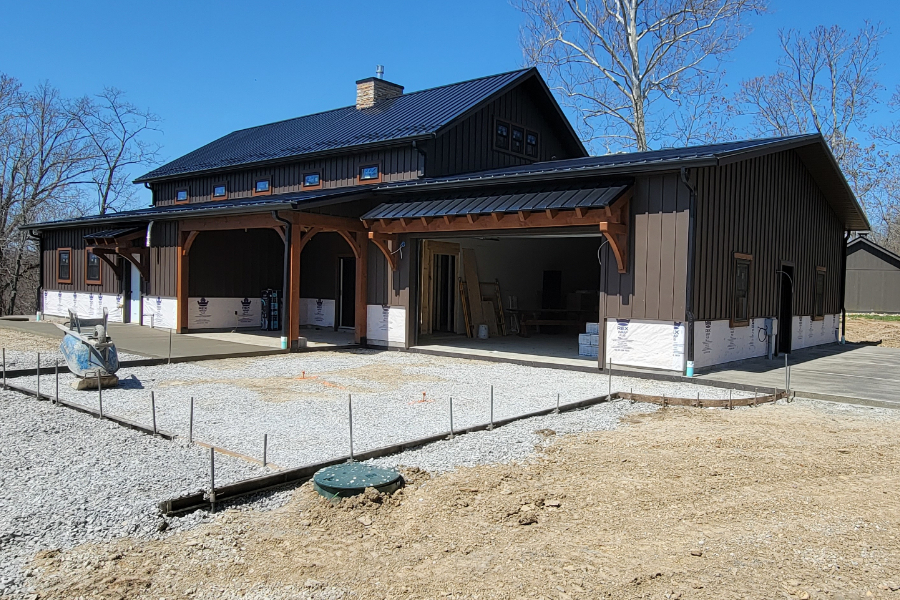
Garage – The Barndominium Interior
Last but not least, there is the garage in the back of the barndominium. It was important for us to have a space to store not just a vehicle, but farm equipment too. We installed doors on each side to be able to get equipment in and out.
One of the biggest advantages to using radiant heat throughout the barndominium is that the garage has heat as well. That will make it nice in the winter when snow and ice need to melt off of vehicles!
One thing is for sure, we are more than excited to get the project complete in the next few month! We will be sure to do a final walk-through and video once everything is in place. – Jim and Mary.
Jim and Mary Competti have been writing gardening, DIY and recipe articles and books for over 15 years from their 46 acre Ohio farm. The two are frequent speakers on all things gardening and love to travel in their spare time.
As always, feel free to email us at thefarm@owgarden.com with comments, questions, or to simply say hello! You can sign up for our free email list in the subscribe now box in the middle of this article. Follow us on Facebook here : OWG Facebook. This article may contain affiliate links.

