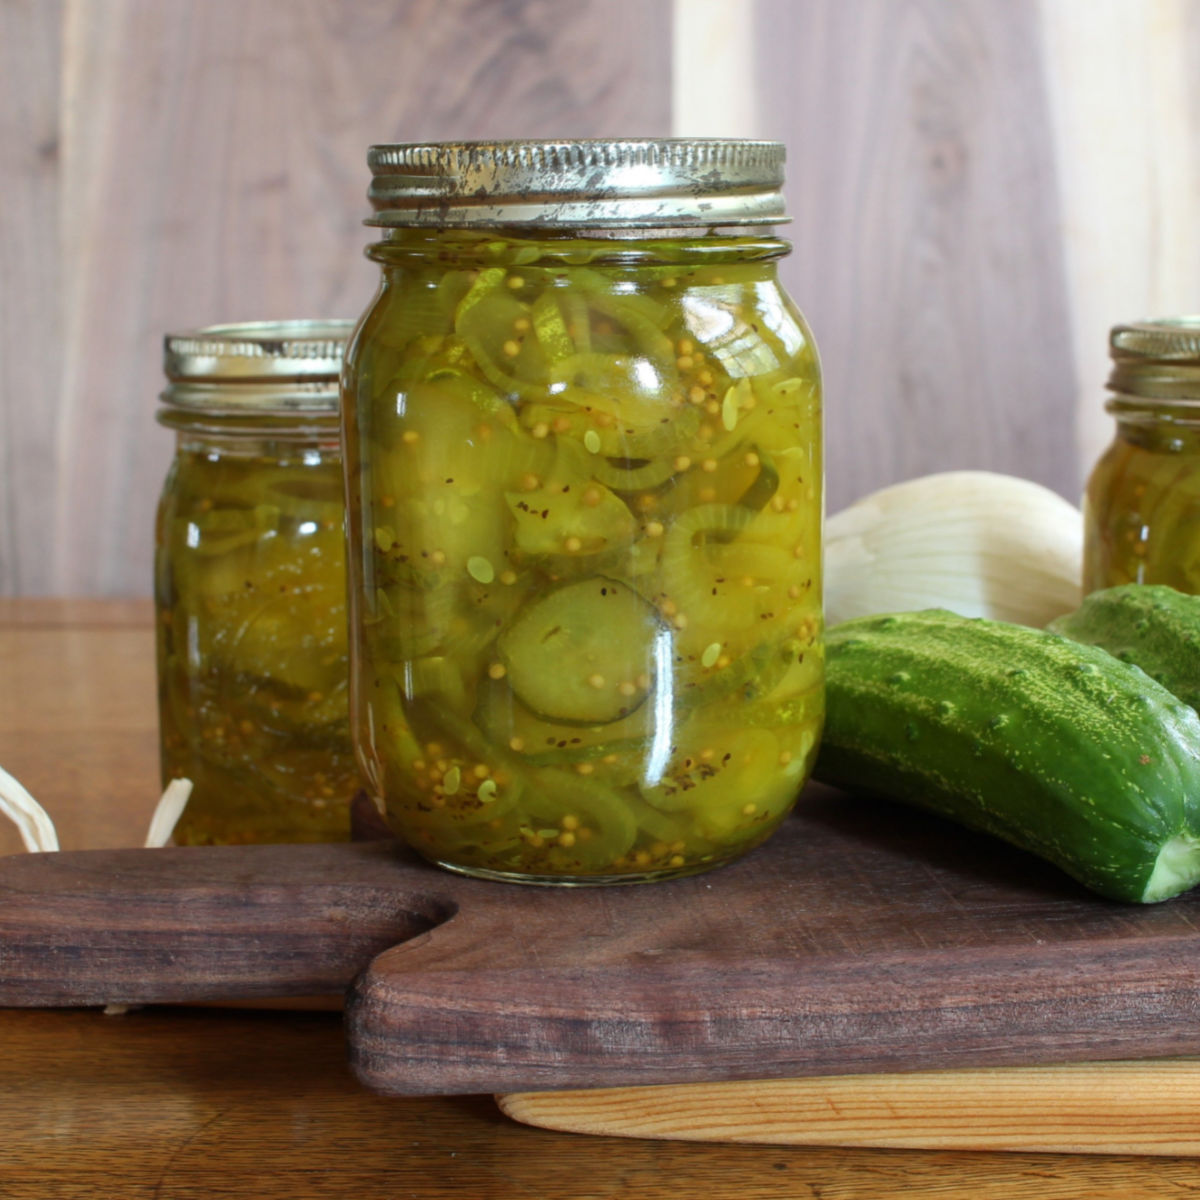
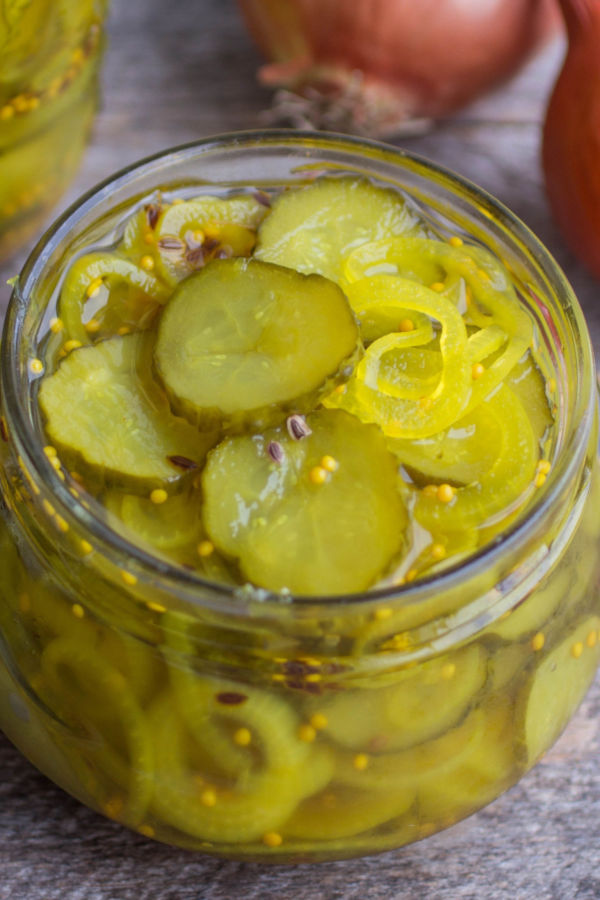
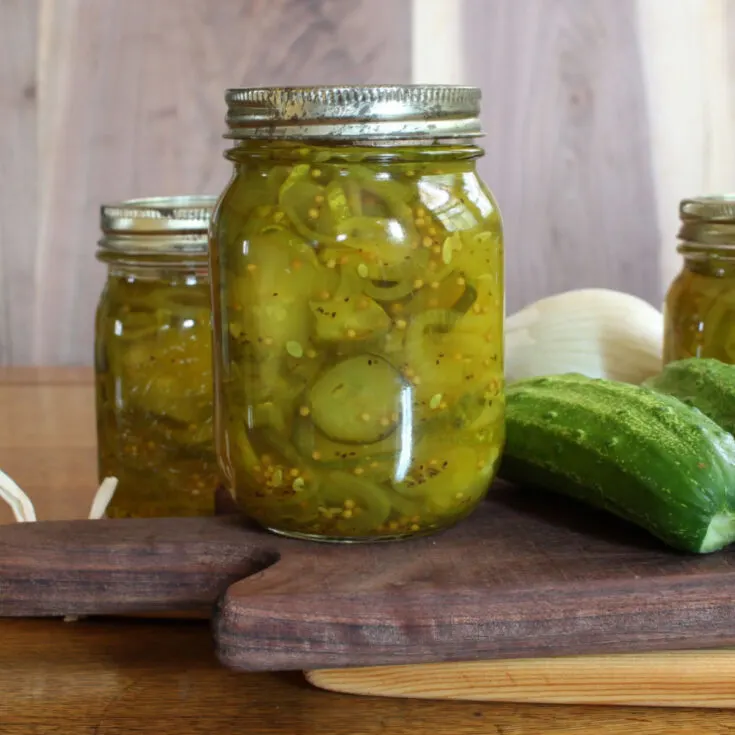
One of the easiest ways to preserve your fresh picked cucumbers is to make homemade bread and butter pickles. Sliced cucumbers are packed inside pint size mason jars and then covered in an easy to make, sweet and tangy brine.
Then place the jars in a hot water bath so that they can seal. Once the jars cool they can be placed in a cool, dark place so that they can be enjoyed any day of the year.
Once you pop open a jar and take a bite into a pickle, you will be amazed at how such an easy process created such a delicious condiment. Serve the pickles on sandwiches and burgers or simply enjoy them as a snack on their own.
What Type of Cucumbers Make The Best Pickles
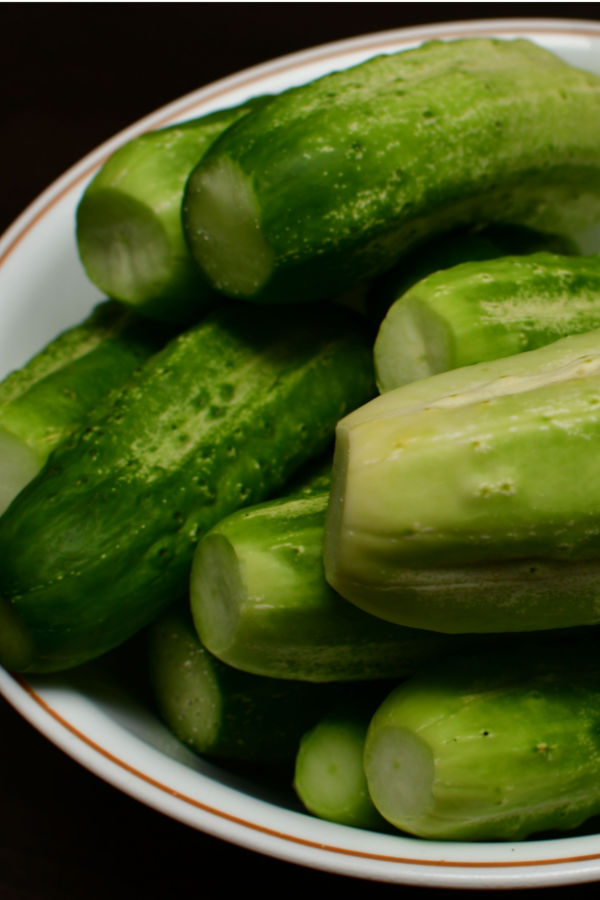
While there are many types of cucumbers that can be used for making pickles, the best cucumbers for pickling are typically those that are small, firm, and have a thin skin. Save the large, bigger cucumbers for your salads or make Cucumber, Tomato & Onion Salad or Cucumber Cream Cheese Spread.
One common variety of cucumber used for pickling is the Boston Pickling cucumber, also known as the standard pickling cucumber. These cucumbers are small and firm which makes them ideal for pickling. They also have a high level of natural sugars, which helps to produce a sweeter bread and butter pickle.
Another good option for pickling is the Persian cucumber. Persian cucumbers are often preferred by home picklers because they have fewer seeds than other cucumber varieties, which can result in a crisper and less watery pickle.
However there are several other different varieties of pickling cucumbers that are available today that would also make great pickles. If you don’t grow your own, you can be sure to find them at your local Farmer’s market, vegetable stand or even at the grocery store.
Tips When Preparing Cucumbers For Pickling
Now that you know what type of cucumbers make the best bread and butter pickles, it is time to get them ready for canning. However, there are a few tips that will help you get bread and butter pickles that turn out nice and crisp.
1. Use Only Fresh Picked Cucumbers. Cucumbers that have been picked off the vine less than 24 hours ago make for the crispiest pickles.
2. Pick Them Young and Small. Pickling cucumbers are designed to be taken off the vine when they are only 3-4 inches in length. The outside should be bumpy and dark green in color.
3. Cut Off The Ends. One of the best things that you can do to ensure that you get crispy pickles to cut off the blossom end of each cucumber. This end contains enzymes that can cause the cucumbers to become soft.
So how do you know which end is the blossom end? The blossom end is small, rough and may even protrude outward slightly. The stem end is large and has an indented circle.
However, if you can’t easily tell the difference between the ends, it is best to cut both ends off.
Equipment Needed To Can Bread and Butter Pickles
Once the cucumbers are ready, it is time to gather the equipment that you will need to can the pickles.
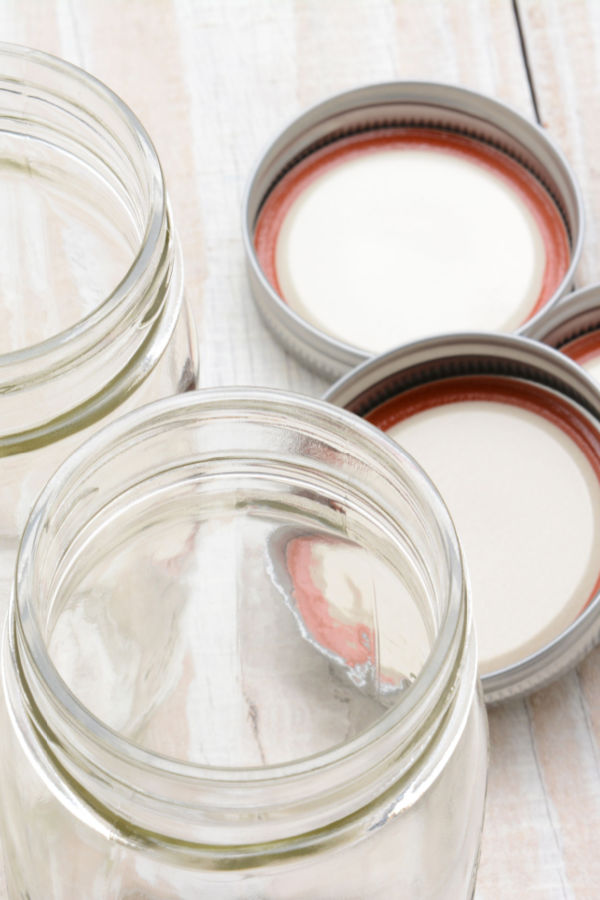
- Canning Jars – You’ll need glass jars with lids and bands specifically designed for canning. For this specific recipe you will need 7-8 pint size jars.
- Water Bath Canner – A large pot with a rack at the bottom is essential for canning. It should be large enough to hold your jars and have enough water to completely cover them with at least one to two inches of water.
- Canning Utensils – You’ll need a few utensils specifically designed for canning, such as a jar lifter to safely remove hot jars from the canning pot, a wide-mouth funnel for filling jars, and a bubble remover/headspace tool for removing air bubbles and ensuring proper headspace.
- Washcloth/Towels – It may sound silly, but a canners best friend can be something as simple as washcloths and towels. A clean washcloth will be needed to wipe the rims of the jars clean before the lid and band go on. And you will need a large thick towel to place the hot jars on so that they can cool.
Important Canning Tips
Water bath canning is one of the easiest methods for canning fruits, vegetables and salsa. However, there are a few important canning tips to help you make sure that the food you preserve is safe to eat.
1. Use a large, deep pot with a lid that can accommodate your canning jars with at least an inch or two of water covering them. The pot should also have a rack or insert to keep the jars from touching the bottom of the pot.
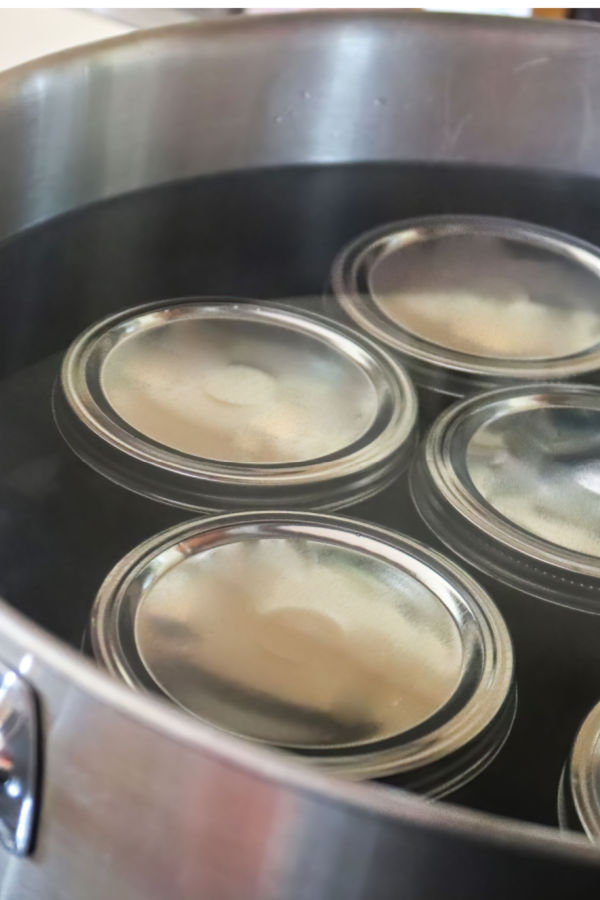
2. Sterilize the jars by boiling them in water for 10 minutes before filling them with the sliced cucumbers and bread and butter brine. Many dishwashers also have a sterilize setting that you can use as well.
3. Be sure to leave the recommended headspace at the top of the jar. Over filling the jars will lead to the contents leaking out and not sealing properly as they expand during the canning process.
4. Wipe the rims clean to remove any spilled brine.
Canning Lids, Bands & Water Bath Canning:
5. Check the instructions on the package of lids that you purchased. Many brands no longer recommend that you heat them before placing them on the filled jars.
6. Only tighten the bands to finger tightness. Over tightening will cause the lid to bend and not seal properly.
6. Process the jars of bread and butter pickles in boiling water for the exact amount of time as indicated in the recipe. However, don’t start timing until the water returns to a full rolling boil.
7. Remove the jars from the water and let them cool on a towel-lined counter for 24 hours before checking the seal.
8. Once the jars have cooled, check for a proper seal by pressing the center of the lid. If it is firm and does not flex, the jar is sealed. If the lid pops up and down easily, it is not sealed and the contents should be refrigerated or reprocessed.
9. Remove the band and store the sealed jars in a cool, dark place for up to one year.
How To Can Bread and Butter Pickles
*Complete recipe instructions including specific measurements, cook temperatures and times are located in a printable recipe card at the bottom of this article. However, be sure to keep reading for helpful tips and tricks when making this recipe.
INGREDIENTS
- 4 quarts sliced cucumbers
- 3 medium onions, sliced
- ½ cup picking salt
Brine Ingredients:
- 3 cups distilled white vinegar
- 1 cup water
- 1 ¾ cup sugar
- 2 tsp. celery seed
- 2 tsp. mustard seed
- 1 ½ tsp. whole cloves
- 1 ½ tsp. ground turmeric
- ½ tsp red pepper flakes
- 2 tsp pickling salt
INSTRUCTIONS TO MAKE BREAD AND BUTTER PICKLES
In a large bowl, add the sliced cucumbers, sliced onions, and ½ cup pickling salt. Gently toss to mix. Pour the mixture into a colander and place the colander inside a large bowl, container or in a clean sink. Let it drain for 3 hours.
After they have been draining for 3 hours, discard the liquid. Then rinse the cucumbers and onion under cold water to remove the salt and drain well.
In a large stock pot add the vinegar, water, sugar, turmeric, cloves, celery seed, mustard seed, red pepper flakes, and 2 tsp pickling salt. Stir until the sugar dissolves and bring the mixture to a boil. Reduce and maintain a simmer.
Pack 7-8 sterilized pint jars with the rinsed and drained cucumbers and onions, leaving ½-inch headspace at the top of the jar. Pour the hot brine over the cucumbers, leaving ½-inch headspace.
Wipe the rims of the jars with a clean cloth. Place the lid on top and then add the band, being sure to not over tighten.
Canning Instructions
Place the covered jars in a boiling water bath, uncovered. Be sure that the jars have 1-2 inches water over the top of the jars. Once the water begins to boil rapidly start the timer for 10 minutes, adjusting for altitude as necessary.
Once the processing time is up, let the jars sit in the hot water for 5 minutes. Then using jar lifters, carefully remove the jars from the water bath and set on a thick towel. Let the jars cool for 24 hours at room temperature.
Check to make sure that each jar is sealed by pushing on the center of the lid. If it doesn’t pop up and down, the jars have been sealed correctly and can be stored in a cool, dark place.
Before storing, remove the outer bands. Store for up to 1 year.
*Be sure to visit our Pickles Page for all of our favorite recipes that include both canned pickles and no-canning pickle recipes.
Enjoy!
Mary and Jim


Jim and Mary Competti have been writing gardening, DIY and recipe articles and books for over 15 years from their 46 acre Ohio farm. The two are frequent speakers on all things gardening and love to travel in their spare time.
As always, feel free to email us at thefarm@owgarden.com with comments, questions, or to simply say hello! You can sign up for our free email list in the subscribe now box in the middle of this article. Follow us on Facebook here : OWG Facebook. This article may contain affiliate links.
Bread and Butter Pickles - Canning Recipe

How to make and can bread and butter pickles using a water bath canner.
Ingredients
- 1 gallon sliced cucumbers
- 3 medium onions sliced
- ½ cup picking salt
Brine Ingredients
- 3 cups vinegar
- 1 cup water
- 1 ¾ cup sugar
- 2 tsp celery seed
- 2 tsp mustard seed
- 1 ½ tsp whole cloves
- 1 ½ tsp turmeric
- ½ tsp red pepper flakes
- 2 tsp pickling salt
Instructions
- In a large bowl, add the sliced cucumbers, sliced onions, and ½ cup pickling salt. Gently toss to mix. Pour the mixture into a colander and place the colander inside a large bowl, container or. in a clean sink. Let it drain for 3 hours.
- After they have been draining for 3 hours, discard the liquid. Then rinse the cucumbers and onion under cold water to remove the salt and drain well.
- In a large stock pot add the vinegar, water, sugar, turmeric, cloves, celery seed, mustard seed, red pepper flakes, and 2 tsp pickling salt. Stir until the sugar dissolves and bring the mixture to a boil. Reduce and maintain a simmer.
- Pack 8 sterilized pint jars with the rinsed and drained cucumbers and onions, leaving ½-inch headspace at the top of the jar. Pour the hot brine over the cucumbers, leaving ½-inch headspace.
- Wipe the rims of the jars with a clean cloth. Place the lid on top and then add the band, being sure to not over tighten.
- Place the covered jars in a boiling water bath, uncovered. Be sure that the jars have 2 inches water over the top of the jars. Once the water begins to boil rapidly start the timer for 10 minutes, adjusting for altitude as necessary.
- Turn off the heat and let the jars sit for 5 minutes in the hot water. Then using jar lifters, carefully remove the jars from the water bath and set them on a thick towel. Let the jars cool for 24 hours at room temperature.
- Check to make sure that each jar is sealed by pushing on the center of the lid. If it doesn't pop up and down, the jars have been sealed correctly and can be stored in a cool, dark place. Before storing remove the bands. Store for up to 1 year.
Notes
- To adjust for altitude follow the Ball Canning Guide Adjustments For Altitude.
Recipe courtesy of Old World Garden Farms
Nutrition Information:
Yield:
8Serving Size:
1 pintAmount Per Serving: Calories: 241Total Fat: 1gSaturated Fat: 0gTrans Fat: 0gUnsaturated Fat: 0gCholesterol: 0mgSodium: 7667mgCarbohydrates: 56gFiber: 2gSugar: 49gProtein: 2g
Nutritional Information is to be used as a general guideline only . Nutritional calculations will vary from the types and brands of the products used. This recipe may not be approved by the USDA. To prevent the risk of botulism, always check with the USDA Canning Guide.