One of the easiest methods to preserve fresh picked green beans is to freeze them. With a few simple steps, you will be able to enjoy the taste of your summer garden all year long without the worries that come with homemade canned beans.
There is nothing more rewarding than being able to fill your pantry shelves and freezer with homegrown garden produce that you grew in your garden. Not only is it a great way to save money, but you also know exactly where your food came from.
Even if you don’t have your own garden, you can still take advantage of the massive seasonal harvest by picking up produce at your local Farmer’s market or grocery store. Then use the opportunity to store the fresh beans so that you can enjoy them throughout the year.
While many of us have fond (or to be honest, scary) memories of our grandparents or parents canning green beans in the kitchen on a hot summer day, this process of preserving is much easier. Not to mention that it is also much safer.
Which is a good thing as canning methods used today are much different from how we learned from our parents. Although if you have absolutely no room in your freezer, you can still Can Green Beans, but I highly recommend using a pressure canner, not a water bath canner.
However, if you are looking for the easiest way to preserve the harvest, freezing is your answer! Just be sure to follow the tips below to make sure that the green beans stay nice and crisp.
Why Freeze Green Beans
Every year, many of us find ourselves with what seems like way too many green beans at once. Whether you had a great harvest from your garden, purchased a large quantity at the Farmer’s Market, or a neighbor shared their crop with you, you may be stuck with the dilemma of what to do with them all before they go bad.
Whatever the reason, those fresh green beans will only last a week or two in your refrigerator. And, let’s admit it, there are only so many green bean recipes a person can consume in a week!
That’s where preserving comes into play. In order to have shelf-stable green beans, you need to purchase and use a pressure canner. Not only are pressure canners expensive, but they are big and bulky to store and come with a variety of safety concerns if they aren’t used properly.
Thankfully, you can set your worries aside and preserve your green beans by freezing them. It is an easy process that doesn’t require any specialized equipment.
Let’s take a look at just how easy it is to freeze green beans with the step-by-step instructions below.
Steps To Freezing Green Beans
It only takes three simple steps to freeze your fresh green beans. No waiting for a pressure canner to come to pressure, no hovering over the dial to make sure it stays steady, and no waiting for the canner to naturally release the pressure buildup. Just three easy steps to preserving fresh green beans!
1. Preparing The Beans
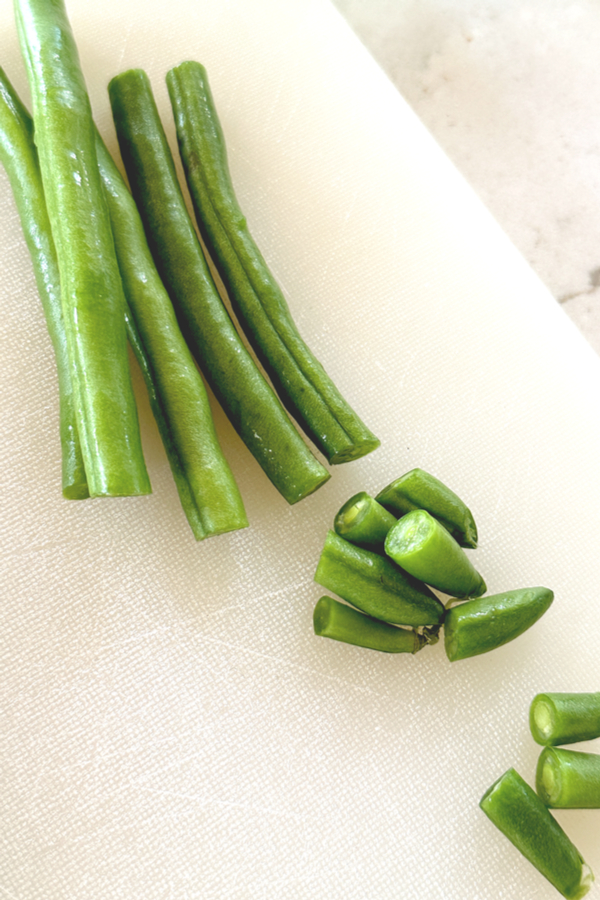
Working in batches, gently rinse the green beans under cool running water. Be sure to remove any dirt and cut away any bad spots on the surface.
Be sure to discard any beans that are discolored or that are soft and limp. It is important to use only fresh and crisp green beans when preserving.
Next, trim the ends with a sharp knife or kitchen scissors. You can either leave the green beans whole or snap them into two-inch pieces.
The optional smaller size makes the beans easier for using in recipes like Vegetable Beef Soup and Green Bean Casserole.
Repeat the process until all of the green beans are washed, trimmed, and snapped to the desired size.
2. Blanching
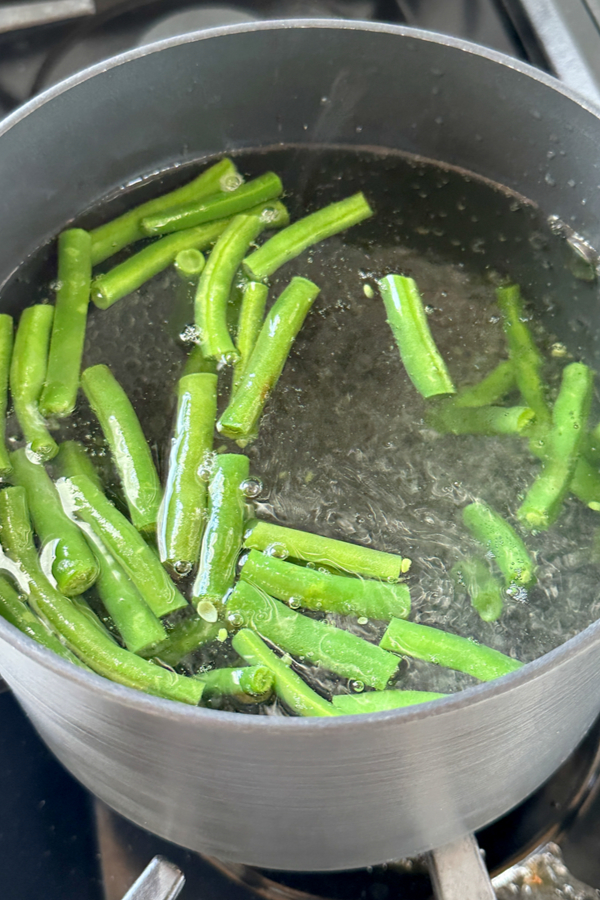
Blanching is a food preparation technique that refers to the process of briefly boiling food items in water from a few seconds to a few minutes. Then you submerge the items in ice water to “shock” them and stop the cooking process.
Although you can technically freeze green beans without blanching them first, but I wouldn’t recommend skipping this simple step. Blanching helps to preserve the green beans’ vibrant green color as well as the crispness texture.
Skipping this process can result in mushy green beans when they are thawed. To blanch simply bring a large pot of water to boil. While you wait, prepare a large bowl of ice water and set it aside.
Once your water is at a rapid boil, add a tablespoon of salt per gallon of water. Now it is time to add the green beans, however, it is best to do so in small batches so that the water can maintain a boil.
Therefore, add 2 cups of the washed and cut green beans to the pot. Allow the water to return to a boil and cook for 2 to 4 minutes or until just tender.
Using a wire skimmer or ladle, remove the green beans and immediately place them in the ice bath until completely cool (about 3 to 5 minutes). (Product Link: Stainless Steel Spider Skimmer)
3. Packaging
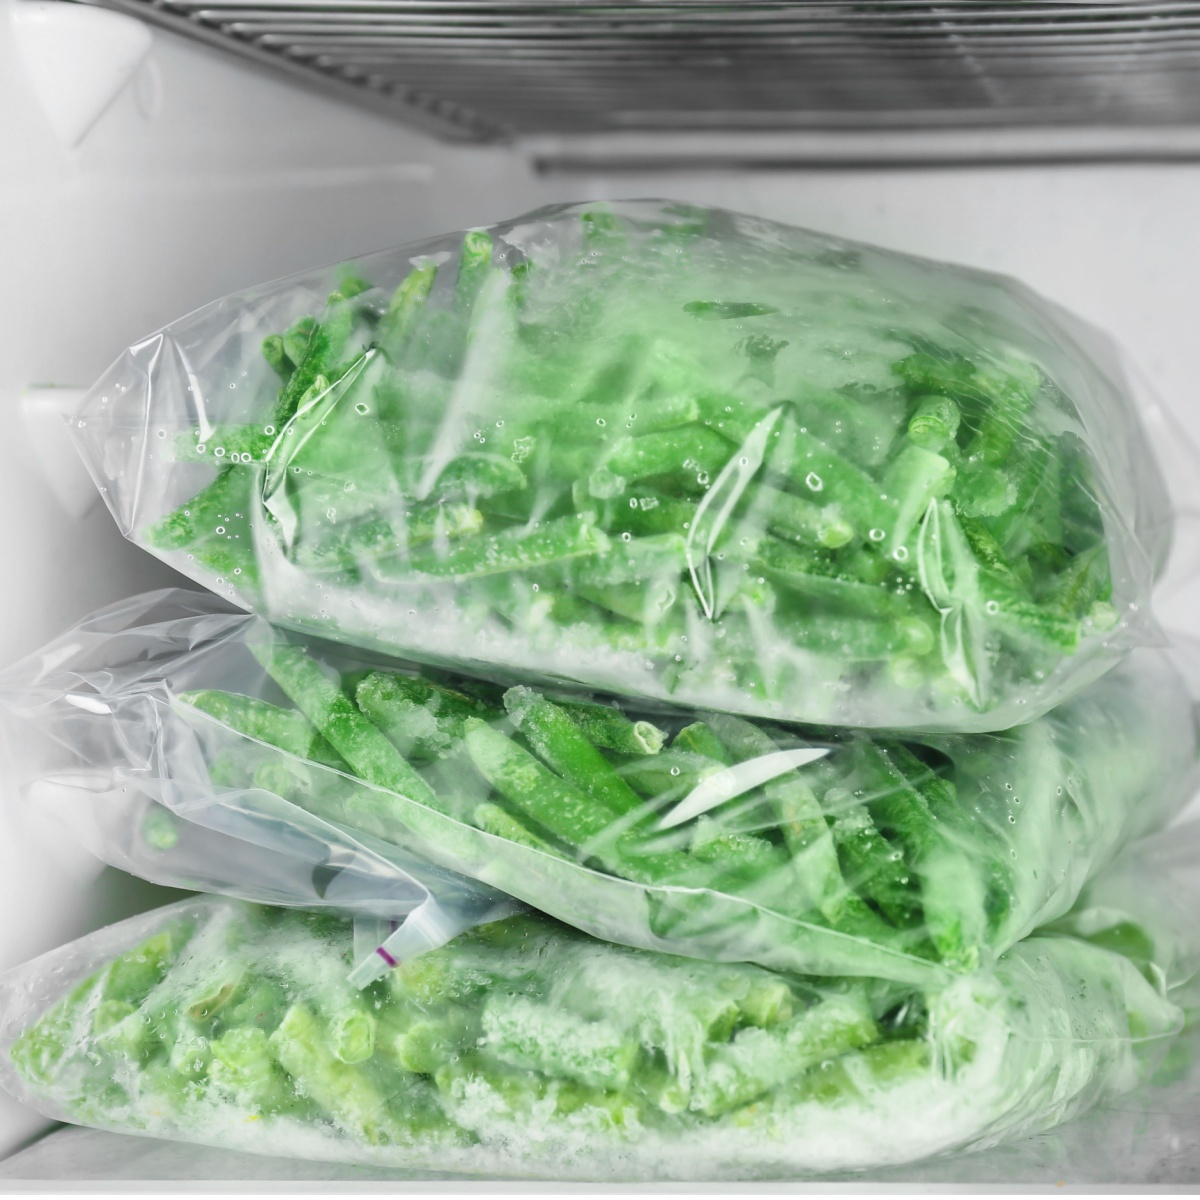
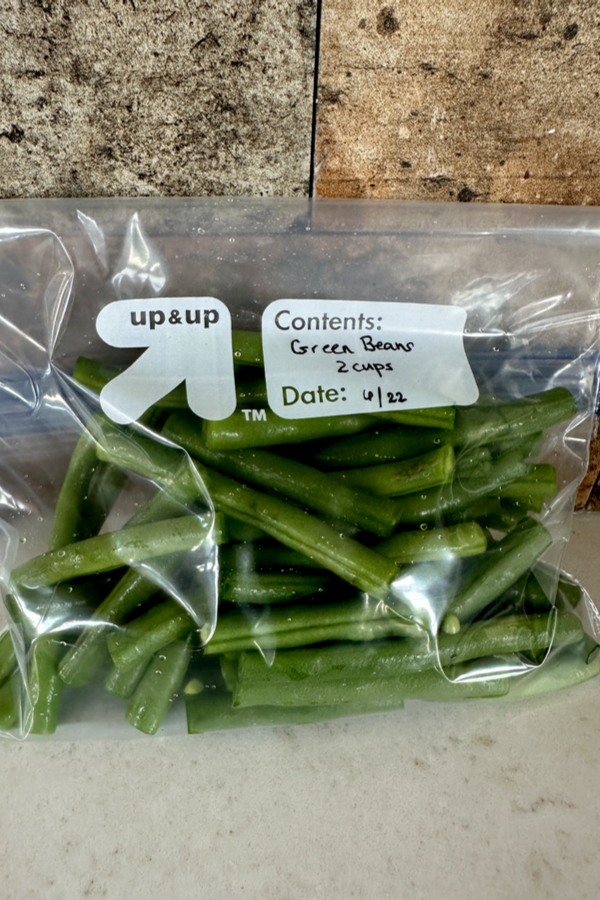
Once the beans cool to room temperature spread them out to dry on clean kitchen towels or paper towels. Once dry, gently pack the beans into freezer-friendly storage bags, glass jars, or plastic food storage containers. Remove as much air as possible before sealing.
Now all that is left is to label your containers with the contents, amount, and date. Place the containers flat in the freezer, leaving a little space between items until they are frozen solid.
You can also flash freeze the green beans after they are dry to help prevent them from forming one large clump in the freezer container. Do this by lining a large baking sheet with parchment paper and spread the beans out in a single layer.
Place the baking sheet in the freezer for 1 hour. Then transfer the beans to a freezer safe container, remove as much air as possible and label as instructed above.
How To Thaw Frozen Green Beans
For many recipes, especially soups and stews, there is no need to thaw the frozen green beans prior to adding them to the dish. However, if you prefer to eat a side dish of green beans or if you would like to add them to a stir fry, it is best to thaw them first.
Below I have listed 3 easy methods to thaw frozen green beans. Depending on the amount of time that you have available, choose the method that works best for you.
Refrigerator:
Place the frozen green beans in a bowl or container and transfer them to the refrigerator. Allow them to thaw slowly over a period of several hours or overnight.
This is the preferred method as it results in the best quality and texture of the green beans.
Cold water:
Place the frozen green beans in a sealed plastic bag, ensuring there are no leaks. Submerge the bag in a bowl of cold water.
Then change the water every 30 minutes to keep it cold. The green beans will thaw within 1-2 hours, depending on the amount of beans in the bag.
Microwave:
If you’re in a hurry, you can also use a microwave to thaw green beans. Place the frozen green beans in a microwave-safe dish, cover them loosely, and set the microwave to the defrost setting or use a low power setting.
It is best to microwave in short intervals, pausing to check and stir the beans every 1-2 minutes. Be sure to check them frequently to prevent them from partially cooking
Once the green beans are thawed, you can cook them using your preferred method, such as boiling, sautéing, steaming, or adding them directly to a recipe.
For the best flavor, texture, and nutritional value, use frozen green beans within 8 months of freezing.
Here’s to enjoying your fresh garden green beans all throughout the year by safely and easily preserving them by freezing!
Enjoy!
Mary and Jim


Jim and Mary Competti have been writing gardening, DIY and recipe articles and books for over 15 years from their 46 acre Ohio farm. The two are frequent speakers on all things gardening and love to travel in their spare time.
As always, feel free to email us at thefarm@owgarden.com with comments, questions, or to simply say hello! You can sign up for our free email list in the subscribe now box in the middle of this article. Follow us on Facebook here : OWG Facebook. This article may contain affiliate links.