If you want to grow your own crop of delicious sweet potatoes this year – it all starts with creating your own slips (or plants) from a sweet potato indoors long before the garden season arrives. And it couldn’t be easier to do!
Sweet potatoes have become more and more popular among gardeners with each passing year. The delicious tuber has gained popularity as the healthier choice for potato lovers. Not only does it have a lower sugar content than white potatoes – it also has higher levels of fiber and vitamins as well.
But when it comes to growing sweet potatoes, they are certainly unique as a vegetable plant. Unlike many other vegetables, they are not started by seeds. Nor, like other potatoes, do they grow by slicing and planting a portion of the potato.
The seeds of regular potatoes are actually a portion of the tuber that contains at least one “eye” or bud. That portion can be sliced away from a potato, and when planted in the soil, the eye then sprouts stems and leaves and grows into a potato plant.
The Sweet Potato Difference
Sweet potatoes are not grown from planting an eye or bud section of the potato. Instead, it is the roots that sprout from the end of a sweet potato that can produce a new plant.
These roots are known as slips and are quite easy to grow from an existing sweet potato. In fact, it’s so easy, it can all be done right in a sunny window in your home in late winter. There is no need for fancy grow lights, heat mats or special growing equipment. In fact, all we use is an organic sweet potato, a toothpick, water and a glass jar!
How To Start Slips From Sweet Potatoes
Creating Your Own Slips From A Sweet Potato
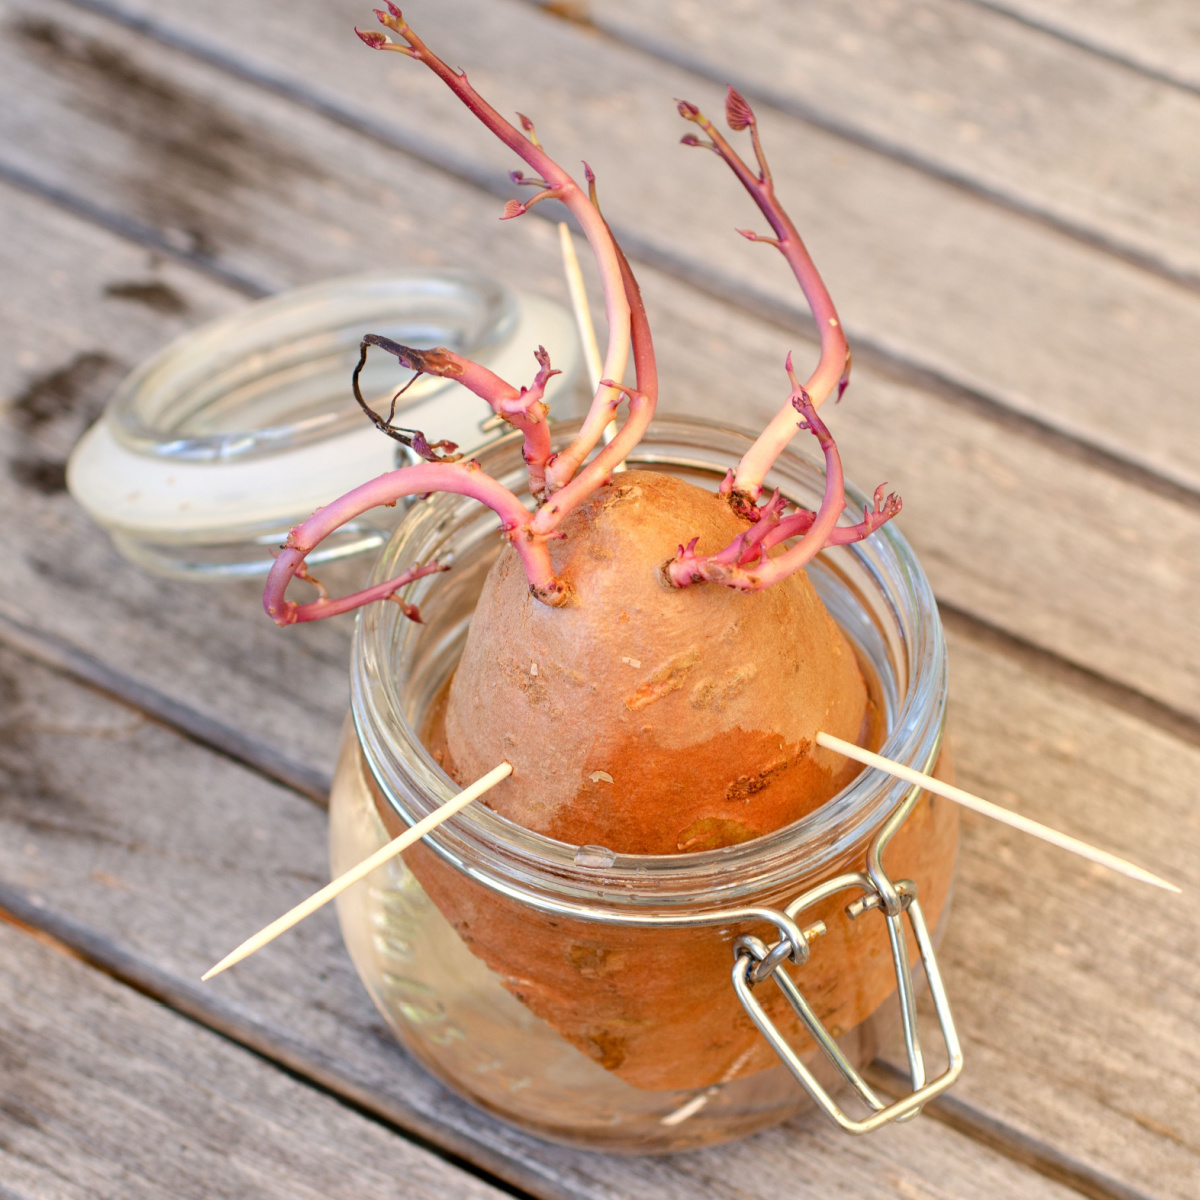
There are several proven methods for growing slips from an existing sweet potato. For us, the toothpick method we cover below always works like a charm. Not only is it easy to do, it can start a lot of plants in short order.
The first key is to always start with a healthy organic sweet potato. Why organic? Because non-organic sweet potatoes are often treated with chemicals that prevent sprouting. With an organic sweet potato, there is no worry of sprouting issues, or of any pesticides being present either.
We prefer to select larger sweet potatoes. This allows us to cut them in half to make two separate growing jars of slips. You can use a whole sweet potato, but for us, we always feel the cut ends aid in speeding up the process of the tops sprouting new slips.
Once you have cut the sweet potato in half, it’s time for the toothpick trick. Stick a few toothpicks just above the halfway point of the cut sweet potato. Place the toothpicks in a line around the circumference of the potato – usually, 3 or 4 toothpicks will work well.
Placing The Sweet Potato In The Jar – How To Start Slips From Sweet Potatoes
Next, take a small glass jar that is slightly larger than the circumference of the sweet potato. We like to use mason or jelly jars for this as they are almost always the perfect size. (See in the next section below for jar, potato and toothpick placement)
Fill the jar about halfway up with tap or untreated water. Do not use treated or city water as it can contain chemicals and salts that will hinder sprouting.
To finish, place the sweet potato down into the jar, letting the toothpicks rest on the jar’s rim to suspend the potato in the water. Half of the potato should be in the water, and half out. Now it’s time to put your jar into a sunny warm window and let the magic happen!
Rooting Potato Slips – How To Start Slips From Sweet Potatoes
It can take a week or more for the sweet potato to develop a few stringy roots below the water line. Then in a few weeks, the sweet potato will begin to sprout stems and foliage from the top.
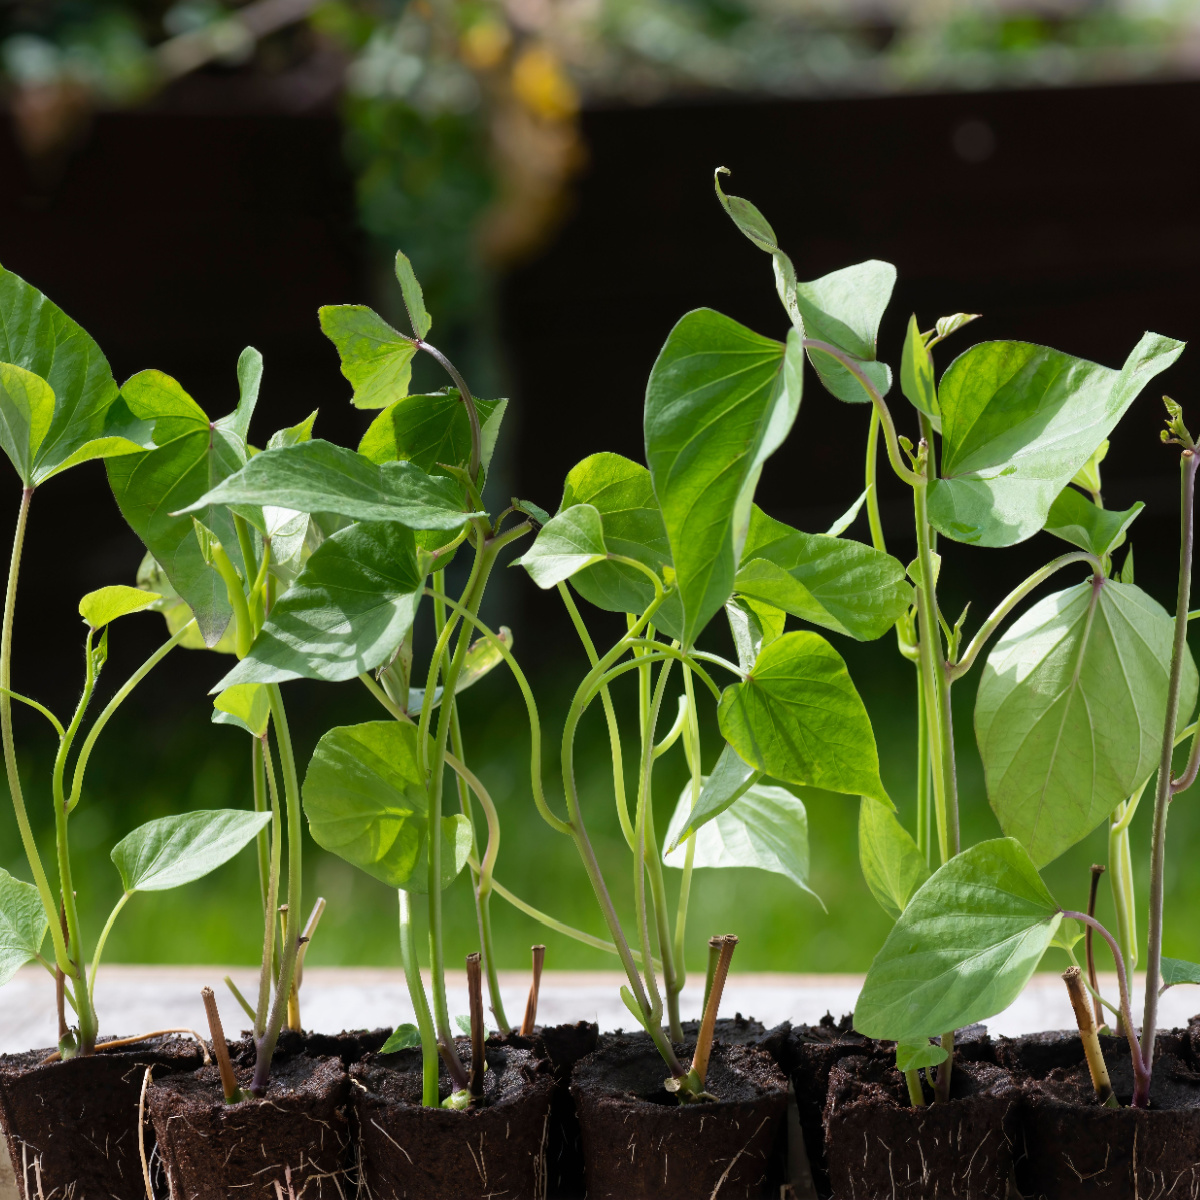
Allow the stems to grow until they reach about 4″ in length. This is important to ensure that you have enough stems to root in water. Next, carefully remove the stems from the base of the sweet potato with a slight twist. Be as gentle as you can, but don’t worry if a tiny bit breaks off in the process.
Next, place the end of the stems down into another jar filled with water. Again, use untreated water. The stems will float when they are little – this is actually normal and not an issue. Just make sure that the slips are not completely under water.
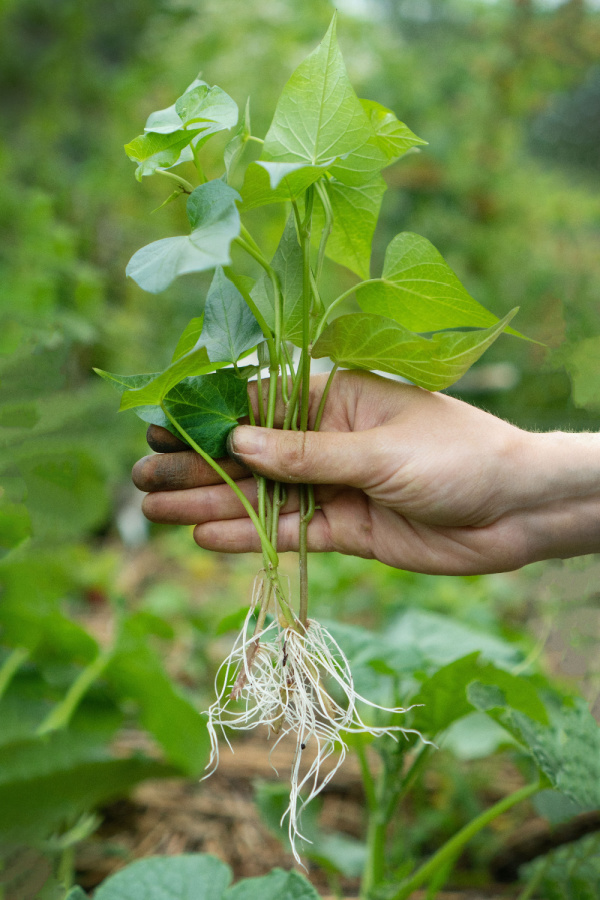
In a few days, the ends will begin to form roots, and your slips will begin to take off. Allow them to grow for a few weeks to have strong roots. At this point, you can either transplant them into soil or simply allow them to continue growing roots in water and plant them directly into the garden when the time comes.
We have done both with equal success. For us, it just seems easier to skip the potting up process to save time and effort. As for timing, we like to start our slips in early to mid March. That gives us 8 to 10 weeks before our planting date.


The really good news is that your original sweet potato will continue to develop new slips in the same location as your old slips formed. Using this method, you can create several rounds of slips before it’s time to plant.
Planting Sweet Potato Slips – How To Start Slips From Sweet Potatoes
Sweet potatoes are vulnerable to frost and cool weather. For this reason, it’s best to plant them once the soil warms in late spring and all threat of frost has passed.
You can plant sweet potatoes in a variety of methods. Many plant sweet potatoes in a traditional garden setting or in raised beds. We actually grow both our sweet potatoes and regular potatoes in crates. It is a simple system that takes all of the hard work out of planting and harvesting! See: How We Plant Potatoes In Crates
No matter where or how you plant, good soil and sunlight are a must! Sweet potatoes thrive on loose, fertile soil. The best way to give them this is to mix in generous amounts of compost into the soil when planting. In addition, always be sure to plant your sweet potatoes where they will get a minimum of six to eight hours of sunlight every day.
When planting in a traditional garden or raised beds, space the slips 8 to 10 inches apart. Always plant your slips at the top of a slight mound of soil. This will keep them from sitting in water and prevent them from rotting off from too much moisture. Bury at least half of the slip to allow for plenty of rooting.

Fertilizing and Water – How To Start Slips From Sweet Potatoes
It’s important to water your slips until they establish their roots in the soil. Check daily the first few days for signs of the slips drying out and water if necessary. Water is important, but be careful not to over-water. If plants begin to yellow, it is usually a sign of over-watering, not underwatering.
Once they are established in a few weeks, sweet potatoes will benefit greatly from a few applications of liquid fertilizer. Compost tea and worm casting tea are our favorites. Not only are they completely organic, but they also provide a steady but low dose of nutrients to plants. You do not have to worry about diluting compost or casting tea as they will not burn plants.
You can also use an organic liquid fertilizer as an alternative. It is best with commercial fertilizers to use at half strength to not overpower plants. Affiliate Product Link: Fox Farm Liquid Concentrate
Apply the first dose after plants have been growing for two weeks outdoors in the soil. Fertilize one more time at the four or five week mark. After this, back off on fertilizing as it can lead to extensive foliage production up top, but less potato production under the soil.
By mid-fall, plants will usually start to yellow at the ends of the vines. This is a sign that they are ready for harvest. Dig up slowly from the edges to avoid damaging the tubers. Once out of the soil, allow the sweet potatoes to cure for 3 weeks before consuming to allow the starch to convert to the sugars that bring out their sweetness.
Here is to growing your own sweet potato slips this year, and to a great sweet potato harvest! Happy Gardening – Jim and Mary.
Old World Garden Farms
Jim and Mary Competti have been writing gardening, DIY and recipe articles and books for over 15 years from their 46 acre Ohio farm. The two are frequent speakers on all things gardening and love to travel in their spare time.
As always, feel free to email us at thefarm@owgarden.com with comments, questions, or to simply say hello! You can sign up for our free email list in the subscribe now box in the middle of this article. Follow us on Facebook here : OWG Facebook. This article may contain affiliate links.