Looking to build your own DIY pickleball court and wondering just how to go about it? We have you covered with today’s article and corresponding video!
One thing is for sure, pickleball is becoming more and more popular than ever with each passing year. The sport certainly pulled our entire family in this summer on a family vacation. So much so that when we got back to the farm, we decided to build a court for us and our farm guests to play whenever they want. And has it ever been a hit!
Today’s article will take you through all of the stages of creating your own court, including sizing it, creating a playing surface – and striping it. We also have included a video walking you through all the building stages as well at the end of the article.
How To Build A DIY Pickleball Court
Although you can create a court on grass, dirt or an existing piece of concrete or asphalt – when you live on a farm with lots of hills – we had to start from square one – which included leveling off an area and then pouring a concrete pad from scratch. Here is exactly how we built the court, step by step!
Creating A Regulation Court – How To Build A DIY Pickleball Court
No matter if you are creating a grass, dirt or concrete court, the most important aspect of all is to get the court dimensions correct. A regulation pickleball court is 44 feet long x 20 feet wide. But it’s important to remember that you need to be sure to have some extra space out of bounds to allow for safe play.
For us, that hit close to home when we were playing on vacation. The out of bounds area there included steep hills and big drop offs, something we wanted to avoid. For our court, we added 3 feet of extra playing surface to our pad to accommodate. In addition, we also added another 3′ area of pea gravel beyond for plenty of out of bounds area.

Creating The Court – How To Build A DIY Pickleball Court
For us, finding level ground was the hardest part of all! We chose an area down by the pond and pavilion and created a level space 56′ long by 32 wide. This allowed for a court with 3′ feet of concrete out of bounds and another 3′ of pea gravel for safe play.
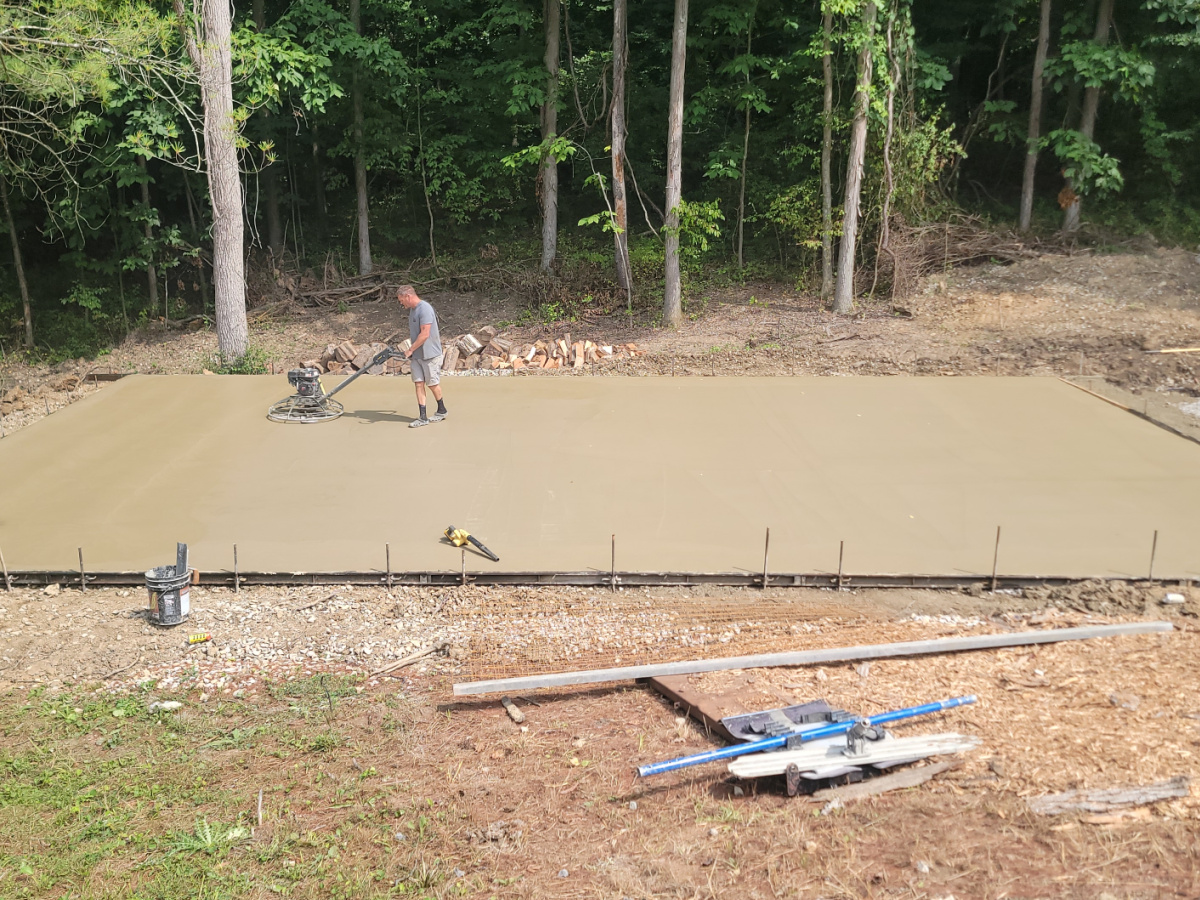
Once it was level and packed down, in went a layer of gravel and the concrete forms. The court is around four to five inches thick. It took 18 yards total for the court and out of bounds areas. The 44 foot x 20 foot court took 16 yards, and then we added 3′ on each end for the darker out of bounds area that used up 2 more cubic yards of concrete.
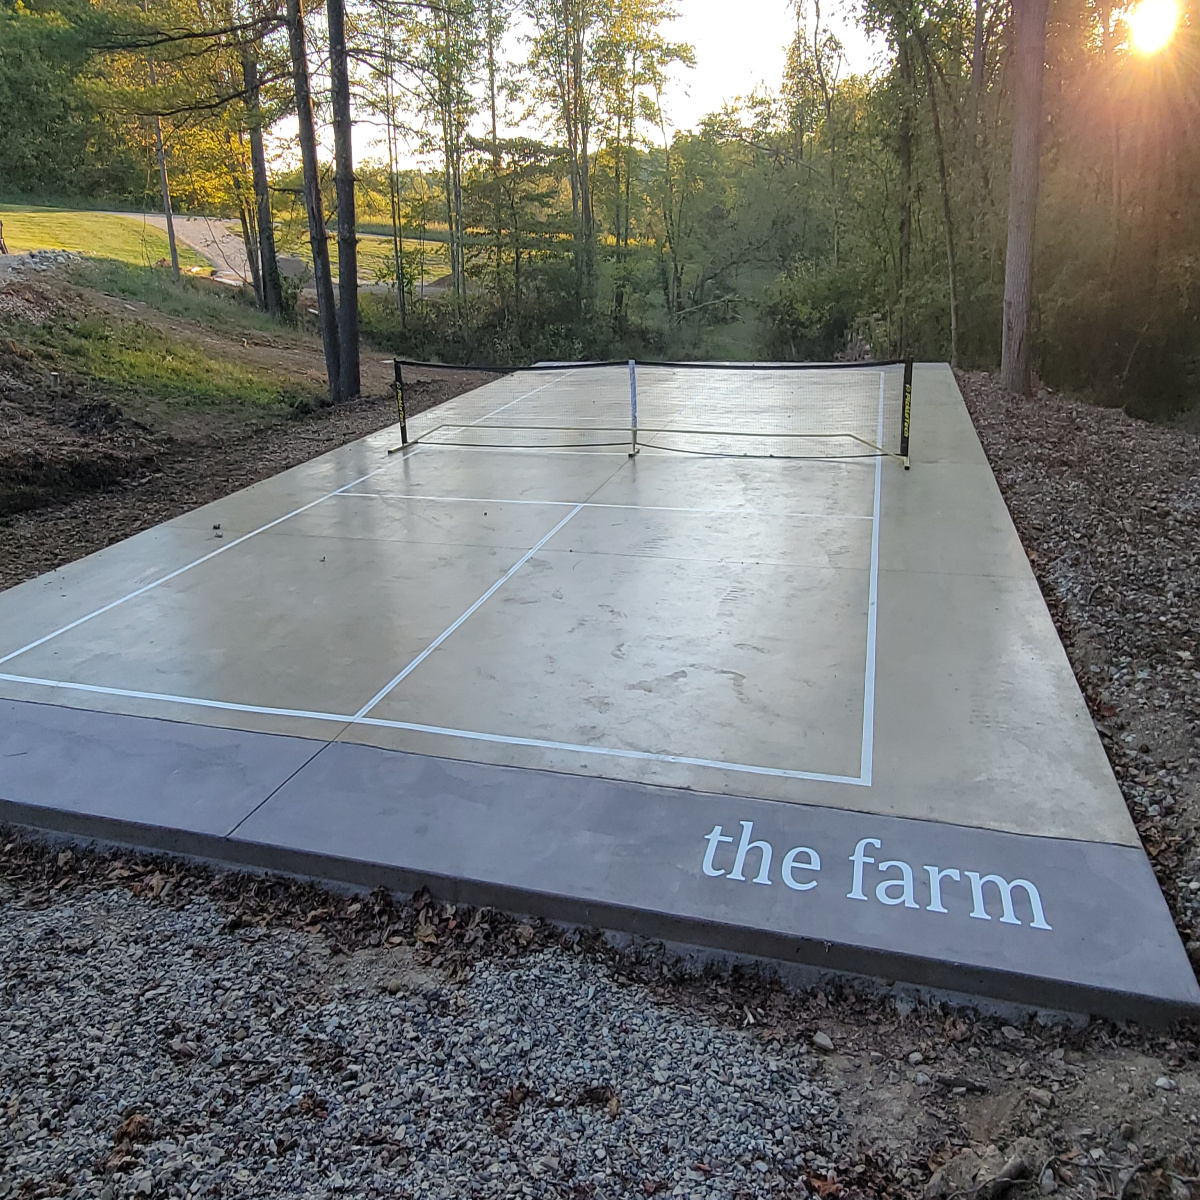
We actually had the concrete colored to dress it up a bit. For the main area we used a light beige and for the ends a darker brown. We then had the surface power troweled to give it a smoother playing surface.
If you are wondering about grip and the slipperiness of concrete and sealer – we did add a bit of grit to our final sealer. It makes the playing surface non-slip and adds a great look to the court as well. Once the concrete was in, it was time to tape and paint the lines!
Taping Off The Lines – How To Build A DIY Pickleball Court
Easily the most tedious of the building process, taping off lines to paint for your court is really about patience.
Without a doubt, the way to go when painting your own lines is to use Frog Tape. There are all kinds of templates on the market, but they can be expensive. Even worse, they can be difficult to use and reuse.
For a little under $30, we were able to purchase a 3 pack of wide tape to create our lines. We first measured off and then snapped a chalk line. Then, we simply put down the tape and rolled it as well to make sure it was tight to the ground. FROGTAPE Multi-Surface Painter’s Tape with PAINTBLOCK, 1.88 Inches x 60 Yards, Green, 3 Rolls
We rolled on the paint using a small roller with a 3/4 inch nap. As a little extra tip – before using the roller, wrap a piece of the tape around it and pull it back off. This will remove all of the little fuzzies that can often end up in your paint!
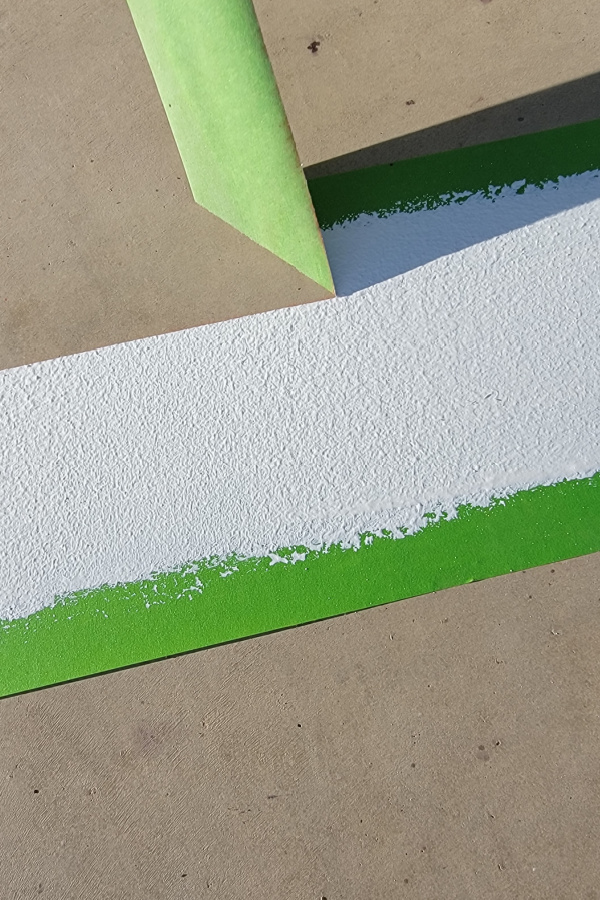
For us, two coats were more than enough to leave bold, thick and most importantly, straight lines! For the paint, we used parking lot paint. It is thick, doesn’t run, and leaves a great line behind. Once all the lines were down, we put on a few coats of diamond sealer and added a little grit to the final coat.
Adding A Logo – How To Build A DIY Pickleball Court
After the main court was in, we poured the 3′ out of bounds area using the darker concrete. Then it was time to dress the court up with a logo!
It was actually quite easy and inexpensive. We had a local decal shop make us two cut-out decals. The total cost was about $30 each for a 5′ x 2′ logo. Then, much as with the tape, we put the logo down and painted it with the parking lot paint.
Once the paint dried, we then lifted up the decal and the logo was in place. All in all, it was a great way to personalize the court for little cost! We know one thing, between our friends, family and our Airbnb guests to the farm – the court will see a lot of action in the coming years!
As for total cost, it really depends on the cost of concrete in your area and if you will be doing it yourself or having it poured. Here concrete is about $140 a yard, so the concrete court material will run about $2500.00.
For those that want to see the whole process, here is a quick 3 minute video that takes you through it all –
Here is to creating and building your very own DIY pickleball court in your backyard! If you’d like to learn about another project at the farm, see our article: The Outdoor Garden Train Project – A Garden Like No Other At The Farm! Jim & Mary
Old World Garden
Jim and Mary Competti have been writing gardening, DIY and recipe articles and books for over 15 years from their 46 acre Ohio farm. The two are frequent speakers on all things gardening and love to travel in their spare time.
As always, feel free to email us at thefarm@owgarden.com with comments, questions, or to simply say hello! You can sign up for our free email list in the subscribe now box in the middle of this article. Follow us on Facebook here : OWG Facebook. This article may contain affiliate links.