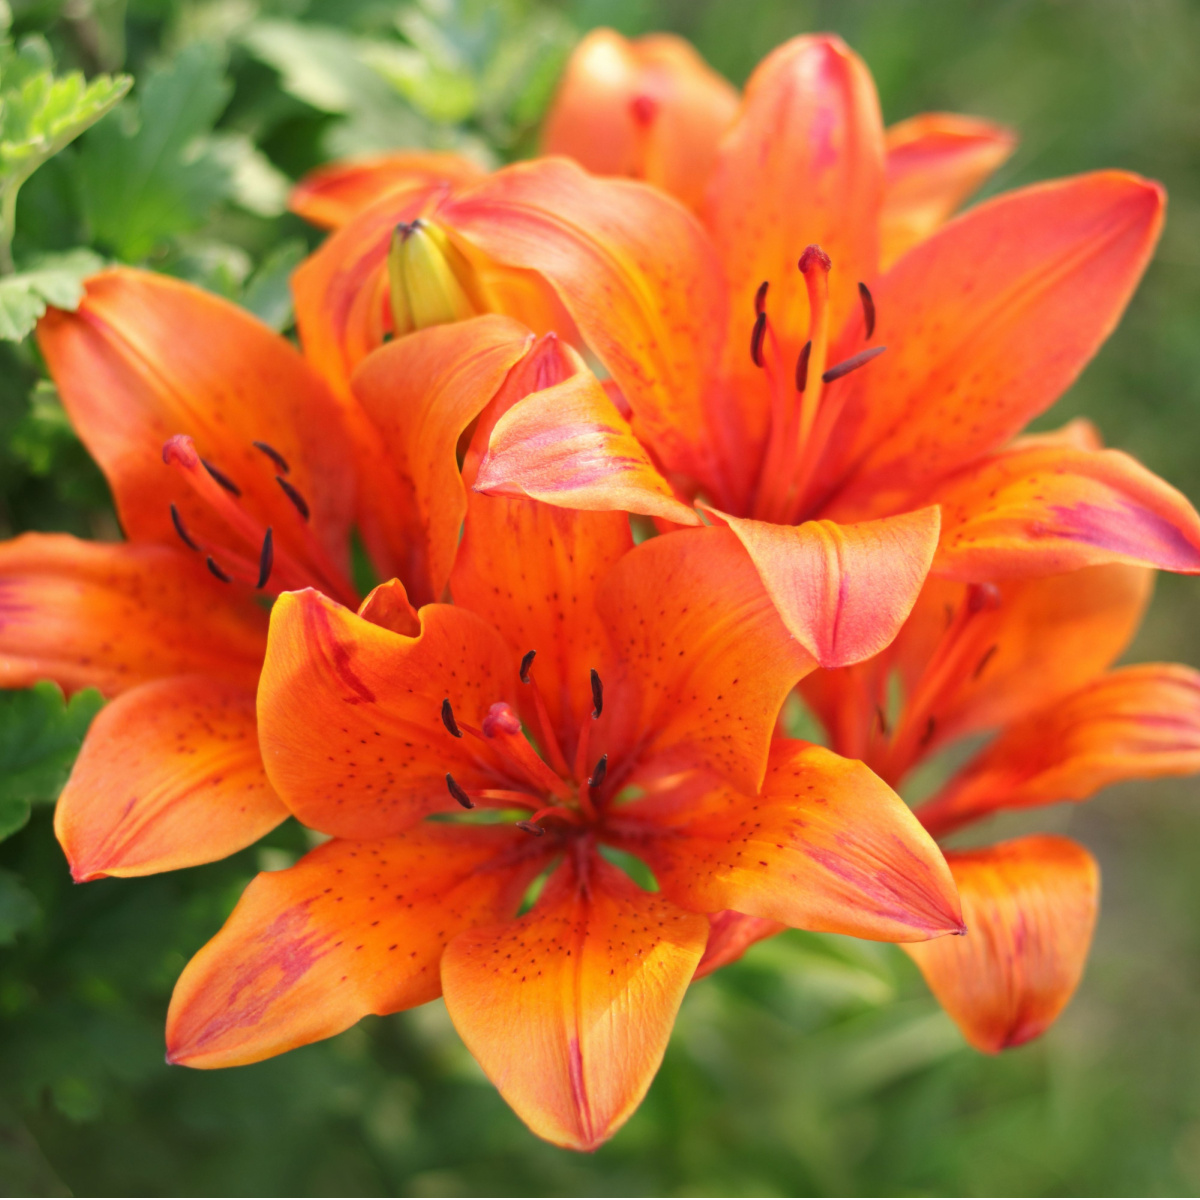
If you are looking to get bigger and better blooms from your daylilies this year – then you need to jump into action early and fertilize this spring!
Daylilies are one of the easiest and most dependable perennials you can grow in your flowerbeds or landscape. They come back stronger each year, don’t require a lot of work, and reward you with loads of colorful blooms.
But even though they are known to be low-maintenance, giving them a little extra attention in the spring – especially when it comes to fertilizing – can make a big difference in how strong and healthy your plants grow – and how many blooms they produce!
Spring is the perfect time to help your daylilies get off to a fast and healthy start. Right as they begin to send up green shoots and form their clumps of foliage, they are also starting to form the buds that will eventually turn into flowers.
Giving them the right kind of fertilizer at this stage gives them the energy to grow thick foliage and set more blooms for the season ahead. With that in mind, here is a look at how to give your daylilies just the right dose of power to make them bloom better than ever!
How To Fertilize Daylilies Early For Bigger Blooms
Why Fertilizing In Early Spring Matters
When your daylilies finally wake up from dormancy, they begin growing new shoots from the base. These new shoots are not only creating the greenery you’ll soon see filling out your flowerbed, but also forming the base for flower scapes and blooms that come later.
If your soil is lacking in nutrients, the plants won’t grow as thick. Even more importantly, they also will not produce nearly as many buds. But by giving your daylilies a balanced fertilizer early in spring, you can supply them with all they need to grow sturdy foliage and strong bloom stems. But it all comes down to giving them the right dose of energy at just the right time!
Using The Right Fertilizer
One of the most important parts of fertilizing daylilies correctly is using the right kind of fertilizer. For daylilies, a balanced granular fertilizer is the best choice. The key is to look for a fertilizer with an even ratio of nitrogen (N), phosphorus (P), and potassium (K). A 10-10-10 basic mix is ideal.
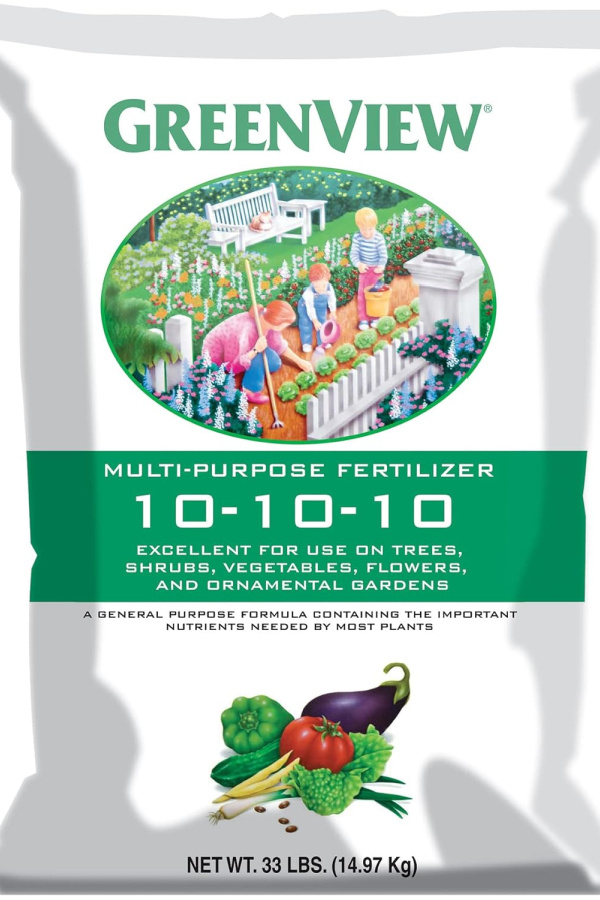

Nitrogen helps promote thick green foliage. Phosphorus helps with root strength and flower bud production. Potassium boosts overall plant health and helps flowers develop stronger and last longer.
Together, these three nutrients power all the growth your plant needs in the spring to be strong, healthy, and full of blooms. Be sure to choose one that is labeled for use around flowers or perennials. Affiliate Link: GreenView Multi-Purpose Fertilizer, 33 lb. Bag – NPK 10-10-10
How Much Fertilizer To Use Early With Daylilies
Daylilies don’t need a heavy application of fertilizer to perform well. In fact, giving them too much can cause more harm than good. A light feeding is more than enough to power strong growth.
The ideal amount to apply is 1/8 cup of 10-10-10 granular fertilizer per clump of daylilies. For larger clumps, you can apply a little more, but don’t go over 1/4 cup per plant. Too much nitrogen will actually cause the plant to grow more leaves at the expense of blooms.
To apply, simply sprinkle the fertilizer around the base of the plant. Make sure to keep the fertilizer a few inches away from the main stem to prevent burning the plant. Scatter it lightly in a ring around the clump, then gently scratch it into the soil with a hand rake or garden fork.


Watering After Fertilizing
Once you apply the fertilizer, it’s very important to water the area well. Watering after applying granular fertilizer helps activate the nutrients. It dissolves the granules and starts moving the nutrients down into the soil where the plant’s roots can absorb them.
If rain is expected within a day, you can let nature do the work for you. Otherwise, give each plant a good soaking with a watering can or garden hose. Try to water slowly so the water can soak into the ground and not run off the surface. This also helps prevent the fertilizer from washing away before the plant gets a chance to absorb it.
When To Fertilize
The best time to fertilize daylilies is in early spring. This is usually when the green foliage first begins to appear and the plant is starting to wake up from winter. Fertilizing right as growth begins gives the plant time to absorb nutrients before it starts forming buds.
If you wait too long, the plant may already have started forming its bloom stems, and it won’t benefit as much from the boost. If you want to give your daylilies a little more help, you can also apply a second light feeding after they finish their first bloom set.
This can help for many daylilies create a second bloom cycle. Just make sure to keep the application light so you don’t overstimulate foliage growth. See our article: What To Do With Daylilies In The Middle Of Summer – After They Bloom!

A Few Other Ways To Help Your Daylilies Early In The Spring Besides Fertilizing
Fertilizing isn’t the only thing you can do to help your daylilies thrive in the spring. There are a few other simple early chores that go a long way toward keeping your plants looking great and blooming strong.
1. Remove Old Foliage
As soon as your daylilies start sending up new shoots in the spring, it’s a good time to clean away any leftover foliage from the previous year. Old leaves and stems can harbor pests and disease, and they also block sunlight and air from reaching new growth.
Using garden shears or even your hands, pull or clip away all the dead, brown leaves from around the base of the plant. Be careful not to damage any new green shoots that are emerging.
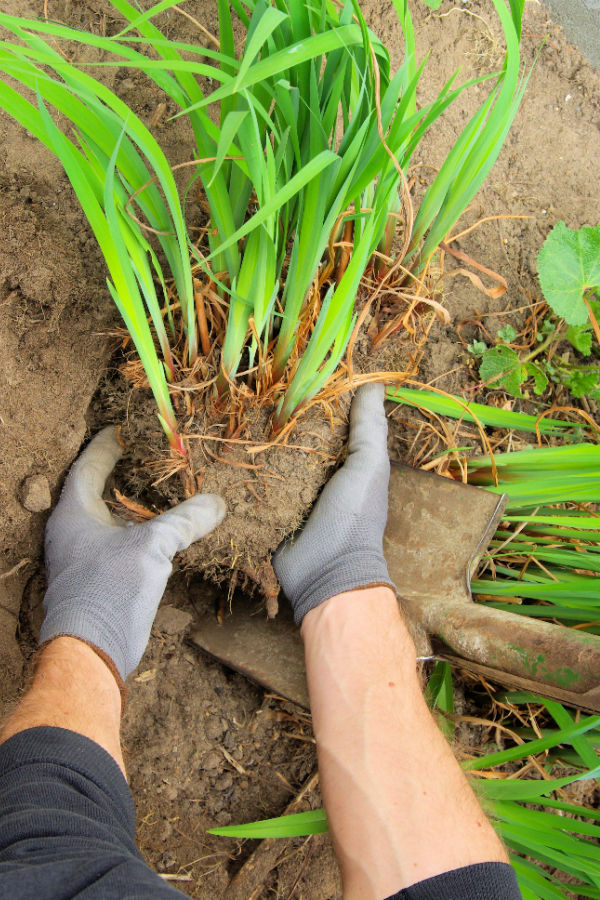
2. Divide Overgrown Clumps
If your daylilies have been growing in the same spot for several years, they may have become too crowded. When daylilies grow too close together, their roots compete for water and nutrients, and bloom production often slows down. You might notice smaller or fewer flowers, or weak growth overall.
Spring is a great time to divide your daylilies before they get too far into the growing season. To divide, dig up the entire clump with a shovel, then gently pull the root ball apart into smaller sections. Each section should have a few shoots and a healthy amount of roots.
3. Mulch To Keep Soil Moist And Weeds Out
Mulching your daylily beds is another simple but powerful way to keep your plants healthy. A 2 to 3 inch layer of mulch around the base of each clump helps hold in moisture, keeps the soil temperature steady, and blocks weeds from taking over the bed.
Keep the mulch pulled back an inch or two from the base of the plant so that moisture doesn’t sit directly against the stems, which could lead to rot. Applying mulch after fertilizing and watering is a great final step. It locks in moisture and helps keep the fertilizer in place so it continues to feed your plants slowly over time.
Here is to taking time to fertilize your daylilies early this spring. And even better – to enjoying bigger and better blooms this year! Happy Gardening – Jim & Mary.
Old World Garden Farms
Jim and Mary Competti have been writing gardening, DIY and recipe articles and books for over 15 years from their 46 acre Ohio farm. The two are frequent speakers on all things gardening and love to travel in their spare time.
As always, feel free to email us at thefarm@owgarden.com with comments, questions, or to simply say hello! You can sign up for our free email list in the subscribe now box in the middle of this article. Follow us on Facebook here : OWG Facebook. This article may contain affiliate links.