Tired of trying to hang outdoor string lights only to watch them sag and fall – or watch the poles or supports you use to hang them bend and break?
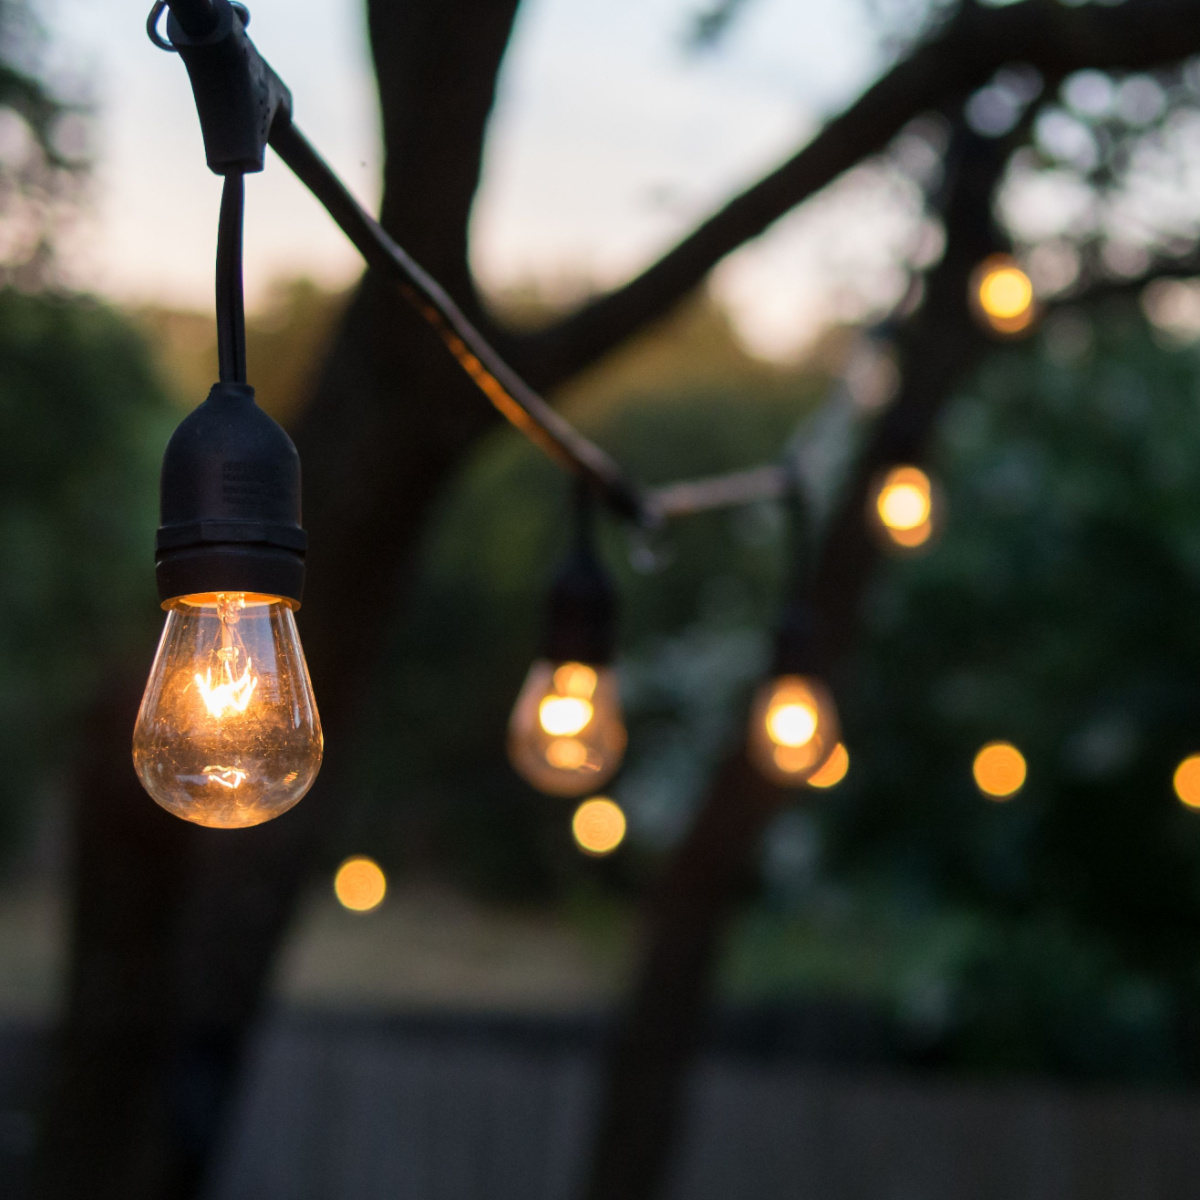
When it comes to creating a warm and welcoming outdoor space, nothing does the job quite like string lights. With their warm, soft glow – they can completely transform the atmosphere of an area. It’s one reason why we use them in so many places at the farm.
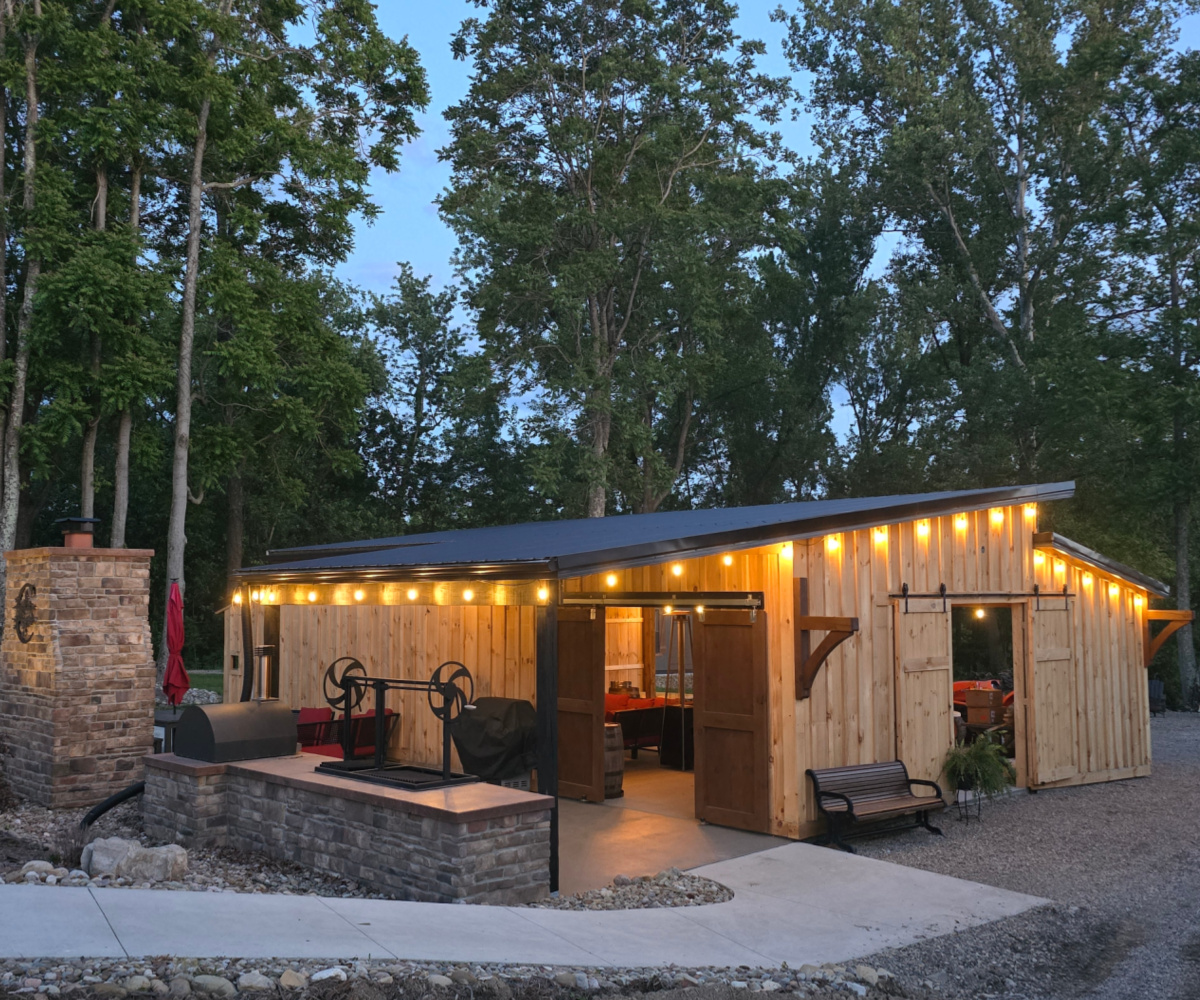
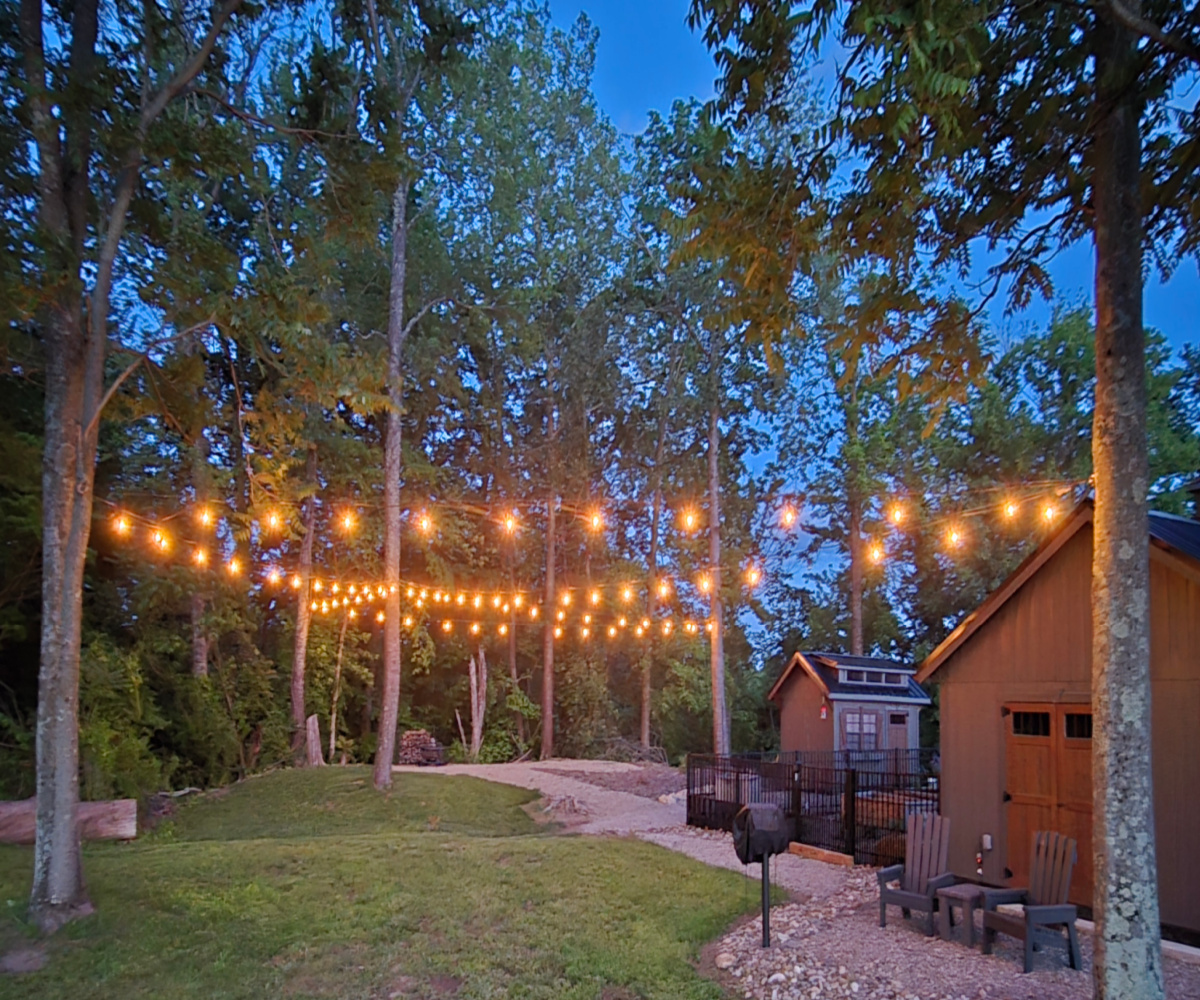
Whether it’s lighting up the courtyard by the party barn, outlining the pond pavilion, or adding a soft glow to a garden pathway, they work like a charm. Over the years, we’ve installed string lights in areas all around the farm, and while the lighting is always wonderful – getting them to stay strong, tight, and secure has come with a few important lessons!
One of the biggest things we’ve learned? If you don’t plan carefully, string lights can sag, snap, or even pull down their supports over time. Especially when you’re spanning long distances. It doesn’t take long before the weight of the lights takes its toll.
The good news? There is a smart and reliable way to hang outdoor string lights that keeps them sturdy and strong from season to season – and it all starts with how you support them.
The Best Way To Hang Outdoor String Lights
Why String Lights Sag – And Why It Happens So Fast
When most people hang string lights for the first time, they simply attach the lights from one point to another. Maybe it’s between two fence posts, trees, or porch corners. At first, everything looks great. But over the next few days or weeks, the strands begin to droop. Eventually, the lights might start scraping the ground or dipping low enough to get in the way.
That sagging isn’t just an eyesore, it’s a warning sign. Even lightweight strands of bulbs can put serious tension on whatever they’re hung from. Once the wiring starts to stretch under the weight, the plastic or metal components can weaken.
Add in wind, rain, or snow, and those lights will droop faster than you think. Worse yet, the strain can cause smaller posts or poles to lean, bend – or even break off entirely.
We’ve had it all happen here on the farm. In one spot, a 4×4 wooden post cracked right at the base after a few months of stress. In another, a thin metal pole bent like a paperclip after a strong summer storm. That’s when we knew it was time to find a better, longer-lasting method – and that’s when we discovered the power of the wire support line.
The Secret Best Hang String Lights That Last: Use A Wire Tension Line
If there’s one thing we recommend more than anything else, it’s this: never hang your outdoor string lights directly from post to post. Especially if you’re going over long distances. Instead, hang them from a tensioned support wire.
This one extra step makes all the difference between droopy, unreliable lights and a clean, professional-looking installation that stays strong all season long. That – and purchasing heavier commercial grade lights that can stand up to the weather! Affiliate Link: Lakumu Outdoor String Lights 96FT(48×2), Commercial Grade Heavy Duty
So, what is a wire tension line? It’s a strong, weatherproof wire that is usually galvanized steel. You then install it first tightly between your two main anchor points. Once the wire is securely in place, you simply use clips or zip ties to attach your string lights directly to it.
This way, the tension and weight are carried by the wire, not by the lights themselves. It not only protects the lights from pulling or stretching, it also keeps the string neat, level, and uniform. No matter how long the run.
It also takes the pressure off your posts, which means you can avoid structural damage or unsightly sagging.
How To Install A Wire Tension Line For String Lights
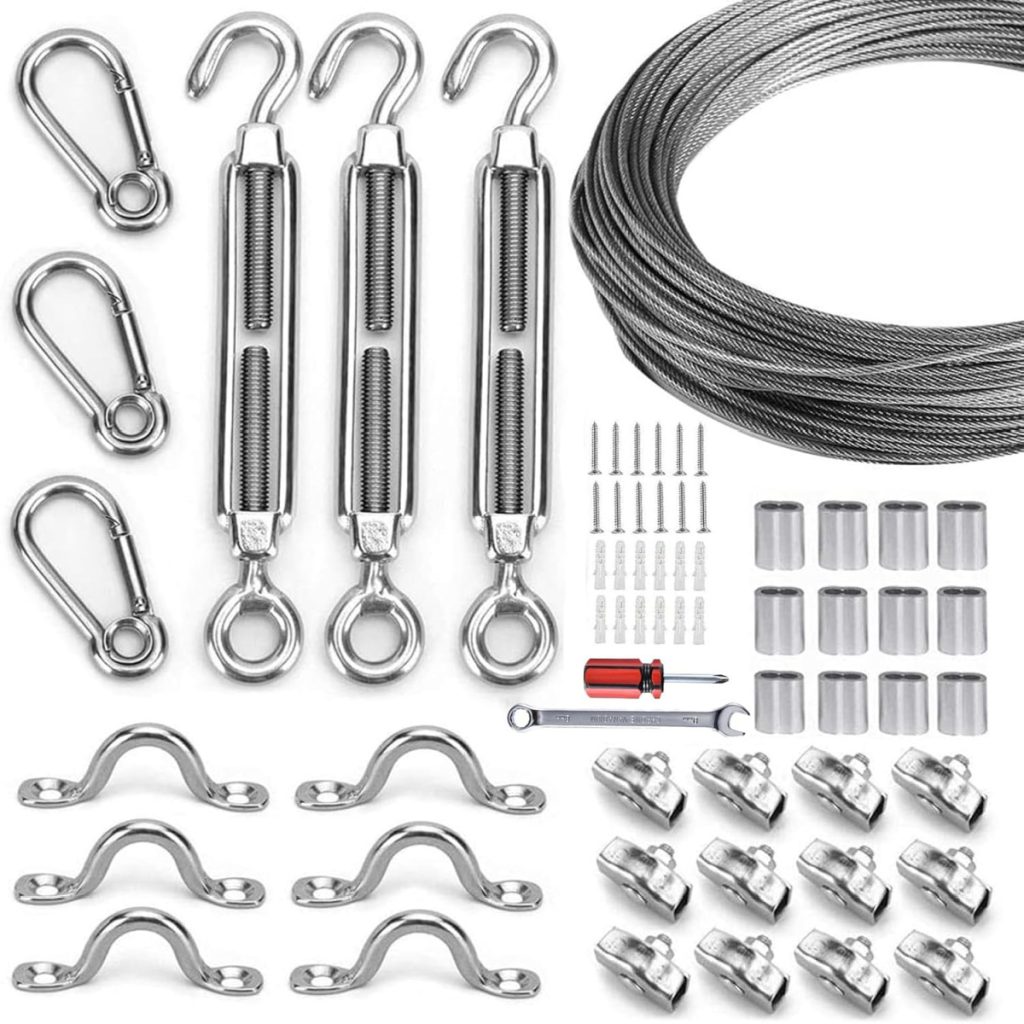
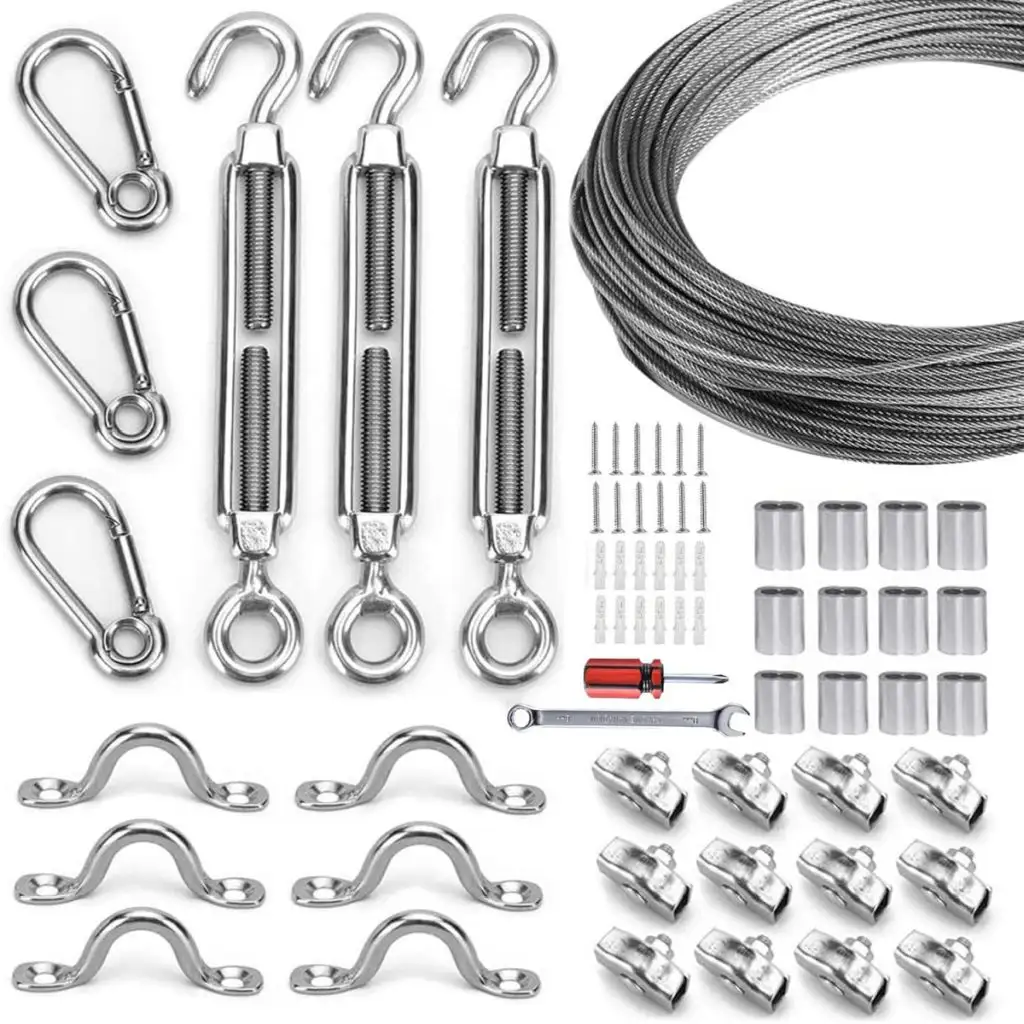
The process for installing a tension wire is fairly simple, and you only need a few key supplies. Even better, they make inexpensive kits that have everything you already need included! Affiliate Link: String Light Hanging Suspension Kit, Outdoor Light Guide Wire & Tension Adjustments.
If purchasing on your own, this is what you need:
- Galvanized steel wire (at least 1/16-inch thick, though 1/8-inch is even better for long runs)
- Turnbuckles (to tighten and adjust the tension)
- Wire rope clamps or cable clips (to secure the wire ends)
- Eye bolts or hooks (to attach the wire to anchor points)
- Zip ties or metal clips (to attach the lights to the wire)
Start by identifying your two strongest anchor points. If you don’t have any natural or structural options nearby, you’ll need to install your own sturdy post first.
Drill pilot holes into your anchor points and install your eye bolts or hooks. Cut your wire to the length you need, but leave a little extra so you can work with it easily. Attach one end of the wire securely to one eye bolt using a clamp. On the other end, use a turnbuckle to attach the wire to the second eye bolt.
As you tighten the turnbuckle, the wire will pull tight, creating a solid, level support for your lights. Once the wire is in place, you can attach your string lights using clips or heavy-duty zip ties. Space them evenly and make sure they’re supported every foot or two to prevent sagging between bulbs.
Choosing The Right Support Structures
Even the best tension wire won’t work without strong supports on each end. One of the most common mistakes people make is using thin wood or small-diameter metal poles. These may work for a short time, but under the weight of a wire and multiple strands of bulbs, they’ll slowly bend or shift out of position.
Our advice: skip the 4x4s and go bigger. At a minimum, use 6×6 pressure-treated posts if you’re installing your own supports. And make sure you set them at least 2 feet into the ground, with a full bag of concrete around the base. This prevents wobbling and shifting even when the wind blows hard.
When we don’t use posts, we try to attach the wires directly to large trees, heavy porch columns, or the sides of solid structures like cabins or barns. The key is making sure the anchor points are sturdy enough to handle the pull of the wire without budging.
The Look Of Light, Without The Worry
By using a wire tension line and mounting to strong supports, the string lights don’t just look better – they also hold up better in bad weather. Nor do we have to worry about them pulling down posts or looking messy after a few weeks.
As for installing on a building, we use galvanized roofing screws with a rubber grommets. They install easily through the led light support holes, and keep water out – and the lights secure. Here is to installing your own strong and beautiful outdoor lighting! If you are looking for more DIY projects to improve your outdoor space, be sure to check out: How To Build The Perfect Backyard Stone Fire Pit – Simple, Inexpensive & Elegant! Happy Gardening – Jim & Mary.
Old World Garden Farms
Jim and Mary Competti have been writing gardening, DIY and recipe articles and books for over 15 years from their 46 acre Ohio farm. The two are frequent speakers on all things gardening and love to travel in their spare time.
As always, feel free to email us at thefarm@owgarden.com with comments, questions, or to simply say hello! You can sign up for our free email list in the subscribe now box in the middle of this article. Follow us on Facebook here : OWG Facebook. This article may contain affiliate links.