Want a simple, easy and totally free way to create stunning coleus planters that fill your patios, decks and landscape with big color and interest?
For us, coleus has become a huge winner on our farm as a potted plant. With their wide variety of shapes, textures, and deep, vivid leaf colors, coleus plants are one of the easiest ways to bring instant charm and life to any setting. Especially when you can grow them like we do for free!
How can you do that? It all comes down to a simple method – propagating new coleus plants from just a few starter plants each spring. And by using a few tried-and-true tricks, you can create dozens upon dozens of stunning, healthy coleus plants all summer long without ever spending another dime.
How To Create Stunning Coleus Planters For Free
Why We Love Using Coleus Around The Farm
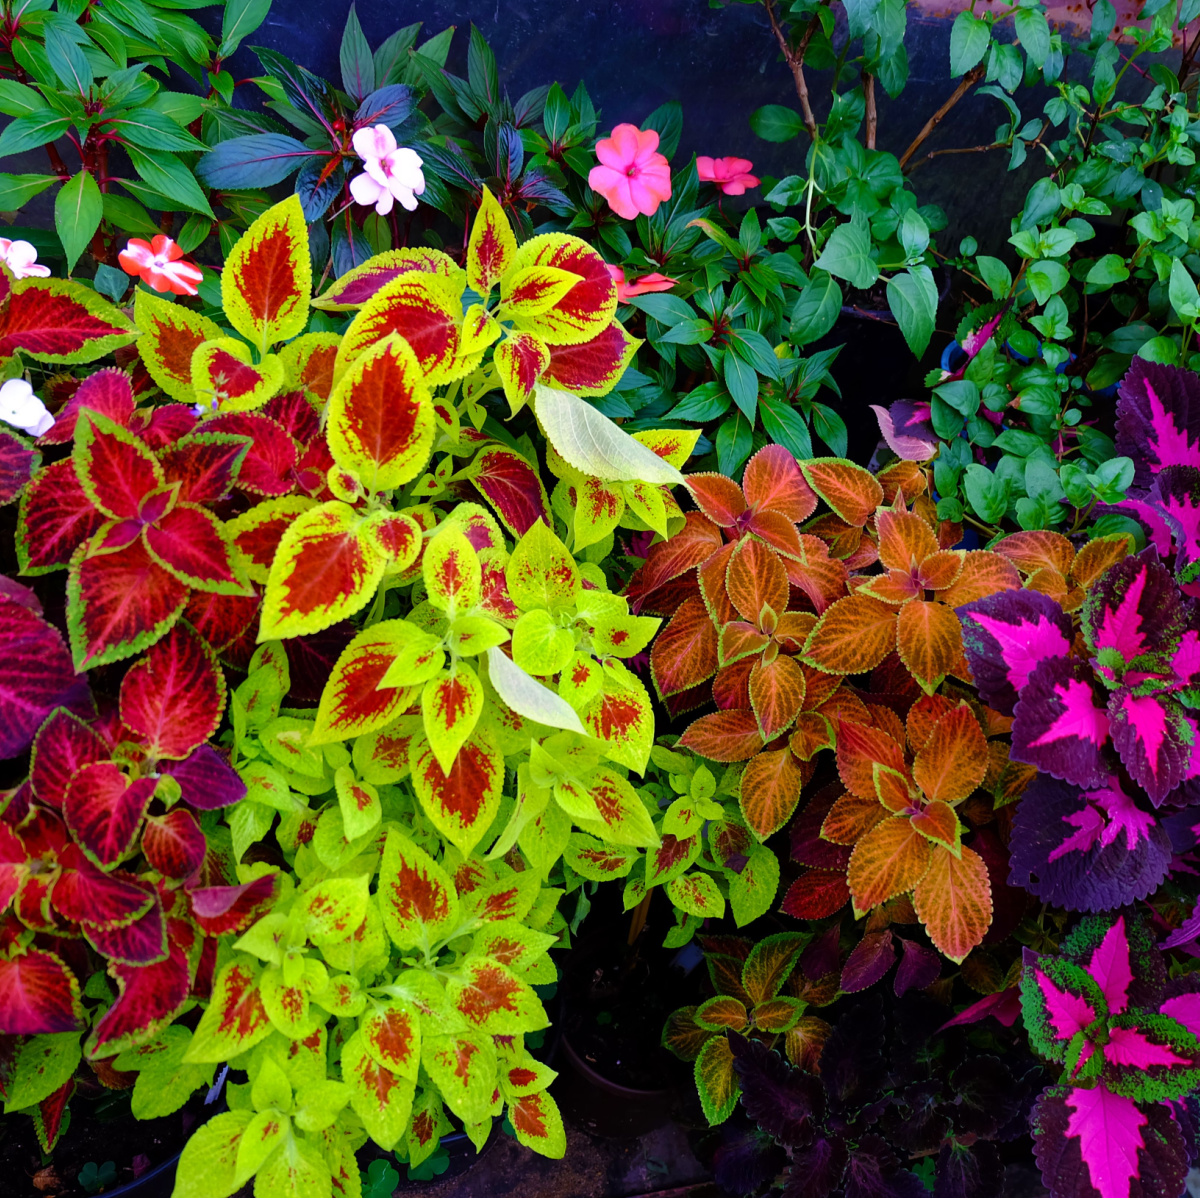
Coleus is one of the most forgiving and rewarding plants when it comes to container gardening. Whether placed in hanging baskets, urns, clay pots, or long planter boxes, their dramatic leaves bring constant color and interest without the need for blooms.
One of the things that makes coleus so perfect for decorating spaces at the farm is their versatility. There are coleus varieties that thrive in full sun, while others prefer full or partial shade. By mixing colors and leaf shapes, you can build eye-catching combinations that turn any ordinary planter into a showstopper. And the fact that deer don’t like them is even better!
But perhaps best of all, when a plant begins to fade or stretch out, we don’t throw it out – we simply cut it back, root a new cutting, and start fresh. This allows us to maintain full, healthy planters all season long, no matter what Mother Nature throws our way.
How To Create Free Coleus Planters From Cuttings
The real secret to our nonstop coleus displays is propagation. Each year, we start with just a handful of healthy, mature coleus plants. These could be store-bought plants early in the season or even houseplants saved from the year before (more on that later).
From those few plants, we create dozens of new ones using nothing more than clean snips, potting soil, and a bit of cinnamon. That’s right – cinnamon. While many think of rooting hormones when they hear about propagation, we’ve found that regular ground cinnamon works just as well.
Cinnamon is a natural anti-fungal agent and helps prevent rot. All while encouraging root development. And best of all, it’s something most people already have in their kitchen, so it’s easy to have right on hand.
How To Create A Coleus Plant From A Cutting
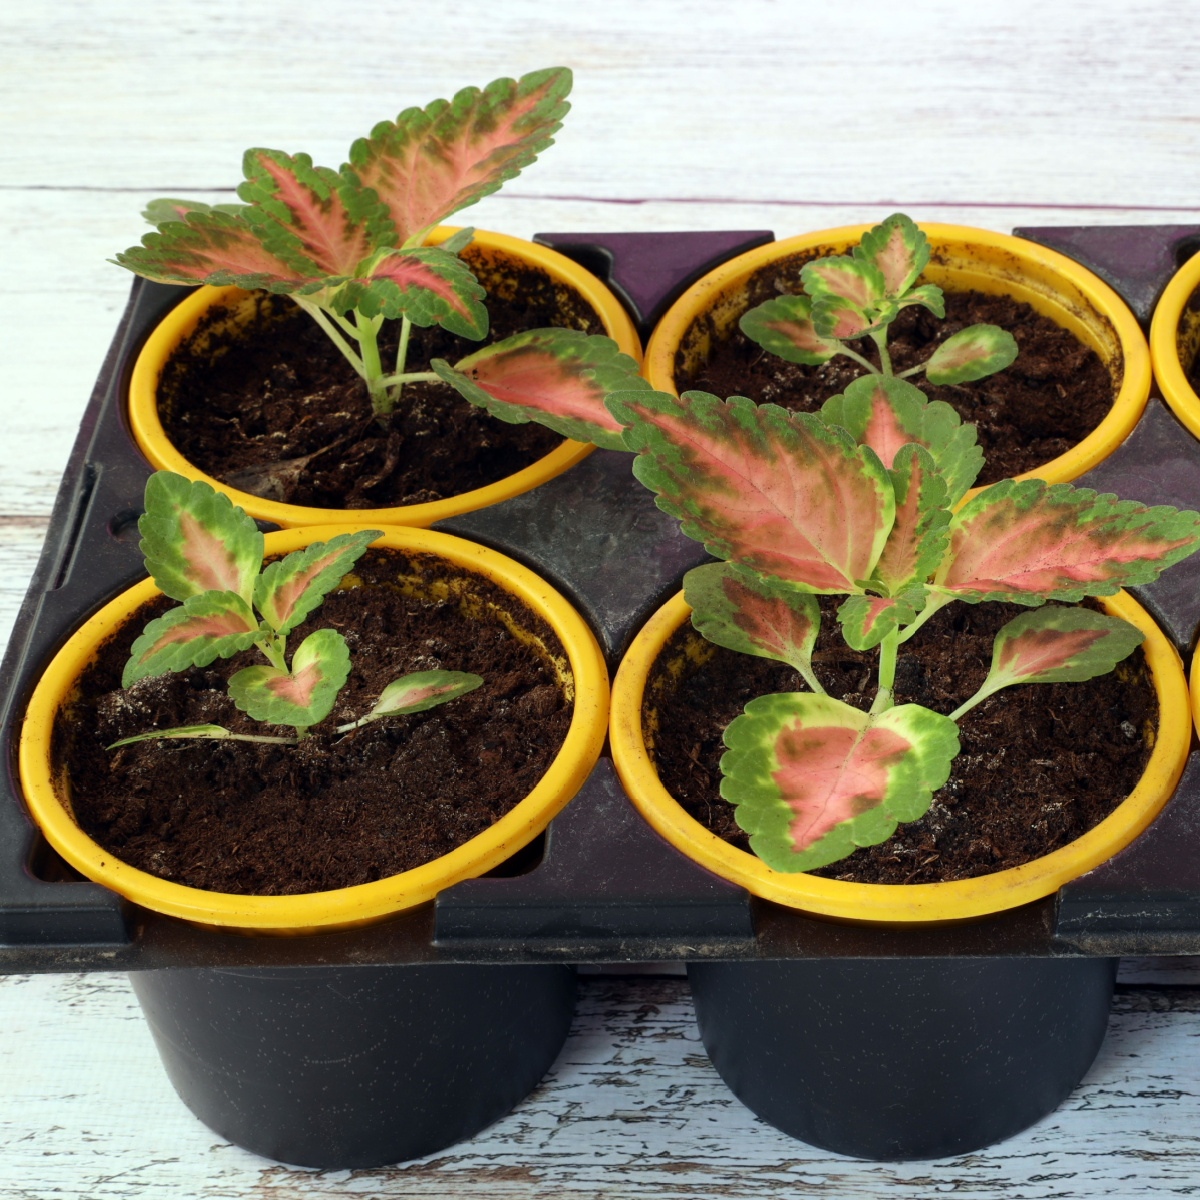
So how easy is the process to create coleus planters from cuttings? For starters, we look for healthy stems on our parent coleus plants. Ideally, we try to cut ones that are at least four to six inches long. Using sharp, clean scissors or snips, we cut just below a leaf node which is the little bump where the leaves attach to the stem.
We remove any lower leaves to give the cutting a clean stem base. The goal is to leave just a few leaves at the top of the cutting. This reduces stress on the plant and allows it to focus its energy on rooting instead of supporting lots of foliage.
Once we have our cuttings, we dip the end of each stem in ground cinnamon. There’s no need to coat it thick, just a light dip on the fresh cut end will do the trick. The cinnamon protects the cutting from rot and disease and gives it a head start toward root growth.
We’ve tried using commercial rooting hormones in the past, but honestly, the results weren’t any better than with cinnamon. Plus, cinnamon is all-natural, inexpensive, and easy to use. Affiliate Link: Simply Organic Ceylon Ground Cinnamon.
Planting Cuttings In Soil
Although coleus cuttings can root in water, we’ve found that planting directly in soil gives faster and stronger results. With water rooting, there’s always the risk of transplant shock when the delicate water-grown roots are moved into pots. But when you root directly in soil, the plant is already adjusted and ready to grow once transplanted.
We plant each cutting into a small three-inch pot filled with moist, high-quality potting mix. We use trays to group the pots together, which makes watering and moving them easier.
After planting, we lightly water each cutting and place the tray in a warm, bright spot – but not in direct sunlight. Too much sun early on can stress the cuttings. Within two weeks, the cuttings begin developing roots and start sending out new leaves.
Transplanting & Replanting To Create New Coleus Planters
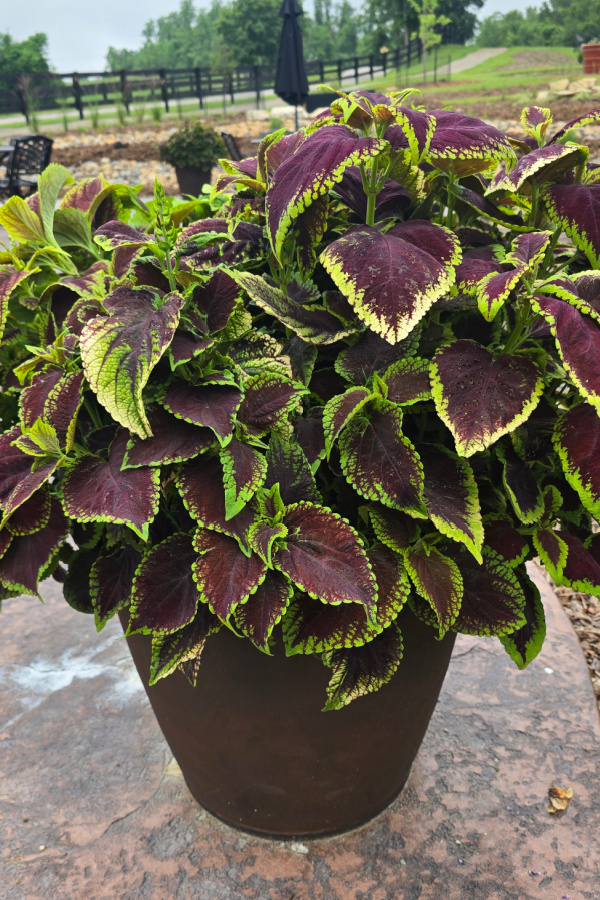
Once the rooted cuttings are established, they’re ready to move into larger containers or directly into the planters. We love mixing several coleus varieties together to get a bold mix of leaf shapes and color. For an extra full look, we often include upright coleus in the center of a pot and surround it with trailing varieties that spill out over the sides.
But our propagation efforts don’t stop with just filling the first round of planters. As the summer goes on, some plants start to outgrow their containers or become too leggy. That’s when we take another round of cuttings – right from the leggy plants – and start new ones all over again.


This keeps our displays full and fresh all summer long, and it’s all done without buying a single new plant. It’s also a great way to refresh tired containers in late summer without having to redo everything. By adding in a few fresh new coleus plants from your cuttings, you can make old planters look brand new again.
Keep It Going Year After Year – Even In Winter!
One of the best parts about growing coleus is that the fun doesn’t have to end when fall arrives. Before the first frost hits, we always save a few of our favorite coleus plants by bringing them indoors. These become our “mother plants” for the following spring. See: How To Save Coleus Plants This Fall – Keep Your Beautiful Coleus Plants Alive For Next Year!
We simply dig up a few of the healthiest and most colorful coleus from our planters and transplant them into small pots. We keep them inside over the winter in a sunny window or under grow lights. Coleus grow well indoors as long as they get light and regular watering. And by late winter, they’re already producing strong stems perfect for taking cuttings all over again.
By saving just a handful of plants, you can have hundreds of new coleus the following year – all without buying a single new plant from the store. Here is to taking a little time to create your own colorful coleus pots, containers & planters this year – and beyond! Happy Gardening – Jim & Mary.
Old World Garden Farms
Jim and Mary Competti have been writing gardening, DIY and recipe articles and books for over 15 years from their 46 acre Ohio farm. The two are frequent speakers on all things gardening and love to travel in their spare time.
As always, feel free to email us at thefarm@owgarden.com with comments, questions, or to simply say hello! You can sign up for our free email list in the subscribe now box in the middle of this article. Follow us on Facebook here : OWG Facebook. This article may contain affiliate links.