Whether it’s a patio or a sitting area tucked away in the corner of your yard, a DIY paver patio can add visual interest and beauty to your landscape.
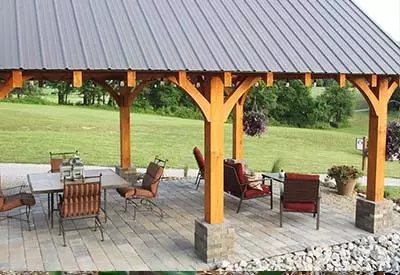
The completed DIY paver patio under the pavilion
In addition to their great look, they also have big advantages over using concrete. For starters, they can be more economical and durable than poured concrete, especially long-term.
While concrete can crack and settle over time, pavers can be picked up, re-leveled, and re-used.
And if for any reason you ever need to relocate a walkway or patio area, pavers can be moved and re-used easily. Not so easy to do with a concrete slab!
When it came to choosing a floor for the outdoor pavilion project at the house, we knew it we would have to use pavers for that very reason. (See : Pavilion Project)
We used nearly 30 truckloads of dirt to build up the area for the pavilion. Although we tamped, packed and pushed it down, we knew that with that much dirt, it would still settle in the coming years.
That made using concrete out of the question. There is just too much chance for it to settle and crack.
Instead, we chose to use a cobbled brick paver that blended in with the rough-sawn posts of the pavilion.
That leads to one more advantage of brick pavers – they come in a near endless variety of shapes, sizes and colors!
And if you are looking for a real bargain, you can usually find reclaimed brick and pavers available, sometimes for free!
Both our barn and pergola patios were created from reclaimed brick found through Craigslist. In both cases, we were able to get the brick for free simply by picking it up.
But no matter what style you choose, it’s important to follow a few simple steps to insure long-term success. Here are 5 of the biggest!
Creating a DIY Paver Patio – 5 Keys To Success
#1 Start With A Strong Base
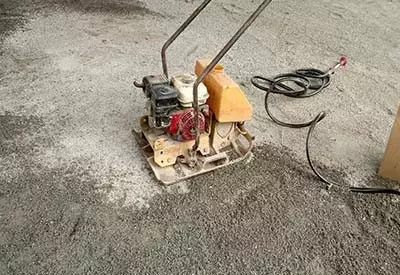
We tamped down a 3″ base of limestone screenings for a solid base.
A brick or paver patio will only be as good as the base it sits on! If it’s unlevel or weak, the patio or walkway will be as well.
We use a combination of limestone screenings and small limestone to form a 3” level base. Limestone screenings are the fine dust and small chips of limestone sifted out when the rock is pulled from a quarry.
They are extremely inexpensive. You can usually get screenings for about$5 to $10 a ton.
Once in place and tamped down, it hardens to a near concrete-like surface. It makes the perfect sub-base for a DIY paver patio.
What about sand in the sub base? Although you will see it used on many diy sites and projects, I have never been a big fan of using a lot of sand under pavers.
They can make initial leveling easier, but they also move and shift over time.
Depending on where you live and what is available, limestone or granite dust is a much better choice.
We have had our two barn patios down for 6 years now, and they haven’t budged using the limestone screening base.
#2 Use A String Level
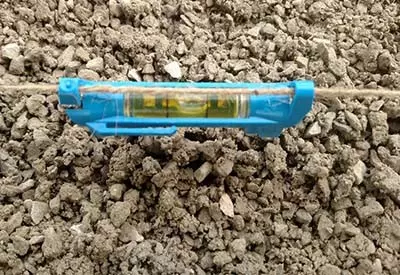
A simple string level makes leveling easy
Once you have your base down, use a simple string level to make sure that your base is leveled out properly. It makes super quick work of what can seem like a tough task.
We place string tied tightly to stakes at each end of the base. Then attach the string level in the middle and you can easily level out the patio base by keeping it at the same height of the string.
A string level will cost you around $2, but they are truly priceless in having a level patio.
#3 Know Your Pattern Before You Start
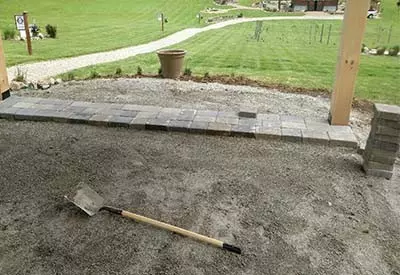
We worked out a pattern before that fit the patio without having to make a single cut. That helped save big on the brick cost!
This is a big one! One mistake people often make on a DIY paver patio is to start laying brick before trialing a patter.
Come up with a pattern that works and then repeat it over and over again to give your patio or walkway a seamless look.
By planning in advance, you can also save yourself a lot of money on extra brick, especially when it comes to making unnecessary cuts of brick.
We worked for about an hour playing with different patterns on the patio, and found one that fit inside our pavilion and required no cuts. It saved us a ton of time and money!
#4 Use Edging Material
Another BIG key! Be sure to use some type of edging to hold in the brick around the edges. Without it, the brick will start to fall away from the patio over time.
There are all types of edging available, from plastic, to wood and metal. Most edging uses some type of long spike to secure to the edge of the brick.
When installing, be sure to install the edging about 1/2″ below the top edge of the brick. It helps hide the edging, and keeps it from ever being a trip hazard.
We have use all types for projects at the farm, but really prefer metal. We found 8′ heavy duty metal edging for about $10 per section at a local home improvement store.
I like metal simply because it seems to hold up really well over time. And now for the final tip…
#5 Lock It Together With Mason Sand
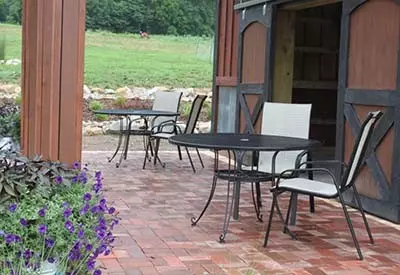
One of our first diy paver patio projects, our barn patio. This was made from reclaimed bricks.
Don’t forget the last but oh so important step! Once your DIY paver patio is down, use a few bags of fine grain sand between the cracks to lock it all together.
Play sand or mason sand work very well. Pour it out onto the patio and sweep it into the cracks. The sand will lock the pavers in place, and help keeps weeds from coming up too.
So many build a great patio and then skip this step, and it really makes a huge difference in the long-term success of the patio!
There you have it, 5 big keys to diy patio paver success – Jim and Mary!
If you would like to receive our DIY, Gardening and Recipe articles each week, sign up via email at the very bottom of the post You can also follow us on Facebook, Twitter or Instagram to receive all of our latest tips and articles. This article may contain affiliate links.
