We can almost taste the first pizza from our wood-fired brick pizza oven right now! Well, almost.

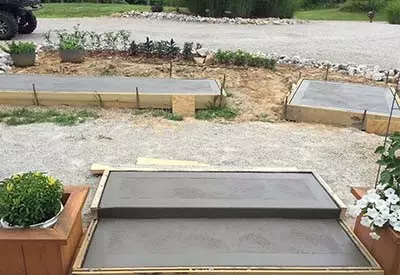
Pouring the slabs. The pizza oven slab in on the upper right. We poured everything at once to make having a truck worthwhile
As we head into weekend #5 of the building process, this project by far has been our most labor intensive DIY effort ever. But it has also been incredibly fun and rewarding.
Especially as we see the brick pizza oven rise ever so slowly from the ground. See: Creating and Inexpensive Outdoor Pizza Oven
The one thing we have found out throughout this process is that it simply takes time. Time to create and build a foundation. Time to build the concrete walls. Time to create and pour the oven slab. And so on and so on.
It has actually been one incredible lesson in learning the art of both patience and persistence!
Here is the progress so far…
The Brick Pizza Oven Construction Process
The project started with the pouring of an 8″ thick concrete footer foundation. We decided to build an outdoor kitchen and grill space in the same area, so we formed both at the same time. Using a few pieces of 2″ x 8″ lumber, we leveled in a form to create a 46″ x 60″ base. We also dug 10″ wide holes on each corner of the pad to a depth of 30″. This will keep the pad from ever shifting through the freeze and thaw of wintertime.
Next, we added a little gravel to the base, old metal fencing and rebar, and then poured the concrete. The pad was complete, and we were ready for weekend #2 – building the block walls.
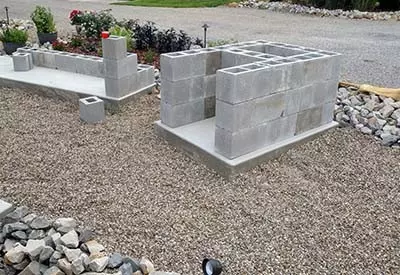
We created the walls with 8″ x 16″ cement block, mortaring together each joint as we went. It was our first attempt ever at laying block. For a couple of rookies, once we got the hang of the process, it was actually fun. It took 44 blocks in all to complete the entire frame.
When we finished, the oven base was 27″ tall, complete with a center compartment to hold wood for the fires. Next up, was concrete oven base slab for the brick pizza oven!
We created the form right on top of the block walls with some old plywood and 2″ x 6″ lumber. Next, we set about mixing bag after bag of high strength concrete to fill the form. I am pretty sure neither of us could move for about two days after that weekend.
Note to self – rent a small mixer next time! Mary will never again believe me when I use the term “it really won’t be that bad to just do it ourselves by hand”!
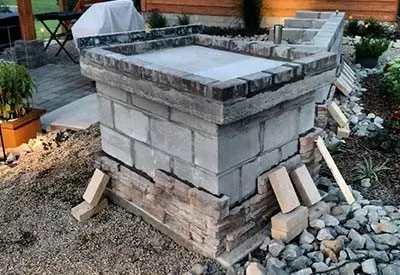
And that leads us to this weekend’s efforts. Mortaring stone to cover the base walls, and mortaring fire bricks to create the pizza oven cooking surface.
For the outside of the oven layer, we used old brick to match the patio. They will not receive any heat, so we can at least use them for the edge that shows. Today, we will lay in the 4 x 8″ fire brick to the center to form the cooking surface.
To cover the walls of the brick oven base, we are using drystack stone. It is made from cement and at $4 a square foot, it was an inexpensive alternative to real stone. It also goes up really easy with mortar, another big advantage.
Next weekend, we will create the arch and start to build the actual oven! It should take us about a total of 145 fire bricks to complete the dome. Once that is complete, all that is left is to cover the cooking dome with two inches of insulating concrete. Then – its time to build the first fire.
Hopefully, in about 3 weeks, we can bring you our final post – with perhaps a picture of our first pizza!
Happy Pizza Making and Eating – Jim and Mary
If you would like to receive our DIY, Gardening and Recipe articles each week, you can sign up via email at the very bottom of this post. You can also like and follow us on Facebook, Twitter or Instagram to receive all of our latest tips and articles. This article may contain affiliate links.


