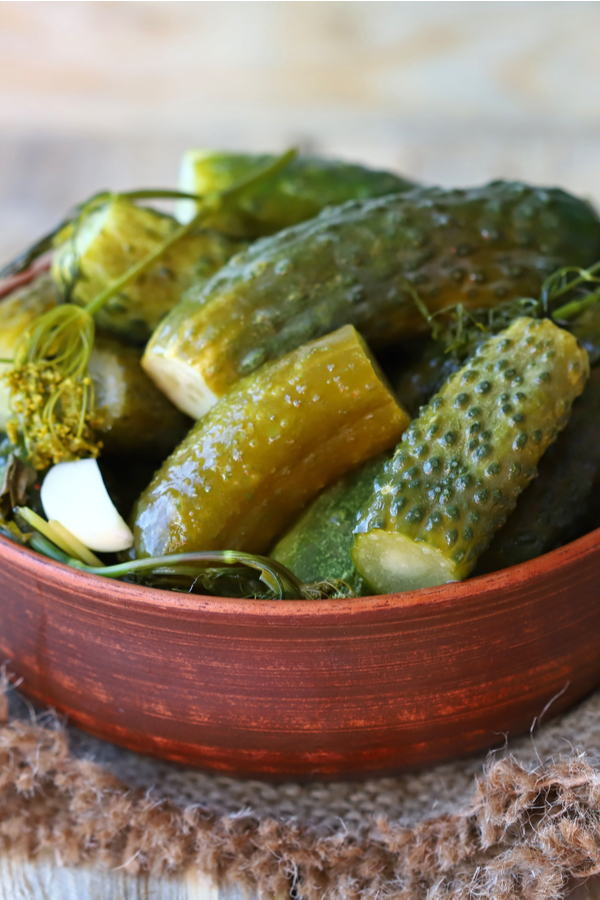
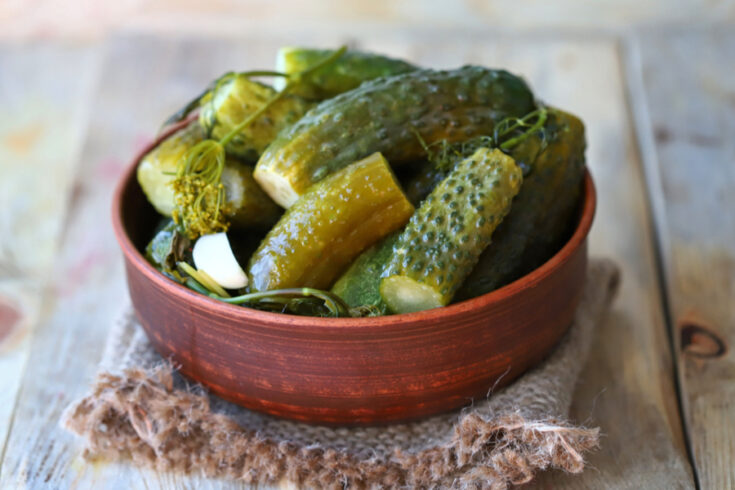
Do you remember your Grandma making dill pickles in a stoneware crock when you were a child? Fermenting cucumbers that were submerged in a salty brine in a large round crock for days or even weeks until they turned into deli style pickles.
Although they are not technically pickles at all (I will explain why below), they were absolutely delicious and somewhat addicting. Every bite was crunchy and the tangy dill flavor more than satisfied your taste buds.
And it seemed like there were an endless supply of them. Whether they were then canned in mason jars or put in the refrigerator to chill, it seemed like a new batch was being made all summer long.
However, as I mentioned above, they aren’t technically pickles at all. Although the common person refers to them as crock dill pickles, they are actually fermented cucumbers.
Fermented Cucumbers Vs. Dill Pickles
The basic difference between pickling and fermenting is the process of how they achieve that iconic sour flavor. Pickled vegetables are soaked in acidic brine which often includes the use of vinegar (acetic acid).
However, fermented foods are put in a salt water brine which may also include spices and sugar. This process develops anaerobic bacteria which then naturally converts carbohydrates to acetic acid to achieve that iconic ‘pickle’ flavor.
Therefore, with either process used acetic acid will preserve the cucumbers. And they both end up tasting like dill pickles.
Equipment Required
1. Fermenting Container
First you must have a large enough container to ferment vegetables. As a guideline, for every 5 pounds of vegetables that you have, you will need a 1 gallon container.
Although I have a fermentation crock, you can still make Crock Dill Pickles in other types of containers. Food grade glass or plastic containers are often used in place of a crock.
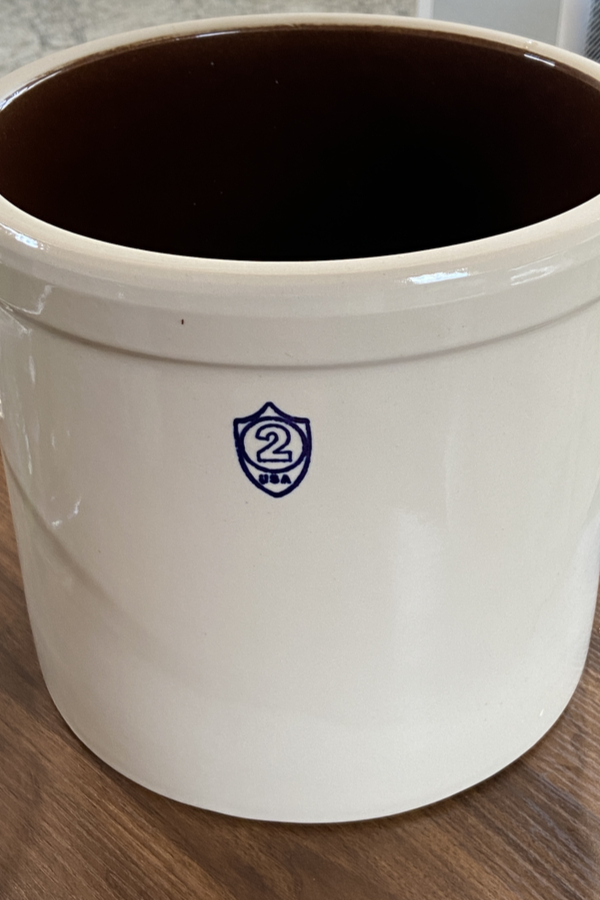
Most often used as a crock substitute are gallon size mason jars. However, it is the preferred method of fermenting to use a stoneware crock.
We are lucky to be located near the area where many of the crocks are actually made, so they are fairly easy to find. However, if you can’t find a stoneware crock near you, you can order the same 2 Gallon Crock that I purchased from Lehmans Hardware Store.
2. Weight
You will also need a weighted object to keep the cucumbers submerged in the brine. Although you can purchase crock weights, I used a dinner plate that was just slightly smaller in diameter than my crock to keep the pickles in the brine.
3. A Cover
Finally, you will need a way to cover the container. Because it will be sitting on your counter for days or weeks, you must keep out the dust, flies, or anything else that can end up in the container.
However, do not use an air tight lid as the gases that build up during the fermentation process need to escape. A have a lid for my crock, however you can use as something as simple as a clean tea towel.
So now that you know what you need to ferment cucumbers, let’s get to the actual recipe and process.
Crock Dill Pickle Recipe
*Complete recipe instructions including specific measurements, cook temperatures and times are located in a printable recipe card at the bottom of this article. However, be sure to keep reading for helpful tips and tricks when making this recipe.
INGREDIENTS
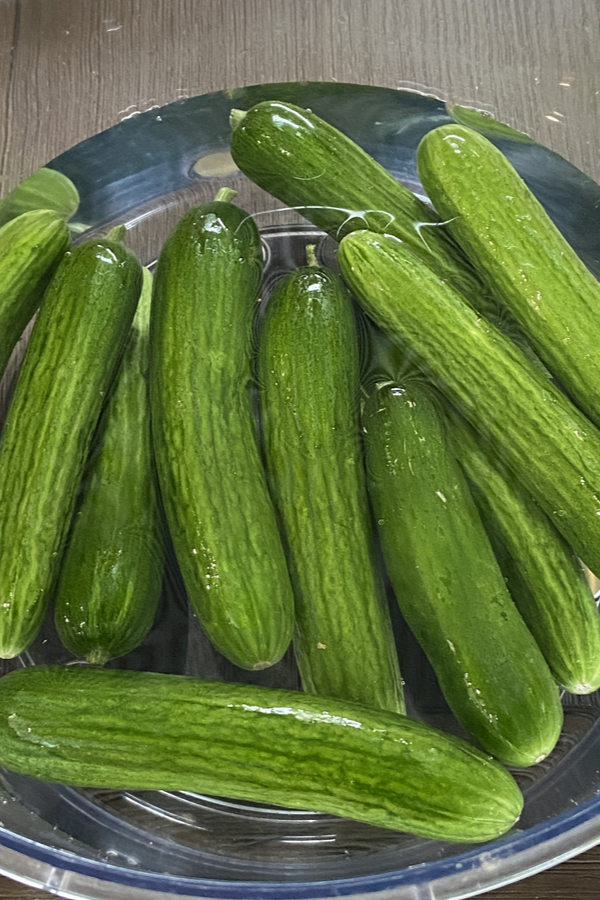
- 24 pickling cucumbers
- 1/2 gallon pure filtered water (not tap water)
- 2 1/2-3 tablespoons sea salt
- 12 cloves garlic peeled
- 4 teaspoons dried dill seed
- 2 teaspoons black peppercorns
- 1 teaspoon black tea leaves or fresh grape leaves
*The salt brine ratio can be adjusted somewhat depending on how salty that you like your pickles. As a general rule of thumb, for every quart of water that you use, 1-3 tablespoons of salt should be added.
However, the guideline for fermenting requires that you have less than a 5% salt ratio, and more ideally between 2-3% when fermenting cucumbers.
To figure out the amount of salt required, take the amount of liquid that you have in milliliters and divide by whatever percent of salt that you desire.
For example, if you want a 2% ratio multiply the amount of liquid in ml by .02. Then that is the amount of salt that you need in grams.
For those that use teaspoon as your measurement, 5.92 grams of fine sea salt equals 1 teaspoon. Therefore, you can adjust the amount of salt based on those guidelines.

INSTRUCTIONS
Before making crock dill pickles, submerge the pickling cucumbers in cold water for 10 to 30 minutes. This will help keep them crisp.
While the cucumbers are soaking in the cold water, make the brine. Do this by combining the water and sea salt and stir until the salt dissolves.
Once the cucumbers come out of the cold water, cut the both ends off each cucumber. This is another way that you can make sure that your cucumbers stay crisp once they ferment.
Now place half of the cucumbers in the crock. Then add half of the garlic cloves, dill seeds, peppercorns and black tea leaves on top of the cucumbers.
Add half of the remaining cucumbers to the crock. Then add the remaining garlic, dill seeds, peppercorns and tea leaves.
Continue to fill the crock with cucumbers. Be sure that your container is large enough so that you can leave 4 inches of headspace at the top.
This is necessary so that you can safely add your weight. But it is also important so that your cucumbers can have 1-2 inches of brine over the top layer for proper fermentation.
Once your ingredients are in the crock, pour the prepared brine over the cucumbers until they are fully submerged and floating.
Place the stone crock weights on top, or a plate with a heavy object on top. The important thing to remember is that the cucumbers need to stay fully submerged in the liquid.
Finally, place the lid on the crock or cover with a clean tea towel. Place the crock in an indoor location that doesn’t get above 80°F.
Fermenting For Days
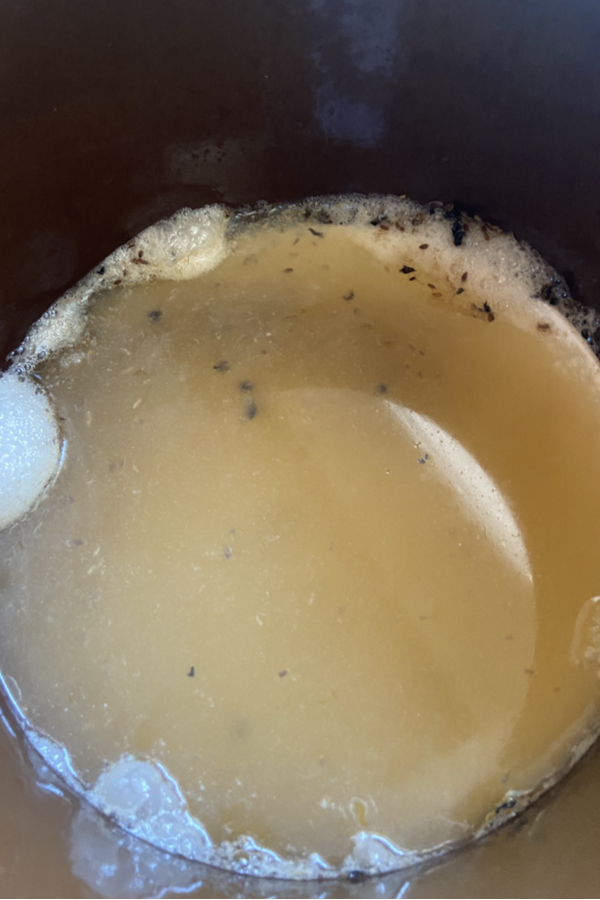
Leave the cucumbers to ferment at room temperature for 3 to 7 days, lightly shaking the crock each day. When you check your cucumbers, you want to see bubbles at the top.
This means that the bacteria is live and fermenting you crock dill pickles. Also, don’t be shocked when you see that the brine has turned cloudy.
This is completely normal. You can taste the crock dill pickles at any point after you see the bubbles appear. The long the length of time that they are in the crock, the more sour that they will become.
However, the more time that they are on the counter in the brine, the higher the chance of the pickles to become soft. It took 5 days for my cucumbers to be fermented for a crisp, yet sour pickle.
Transfer the fermented pickles to a gallon sized glass jar or plastic container. Then pour the brine over top so that it covers the top of the pickles.
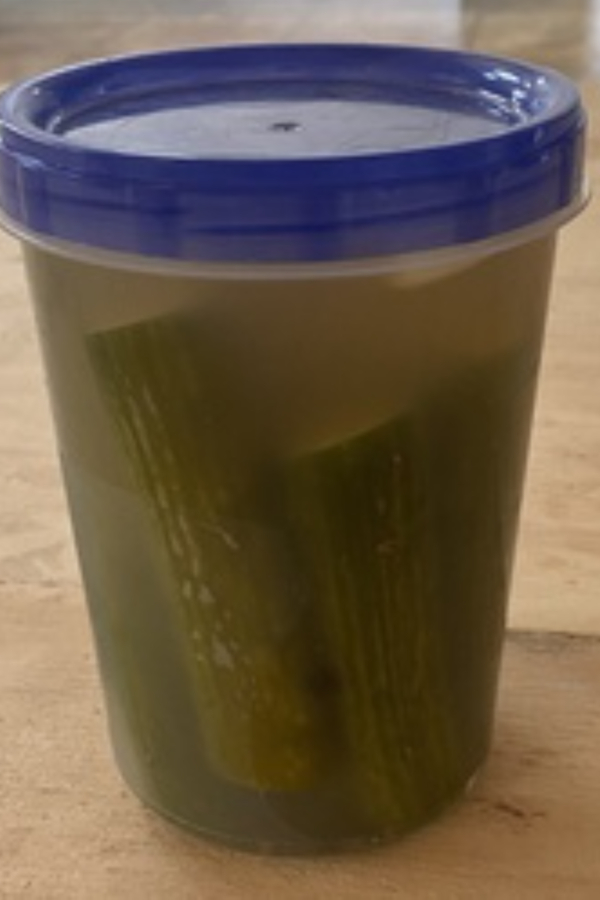
Store in the refrigerator. This will bring the fermenting process to a near halt.
Fully fermented pickles can also be stored in the refrigerator for up to 6 months. However, you may need to remove surface scum from the container whenever it appears.
How To Can Fermented Cucumbers
You can also make your crock dill pickles shelf stable by canning them. Follow the same instructions for making the fermented cucumbers to your taste.
Then remove the pickles from the brine and place them in clean and sterilized quart size mason jars. Then place the brine in a large stockpot.
Heat the brine until it boils for 5 minutes. Then pour the brine over top of the pickles, being sure to leave 1/2 inch headspace at the top of each jar.
Process in a hot water bath for 15 minutes, adjusting for altitude as necessary.
Enjoy!
Mary and Jim


Jim and Mary Competti have been writing gardening, DIY and recipe articles and books for over 15 years from their 46 acre Ohio farm. The two are frequent speakers on all things gardening and love to travel in their spare time.
As always, feel free to email us at thefarm@owgarden.com with comments, questions, or to simply say hello! You can sign up for our free email list in the subscribe now box in the middle of this article. Follow us on Facebook here : OWG Facebook. This article may contain affiliate links.
Crock Dill Pickles

How to ferment cucumbers to make dill pickles in an old fashioned crock. A great way to preserve cucumbers for long term storage.
Ingredients
- 24 pickling cucumbers
- 1/2 gallon pure water
- 3 tablespoons sea salt
- 12 cloves garlic peeled
- 4 teaspoons dried dill seed
- 2 teaspoons black peppercorns
- 1 teaspoon black tea leaves or fresh grape leaves
Instructions
- Submerge pickling cucumbers in cold water for 10 to 30 minutes to help keep them crisp.
While the cucumbers are soaking, make the brine by combining the water and sea salt and stir until the salt dissolves.
Cut the both ends off each cucumber. Then pack the crock with cucumbers. Once you have half of the cucumbers in the crock, add half of the garlic cloves, of dill seeds, peppercorns and black tea leaves.
Keep packing the cucumbers, stopping to sprinkle more of the other ingredients when the crock is 3/4 full.
Continue to fill the crock with cucumbers until 4 inches from the top of the crock.
Pour the prepared brine over the cucumbers until they are submerged.
Place the stone weights on top, or a plate with a rock on top. The cucumbers need to stay submerged in the liquid.
Place the lid on the crock or cover with a towel.
Now leave the cucumbers to ferment at room temperature for 3 to 7 days.
When they are done to your liking, remove the lid and plates/weights. It is completely normal to see bubbles at the top and also for the brine to become cloudy.
Transfer the fermented pickles to a gallon sized glass jar or plastic container and store in the refrigerator.
Notes
When you first taste your pickles they will be salty and crunchy. They may not be fully pickled through the center of the cucumber but they will continue to 'pickle' while they are stored in the refrigerator.
Recipe courtesy of Old World Garden Farms