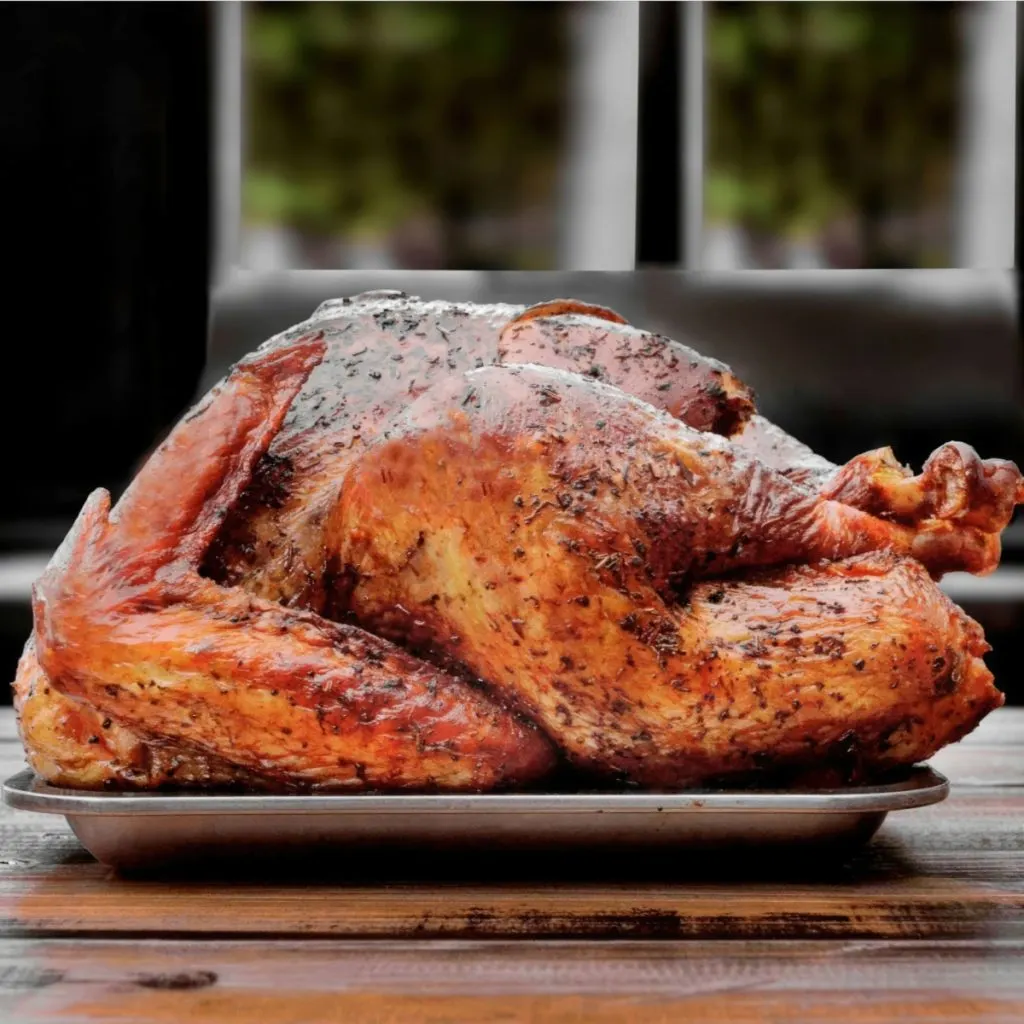
Several years ago I began to use my smoker to cook our Thanksgiving turkey and it was the best smoked turkey that I had ever had! It turned out super moist, flavorful, and just tasted incredible, and my family couldn’t agree more.
Now it’s a Thanksgiving tradition for me to make a smoked turkey every year to share with my family and friends. Once you give it a try you will agree that it is the best way to cook a turkey.
This recipe gives you a juicy, tender bird that has that rich smoky flavor that only a smoker can provide. Best of all, it’s surprisingly easy to make it turn out perfect every time.
However, it does take a little planning. From thawing to brining to smoking, it definitely is a process, but one that you can easily do to make your Thanksgiving meal even better this year, and for years to come!
How To Safely Thaw A Frozen Turkey
Before you can smoke a turkey you must first make sure your turkey is fully thawed. You can thaw it in the fridge, which is the safest method, or in cold water if you’re short on time.
Thawing in the Refrigerator
For every 4 pounds of turkey, plan on one day of thawing in the refrigerator. So, if you have a 15-pound turkey, it’ll take about four days. However, make sure it’s completely thawed the day before you plan to smoke it because you’ll need to brine it overnight.
Thawing in Cold Water
If you need a faster method, submerge the turkey (still in its original packaging) in a large sink or container filled with cold water. Change the water every 30 minutes, and allow about 30 minutes per pound of turkey. This method requires more attention but gets the job done faster.
Safety Note
Avoid thawing a turkey at room temperature because bacteria can grow at warmer temperatures. Once the turkey is thawed, it’s time to move on to the next important step – brining.
How To Brine A Whole Turkey
One of the biggest keys to making your Smoked Turkey the best tasting turkey that you have ever had is to let it soak in a brine overnight. The brining process helps ensure the turkey stays juicy and flavorful as it cooks.
Although there are several recipes for brining a turkey, I prefer to keep it simple. A simple brine of water, salt, and sugar, plus a few optional aromatics is all you need.
Making the Brine
For every gallon of water, add 1 cup of kosher or pickling salt and 1/2 cup of sugar. Heat the water on the stove until the salt and sugar dissolve, then let it cool down completely.
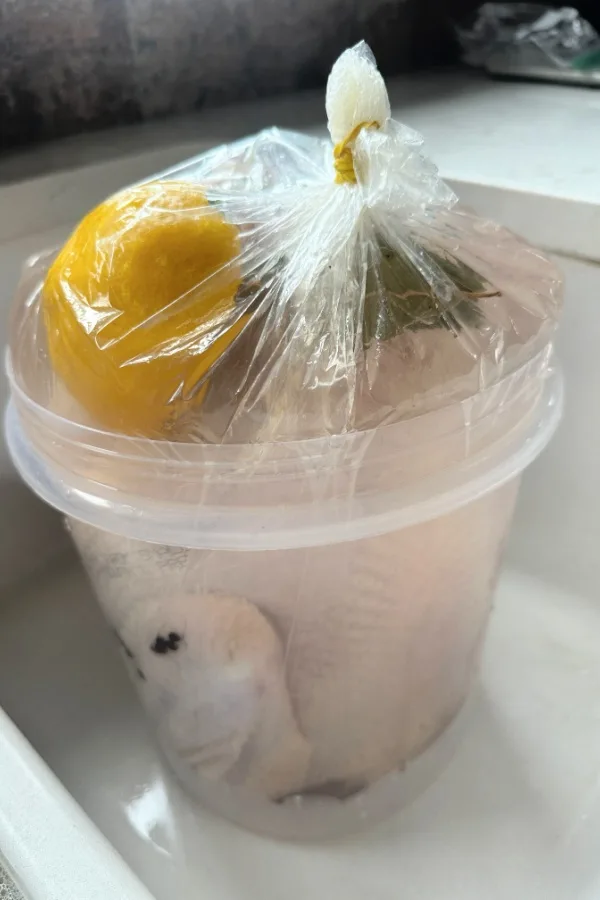
To boost the flavor, add a cut lemon, a handful of peppercorns, and two bay leaves. Pour the cooled brine into a large container and submerge the turkey in it. If the turkey floats, weigh it down with a heavy pot or foil-covered brick. Then place it in the refrigerator overnight.
In the morning, take the turkey out of the brine, rinse it well under cold water to remove excess salt, and pat it dry. Then place it on a baking sheet in the fridge (uncovered) for up to four hours.
This air-drying step helps the skin crisp up nicely as the bird cooks in the smoker.
Seasoning the Turkey
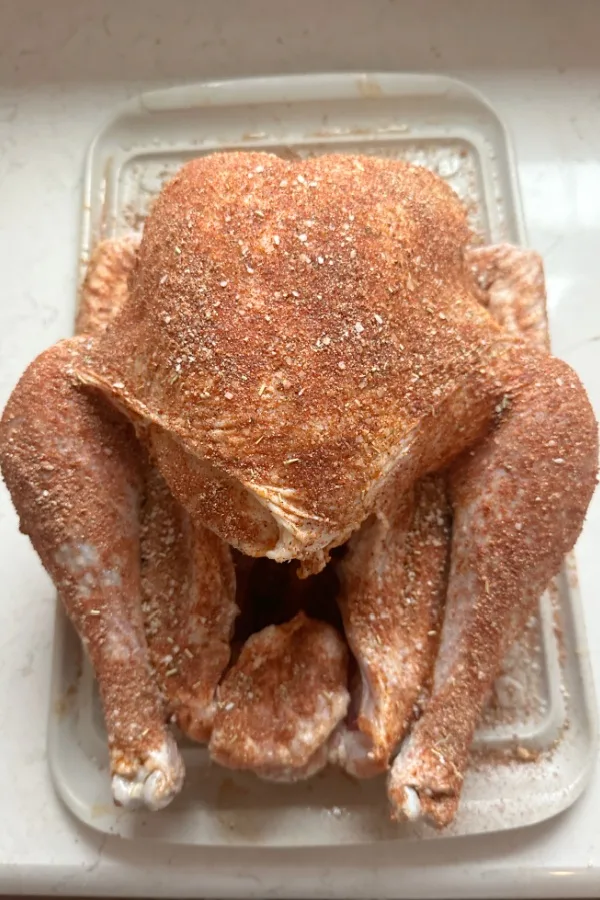
After brining and drying, it’s time to add a rub to give the turkey even more flavor. I brush mine with olive oil and then sprinkle on a dry rub.
You can use your favorite store-bought rub, or simply use salt and pepper. I like using a slightly sweet rub that includes a bit of sugar, salt, and pepper as it balances perfectly with the deeper, smoky flavor.
No matter what type of dry rub that you use, be sure to season inside the cavity as well. This will help flavor the meat as it cooks.
The Best Way To Cook A Smoked Turkey
Now let’s get into the smoking part. Set your smoker to 225°F.
As a general rule, plan on about 30 minutes per pound, plus an extra 30 minutes to be safe. So, for a 15-pound turkey, you’d smoke it for about 7 1/2- 8 hours.
Preparing the Smoker
Each smoker is a bit different, so set it up according to the manufacturer’s instructions. I’ve used electric smokers, pellet smokers, and even the Big Green Egg, and they all work great.
For what type of wood to use to make the best smoked turkey I suggest using a light fruit wood like apple or cherry, which adds a mild smoky flavor. However, if you are looking for a bolder, more smoky flavor use hickory wood or pellets.
If you are using an electric smoker, soak your wood chips in water for about 30 minutes before adding them to the smoker. This keeps them from burning too quickly and helps them produce a steady stream of smoke over the long cooking time.
Smoking Process
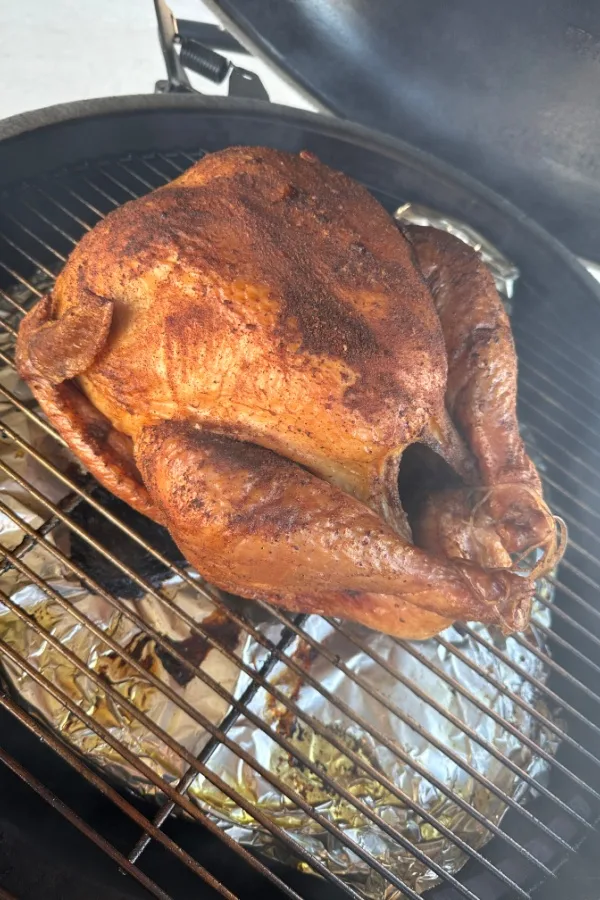
Place the turkey, breast side up, on a middle rack in the smoker or on the indirect side of the smoker. On the rack (or shield) directly below, set a shallow pan with about two cups of water to catch the drippings.
This moisture not only helps keep the turkey moist it also gives you a great base for making turkey gravy afterward.
About an hour before the estimated end of cook time, check the internal temperature of the thickest part of the turkey thigh with an instant read digital thermometer.
Knowing When Your Smoked Turkey is Done
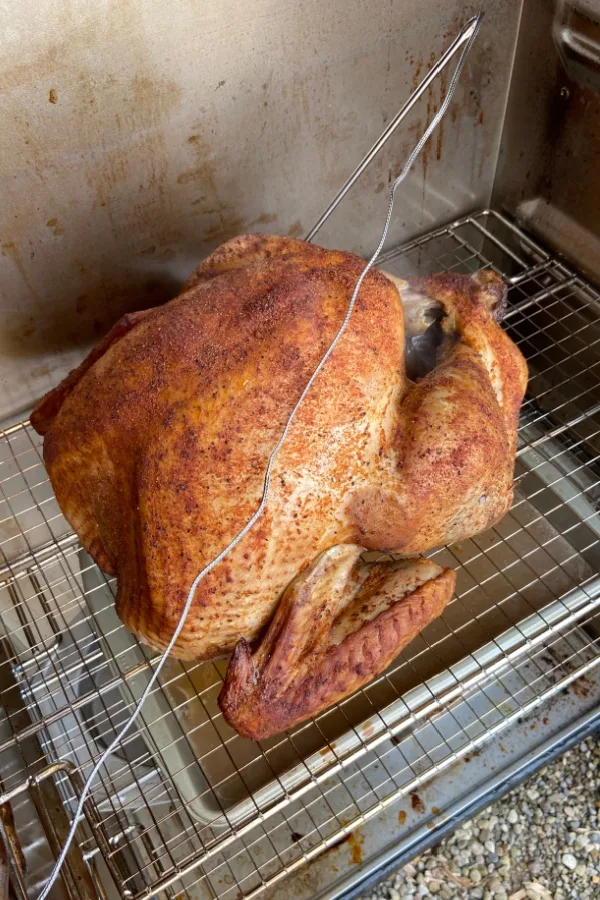
To make sure your smoked turkey is fully cooked, check that the internal temperature in the thickest part of the thigh reaches 165°F. I use a wireless digital meat thermometer so I can monitor the turkey’s temperature from inside the house—it makes the process a lot easier.
Once the turkey hits 165°F, take it out of the smoker and cover it loosely with foil. Let it rest for about 20 minutes. This resting period allows the juices to redistribute throughout the meat, making every slice juicy and tender.
Making Turkey Gravy (Optional)
If you’ve collected those smoky drippings, you’re all set to make some amazing gravy! Just strain the drippings, add a bit of broth, and whisk with flour to thicken. Place the mixture in a medium saucepan and heat until the desired thickness is reached.
Although this takes an extra few minutes you can make the gravy while the turkey rests. Believe me, the smoky flavor in the drippings takes homemade gravy to the next level.
Serving the Smoked Turkey
Once the turkey has rested, it’s ready to carve and serve. You’ll be amazed at how moist and tender it is, and the smoky flavor is just unbeatable. Smoked turkey is perfect for Thanksgiving, but I think it’s also great for any special gathering.
So do yourself a favor this year and purchase a second bird during the holiday season while they are on sale. Then in the middle of winter, when you are craving the taste of smoked turkey, you will have one ready to cook.
Enjoy!
Mary and Jim

Jim and Mary Competti have been writing gardening, DIY and recipe articles and books for over 15 years from their 46 acre Ohio farm. The two are frequent speakers on all things gardening and love to travel in their spare time.
As always, feel free to email us at thefarm@owgarden.com with comments, questions, or to simply say hello! You can sign up for our free email list in the subscribe now box in the middle of this article. Follow us on Facebook here : OWG Facebook. This article may contain affiliate links.
The Best Smoked Turkey Recipe
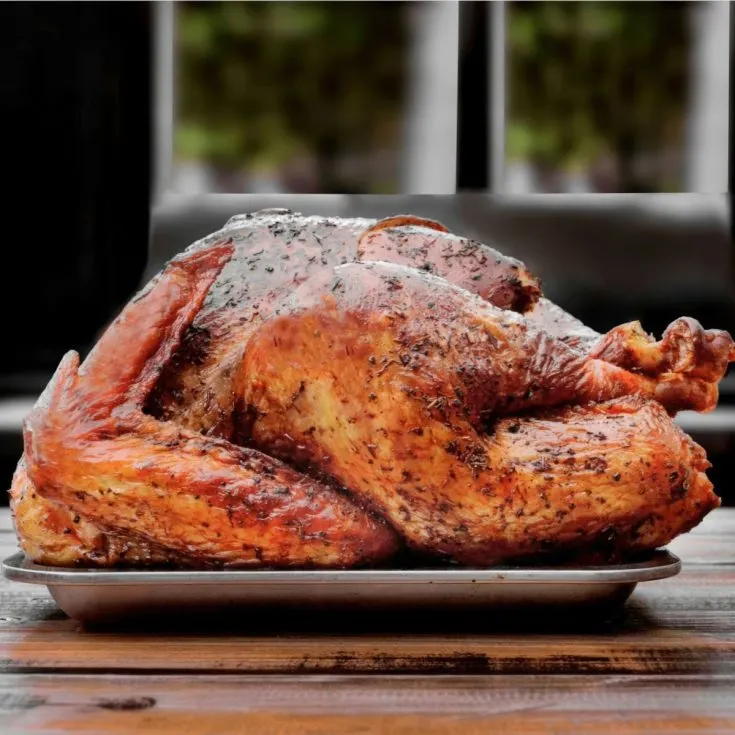
The best and most delicous way to cook a turkey! Use your smoker and your bird will come out moist, flavorful and perfectly cooked with very little hands on time required.
Ingredients
- 14 pound whole turkey
- 3 tablespoons extra virgin olive oil
- 3 tablespoons dry rub, homemade dry rub link in article
- 2 cups of water, to catch the drippings
Brining Ingredients
- water
- Kosher or Pickling Salt
- Sugar
- 1 lemon, cut into wedges
- 1/4 cup whole peppercorns
- 2 bay leaves
Instructions
The day before you want to cook your turkey, be sure that it is completely thawed and remove the neck and giblets from the cavity.
Prepare Your Brine
- Because all turkeys are different sizes and all brining containers are unique, the amount of brine that is needed will vary from person to person. For every gallon of water, add 1/2 cup salt and 1/4 cup sugar and heat until it is just dissolved.
- Allow the brine mixture to cool. Then add your lemon pieces, peppercorns, and bay leaves to the brine.
- Pour the brine into a very large container and submerge your turkey inside the brine. Keep in the refrigerator and brine overnight.
Prepare Your Turkey For The Smoker
- In the morning, remove the turkey from the brine and rinse under cold water. Be sure to rinse both sides of the bird and inside the cavity. Pat dry with paper towels and let it sit on a large cookie sheet to air dry for up to 4 hours.
- If you are using an electric or propane upright smoker, soak your wood chips in water 1 hour before you are ready to smoke your turkey. Use apple, cherry or hickory whenever possible.
- When you are ready to smoke your turkey, pat it dry with a paper towel one last time. Then rub oil all over the skin and inside the cavity.
- Next, sprinkle a dry rub mixture over all sides and inside cavity.
- Preheat the smoker to 225°F and once at temperature, place the turkey, breast side up on the second from the bottom rack or over indirect heat.
- Place a shallow baking pan filled with two cups of water on the rack or shield directly below the turkey to catch the drippings (optional).
- Add the wood chips and smoke for approximately 30 minutes per pound, then add another 30 minutes to the final anticipated cook time.
- One hour before the turkey is supposed to be done, insert a digital meat thermometer in the thickest part of the thigh, being sure not to touch the bone.
- The turkey is done when the internal temperature reaches 165°F at both the thigh and breast. Remove it from the smoker and let it rest under foil for at least 10 minutes before carving.
- Use the pan drippings to make your gravy, if desired.
Notes
- I prefer to let the turkey thigh internal temperature to reach 180°F so that the meat is fall apart tender.
Recipe courtesy of Old World Garden Farms
Nutrition Information:
Yield:
14Amount Per Serving: Calories: 890Total Fat: 36gSaturated Fat: 10gTrans Fat: 0gUnsaturated Fat: 24gCholesterol: 494mgSodium: 511mgCarbohydrates: 2gFiber: 1gSugar: 0gProtein: 130g
Nutritional Information is to be used as a general guideline only . Nutritional calculations will vary from the types and brands of the products used.

