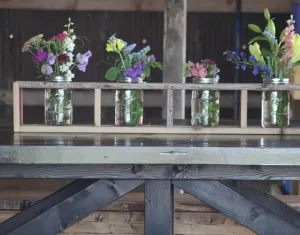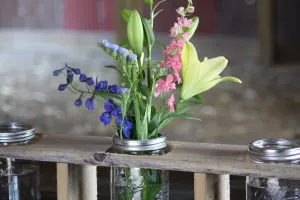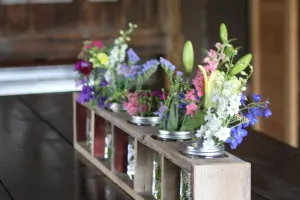
Using just a few pieces of old barn wood and some mason jars, you can create this centerpiece to hold flowers, candles and more.
Creating a Mason Jar Centerpiece.
With the garden all planted and growing, and a little bit of extra time before the heavy picking and canning season begins – we thought today would be a great time to focus on an easy DIY project using old barn or pallet wood.
Mary had been wanting a centerpiece for our barn table at the farm – and with the table measuring 12′ long – the hardest part was to come up with something that could fill the space and still look like it belonged. The answer came in the form of some left over barn wood and a few mason jars.
The best part about this project is that you can create it in less than an hour using some simple scraps of barn wood or pallets. We built ours to be 48″ long and with 5 mason jars evenly spaced to fit the long table – but you can adjust the final length to accommodate whatever size you need.
Now we have an easy to use centerpiece carrying on our barn theme that can hold fresh-cut flowers, candles – or whatever is in season.
Here is how we built it:
Mason Jar Centerpiece
Materials List:
***We have included the material list for our centerpiece that measures 48″ long. If you would like a smaller version, you can simply adjust the length of the boards, and the number of mason jars to suit your needs.
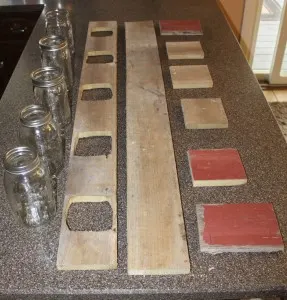
(2) old barn, pallet or wooden boards measuring 48″ long x 5″ wide (top and bottom pieces)
(4) pieces of matching wood 4″ high x 5″ wide (middle dividing pieces)
(2) pieces of matching wood 5 1/2″ high x 5″ wide (end pieces)
Wood glue (optional)
(5) Mason quart jars
(24) 1 1/2 inch finish nails, or screws for assembly
Tools Needed:
Jigsaw
Drill with a 1/2″ bit
Tape Measure
Circular or Table Saw To Cut Barn Pieces to length and width
How We Built It:
We started by running two pieces of old barn wood through a table saw to make them a uniform 5″ wide. We then cut two pieces to 48″ lengths for the top and bottom, and cut the remaining divider and end pieces as well.
Our barn boards were 3/4 thick wood – so we cut our two end pieces at 1.5″ longer than the middle dividing pieces to cover the top and bottom boards at the ends.
Once all the pieces were cut – we selected one of the 48″ long boards and traced our 5 mason jar holes evenly spaced across the board. To cut out, we used a drill with a 1/2 bit to cut a hole inside of each traced square, and slipped in the jigsaw blade and cut out the trace line.
Then, we simply assembled the end boards and middle dividing boards with a couple of nails, and in a little under an hour – our centerpiece was complete!
Happy Gardening! – Mary and Jim
If you would like to receive our DIY & Gardening Tips every Tuesday – be sure to sign up to follow the blog via email in the right hand column, “like” us on Facebook, or follow us on Twitter.


