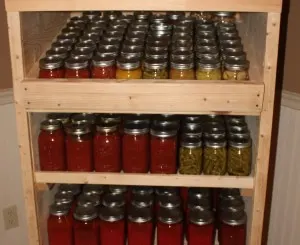
Canning has become a lost art in some sense. Just ask your friends if they remember their Great-Grandmother, Grandmother, or even their own parents canning vegetables when they were growing up. Most likely, a few of them will recall and be able to tell stories of picking and snapping green beans in preparation for canning or remember pulling that first pickle out of the mason jar to take that crunchy bite made directly from the summer’s garden.
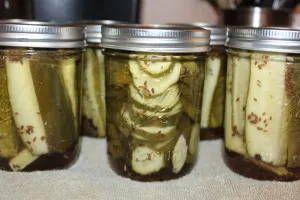
There is nothing better than eating a homemade pickle in the middle of winter, knowing it came from your garden.
What are the benefits of canning? Although there are too many reasons to list, below are our top five reasons that canning is a necessity in our lives.
Why can?
- Canning saves you money…..preserving food from the garden or from the farmer’s market allows you to eat many meals for pennies as compared to buying or eating out.
- Canned foods taste so much better than store bought…..you can taste the freshness from your garden and you can season your recipe for your taste buds rather than a commercial plant adjusting the taste to please the majority of the consumers.
- NO artificial ingredients or preservatives…..enough said.
- Less waste…..have you ever really thought about how much waste comes from eating pre-packaged food that you buy from the grocery? When you can your own food you are reducing the impact on the environment by picking from your own garden and using mason jars that can be used over and over again.
- Heritage…..I have to admit, there is a feeling of nostalgia when I hear the swish-swish of the pressure canner or the POP sound of a jar that is sealing. It provides me with an emotional connection to my ancestors that canned out of pure necessity and allows us to preserve that history in a sustainable way.
We get a lot of questions from readers all over the world about how to get started canning. In order to begin, you first must know the difference between water bath canning and pressure canning.
Canning using the hot water bath method is a simple process and where every beginner should start. You clean and sterilize mason jars which then are filled with most often hot, highly acidic food. You simply wipe the rim clean, place a heated lid over the top, and secure by screwing a ring on the jar.
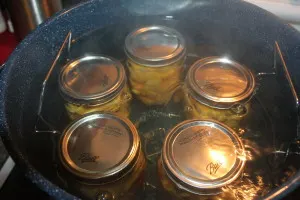
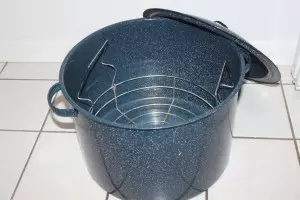
The filled jars are then placed carefully in the boiling water bath of the canning kettle and placed on the wire rack. When filled, the water level needs to be one to two inches above the top of the tallest jars. The cover is put on the kettle and it is allowed to return to a full rolling boil, at which time the processing time starts.
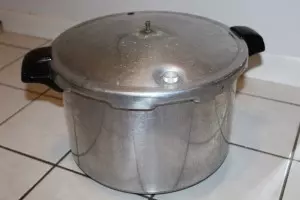
Pressure canning is necessary to safely preserve foods that are lower in acid that must be heated beyond the temperature that can be reached by using the water bath method.
There are two types of pressure canners – dial and weighted. Both types are suitable for canning in your home kitchen. We won’t go through the procedures of pressure canning, as each brand has specific instructions that must be followed included in the instruction manual. By following those instructions you won’t have the aged old fear of ‘blowing up your kitchen’.
For both methods, when the processing has been completed, remove the jars using tongs and place on folded towels. Allow the jars to cool completely (usually overnight). This allows the jars to seal with that famous ‘POP’ sound indicating that successful seal. Store jars in a cool, dark place.
Equipment needed:
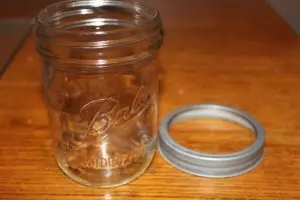
- Canning Jars, Seals, and Rings – use mason style jars with sealed lids and rings, which can be found at most stores. You can reuse the jars and rings but not the seals. *You can find inexpensive mason jars at many flea markets, garage sales, or even in the basement of your neighbor’s homes – it never hurts to ask
- Wide-Mouth Funnel – makes filling jars easier and less messy
- Magnetic Lid Lifter – for easy removal of lids in hot water
- Ladle – for filling jars
- Hot Water Canner/Large Pot – for boiling high acid foods (ex. preserves, jams, salsas, some tomatoes)
- Pressure Canner – used for canning vegetables and meats that need to reach a high temperature (0ptional depending on what recipe you are using)
- Tongs/Jar Lifter – rubberized lifters make removing cans a breeze, but a good pair of tongs can work just as well
- Clean Cloths/Towels– used to wipe down jars, lids and rims of jars and thicker towels used for placing the heated jars on for cooling
For a new individual that is exploring the possibilities of canning, there are some helpful tips/hints that I wish someone would have shared with me when I began.
Secrets to a successful canning season:
- If this is your first time canning, start with simple recipes such as jams and jellies. Most recipes require only a few ingredients and use the water bath method.
- Always, Always, Always follow an udated and approved USDA recipe for canning. Just because you have a recipe from Grandma’s recipe book, it does not mean that it is safe to use today. The acids in many vegetables have changed over the years and many methods used for canning decades ago are no longer safe.
- Food expands when heated, so never overfill your jars. This would cause leakage and may result in a jar not being sealed.
- You must adjust canning times based on your altitude. Check out this altitude adjustment guide for the specifics.
- Test all jars after they are completely cooled by pushing down in the center of the lid. A properly sealed jar will not have any movement. If you can push your lid in, it did not seal properly and needs to be placed in the refrigerator for use within a week.
-
Mark your jars by writing with a permanent marker on the lid with the name and date. You might think you will remember what was in each jar, but many items all look the same (pizza sauce and taco sauce) in the middle of winter.
- Don’t be afraid to try canning – ask someone to do it with you if you are unsure, two heads sometimes can be better than one.
I am sure there are many other tips that our readers can provide to make it a successful canning season for both the new and experienced canner. Feel free to share those ideas in the comment section for all our readers to enjoy!
Happy Canning!
Be sure to sign up for our free email newsletter to get our 3 articles each week – delivered straight to your inbox. You can do so in the upper right hand side bar of this page. This post may contain affiliate links.
Mary and Jim

