In spite of what many think, it really is possible to create a stunning, easy to maintain, low cost landscape.
In fact, with a little planning, labor and DIY gusto, you can create nearly anything you can imagine. And for far less than you ever thought possible!

7 years ago, we were faced with a blank canvas and a near zero budget to start landscaping our little start-up farm.
There wasn’t a plant to be found anywhere on the 3 acre property, only brush and overgrown thickets.
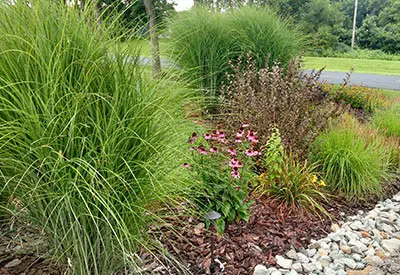
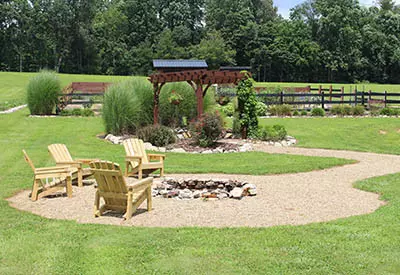
Fast forward 7 years, and today the farm is filled with over 1200 plants, 15 flowerbeds, walkways, sitting areas and more.
And though it might look like it cost a bit to create, in reality, nearly all of it was built for free. Best of all, it’s low-maintenance nature makes it easy to maintain.
That lets us spend more time enjoying it, and less time working in it!
Through it all, there were 4 basic keys that helped us create our low maintenance, low cost landscape.
The Four Keys To Create An Easy To Maintain, Low Cost Landscape
#1 Learn The Power Of Dividing And Transplanting.
One thing is for sure, if you are going to purchase all of the plants needed to fill a landscape, you are going to spend a fortune!
The first key to creating a low-cost landscape is to use the power of dividing and transplanting.
So many times, folks head to their local home and garden store without ever giving a second thought to transplanting and dividing.

Whether from existing plants in your own landscape, or from plants from friends, family or neighbors, there are thousands of perennials that can be easily divided to create new plants for free.
See : Dividing Perennials In The Summer
Of our 1200 plus plants around the farm, nearly all have come from this process.
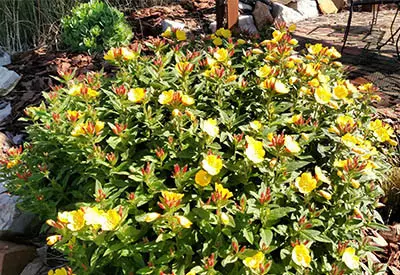
Ornamental grasses, daylillies, hosta’s, daisies, coneflowers and close to 50 other varieties of perennials now fill the landscape – all at zero cost!
Spring and fall are excellent times to dig up and divide most perennials. Some can even be dug and transplanted in the middle of summer. It is a great way to add tons of plants without any cost.
And if you don’t have your space figured out when plants become available, create a temporary holding bed in your yard or garden.
We filled one quarter of our first year garden with transplants while we created beds around the farm. By the following year, they were ready to easily be transplanted where we needed them.
Finally, Wwhen you do purchase plants – buy small to save big! You can save a small fortune simply by buying a smaller plant. And those small plants will become big enough to divide in a few years, giving you plenty to add in wherever you like.
#2 Fill Up Those Bed Spaces
When it comes to creating both a low maintenance and low cost landscape, this is a huge key!
As you create, expand or work existing flowerbeds, fill beds more with plants than mulch! This has multiple benefits for you, your landscape, and your wallet.
Large, sparsely filled beds are costly to mulch and re-mulch. And those big open spaces are an easy target for weeds to take hold.
Thick perennial plantings or groupings on the other hand help to snuff out weeds. They also conserve moisture in the soil, reducing the need to water.
But perhaps best of all, they eliminate the need to use large quantities of mulch each year, saving big money on the budget.
We have reduced the amount of mulch needed each year drastically simply by continuing to fill bed space with plants. Plants are truly the ultimate living mulch!
#3 Use Natural, Local and Inexpensive Materials Whenever Possible

When it comes to creating walkways, edging and more, think natural and think local for great savings and great looks!
By using locally available and abundant materials, you not only save money, but create a look that fits into your area’s natural surroundings.
For us, it was using limestone rock for bed edging and limestone dust and pea gravel for walkways.
Both materials are locally abundant and inexpensive. Using them saved huge dollars on our landscape budget.
We created our walking paths for about .03 a square foot with the gravel and limestone dust. Our natural limestone rock edging came in at less than .30 cents per foot.
If you live in other regions, it might be decomposed granite, sea shells or sandstone. The key is to find local, abundant and readily available materials that fit into your surroundings.
#4 Choosing Long Lasting Mulches
When you do mulch, be sure to choose a durable, long-lasting mulch to avoid costly re-mulching.
Stay away from super fine, triple shredded mulches for flowerbeds. These soil-like mulches might look great when they first go down, but they quickly decompose and disintegrate.
They often require several coats in a single season to keep beds looking good. That can come at a hefty price tag!
Their fine, silt-like nature also allows weeds and weed seeds to more easily become established.
As these mulches quickly decompose into the soil, they replant the weeds seeds laying on top, creating a nightmare of a weed problem.
Choose more coarse mulches such as single shredded hardwood, bark or nuggets that will protecting bed spaces longer, and at a much more economical cost.
We have used large pine nuggets in our beds for a long-lasting mulch that stays in place for years.
Here’s to creating a low maintenance, low cost landscape – Jim and Mary!
If you would like to receive our DIY, Gardening and Recipe articles each week, you can sign up via email at the very bottom of this post. You can also like and follow us on Facebook, Twitter or Instagram to receive all of our latest tips and articles. This article may contain affiliate links.
