Did you know you can grow your own sweet potato starts with nothing more than a sweet potato, a toothpick – and a glass of water? It’s true! And not only is it easy to do, it will give you amazingly healthy and strong transplants for growing your own delicious crop of sweet potatoes this year!
As sweet potatoes continue to grow in popularity, so has the interest in gardeners planting them right at home in their backyard garden. And why not – beyond their nutritional value, sweet potatoes are easy to plant, grow and harvest. Even better, as a root crop, they can be stored and kept to use deep into the winter months.
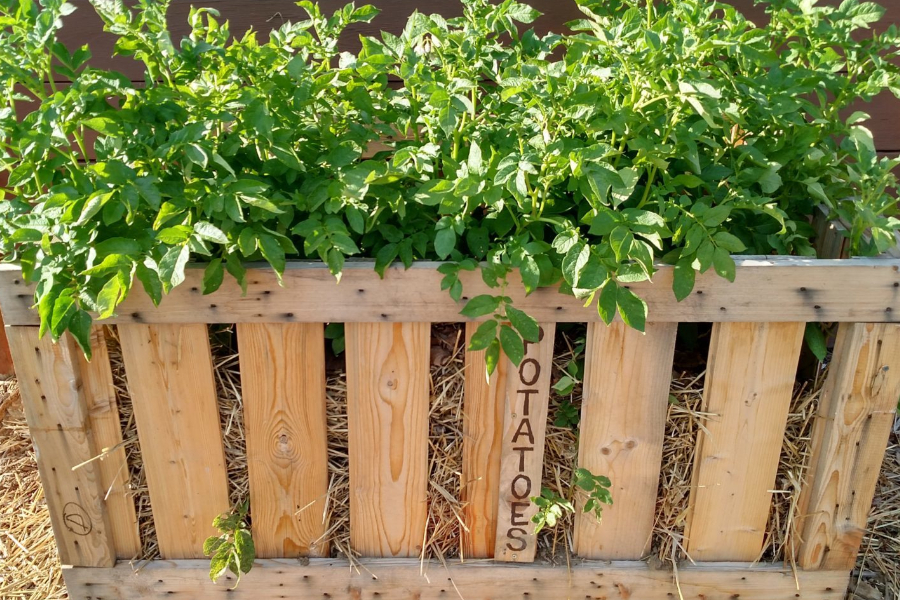
We have been growing them for years now using our homemade potato crates – and love starting our own plants for free each year. But although sweet potatoes and traditional potatoes share the same name, they are not from the same plant family. Nor do they grow in the same way.

The seeds of regular potatoes are actually a portion of the potato that contains at least one “eye” or bud. When planted in the soil, the eye then sprouts stems and leaves. But instead of using a portion of a sweet potato for its seed, you instead use the roots that sprout from a sweet potato.
These roots are usually called starts or slips. And they are actually quite easy to grow from an existing sweet potato. In fact, it’s so easy, it can all be done right on your kitchen or dining room windowsill.
How To Grow Sweet Potato Starts
There are several proven methods of growing slips from an existing sweet potato. But for us, nothing beats the ease of using the simple toothpick method. And all you need to do it is a little water, a clear glass mason jar, and sweet potato!
First, start with a good, healthy organic sweet potato. Why organic? Because non-organic sweet potatoes are often treated with chemicals that will prevent sprouting.
Although you can leave the sweet potato whole, we tend to use larger sweet potatoes and cut them in half to make two separate slip growing jars. We have used both methods (whole and cut), but always feel the cut ends help speed up the top sprouting process.
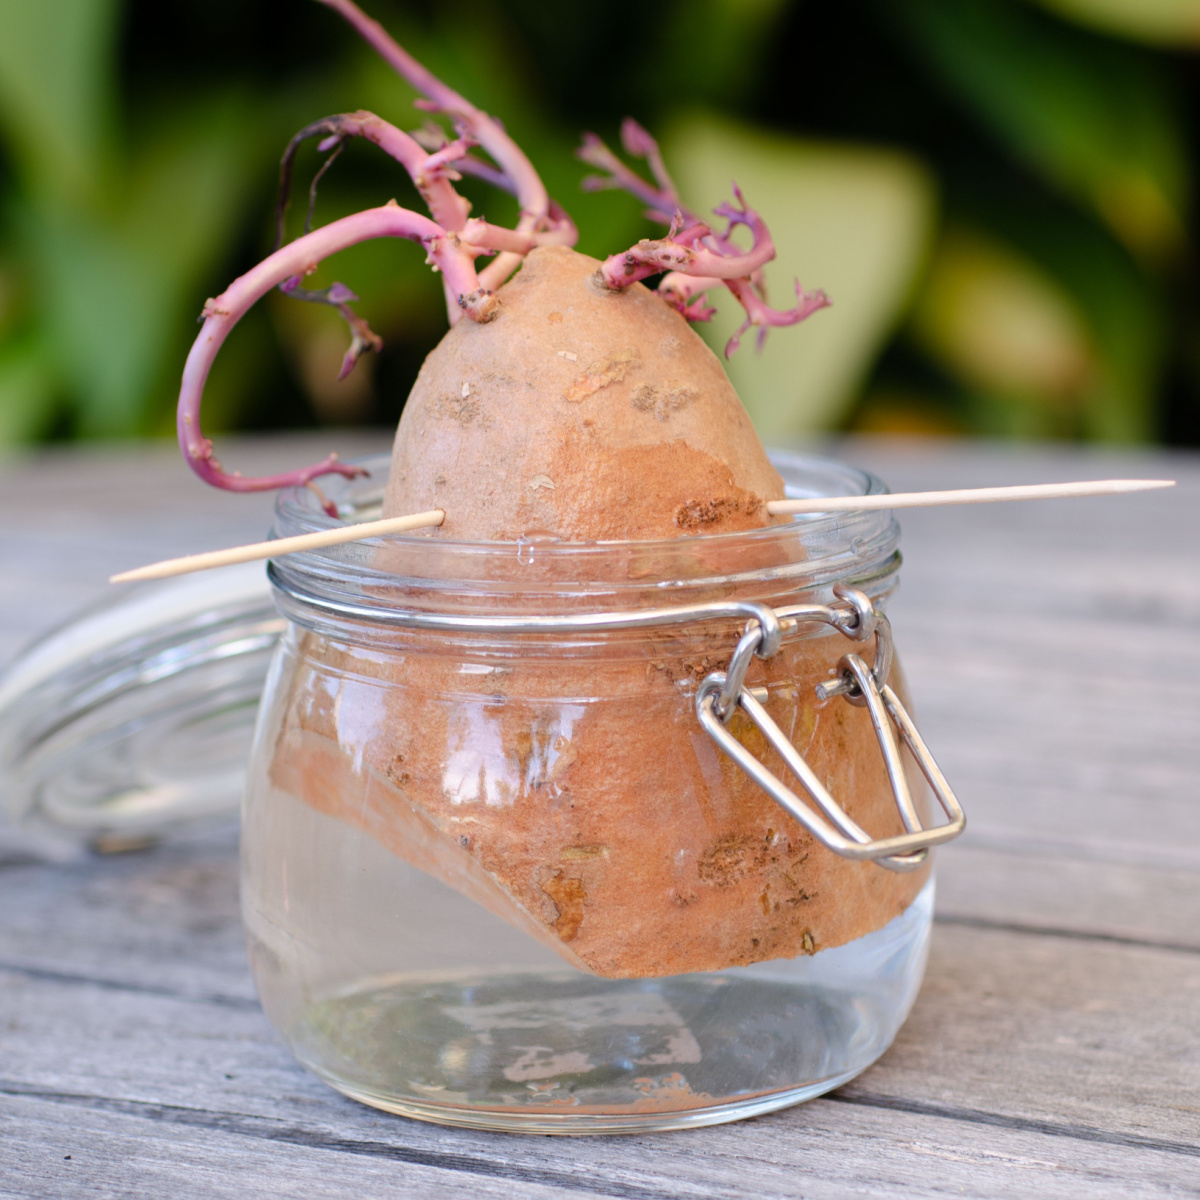
Next, stick in a few toothpicks just below the half way point near the bottom of the sweet potato. Place the toothpicks in a line around the circumference of the potato.
Finish by filling a mason jar with tap water (non-treated water) and rest the sweet potato down into the jar on the toothpicks. For best results, make sure that a bit more than 1/2 of the potato is out of the water. Now it’s time to put your jar into a sunny warm window and let the magic happen!
How Sweet Potato Starts Grow & Form
The sweet potato will develop a few stringy roots below the water first. Then in three to four weeks, it will begin to sprout stems and foliage from the top. It can take a bit longer if the room they are in is on the cooler side.
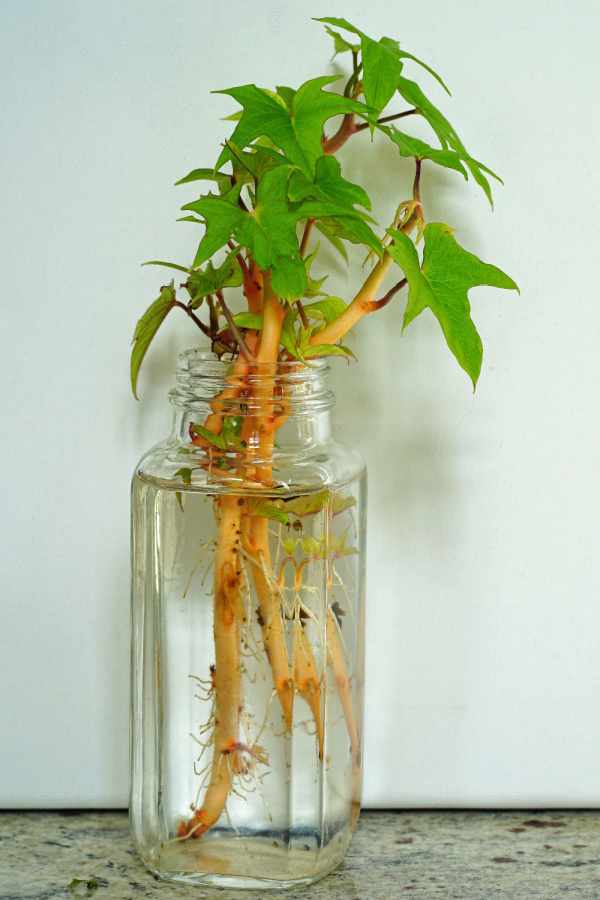
Allow the stems to grow until they reach about 4″ in length. Then carefully remove the stems from the base of the sweet potato with a slight twist. Be gentle, but don’t worry if it breaks off a bit in the process.
Next, place the end of the stems down into another jar filled with water. The stems will float a bit, and that is fine. Just be sure the slips are not completely under water. In a few days, the ends will begin to form roots, and your slips will begin to grow up! Allow them to continue growing and fill out right up until planting day.
The best part of all is that your original sweet potato will continue to develop new slips in the same location as your old slips developed. Using this method, you can create several rounds of slips before it’s time to plant.
Planting Your Slips
Sweet potatoes are vulnerable to frost and cool weather. For this reason, it is best to plant them once the soil warms in late spring, and all threat of frost has passed.
You can plant sweet potatoes in a variety of methods. We actually grow our sweet potatoes in crates and love the ease of the method. But they can also be planted in a traditional garden or raised beds with success as well. See: The Easiest Way To Grow Potatoes Ever – How To Grow Potatoes In Crates!
No matter where you plant, good soil is a must! Sweet potatoes thrive on loose, compost-filled soil with plenty of nutrients.
Space the slips when planting 8 to 10″ apart. Always plant your slips at the top of a slight mound of soil. This will keep them from sitting in water and prevent them from rotting off from too much moisture.
Bury at least half of the slip to allow for plenty of rooting. If planting in raised beds or a traditional garden, make sure the soil below is loose and fertile. Amending with compost is always a good idea to promote good root growth.
Within a few weeks, the foliage should begin to grow wild, and your sweet potato crop will be off and running!
Fertilizing and Water
Water the slips well until they become established in the soil. Check daily the first few days for signs of the slip drying out and water if necessary.
Water is important, but be careful not to over-water. If plants begin to yellow, it is usually a sign of over-watering.
Once established in a few weeks, sweet potatoes can benefit greatly from a few applications of liquid fertilizer. Compost tea, worm casting tea, or a high quality organic liquid fertilizer will all do the trick. Affiliate Link: Organic Liquid Fertilizer
Apply after two to three weeks in soil, and once again a few weeks after that for best results. Once the plants have taken off, back off on fertilizing as it can lead to extensive foliage production up top, but less potato production under the soil.
By mid-fall, plants will usually start to yellow at the ends of the vines. This is a sign that they are ready for harvest. Dig up slowly from the edges to avoid damaging the tubers. And that’s how you grow your own sweet potatoes from slips! Happy Gardening – Jim & Mary
Old World Garden Farms
Jim and Mary Competti have been writing gardening, DIY and recipe articles and books for over 15 years from their 46 acre Ohio farm. The two are frequent speakers on all things gardening and love to travel in their spare time.
As always, feel free to email us at thefarm@owgarden.com with comments, questions, or to simply say hello! You can sign up for our free email list in the subscribe now box in the middle of this article. Follow us on Facebook here : OWG Facebook. This article may contain affiliate links.