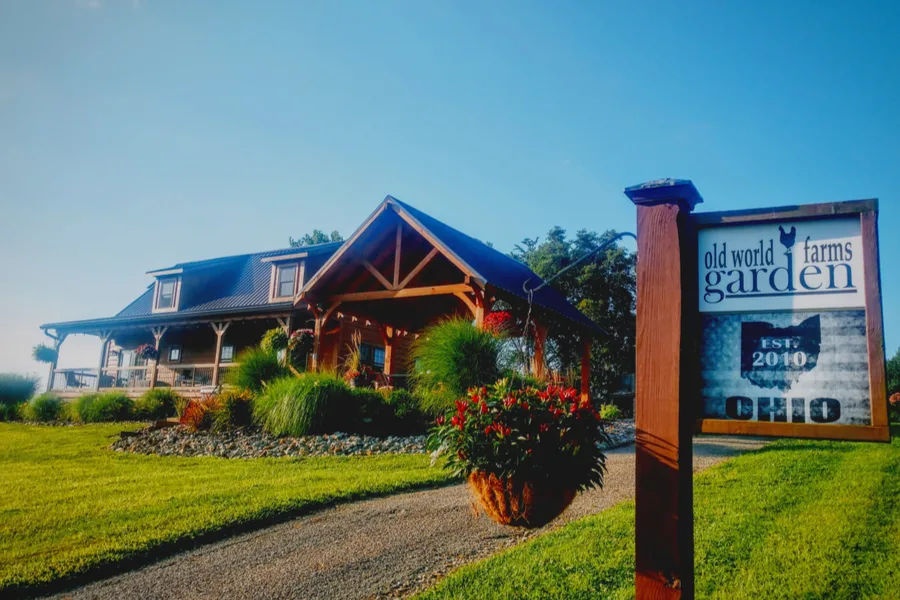
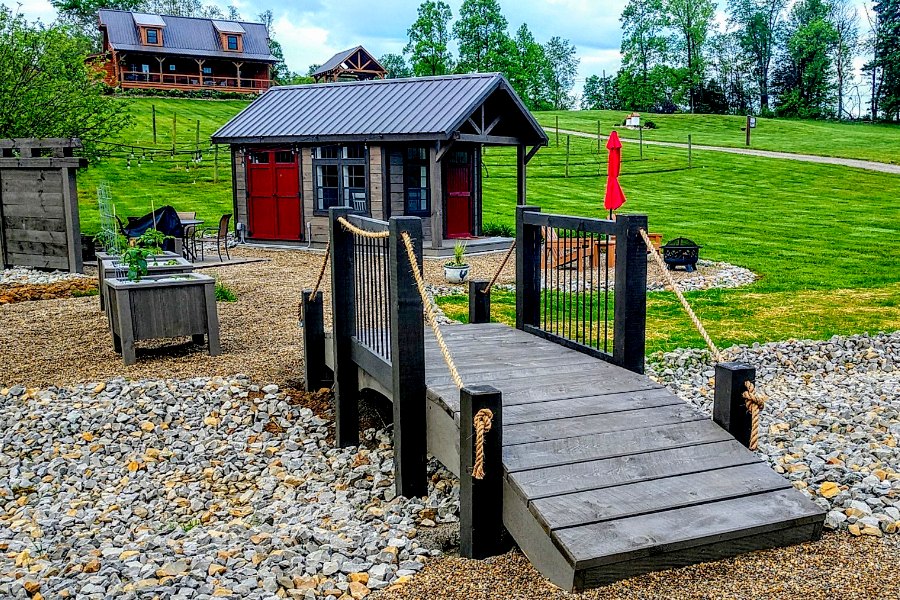
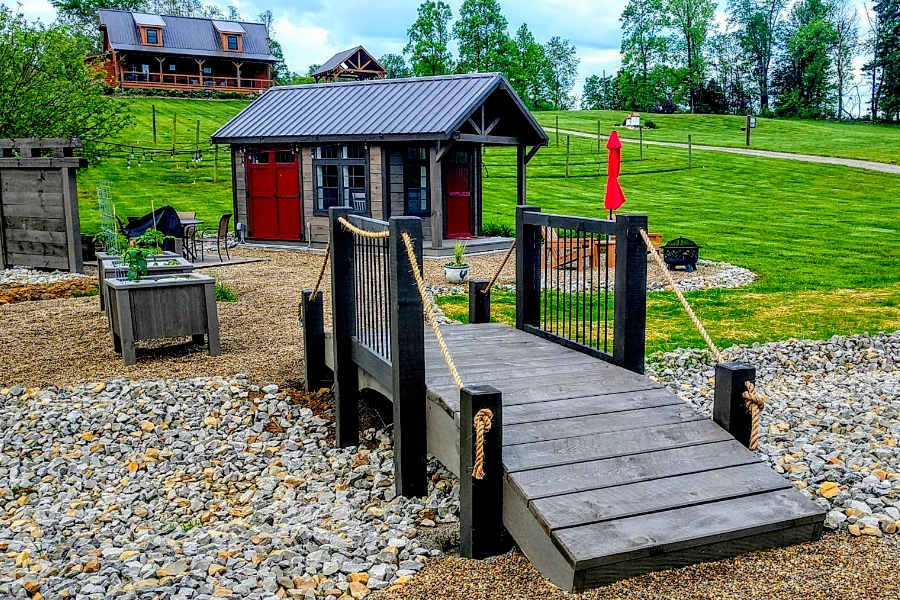
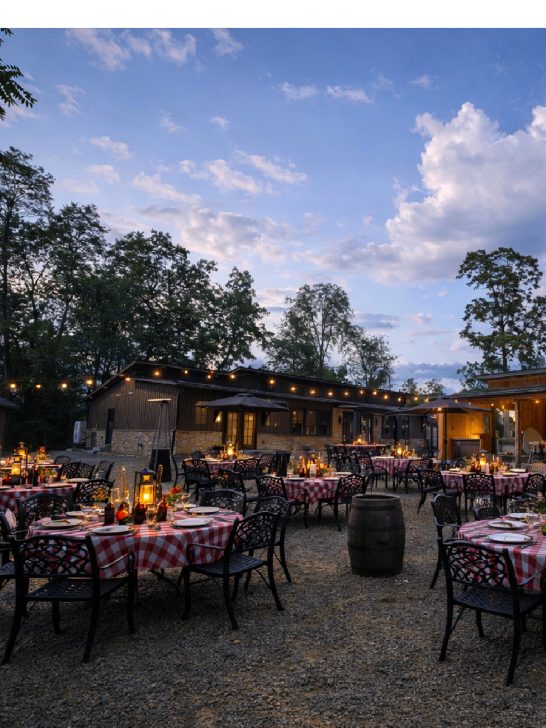
Planting The Garden! The Sunday Farm Update

A Celebrity tomato plant stands ready to grow after being planted this past week.

A Celebrity tomato plant stands ready to grow after being planted this past week.

It is always one of our favorite weeks of the year…the planting of our garden!

Winter had a final stand last Sunday and Monday night with one last frost at the farm.  By Wednesday however, the temperatures quickly rose into the 70 and 80′s – and the threat of cold weather became a distant memory.  It was finally time to get the full garden planted!

It doesn’t take long for us to get the plants in with the raised row system, and with a few hours of work each evening on Thursday and Friday – the 2013 Garden Plan came to life.  All in all, over 140 plants went into the ground – including 40 tomato and peppers plants each, along with rows of cabbage and head lettuce transplants.  We also seeded in multiple rows of green beans, potatoes and onions to go with the early spring crops of radishes, sugar snap peas, lettuce, arugala and carrots already in the ground.  (You can see the entire garden plan at the bottom of the post)

All of the raised rows are planted - we will be heading out today to straw the walking rows.

All of the raised rows are planted – we will be heading out today to straw the walking rows.

We create all of the holes in each row with a post hole digger.  It allows us to quickly have a planting hole that is both deep and wide enough to easily plant in. Next – we add in a shovel full of compost to the hole – and mix back in the existing soil to plant the transplant.

Finally,  we add a thin layer of compost as a top dressing and mulch around each transplant, water them in – and move on to the next plant.

The strawberry plants are off to a good start

The strawberry plants are in and will even give us a small harvest this year.

One of our other goals this year was to get our strawberry and blueberry patches planted.

Over the last few weeks we had turned over and prepared the soil for the patch where the old chicken coop once stood. The soil is rich in nutrients from the chickens over the the last few years, and should provide years of good blueberry and strawberry harvests.

We chose a June bearing variety (Sparkle) for our strawberries. Ever-bearing varieties can provide berries throughout the season, but the June bearing will provide larger and more abundant harvests – which are perfect for canning and preserving.  For the blueberries, we chose three different varieties of bushes – allowing for better pollination and higher yields.

Bringing back pollen to the hive...if you look closely you can see the yellow pollen on the incoming bee

Bringing back pollen to the hive…if you look closely you can see the yellow pollen on the incoming bee

The bees have plenty of fresh blooms to choose from - here the wegelia at the front entrance

The bees have plenty of fresh blooms to choose from – here the wegelia at the front entrance

The chicks are now almost 13 weeks old, and have taken to sunning themselves outside of the coop.

The chicks are now almost 13 weeks old, and have taken to sunning themselves outside of the coop.

The honey bees and our new hive are off to a great start.  The queen has successfully found her way out of her cage, and the bees have begun to diligently bring in pollen at an amazing pace.  It is truly amazing to sit and watch them fly in, one after another, with their bodies and legs covered in the colorful yellow and purple pollen of the surrounding blooms.  It’s a great feeling to know that they are close by to help pollinate our crops – and even better to know that if all continues to go well, we can hope to have our first harvest of our own “local honey” this fall.

The new chicks are likewise off to a great start.  They seem to love their new coop – and have more than doubled in size since moving out  to the farm from the brooder from the house.  They will turn 13 weeks old this Monday – which means we are only 5 to 7 weeks away from them starting to lay.  Our new chicks are all Golden Comets, and most will begin to lay somewhere between weeks 18 and 20. We have been able to let them free range over the entire farm for the last few weeks – but with the garden, strawberry, and blueberry patch areas planted now – we will lay out some large fenced-in grazing areas to keep them from damaging any of the crops.

Here’s to a great start to the growing season!

Happy Gardening – Jim and Mary!

If you would like to receive our Gardening / DIY and Farm Updates each week – be sure to sign up to follow the blog via email in the right had column, “like” us on Facebook, or follow us on Twitter.

The 2013 Garden Plan.

The 2013 Garden Plan.

The Farm Hits 1,000,000…And Exciting News With Hometalk!

Building our barn was the best

Our Recycled Barn – One of our favorite projects completed on the farm

Our garden - one of our favorite places to write about and work in!

Our garden – one of our favorite places to write about.

Saturday was a good day for Old World Garden Farms!

15 months ago, when we first started this blog to document building our little farm – we felt fortunate to have a few followers and a few hundred visitors each week. We enjoyed sharing our 3 weekly updates, The Sunday Farm Update Post, Tuesday DIY and gardening articles, and our Friday recipes.  

We used to joke about someday getting to 10,000 visitors, and a 100 followers.  Well, yesterday – in what still seems crazy to us – we passed our 1,000,000th visitor to the site and our 11,000th email follower!  

The milestone couldn’t have come at a better time – as we have a lot of exciting new ventures going on at the farm and the blog. We figured it was a great time to announce them today on the Sunday Update.

Hometalk and Old World Garden Farms – Planning Our First Garden Meet-Up Event

hometalkMaybe the most exciting news of the week is being selected by Hometalk to host a Meet-Up that will be taking place later this summer in Central Ohio. For those that don’t know – Hometalk is an incredible website devoted to DIY, Gardening And Landscaping – and creating a platform for people to instantly tap into others hard-earned experience.  They have featured many of our projects on their site in the past year, and we are so excited to be chosen to co-host a meet up event with them on our favorite subject – gardening!

old world garden farms logo smallWe have been working with Miriam Illions, the Director Of Community Development for Hometalk, to host the event here in Central Ohio.  We are still working out the details, but we will be partnering with Hometalk and a local Central Ohio Greenhouse to host an afternoon covering gardening techniques and tips that we use at the farm – including composting, raised bed gardening and more.  We will even have a a demo on working with pallets to build your own compost bin. It will be a great day to share gardening ideas and spread the word about one of our favorite sites, Hometalk.

We will be sure to publish all the details of the event in next Sunday’s post.  If you are close to the Columbus, Ohio area – we invite you to come on over and meet with us and share in a great day.  For those a little farther away – we will be sure to post lost of pictures and updates of the event!

sunday farm updates

Click To See All Of Our Past Sunday Farm Updates

While we are at it, we also want to take a minute to thank so many other blogs and websites that have helped us grow over the last year by showcasing our stories, recipes and gardening tips. In particular, Homestead Survival, Canning Granny and Prepper Chicks have all been instrumental in highlighting so many of our stories and posts to their readers – and they are incredibly wonderful web sites full of great information!

Last but not least – we extend a huge Old World Garden Farm “Thank You” to everyone who has visited, commented and shared in our stories to get us to our first million visits. We feel so fortunate to have such wonderful and loyal followers, and hope you continue along with us as our story at Old World Garden unfolds.  We hope someday, to document the entire journey in our ultimate dream – the writing and publishing of a book about our little farm. More than anything else, we will continue to do what we love the most – work and build our little farm one day at a time.

Happy Gardening – Jim and Mary!

f you would like to receive our Gardening / DIY and Farm Updates each week – be sure to sign up to follow the blog via email in the right had column, “like” us on Facebook, or follow us on Twitter.

The Honey Bees Arrive At The Farm! The Sunday Farm Update

The bees are dumped into our waiting hive.  In spite of some nervousness...the whole process went fairly well.

The bees are dumped into our waiting hive. In spite of some nervousness…the whole process went fairly well.

The bees are shipped in a wooden crate like box with a can of syrup to keep them fed.  The little tab you see on can is what is holding the queen's cage suspended in the box

The bees are shipped in a wooden crate like box with a can of syrup to keep them fed. The little tab you see on can is what is holding the queen’s cage suspended in the box

The dream of having our own bee hive at the farm – and of course our own  honey, finally became a reality this past week!  On Friday, we received our package of bees and within a few hours – Mary and I officially became “beekeepers”.

All in all, it was a fairly smooth process – taking only about 15 minutes to open the package, remove the queen and bees and place them into the hive.  We had both went over the process of hiving the packaged bees a hundred times in our head – but that doesn’t mean we weren’t a little nervous heading to the farm with about 8,000 bees in a box in the trunk!

Knowing that calm is a good thing when working with bees – we did our best to stay relaxed (or at least a good fake job :) ). We put on the bee suit and went to work.  We had installed the base and bee-hive structure the previous day in a semi-protected area along a tree line at the farm.  All we had to do now was open the box – remove the queen cage, dump the remaining bees into the hive, and then place the queen in with them.

The queen comes with the bees in a little “cage” suspended from the top of the bee package. On one end of the cage is a wooden plug that once removed, reveals a hard sugary substance. The entire cage is hung in the new hive, and the worker bees will slowly eat the sugar and release the queen. The time it takes this process to occur allows the bees and the queen to become familiar with each other and the bees to accept her as their queen.

Prying out the wooden plug from the queen's cage.  Once the wood plug is out -t he worker bees will begin to eat through the remaining sugar plug to free her into the hive.

Prying out the wooden plug from the queen’s cage. Once the wood plug is out -t he worker bees will begin to eat through the remaining sugar plug to free her into the hive.

About the only hiccup in the whole process is that I dropped the queen box into the mass of bees when opening the shipping box.   Needless to say, the bees were not very happy with me at that point!  But as they swarmed around me – I tried hard to remember the words of our bee-keeping mentor that “calm is good” – and that I was also fully protected.  I slowly reached in, removed it, and then continued on by dumping the remaining bees into the hive.  Next, we suspended the queen and her cage between the frames, closed it up, and all was well!

For the first week or two, we will supplement the bees with a syrup solution made simply from one part water and one part sugar.  It will provide the new colony with some nutrition while the bees become familiar with the surroundings and begin to collect and bring back pollen to the hive.  That is the yellow jar-like object you see attached to the hive.

Placing the Queen in the hive

Placing the Queen in the hive

After placing the queen in the hive, we simply closed the top.  The yellow jar attached to the hive is the  sugar water feeder.

After placing the queen in the hive, we simply closed the top. The yellow jar attached to the hive is the sugar water feeder.

By yesterday afternoon, just about 24 hours after we had released the bees into the hive – you could already see them flying in and out exploring their new surroundings. Most likely, we will be able to remove the feeder soon – especially with as warm as it is, and with plenty of pollen now available for the bees to collect.

It will be exciting to see the activity throughout the summer.  We will wait about 2 more days and then open the hive to make sure the queen has been freed from her cage and that she has begun to perform her duties. After that – we will leave them “be” for a while and let them to their work of gathering pollen and pollinating our crops.  Hopefully, by summer’s ends, we will have added a couple more super boxes to the hive and have some honey to share with friends and family.

Much like the bees, we have been busy as well this week with the early stages of planting – and continued work on the garden and grape vine fencing.

The sugar snap peas emerging through the ground

The sugar snap peas emerging through the ground

The radishes, carrots, sugar snap peas, onions, lettuce and kale have all emerged from the ground and are coming along nicely. The asparagus spears have broken through the ground as well. We started our asparagus patch last year with crowns – and now in their second season they are starting to really take off.  We will harvest just a few this year – and leave the rest to grow and become strong.  By next year, we should be starting to harvest a pretty good crop.  We were even able to plant our first 3 cucumbers yesterday in the straw bale garden crate.

This coming week – planting will continue with some of our peppers and zucchini, potatoes and onions will go in – followed by all of our tomatoes and peppers next week.  It’s hard to believe that within two weeks it will all be in the ground!

Happy Gardening!  - Jim and Mary

If you would like to receive our Gardening / DIY and Farm Updates each week – be sure to sign up to follow the blog via email in the right had column, “like” us on Facebook, or follow us on Twitter.

Digging Holes, Building Fences, And Great Neighbors…The Sunday Farm Update

With 72 holes to dig - it was time to bring in some bigger equipment to do the job!

With 72 holes to dig – it was time to bring in some bigger equipment to do the job!

72.  That was the magic number of 12″ wide and 30″ deep holes that we had to dig at the farm last week.  Between the 26 holes needed for the fence to enclose the garden – 30 for the vineyard trellis – and another 16 for the chicken coop run and sensory garden pergola – it was time to go beyond traditional post-hole digger technology.

Mary and I had spent the previous Sunday with a tape measure and a can of orange marking paint – carefully squaring and marking every hole that we needed. After that – it was time to go rent a bobcat and dig!

The post and board fencing being installed around the garden.

The post and board fencing being installed around the garden.

We’re very fortunate to have mainly rock-free land at the farm.  In fact – we hit only 1 rock while digging all 72 holes. In all, it took us about two hours – in what would probably have taken us 10 days and a couple of bottles of ibuprofen if dug by hand!

For the most part – it was smooth sailing. I will certainly admit though that digging the grape trellis holes on the hill was a little challenging.  Okay..to be perfectly honest…maybe somewhat frightening! But once I got over the fear that I wasn’t going to tip – all was well. :)

Next up is the long process of running string and setting posts.  After spending a few evenings this week of setting the garden fence posts – we are all but positive we may still go through a couple of bottles of ibuprofen!

It doesn't look like much now - but hopefully grape vines will be filling the posts and trellis wire line we will install in the coming weeks.

It doesn’t look like much now – but all of these holes are the foundation for the grape post and trellis system that will hopefully be filled with grape vines soon enough!

We have about half of the garden posts and board fencing up so far – and should be able to have the grape trellis and chicken run posts up this week.  The vineyard trellis project is a must – as our now 1-year-old grape plants are starting to bud, and will need to be trained up trellis lines this spring.     

This past week made us realize how lucky we are to be surrounded by so many great people and local businesses.  In building the farm over the last few years – we have developed quite a few fantastic relationships with some great local small business owners.  We try hard to support local business whenever we can – not just because it’s the right thing to do – but for the value and knowledge they bring to our projects.

Case in point – I can’t tell you how many times Bob from Paisley Rentals has gone above and beyond in helping us with whatever project we are working on. To the point of even dropping off or picking up tools from the farm when we were desperate. The same goes for a nearby sawmill where we buy our lumber, or the local greenhouse where we get our trees and plants. The knowledge, advice and friendliness of all of them goes above and beyond – and it made us realize that our little farm project would not be nearly as far along without them.

We have had a lot of great help along the way in building the farm.

We have had a lot of great help along the way in building the farm.

That extends to our neighbors as well – all of them at some point have lent a hand – whether it be feeding and watering our chickens when out of town – or helping to pull our truck out of a groundhog hole that swallowed it up in the field.

All in all – it just makes us realize we are very fortunate enough to be around so many great people, that in their own way, help us to build the farm.

Happy Gardening!

Jim and Mary

If you would like to receive our Gardening / DIY and Farm Updates each week – be sure to sign up to follow the blog via email in the right had column, “like” us on Facebook, or follow us on Twitter.

The New Chicken Coop Is Completed – Building Security For Our Chickens

The new coop - a much larger and hopefully more secure home for our girls

The new coop – a much larger and hopefully more secure home for our girls

The new chicks are getting big!  They are ready for their new home.

The new chicks are getting big! They are ready for their new home.

1/2" x 1/2" heavy gauge wire mesh covers each of the three windows.  It is stapled and then backed with an additional nailed board.

1/2″ x 1/2″ heavy gauge wire mesh covers each of the three windows. It is stapled and then backed with an additional nailed board.

The coop was framed in 2 x4's - on top of a concrete block foundation secured with concrete and bolts

The coop was framed in 2 x4′s – on top of a concrete block foundation secured with concrete and bolts

The entire coop is covered in 1/2 strand board to keep out unwanted intruders

The entire coop is covered in 1/2 strand board to keep out unwanted intruders

A secured and covered run will be attached to the back - with 1/2" wire mesh used to secure the flooring and sides

A secured and covered run will be attached to the back – with 1/2″ wire mesh used to secure the flooring and sides

Finally!  The new coop is  complete. With just a few small finishing touches to make this week – it will be ready to house our chickens for years to come.  It’s just in time too – as our 18 little new chicks are more than ready to move out of the temporary pen in the garage!

We designed the new coop to mimic a traditional mid-western farm coop – and to match the barn.  We also kept with our re-use and re-purpose theme, utilizing recycled materials throughout.

Just like our barn – the lower sides are made from reclaimed barn metal roofing. The board and batten top siding are made from picket fence boards.  We were also able to re-use a lot of old fencing and wiring – and even the coop’s roof is reclaimed metal left over from a project.

We built the coop’s door to match the design of the barn – making it from simple 2 x 6 framing boards attached to a 1/2″ plywood back.  We curved the top 2 x 6 to mimic the big doors – and then filled in with picket boards to create the finished look.

The coop measures 12′ x 10′ – and 8′ high in front, sloping to 6′ 6″ at the rear. The added space will give lots of room for the girls – and even more for us when collecting eggs and cleaning it out!

If you follow along, you know that in the last 6 weeks, we’ve had some intruders into our old coop that unfortunately killed some of our older chickens.

It was a tough pill to swallow – especially since we’ve never had any problems in the two and a half years we’ve had them. We’re now almost positive the culprit was a mink.  So in addition to proofing the new coop for raccoons, coyotes and opossum – we used tightly spaced, heavy gauge wire mesh throughout to keep out mink and weasels.

Security For The New Coop:

A secure coop starts with a secure base – for ours we used a footer made from 18″ concrete blocks placed on a 6″ packed limestone base.  We then filled the blocks with concrete and embedded 1/2″ x 9″ bolts to attach and bolt through the 2 x 8″ foundation boards.

We built additional security into the floor – laying down a double layer of chicken wire along with a layer of wire mesh on top of the packed limestone floor.  We then secured it up and over the inside edge of the foundation and top sill board with heavy-duty staples.  We then added 3″ inches of packed limestone and 4″ of packed topsoil on top to create the finished floor.

Now – even if a raccoon, opossum or mink tries to tunnel under the 8″ concrete block and 6″ packed limestone base – they would still have to dig through the 3 layers of tight wire mesh and 4″ of packed earth to get into in the coop.

The shell of the coop is made from 2 x 4 studs – covered completely in 1/2″ strand board along with a breathable moisture barrier.

We made the door from some 2 x 6's, fence picket boards, and a 1/2" sheet of plywood

We made the door from 2 x 6′s, fence picket boards, and a 1/2″ sheet of plywood

We installed tight, heavy gauge 1/2 x 1/2 inch wire mesh in the windows on each side of the coop to provide for good air flow – and then added a final 3rd large mesh covered window over the top door for additional ventilation.  All three windows can then be covered with plexiglass frames for the winter.  The door is attached with 3 heavy-duty strap hinges and double slide bolts to prevent anything and everything from being able to pry it open.

We still have some work to complete this week. The entire run – including the floor – will be encased in 1/2″ x 1/2″ heavy gauge wire mesh to prevent intruders – and will give the girls access to the outdoors 24/7.  We’re also adding gutters and a rain collection system to the coop, and later this summer will attach two solar panels on the back to provide lights and a water warmer for winter.  Beyond that and applying a few coats of matching barn stain to the coop – the chicken coop project can be crossed off the list!

Hope everyone has a great Sunday! – Jim and Mary

If you would like to receive our Gardening / DIY and Farm Updates each week – be sure to sign up to follow the blog via email in the right had column, “like” us on Facebook, or follow us on Twitter.

The New Chicken Coop Rises And The Farm Comes to Life!

Finally!  A Sunday Farm Update with some activity to report at the farm! The temperatures, although not “warm” – have at least begun to reach the 40′s and 50′s – so things are getting in full swing.

The chicks love the space of their new holding pen in the garage...and Jazzy still loves to watch them

The chicks love the space of their new holding pen in the garage…and Jazzy still loves to watch them

The new coop rises at the farm.

The new coop rises at the farm.

We used bolts embedded in the concrete filled block to secure the coop to the foundation

We used bolts embedded in the concrete filled block to secure the coop to the foundation

The new Chicken Coop emerges behind the old one.  The original coop will have new life with my sister and brother in law once our is complete - as they raise a few chicks of their own.

The new Chicken Coop emerges behind the old one. The original coop will have new life with my sister and brother in law once our is complete – as they raise a few chicks of their own.

Our 18 baby hens have outgrown the comfy surroundings of their brooder in the basement.  Mary’s vehicle once again is the loser in the deal – as the garage space now serves as a home for the chicks.  We made a 4 x 8′ makeshift chick pen out of some left over 2 x 4′s and chicken wire – and they seem to love the added room as they feather out.  They turn 6 weeks old on Tuesday, which means they are just two weeks away from heading to the farm.

What does that means for us? It means we need to get the new coop complete!  So this past week – it took center stage.  We have taken some time in designing and constructing this one – building in some careful details we have learned from experience.

We finished up the foundation with a few hours of work here and there on nights throughout the week.  It is made up of 5 inches of packed limestone dust, with 8″ of concrete filled cement block on top for the main foundation.  We set anchor bolts in the concrete within the block to make sure the coop stays secure for years to come.

On Saturday – we were finally able to get building!  We had pre-built the front and back walls way back in January – so they went up fast – as did the sides and rafters. By the end of a long day, the coop started to rise from the ground.  To match the barn, we will use reclaimed windows and metal siding, along with a board and batten finish on the exterior. Weather permitting – we hope to have most of that completed by tonight.  That leaves us about two weeks to finish the attached 10 x 12 covered run, and get things painted and stained.

With the recent issues of unwanted guests to our old coop – we have added a lot of extra security to the new coop design to hopefully eliminate any predators.  We will be burying two staggered rolls of heavy-duty, close-knit welded wire fencing 12″ down in the ground and pouring in concrete to prevent digging in.  The coop will also have mesh installed under the floor, and all of the walls will have a layer of sheathing behind the metal and board and batten exterior to prevent entry.

The bee hive after getting a second of 3 coats of stain.

The bee hive after getting a second of 3 coats of stain.

The seedlings are up and growing strong - hopefully  ready to put outside in a month or so.

The seedlings are up and growing strong – hopefully ready to put outside in a month or so.

The honey bee hive received a few coats of stain and is now complete and ready for the bees! Our official delivery date is April 19th – we can’t wait for the hive to become full of activity and hopefully this fall – honey!

The seedlings we started indoors are really starting to take off.  We keep our shop lights about 1 and 1/2 inches from the top of the plants to keep their growth strong and prevent them from getting spindly or leggy.  It really works well with the ordinary shop lights, keeping the growth low and slow, and developing strong seedlings. They continue to get about 10 to 12 hours of artificial light each day.

With the temperatures expected to finally start climbing into the mid 60′s this week – we are hoping to move them to the back porch soon to get them acclimated to natural daylight and daily temperature fluctuations. It’s a great idea to get your plants used to the outside conditions a few weeks before planting time in the garden, a process called “hardening off”.  We usually will keep ours on the porch for the final two to three weeks – only covering them or bringing them in at night if there a threat of frost.

Spring is always one of the most exciting and yet challenging times of the year for us.  With one off to college and 3 others all playing high school and junior high baseball, it makes for some long and creative days attending games and getting in work at the farm.  But as with all of them, you find time to do the things you love – and we wouldn’t trade the madness for anything in the world! :)

Happy Gardening!

Jim and Mary

If you would like to receive our Gardening / DIY and Farm Updates each week – be sure to sign up to follow the blog via email in the right had column, “like” us on Facebook, or follow us on Twitter.

Raccoons, Hens and Bees (No Bunnies) – The Easter Sunday Farm Update

First and foremost, thank you to everyone for all of the kind and encouraging words sent after last Sunday’s post.  It was nice to hear from so many of you, and also to have some of your ideas and thoughts on tackling the problem of the raccoons in the coop and mice in the equipment!

Spring at the farm always seems to be the time of year that everywhere you turn, a project is either starting, in process, just completed, or just created.  With the weather finally warming to the 40′s and 50′s – this week had it’s share of projects in all of those phases:

Update On The Hens and Raccoons:

The cat was not happy with his capture!

The cat was not happy with his capture!  He happily ran off off after his release and went back to his life of leasure.

We spent the last week making an extra nightly trip to the coop to shut off the entrance from the enclosed run to the coop.  We have finally figured out that it must be baby raccoons wedging themselves into the coop through the 1.5 x 4″ wire mesh fencing we have in the coop run.  For two years, we never had a single problem with a predator entering our coop until now. Most likely, the baby raccoons are just small enough to squeeze through.   For now, shutting off the entrance has kept them safe.  This week – we will install smaller mesh to the outside of the run to keep them out.

On a somewhat humorous note – we have set two live traps each night to hopefully catch the raccoons.  To this point – they have worked incredibly well in catching and holding only a couple of neighborhood cats! Apparently, cats love the taste of marshmallows and peanut butter bread too!  Needless to say – the look on the cats face as we let them out is one of pure disgust.  I haven’t been able to figure out if the disgust is at us for setting the live traps, or at themselves for being caught in such a basic walk-in trap :) .

The Honey Bee Project:

The beehive is all assembled and ready for our first hive!

The beehive is all assembled and ready for our first hive!

Our quest to have our first bee hive is getting close!  The bees are scheduled to arrive the 19th of April, and we spent the last two weeks building the beehive from the kit we purchased last month.  It’s actually quite the process to assemble all of the boxes, frames and beeswax foundation sheets.  All I can say is that Mary and I have a new respect for the craftsmanship and details that go into making and building a hive – and I am really glad we have a nail gun!

None the less, by weeks’ end, our entire beehive was assembled and ready to go!  We are going to apply a couple of coats of stain to the outside of the hive body to match the barn and we are ready for the bees….and of course, the honey!

Baby Chicks Head Into Week Four:

The chicks are starting to get their feathers

The chicks are starting to get their feathers

We are almost to the halfway point with raising our baby chicks in the brooder.  At 8 weeks, they will have completely feathered out and be ready to move into their permanent digs at the farm.  Weeks 3 and 4 are always filled with new achievements for the chicks.  All of them have begun to roost on the starter poles we put in the coop.  It’s hilarious to watch them jump up and learn the art of balancing.  It usually only takes a couple of falls before they get the hang of it.  They could easily be mistaken for little pigs – they have nearly quadrupled their daily intake of food and water, and so far – all 18 are getting along well.  Usually at around week 6 or so, they will start to establish more of a pecking order and have a few dominant hens put the other “ladies” in their place.

New Coop Progress:

Jazzy looked confused when we asked her if she wanted to live at the new coop to protect the hens :)  She would probably be more scared of the raccoons than the chickens...

Jazzy looked confused when we jokingly asked her if she wanted to live at the new coop to protect the hens. She would probably be more scared of the raccoons than the chickens :)

With only a little over 4 weeks to go – that means the new coop has to be finished soon! This past week – we worked on finishing up the foundation, so hopefully, with the forecast for sun and 50′s this week – we can get the coop walls installed.  I am really glad we pre-built the walls back in January – it will save a lot of time in finishing the project.  With the recent coop break-ins we have had with the raccoons – we are adding some extra security to the new coop.  A double layer of smaller 1 x 1 wire mesh will be used to fence in the coop run, and we will install it down into the soil a full foot and embed with concrete.  Hopefully, that will keep them safe and happy.  We should have some good pictures next week – hopefully of the coop mostly finished!

Wishing everyone a Happy and Safe Easter, and here is to Spring finally arriving!

- Jim and Mary

Dealing With A Little Sadness At The Farm…The Sunday Farm Update

It was a tough week at the farm as we lost Big Mamma.

It was a tough week at the farm as we lost Big Mamma and two other of our chickens to raccoons

Sometimes…things don’t come up all roses.  Sometimes they don’t work out the way you had planned.  And sometimes, things can happen at the farm that really break your heart.  This was one of those weeks.  In fact, it was a really tough and trying week.  But, as crazy as it sounds  -  it’s the tough weeks that make you realize how important it is to work every day at your dreams.

It started off last weekend when we tried to fire up Betsy, the old farm truck. While in winter storage at the farm, it seems that field mice had decided to seek comfort and warmth inside of the glove box, under the seat, and inside of the engine compartment. To make matters worse, they decided to chew up the firewall material and wiring to make their fluffy, warm nests.  After spending the better part of a day cleaning it all up – we discovered the trucks two batteries finally were beyond charging and needed replaced.

The remnants of an ornamental pine tree after catching fire from a spark

The remnants of an ornamental pine tree after catching fire from a spark

And when I went to fire up our gas generator for a little power – the cord of course, came off in my hand with the very first pull of the year! Next up, we watched one of our little ornamental pine trees shot up in flames from a tiny spark that blew in from a nearby ornamental grass clearing fire we had set.  It was also the week we decided we had to tear apart the leaf silo project and start over – after it toppled over in a winter windstorm and became damaged beyond repair.

And then finally, the past few nights, total heartbreak. For the first time since our coop was built two years ago,  raccoons somehow found a way into what had been a  secure area – and claimed the life of three of our beloved chickens, including our absolute favorite “Big Mama”.  It was indeed a tough week at the farm.

So it got us to thinking about why we started the farm in the first place – and why we choose to garden, raise chickens, keep bees and build and work at the projects we do – even though they can bring their fair share of disappointment at times.

The old farm truck - the winter home of field mice :(

The old farm truck – the winter home of field mice :(

The farm is an escape for both of us.  It’s not our “real job”, but the one we love to do no matter what.  One of my pet peeves in the “real” business world has always been those that hold meetings for the sake of meetings, and to think so long and plan so hard that nothing ever happens (think congress?). I’m not sure who said it, but I have always loved the saying “Don’t be a think tank – be a DO tank”.  The farm has always allowed us to be doers.  If we had waited  for the “prefect time” to build the coop, create the garden, or build the barn – we may never get to experience any of them.  And yes, we have made plenty of mistakes along the way – and had our share of  set-backs and disappointments.  

The silo as it looked in the fall, before the windstorm that toppled it.

The silo as it looked in the fall, before the windstorm that toppled it.

Yes it’s true if we had never started raising chickens we wouldn’t have the heartbreak of losing any this past week.  And if we didn’t have the old farm truck – we wouldn’t have to worry about it getting destroyed by mice.  And if the leaf silo project had never been thought of – we wouldn’t have lost it to a windstorm.  But at the same time – we would never have accomplished a single thing.  The farm simply allows us to be doers – and  not just thinkers – and that makes it all worth it.

So although our hearts are a little heavy for our chickens, and although things didn’t go quite right this week – we will keep trying and keep building and growing - because the real disappointment for us would be to never try at all.  The best way to put it is that we are and always will be blessed with work we love to do.

One of my favorite quotes of all time comes from Albert Einstein, when he simply stated, “you have never failed until you stop trying”.   That’s the way we feel about our little farm and garden. it’s a never-give up proposition for us.

Our chicks are growing up and starting to get their feathers.

The chicks are growing up and starting to get their feathers – and will be enjoying the farm in a few weeks.

So this week, we will continue to care for our 18 little chicks that will head to the farm in late April, and ready our new beehive with a coat of paint to prepare for our first hive of honey bees coming in late spring.  All in an effort to keep growing and building our dream of the farm.

Happy Sunday,

Jim and Mary

The Completed Sensory Garden Plan – One Step Closer To Helping Autistic And Special Needs Children

The Sensory Garden Layout - full size picture at bottom of the post.

The Sensory Garden Layout – full size picture at bottom of the post.

Our sensory garden plan is finished! Most who follow along with the blog know that it has been Mary’s dream as an Occupational Therapist to create a space at the farm to help those with special needs find comfort, learn, explore and grow.  With a finished plan – the dream is now one step closer.  We have approached it as we have with every other project on the farm – using reclaimed resources throughout the design - including old windows and bricks that will become part of a new covered garden house pergola as the centerpiece.

The garden will sit at the top of the hill, overlooking the farm below. To the casual visitor, it will look like a typical space filled with herbs, flowering plants, a water feature and garden house.  And for many days, it will be just that – a place for us to enjoy, take a walk, or have a quiet evening dinner underneath the garden house pergola.

But for Mary and others who will use the space – it will also become a place to help those with special needs by appealing to all of their senses – especially those of smell, vision, touch, and hearing.

The garden uses the familiar shape of the logo for Autism - the puzzle piece.

The garden uses the familiar shape of the logo for Autism – the puzzle piece.

Sensory gardens are places designed to help those with special needs to relax and enjoy themselves by stimulating their senses in a comfortable and safe way.  Their different way of learning sometimes can become difficult in typical environments. The sensory garden can incorporate what is taught in the classroom and apply it in a natural outside environment.

We designed the garden in the shape of one of the most widely recognized symbols for autism – the puzzle piece.  The main 6′ brick pathway extends straight through the center of the puzzle piece, with a large 20 x 10′ pergola and garden house structure that will anchor the center area.  It will have a gabled metal roof, with four reclaimed windows used to create an open-style covered structure. Benches on each corner will provide a shady quiet place to relax, rest, and take in the environment – with a reclaimed 10′ barn table directly in the center.

We use ornamental peppers almost everywhere at the farm to add color to the landscape

Bright vibrant plants like the beautiful ornamental pepper plants will be used to stimulate the senses

Herbs such as basil will be used to stimulate the senses

Herbs such as basil will bring smell, texture and taste to the garden

As you walk under the arbored entrance – there will be vibrant, colorful plantings. Flowering bulbs, sunflowers, marigolds, petunias, ornamental peppers, swiss chard and chocolate ruffles will be among the many plants that give an explosion of color for the eyes.

From the main walkway, there will be six paths leading to different areas for the senses.  To the right, an area for sound and hearing – filled with bamboo and bamboo wind chimes, along with rustling plantings of grasses, popcorn stalks and more.  To the left, an area for smell and taste – filled with an assortment of fragrant, tasty plants and herbs such as chives, mints, dill, rosemary, basil, strawberries and blueberries among others.

From the main garden house – two more paths will extend to the open areas of the puzzle piece.  To the left will be a big water pond feature full of sounds and sights.  To the right, a platform therapy swing installed on a pergola frame,  located underneath the shaded canopy of an existing large oak.

Bamboo wind chimes for the sound

We want to add bamboo wind chimes like these to add sound to the garden

Finally, at the back, there will be two sensory learning areas dedicated to touch.  On one side a covered potting shed that will be used to learn about the feel of soil, sand and plants. Allowing children to plant their own seeds to take back with them.  The other side will be home to a covered and elevated sand box area that allows children to work and play with sand, marbles and other materials of different textures and shapes.

Over time, the entire garden area in between the “designated” areas will be filled in with hundreds of plants that can stimulate all of the senses.  Colorful annuals and perennials like curry, lavender, Jerusalem and silver sage, lambs ear and hens and chicks to name just a few. It will be full of plantings that celebrates the senses and seasons.

Completing The Project:

We will use reclaimed brick for the 6' wide main walkway, adding beauty, color and texture to the landscape

We will use reclaimed brick for the 6′ wide main walkway, adding beauty, color and texture to the landscape

We will a pergola garden structure to the center of the garden, matching  the style of our garden pergola but with some added touches like a gabled rood and reclaimed window walls

We will add a pergola garden structure to the center of the garden. It will match the style of our garden pergola but with some added features like a gabled roof and reclaimed window walls

March will mark the start of the first phase of the process – laying out the bed space, seeding the grassy areas around, and installing the crushed limestone base for the walkways. It will take a little time, but over the next 6 months, we hope to complete the remaining 5 phases :

Phase 2 (April) Transplanting – using all the available plants we have secured and saved and installing them in the given areas.

Phase 3 (May)  Planting remainder of annuals and perennials

Phase 4 (June) Installing reclaimed brick paver center walkway

Phase 5 (July) Installing the water feature

Phase 6 (August) Installing the Pergola, Potting Shed area and Swing area

Hopefully, by mid summer, a lifelong dream for Mary will come to fruition with the completion of the garden!  We will post updates and pictures along the way.

Have a great Sunday everyone!

Jim and Mary

**If you would like to receive our Sunday Farm Update each week – be sure to sign up to follow the blog via email in the right had column, “like” us on Facebook, or follow us on Twitter.

The Sensory Garden Layout - full size picture at bottom of the post.

The Sensory Garden Layout

Cutting Back, Dividing and Preparing Ornamental Grasses For Spring – The Sunday Farm Update

Ornamental Grasses add beauty to the landscape year round - here they are in late fall in full plume.

Ornamental Grasses add beauty to the landscape year round – here they are in late fall in full plume.

Those same grasses can catch the beauty of a winter snow

Those same grasses catching the beauty of a winter snow

Even though its still cold in the Midwest – this past week was spent caring for our ornamental grasses. They are a big part of our farm’s landscape – and now is the perfect time of the year to not only cut them back, but divide and transplant new starts as well.

Ornamental grasses come in all sizes and shapes, adding vibrant texture and color to the landscape throughout all four seasons.  They require little care, are extremely drought tolerant, and can be used as the centerpiece or accent plants in flowerbeds. They can also be an extremely inexpensive way to landscape large areas, dividing a few existing plants into enough to fill a whole bed.

In just a few short years – we now have a little over 250 ornamental grasses in the landscape – grown from just 10 original plants from 5 different varieties.  All of which we have grown and planted for free – transplanting and dividing grasses from friends, family and our own home’s landscape.  We will be adding to that total this spring as we incorporate more into the front entrance and sensory garden areas.

Although many people cut them back in the fall – we leave our ornamental grasses up throughout the winter.  It provides texture to the winter landscape, especially when snow or ice coat their tall spikes.  Of even more importance, it’s a great refuge for birds and other wildlife that stay around through the cold winter months, providing them with wind breaks and easy-to-find nesting materials.

We use a reciprocating saw to cut the grasses off about 3 to 5" above the ground.

We use a reciprocating saw to cut the grasses off about 3 to 5″ above the ground.

However, once spring starts knocking on the door in late February and early March,  we begin the simple process of cutting back and dividing.   There are several ways to cut back ornamental grasses – but one of the easiest methods we have found is to use our reciprocating saw.  Yes, it’s good for more than just tearing apart pallets! :) . We use a long  12” construction blade that makes quick work of cutting the grasses back, slicing through with a sharp clean cut.  As a good rule of thumb, we cut ours back about 3″ to 5″ off the ground – leaving a little added support for the new grass as it sprouts up later in the spring.

Tranplants

We used 100% free ornamental grass transplants and perennials to landscape the barn patio area.  Here is how the area looked right after transplanting.

transplants by year end

By the end of last year- they had filled in beautifully –  adding texture and color to the hillside.  These should get big enough this year to grow into a nice privacy row.

As for what we do with the cut grass trimmings? Ornamental grass clippings are always one of the hardest materials we have found to compost in our piles.  They don’t seem to chop well in our shredder, and they can take forever to break down.  We speed the process up by piling them up in an open area, lighting them with a single match,  and adding the resulting ashes to our compost bin once they have cooled down.

Once your grasses are cut back, its a great time to divide them to get extra plants for your landscape. From a typical 2 to 3 year old plant, we can get as many as 6 to 10 new plants.   For those that want more information on the how to’s of dividing ornamental grasses, we  have a complete tutorial that can be found here : Planting And Dividing Ornamental Grasses.

With the grasses all cut back now – we are hoping that we can turn our focus to building the new chicken coop…after all, the new baby chicks will be arriving in a few weeks, and we need bigger living quarters for the soon to be expanded flock!

Here’s to Spring!  - Mary and Jim

**If you would like to receive our Sunday Farm Update each week – be sure to sign up to follow the blog via email in the right had column, “like” us on Facebook, or follow us on Twitter.