Refrigerator dill pickles are a great alternative when you don’t have the time or the equipment to make traditional canned pickles. It is a perfect way for new gardeners who have not yet attempted canning to reap the benefits of a plentiful cucumber harvest.
However, even with years of experience canning pickles, I also like to make refrigerator pickles because they come out super crisp every time. Not only are they ready to eat in 48 hours, but you can bet that each time that you take a bite into one that it will be nice and crunchy.
There is nothing more disappointing than to open a jar of homemade pickles in the middle of winter, only to find out that the pickles are soggy. After spending months growing the cucumbers and hours in the kitchen to preserve them, your efforts have a less than desirable outcome.
Although I have figured out the Secrets To Making Crisp Canned Dill Pickles, sometimes even the best laid out plans don’t work out. Not to mention, there are times when I need to make a batch that is ready to eat within days, and not weeks.
However, to make them turn out perfect every time, there are a few key steps to follow. Once you follow these tips you will be able to enjoy the great taste of crispy homemade pickles whenever you desire.
Just be sure to plant enough cucumber plants this year. These pickles will become your new favorite snack and you will want to have a batch in the refrigerator all summer long!
How To Make Refrigerator Dill Pickles
There are a few important tips to follow when using any method for making pickles. Whether you are canning pickles or are making them in the refrigerator be sure to follow tips below so that they turn out perfect each and every time.
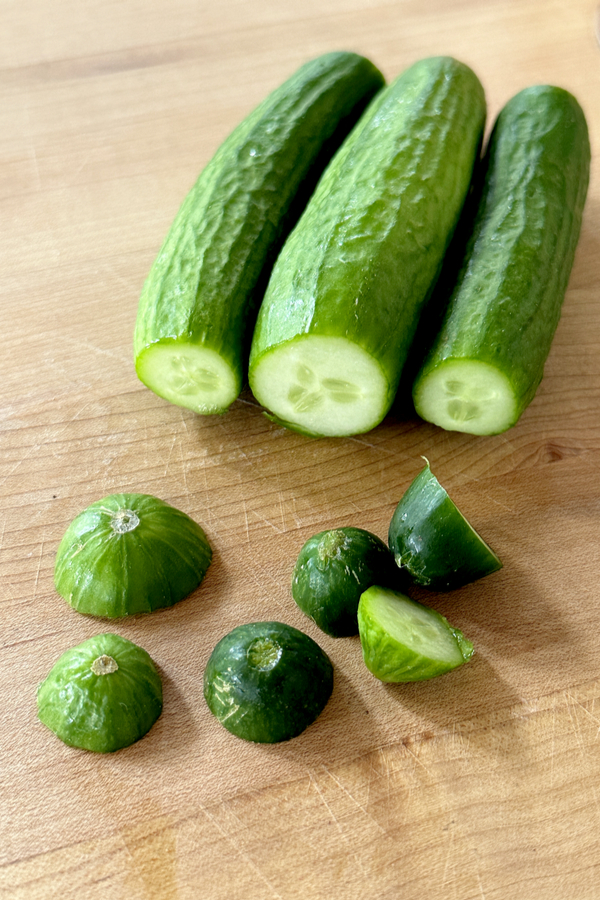
1. Use Pickling Cucumber Varieties
Pickling cucumbers are much different than the cucumbers that you find at the grocery store to use in salads. First of all, pickling cucumbers are much smaller in both length and diameter when compared to salad cucumbers.
However they also have less of a seed core and have a tougher skin which results in a much crisper cucumber. As a result, the pickles will turn out more crispy as well.
Although this time of the year many standard grocery stores are beginning to carry pickling cucumbers. Look in the produce section for a bag of small cucumbers and you might be able to get a jump start on making pickles this year.
2. Do Not Use Overripe Cucumbers
It is also important not to use overripe cucumbers when making refrigerator dill pickles. Overripe cucumbers have an extra large seed core and they can taste bitter.
So how do you know when a cucumber is overripe? It is quite simple. Cucumbers that are overripe begin to turn from the iconic green color to yellow in spots.
They also tend to have a larger circumference in the middle when compared to each end. Although they don’t make good pickles, often times they can still be used for salads, such as Cucumber, Onion & Tomato Salad. And they are also great to use to make Tzatziki dip.
3. Use Fresh Picked Cucumbers
Another important step when making pickles is to use fresh picked cucumbers. And when I talk about fresh picked, I don’t mean the cucumbers that have been sitting in your crisper drawer for days, or even a week or two.
Here I am referring to making pickles on the same day that the cucumbers are picked. Fresh cucumbers turn into crisp pickles.
If you buy your cucumbers from a local Farmer’s market, ask the vendor when they were picked. Most often they have been picked within 24 hours of the market day.
Luckily, because this is a refrigerator dill pickle recipe that can be made in small batches, you won’t have to wait until your cucumber plants produce heavily to make pickles. Instead, you can pick a few and get started.
4. Cut Off The Blossom End
The final tip is an important one. When making pickles it is best to cut off the blossom end of the cucumber and discard it or add it to your compost pile.
The blossom end is the end of the cucumber that has a smooth round circle. This end contains enzymes from the flower blossom that can make the pickles turn soggy if not removed.
However, even after looking at both ends of the cucumber and you aren’t sure which one is the blossom end and which one is the vine end, do yourself a favor and cut both ends off. That way you will be sure to have removed the end with the enzymes that will prevent your pickles from becoming crisp.
How Many Cucumbers Per Pint To Make Pickles
Every time I share a pickle recipe I will get several questions regarding how many cucumbers are needed per pint to make pickles. Although I would love to give a definitive answer, the answer really is, ‘it depends’.
Cucumbers come in all shapes and varieties. Depending on what type of cucumber you plant, where you planted it, and when you picked or purchased them the size will differ from person to person.
Then comes the question of how you cut the cucumbers for pickling. Depending on if you keep them whole, cut them into spears, or slice them into chips will determine how many that you will need per pint.
However, as a general rule of thumb, 7 pickling cucumbers will yield approximately 3 pints of refrigerator dill pickle spears.
However, because this is a refrigerator recipe, you can use any type of closed container to make the pickles. Therefore, this recipe is great for those that want a small batch of pickles, or are looking to use a few cucumbers right away.
Refrigerator Dill Pickles Recipe
*Complete recipe instructions including specific measurements, cook temperatures and times are located in a printable recipe card at the bottom of this article. However, be sure to keep reading for helpful tips and tricks when making this recipe.
YIELD
- approximately 3 pints
INGREDIENTS
- 2 pounds pickling cucumbers, approximately 7-8
- 1 1/2 cups apple cider vinegar
- 1 1/2 cups water
- 2 tablespoons pickling salt
- 3 tablespoons sugar
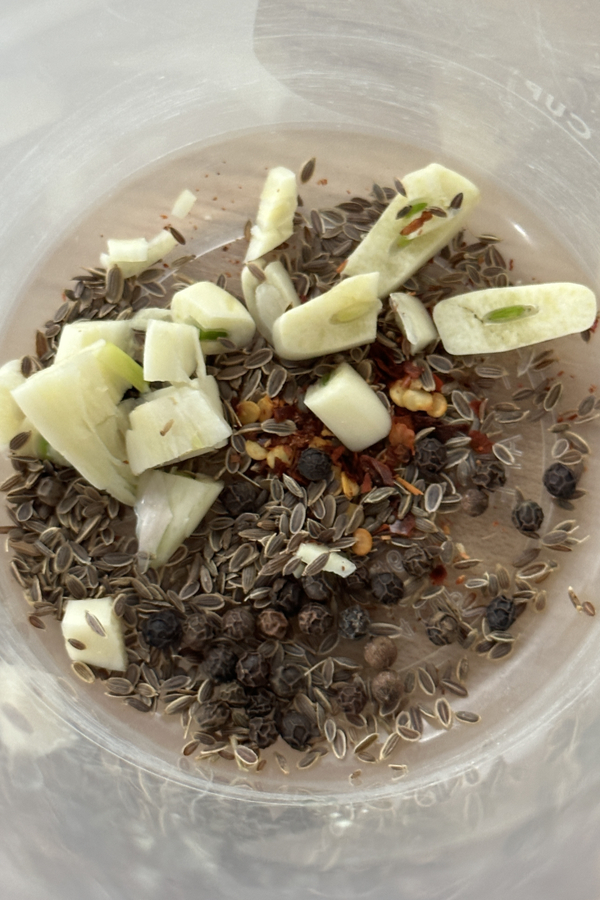
- 6 garlic cloves, peeled and crushed (2 per jar)
- 3/4 teaspoon crushed red pepper, (1/4 teaspoon per jar)
- 3 teaspoons dill seed per jar, (1 teaspoon per jar)
- 1 1/2 teaspoons black peppercorns, (1/2 teaspoon per jar)
INSTRUCTIONS
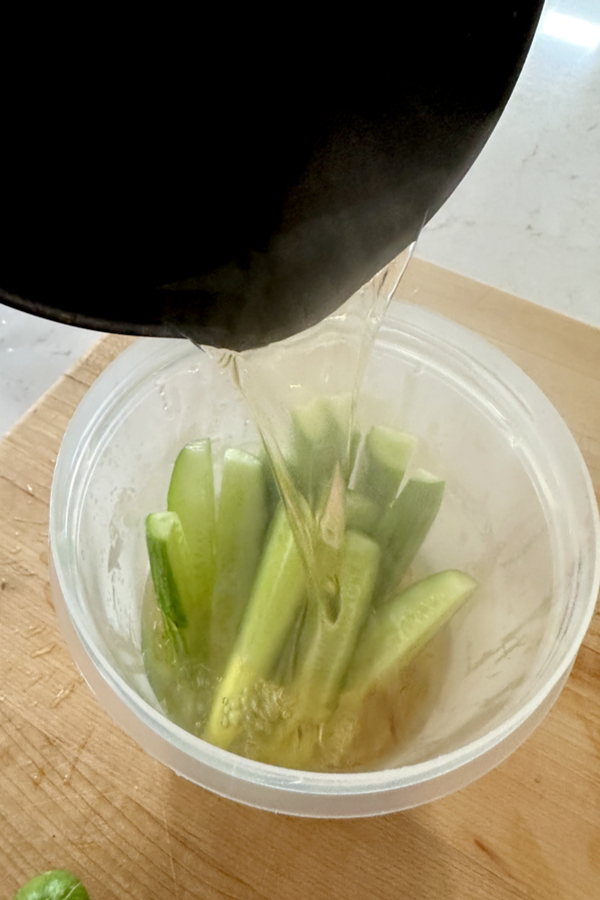
In a large sauce pan, combine vinegar, water, salt and sugar. Then bring the mixture to a simmer.
While the brine is heating up divide the spices evenly between 3 pint mason jars. *You can also make this in one large, container as well. In that case, add all of the spices to the container.
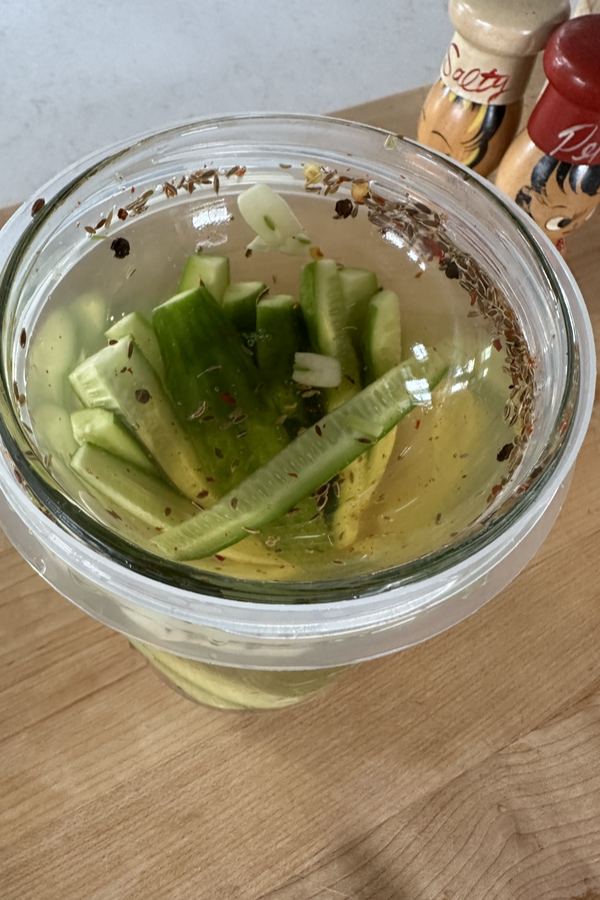
Wash the cucumbers and cut the ends off the blossom end or to make it easy, cut off both ends. Then slice the cucumbers into spears (or desired sections).
Pack the cucumber spears tightly into the jars. Then pour the hot brine into the jar, leaving approximately ½ inch headspace. Place lids (and bands if you are using mason jars) on the jars and let them cool to room temperature.
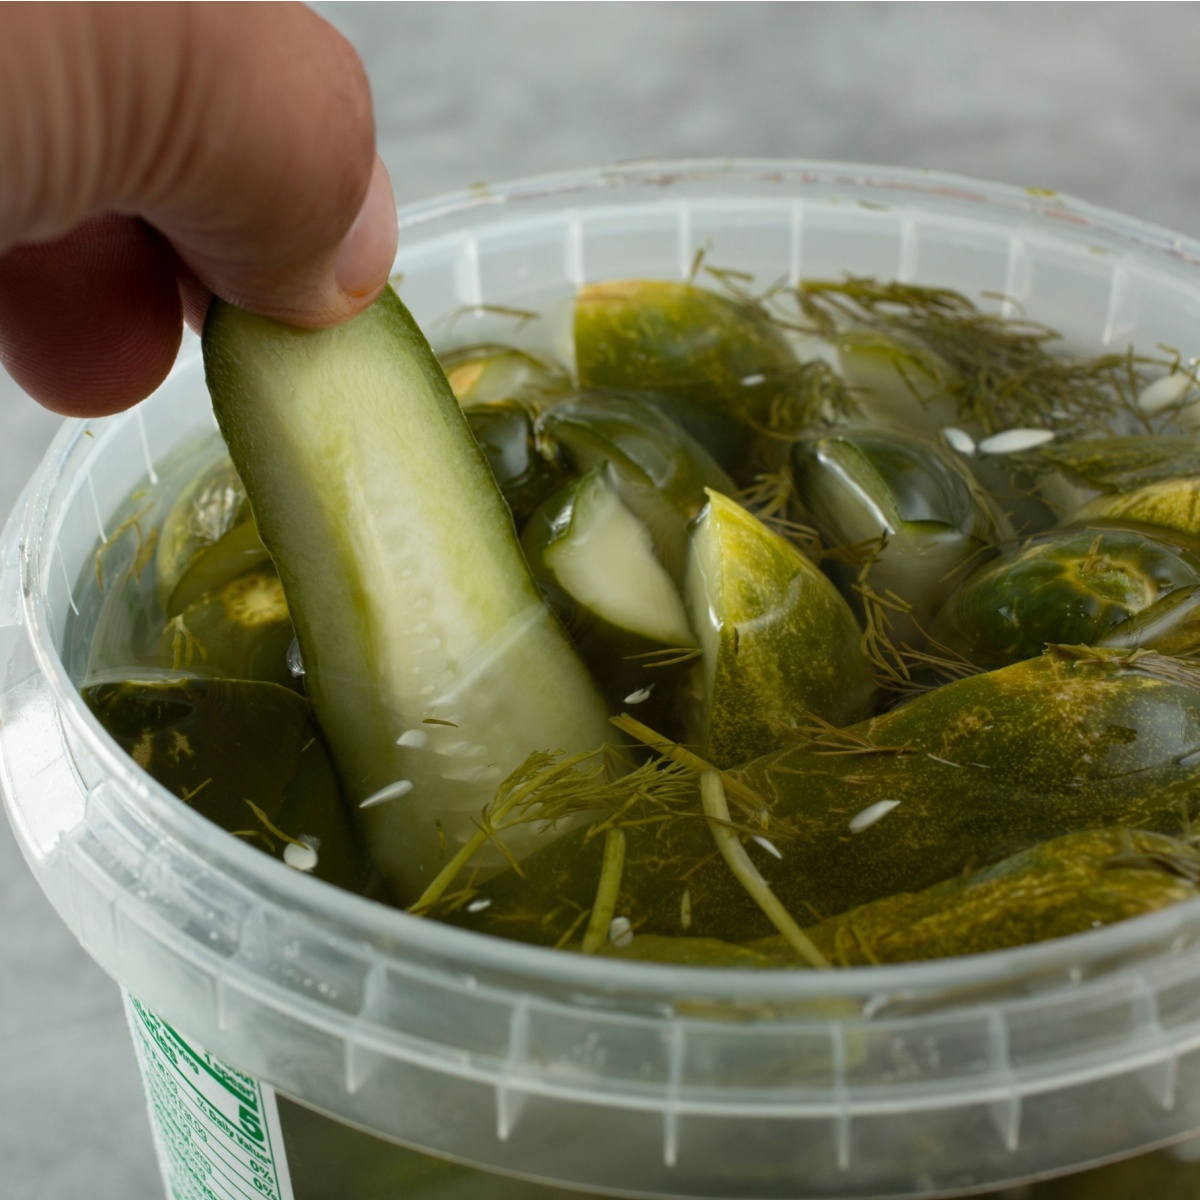
Then place the jars of dill pickles in the refrigerator. The most difficult part about making these pickles is waiting to eat them!
It is best to wait a full 48 hours before taking the first bite. This will allow enough time for the cucumbers to absorb the flavor and become pickled.
The pickles can be stored in the refrigerator for up to a month, if they last that long! If you are looking for a great canning recipe to preserve pickles, try this Homemade Gherkin Pickles – A Classic Pickle Recipe.
Enjoy!
Mary and Jim


Jim and Mary Competti have been writing gardening, DIY and recipe articles and books for over 15 years from their 46 acre Ohio farm. The two are frequent speakers on all things gardening and love to travel in their spare time.
As always, feel free to email us at thefarm@owgarden.com with comments, questions, or to simply say hello! You can sign up for our free email list in the subscribe now box in the middle of this article. Follow us on Facebook here : OWG Facebook. This article may contain affiliate links.
Refrigerator Dill Pickles Recipe


No need for expensive canning equipment to turn your cucumbers into dill pickles. This easy refrigerator dill pickles recipe will have you enjoying homemade pickles in 48 hours!
Ingredients
- 2 pounds pickling cucumbers, approximately 7-8
- 1 1/2 cups apple cider vinegar
- 1 1/2 cups water
- 2 tablespoons pickling salt
- 3 tablespoons sugar
- 6 garlic cloves, peeled and crushed (2 per jar)
- 3/4 teaspoon crushed red pepper, (1/4 teaspoon per jar)
- 3 teaspoons dill seed per jar, (1 teaspoon per jar)
- 1 1/2 teaspoons black peppercorns, (1/2 teaspoon per jar)
Instructions
- In a large saucepot, combine vinegar, water salt and sugar. Bring to a simmer.
- While the brine is heating up divide the spices evenly between 3 pint mason jars. *You can also make this in one large container as well.
- Wash the cucumbers and cut the ends off both sides then slice cucumbers into spears (or desired sections).
- Pack the cucumber slices tightly into the jars.
- Pour the hot brine into the jar, leaving approximately ½ inch headspace.
- Release any trapped air bubbles by running a plastic knife down each side of the jar.
- Place lids (and bands if you are using mason jars) on containers and let cool. Place jars in refrigerator. Let them sit for at least 48 hours before eating.
Notes
Recipe courtesy of Old World Garden Farms
Nutrition Information:
Yield:
3Serving Size:
1Amount Per Serving: Calories: 97Total Fat: 0gSaturated Fat: 0gTrans Fat: 0gUnsaturated Fat: 0gCholesterol: 0mgSodium: 207mgCarbohydrates: 19gFiber: 1gSugar: 14gProtein: 1g
Nutritional Information is to be used as a general guideline only . Nutritional calculations will vary from the types and brands of the products used.